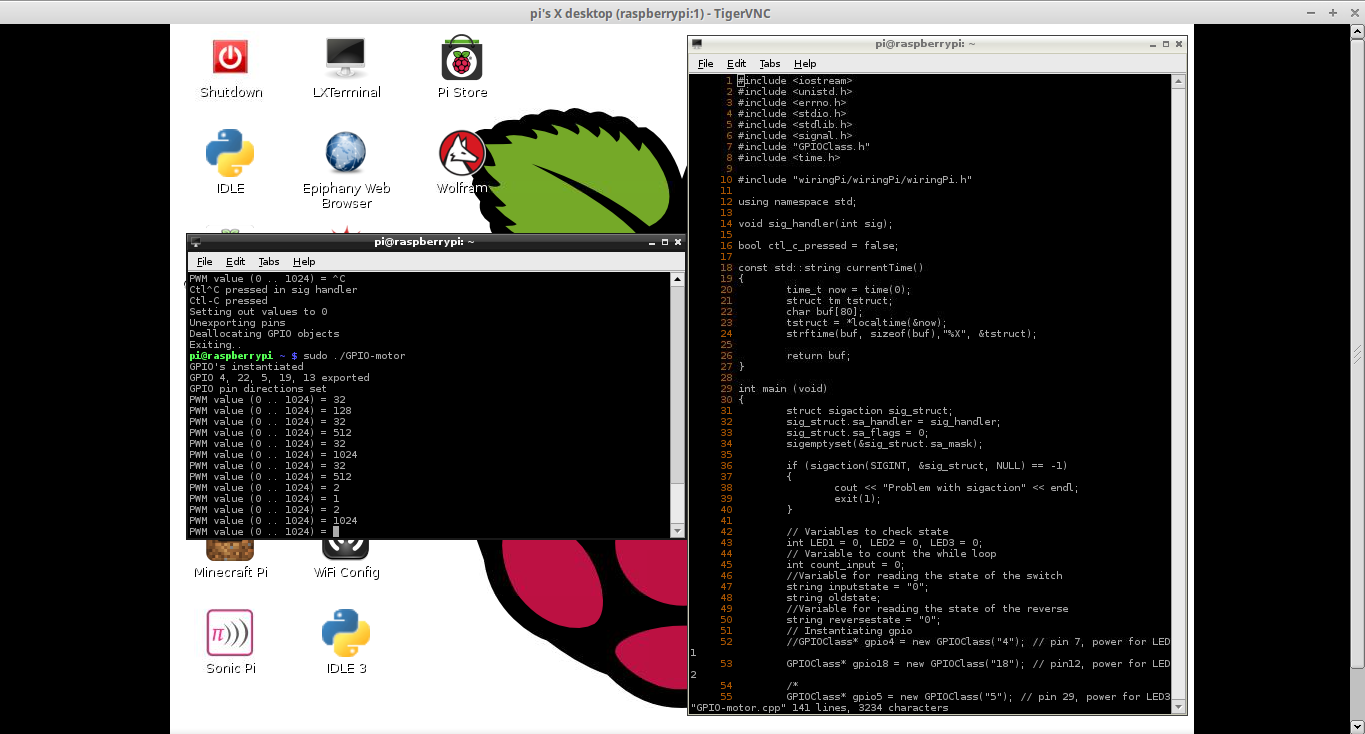
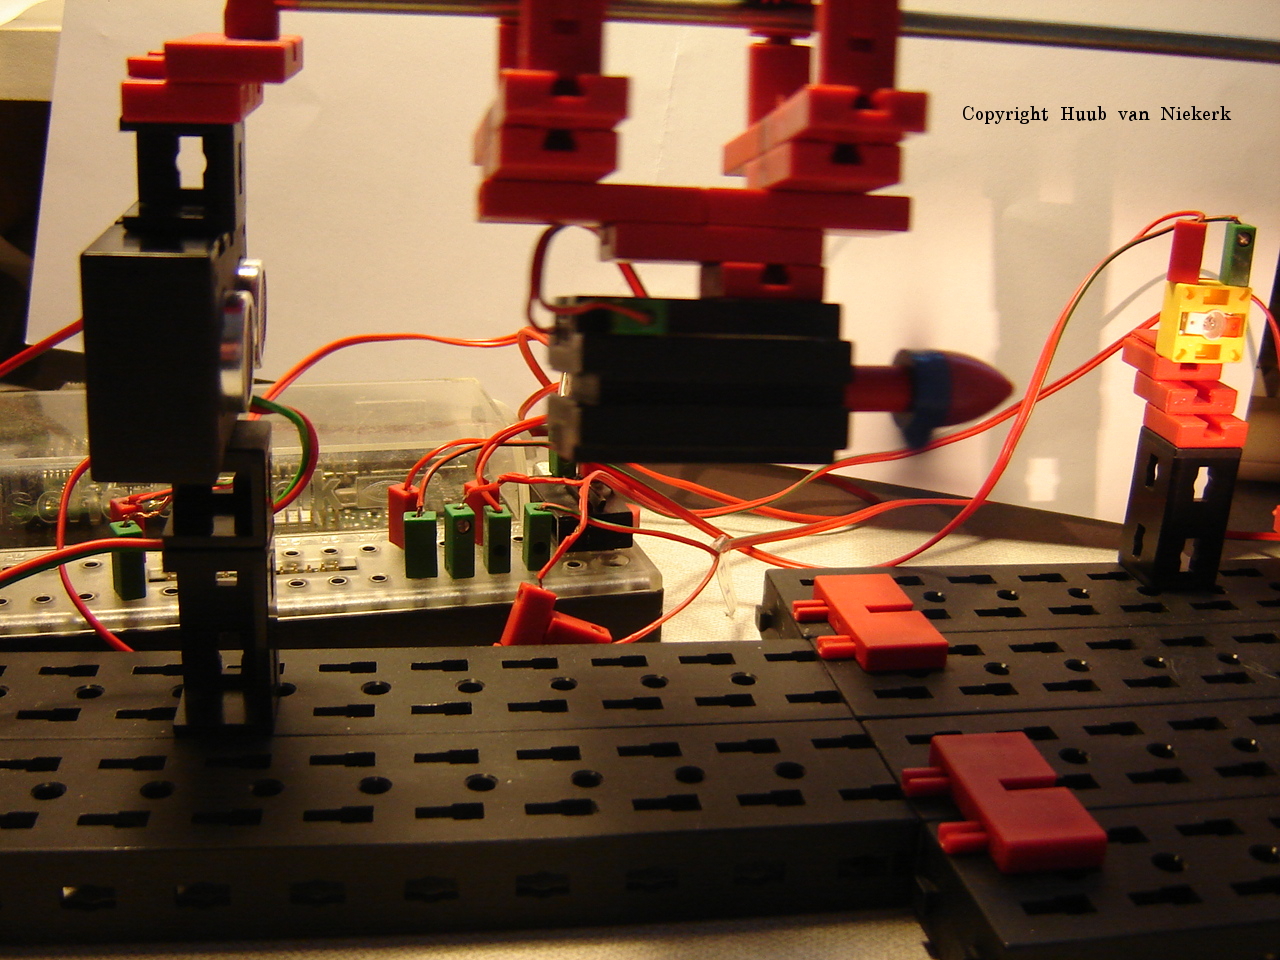
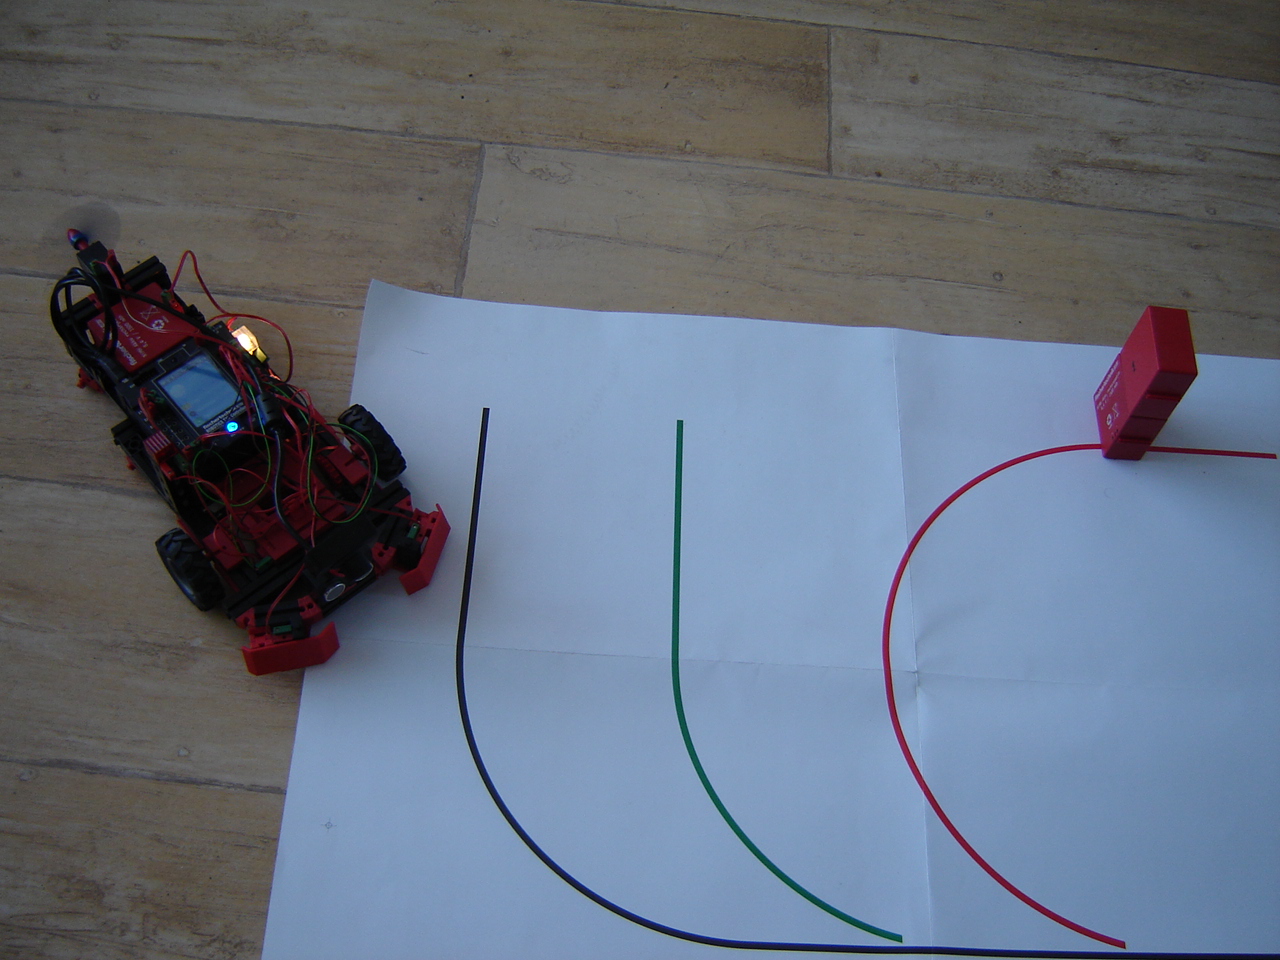
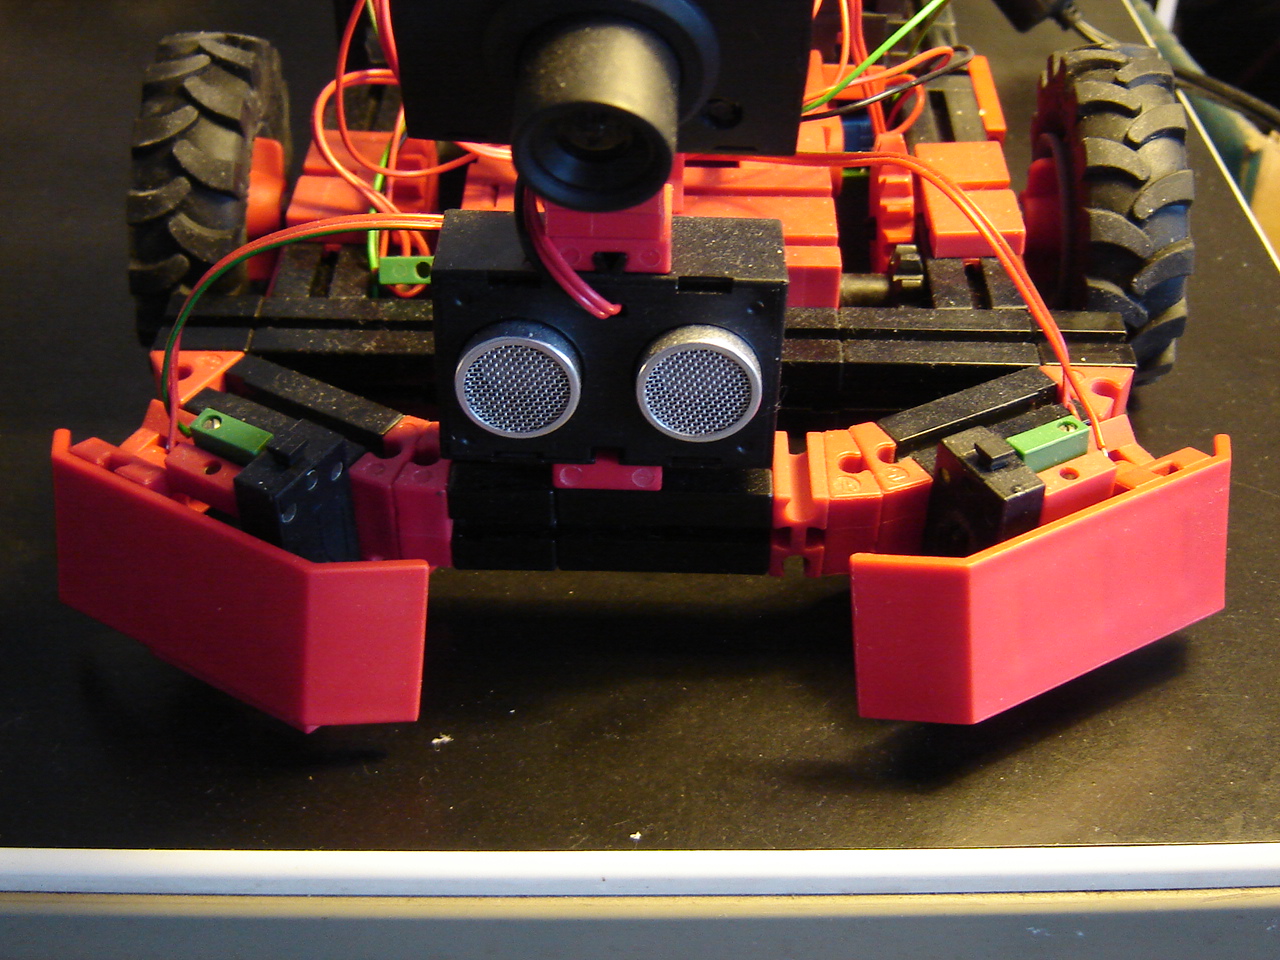
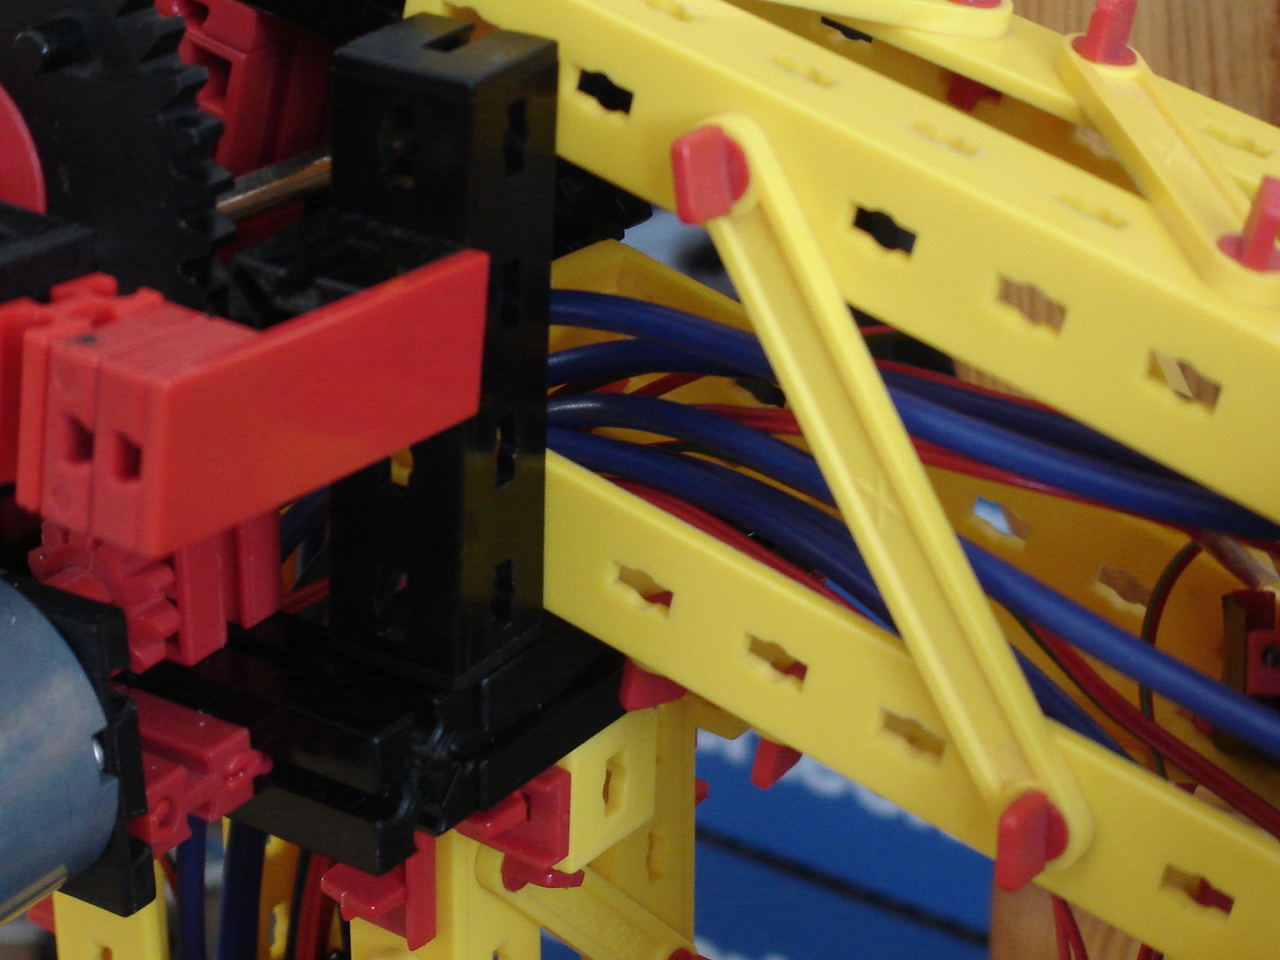
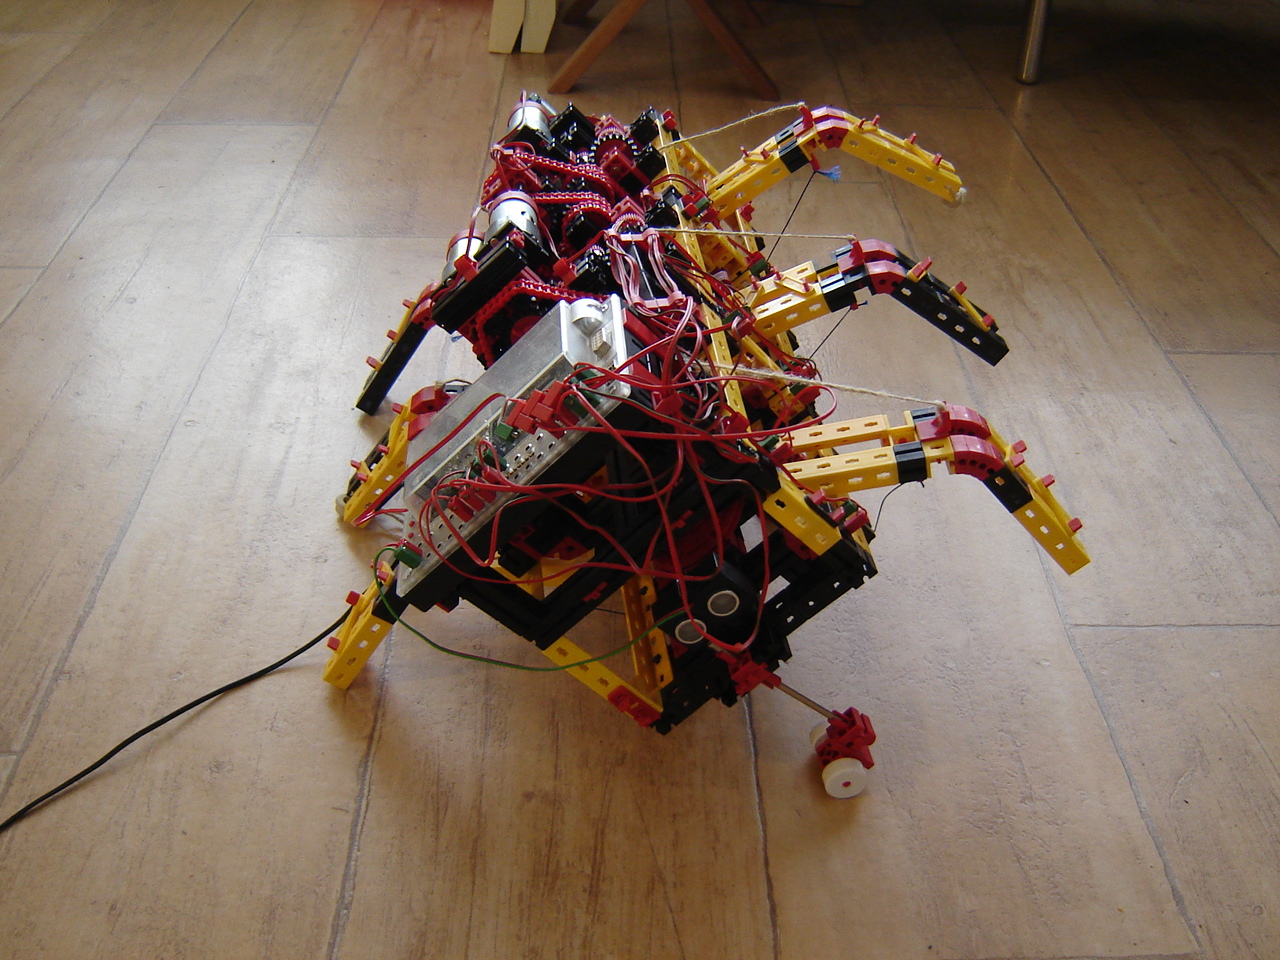
BB: Stabilizing the new underground, bit of rewiring, and recoding. But will it work? Click the first image to watch the video.
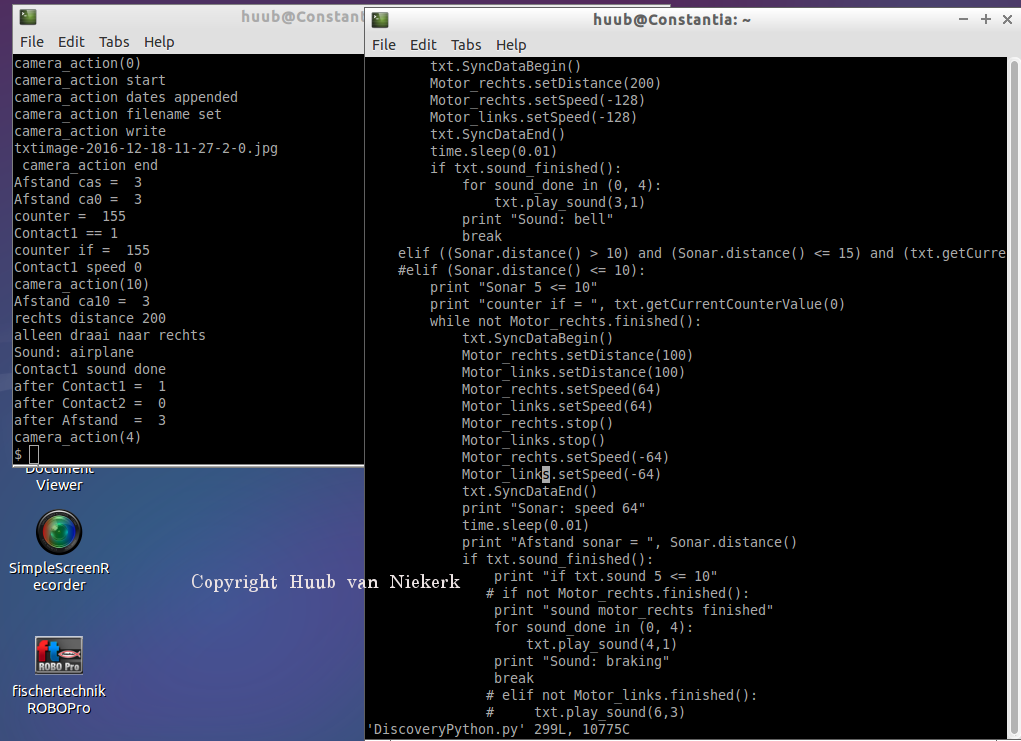
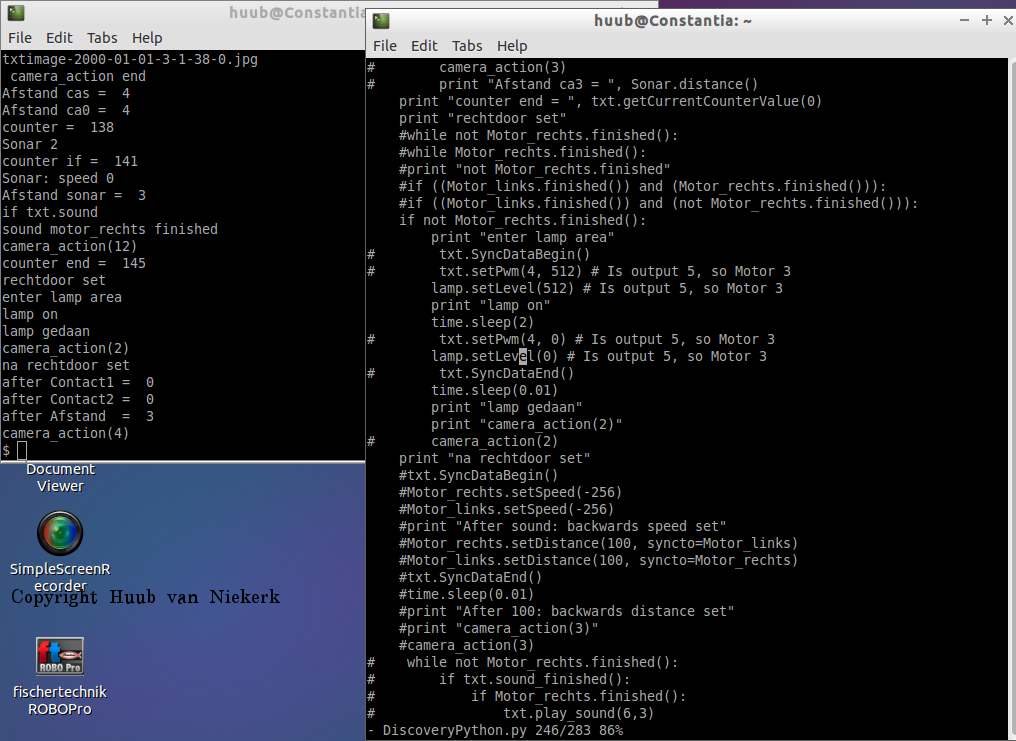
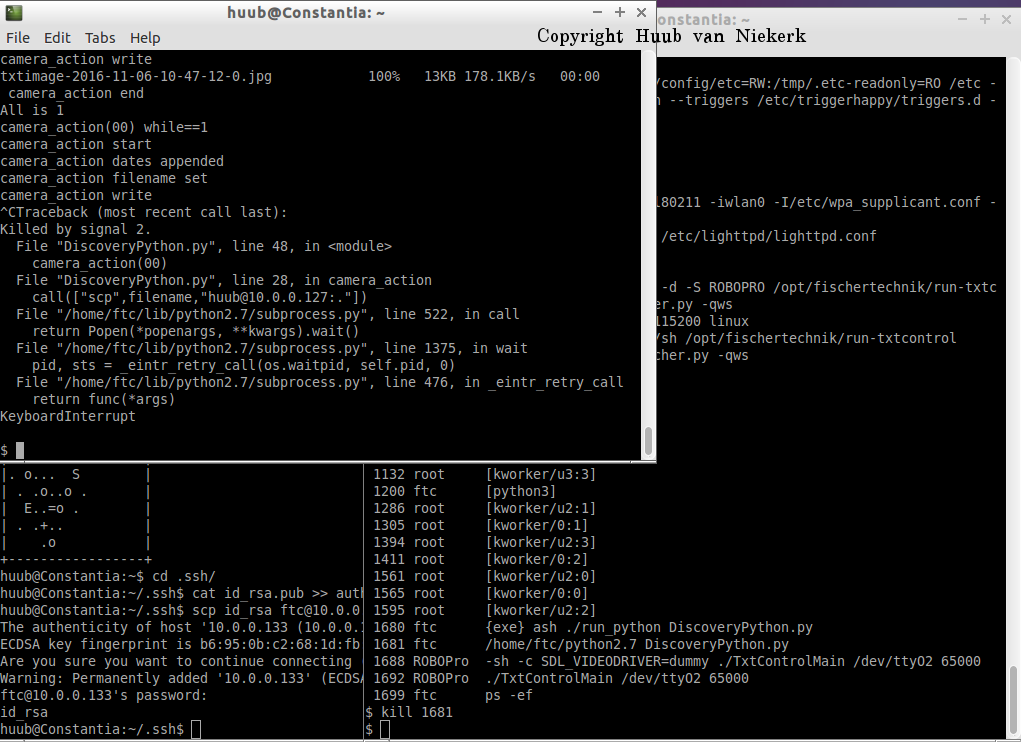
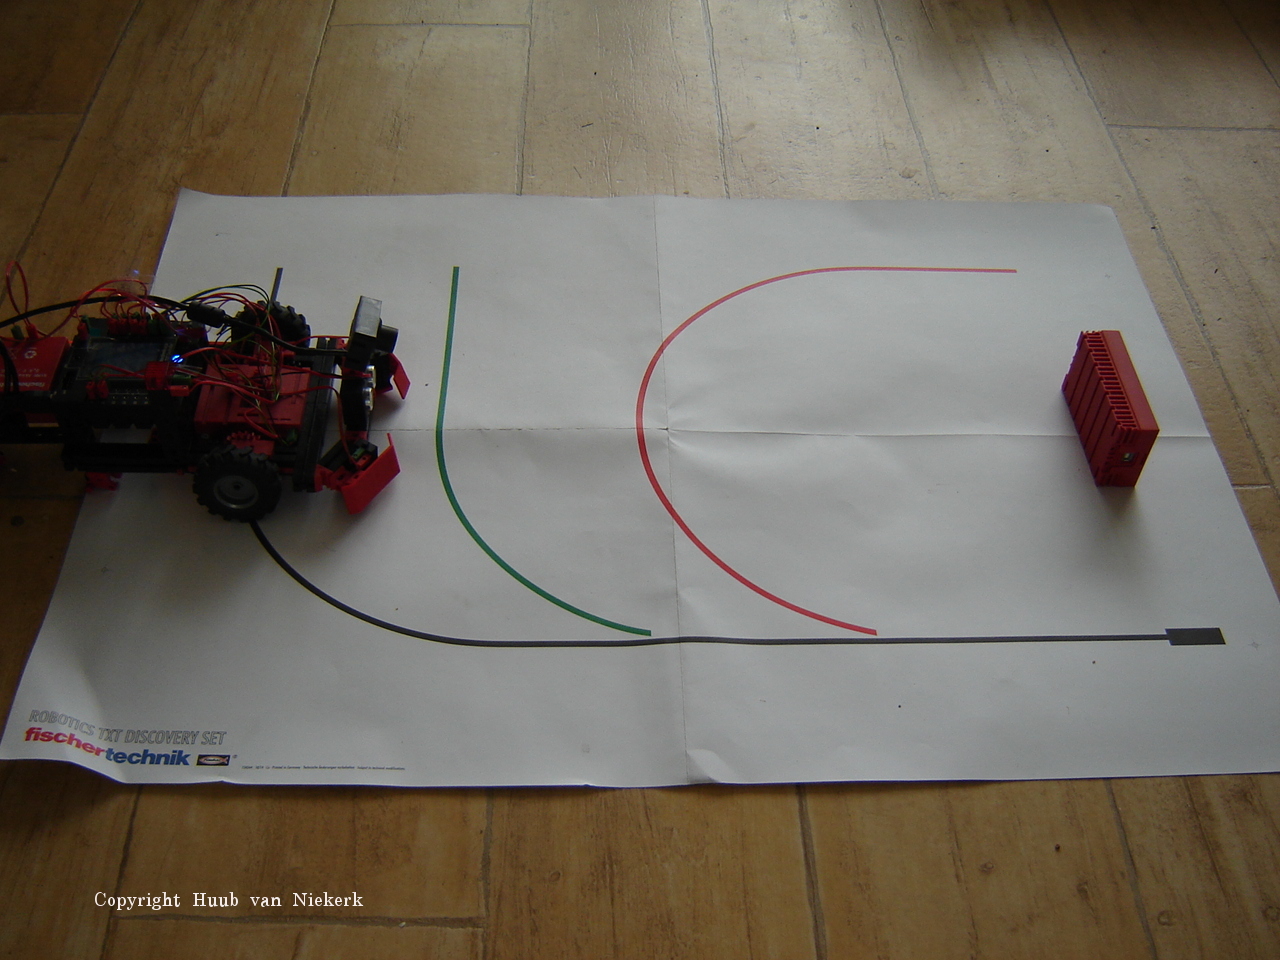
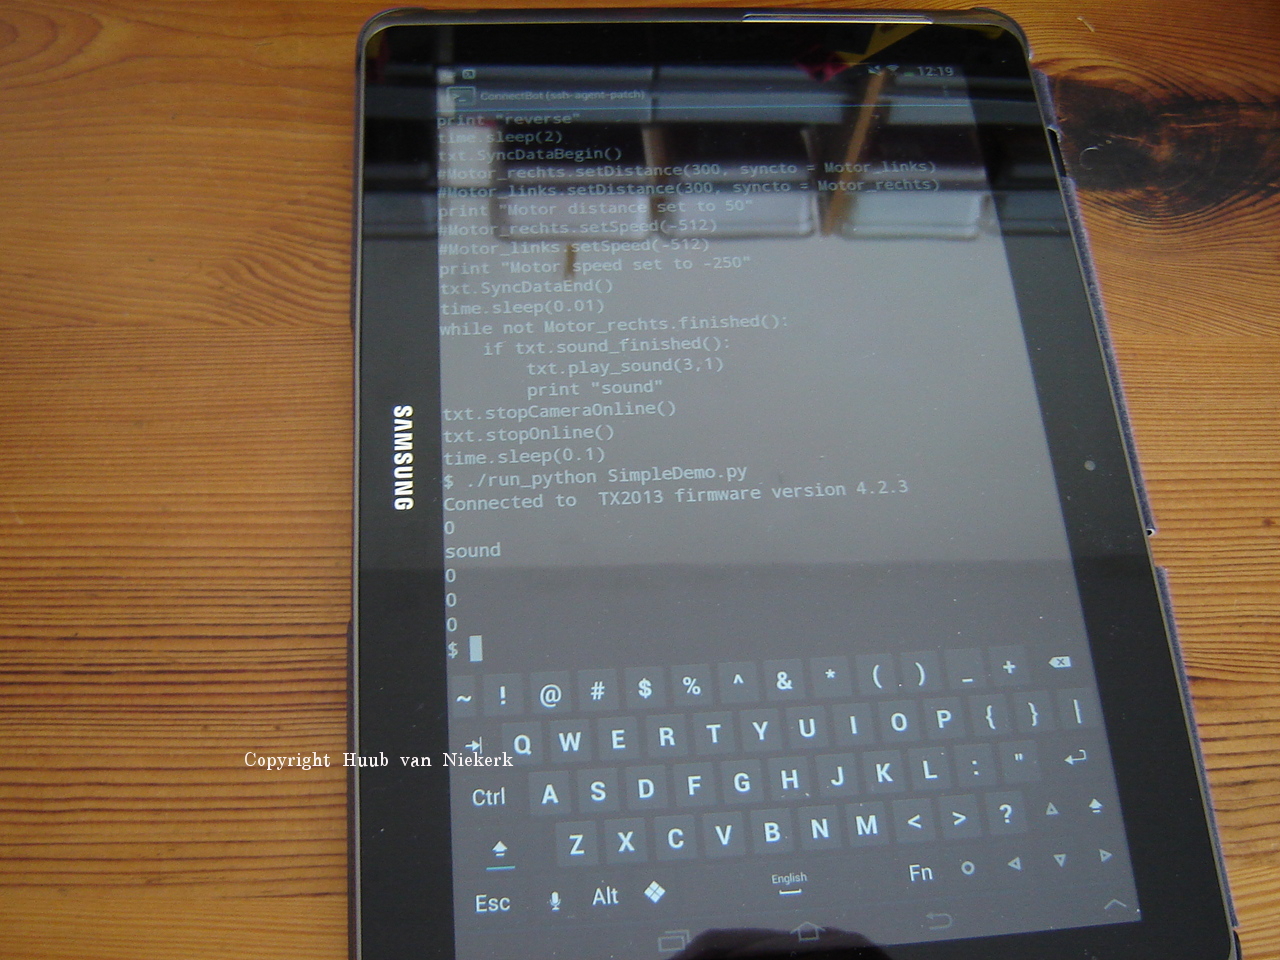
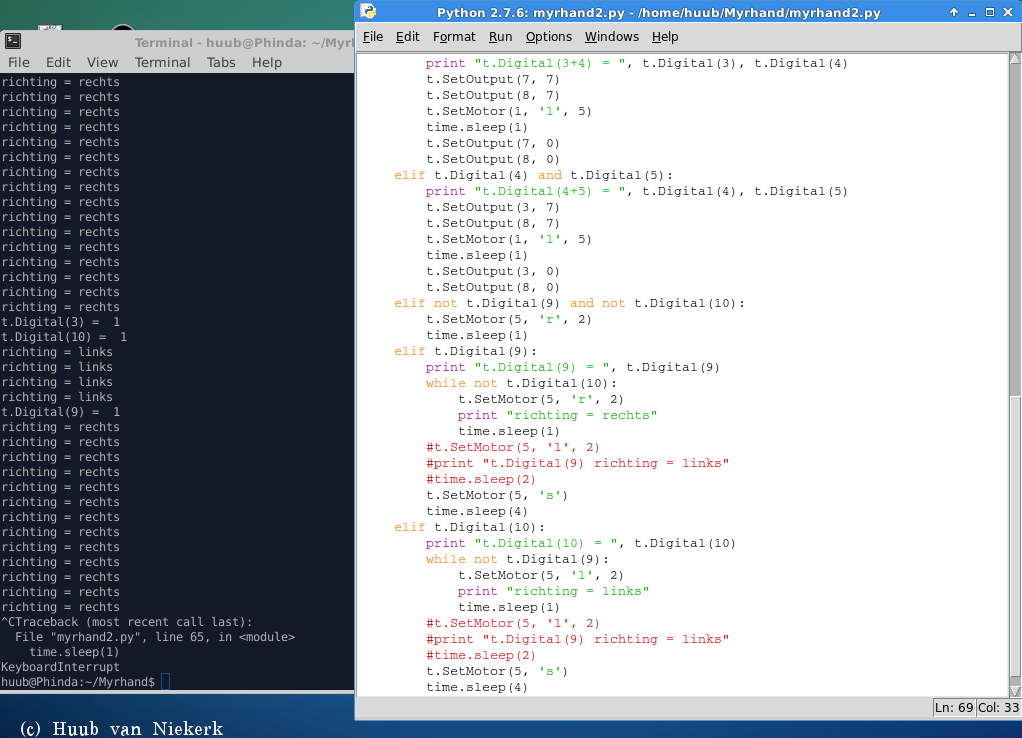
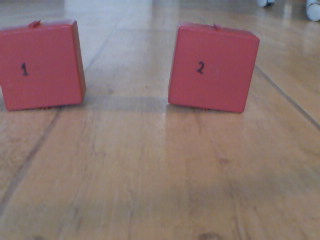
Discovery: Checking date and time again gives an oops. Replacing the barttery gives another oops. Taking the motor synchronisation apart, I write a new code and use ROBOPro again... what's the difference? Does it work or does it oops? Click the image to watch the video.
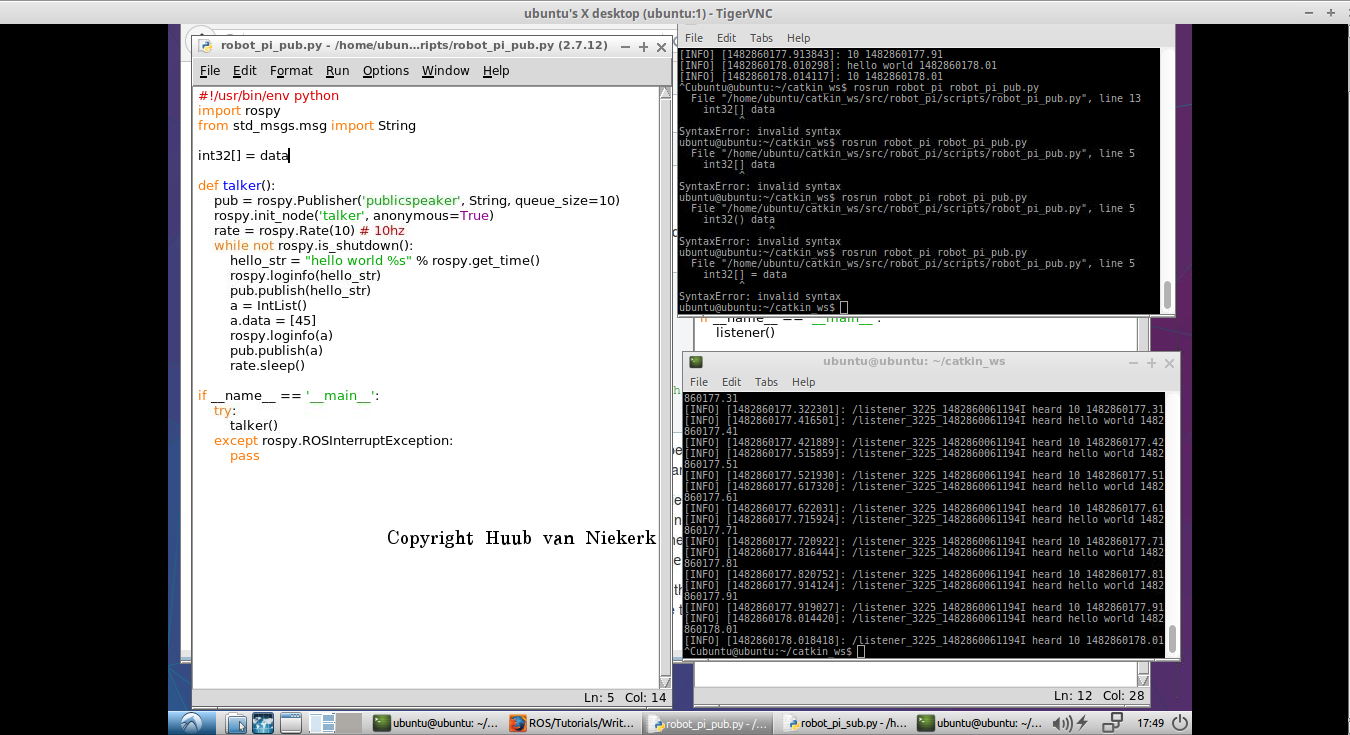
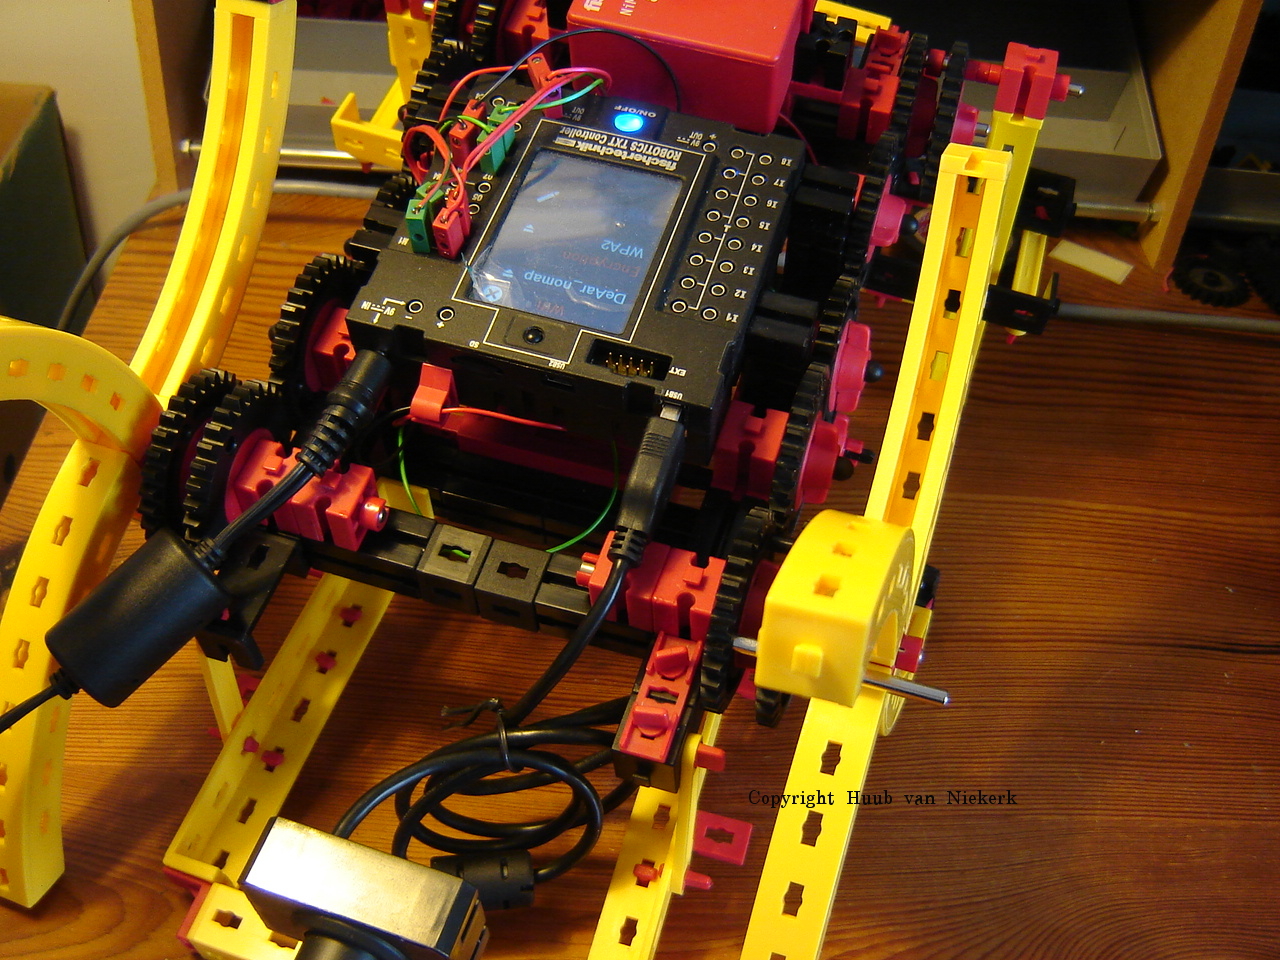
RPi/ROS: Using the RPi2, I have replaced Raspbian Linux by Ubuntu 16.04 to run ROS. This took some effort, since Ubuntu for RPi comes as a server and you'll have to install a desktop yourself. Apart from that, it looks like it's working. Click the image to watch the video.
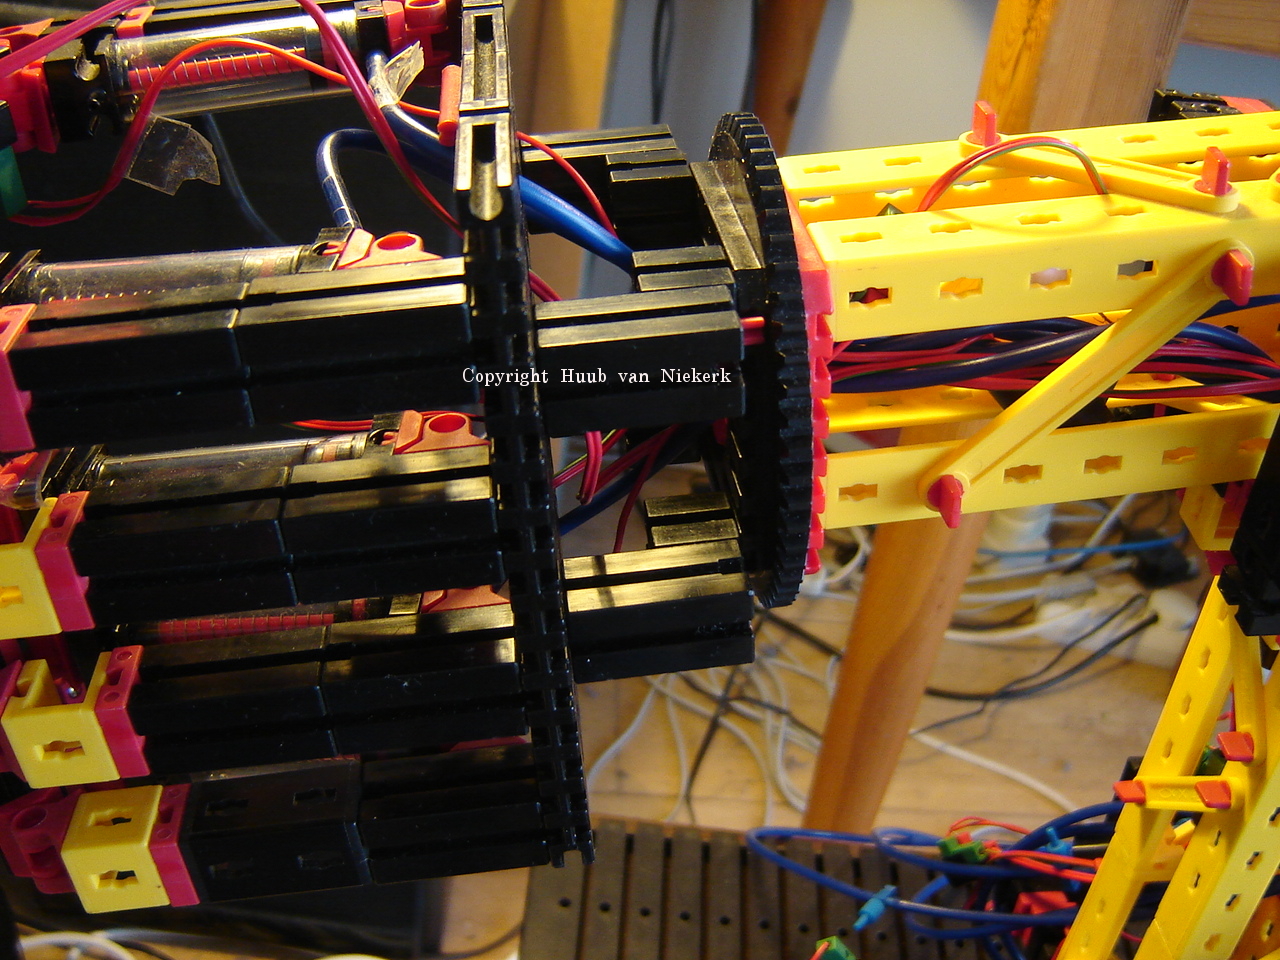
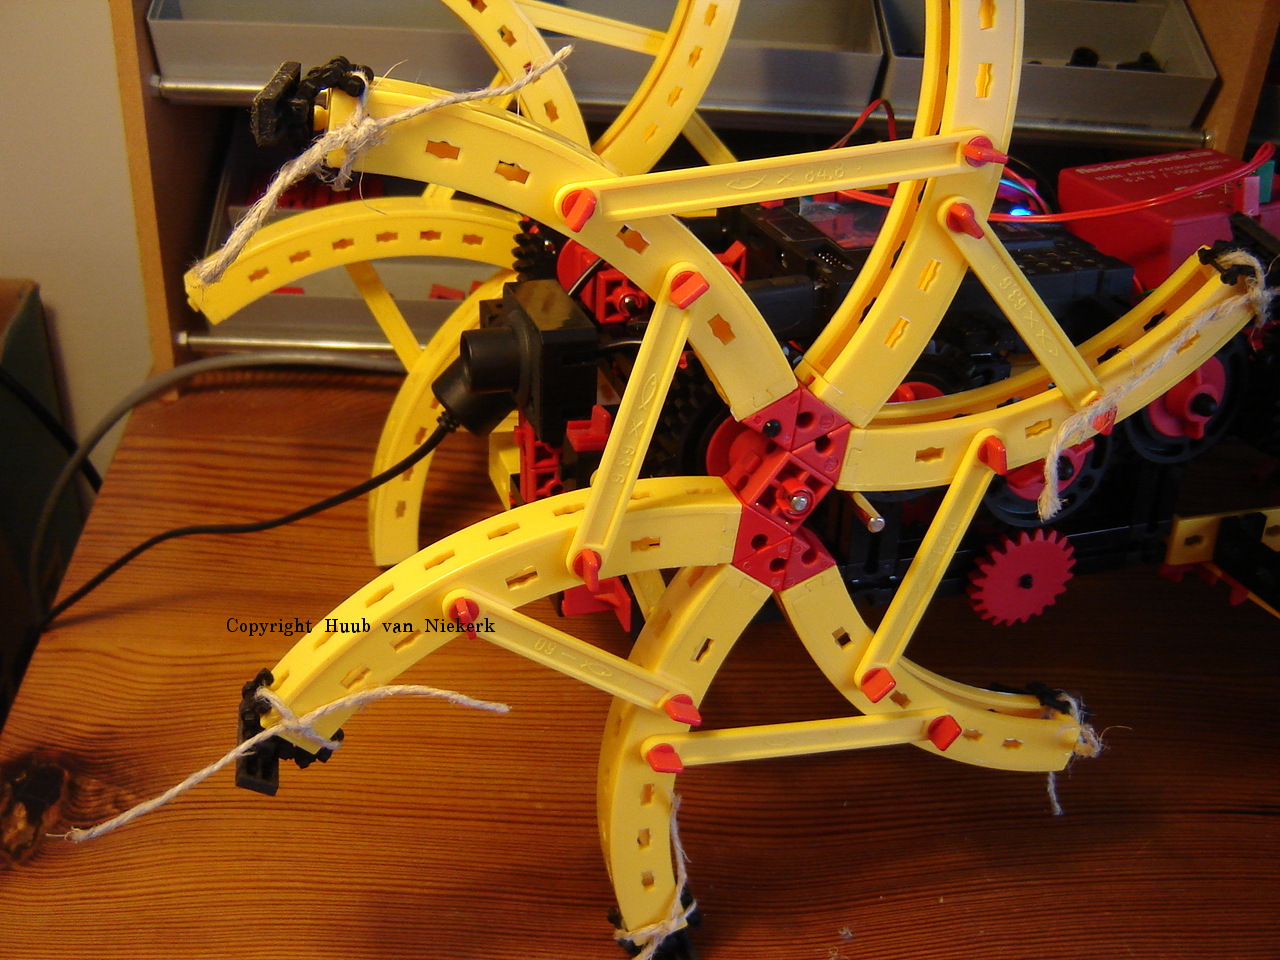
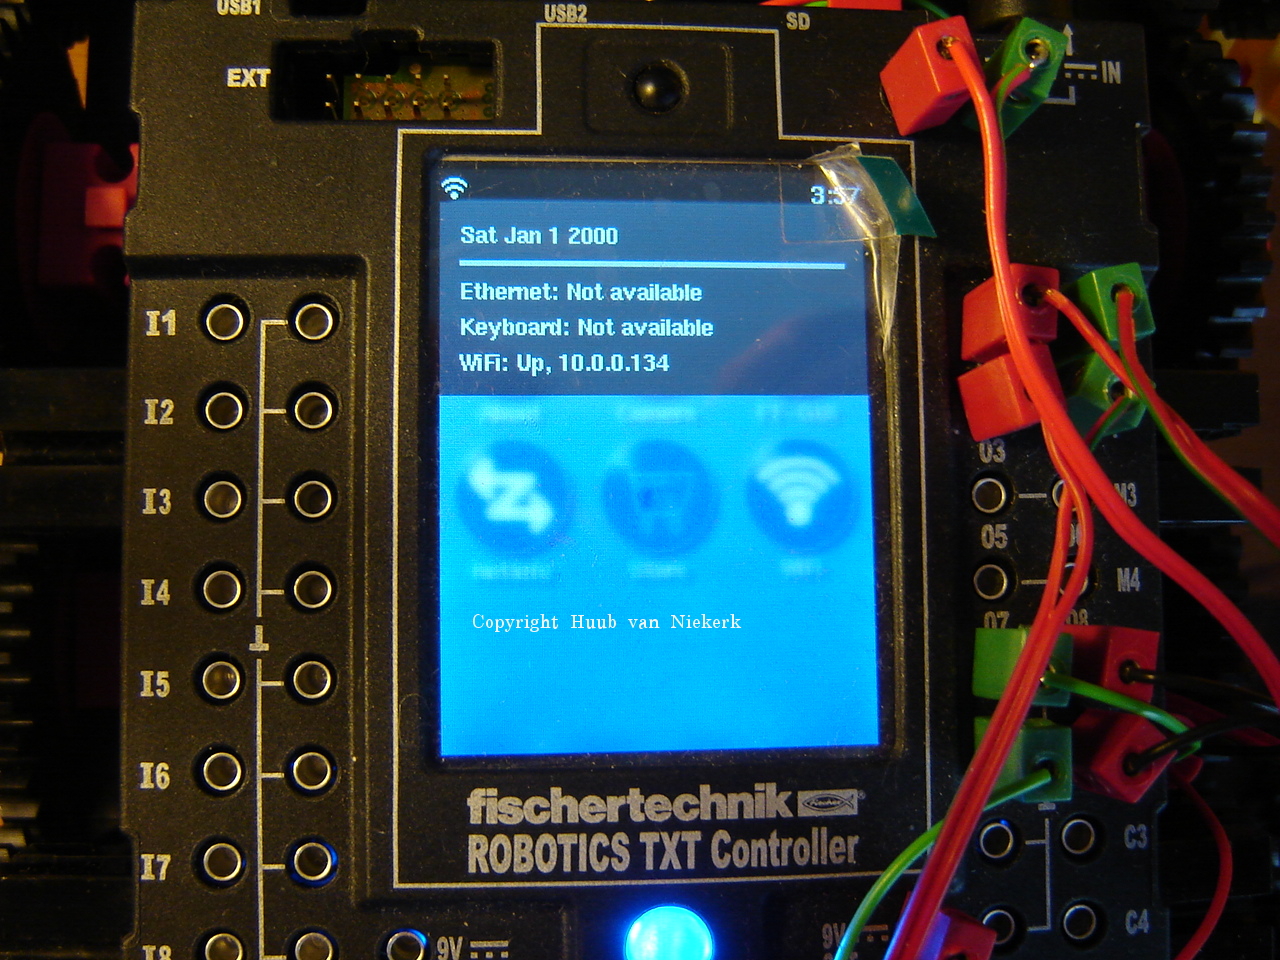
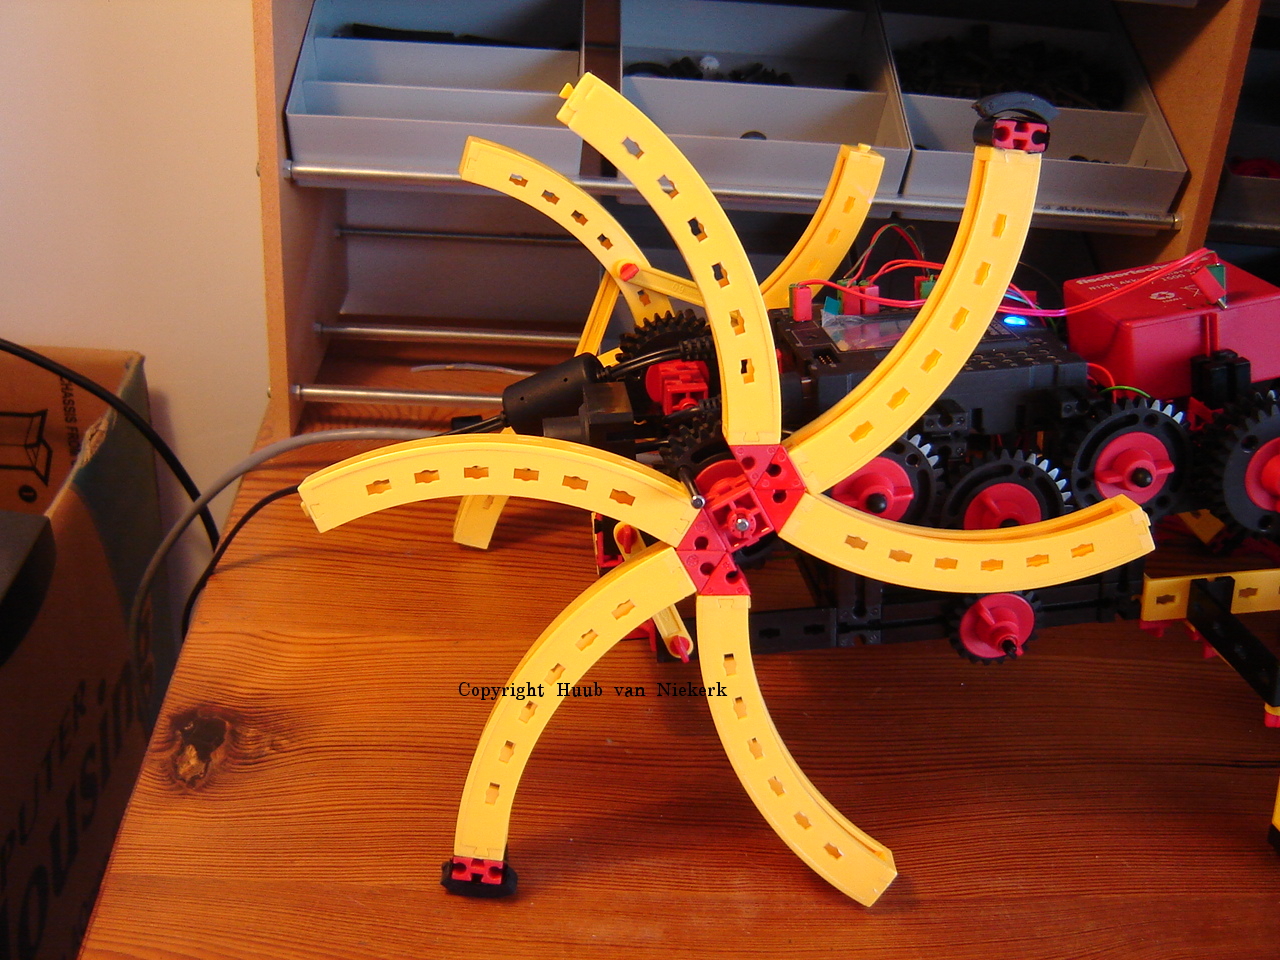
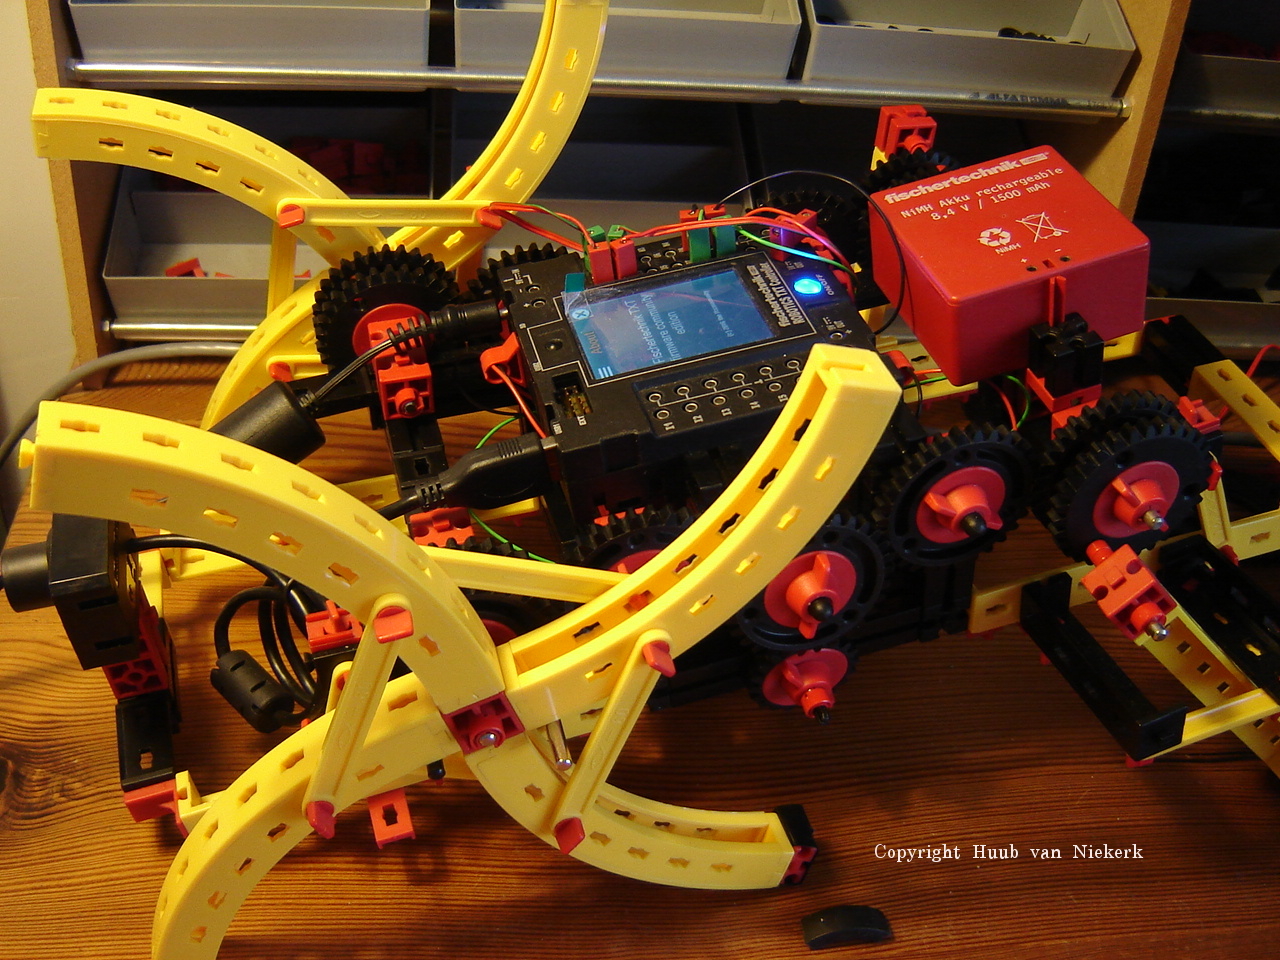
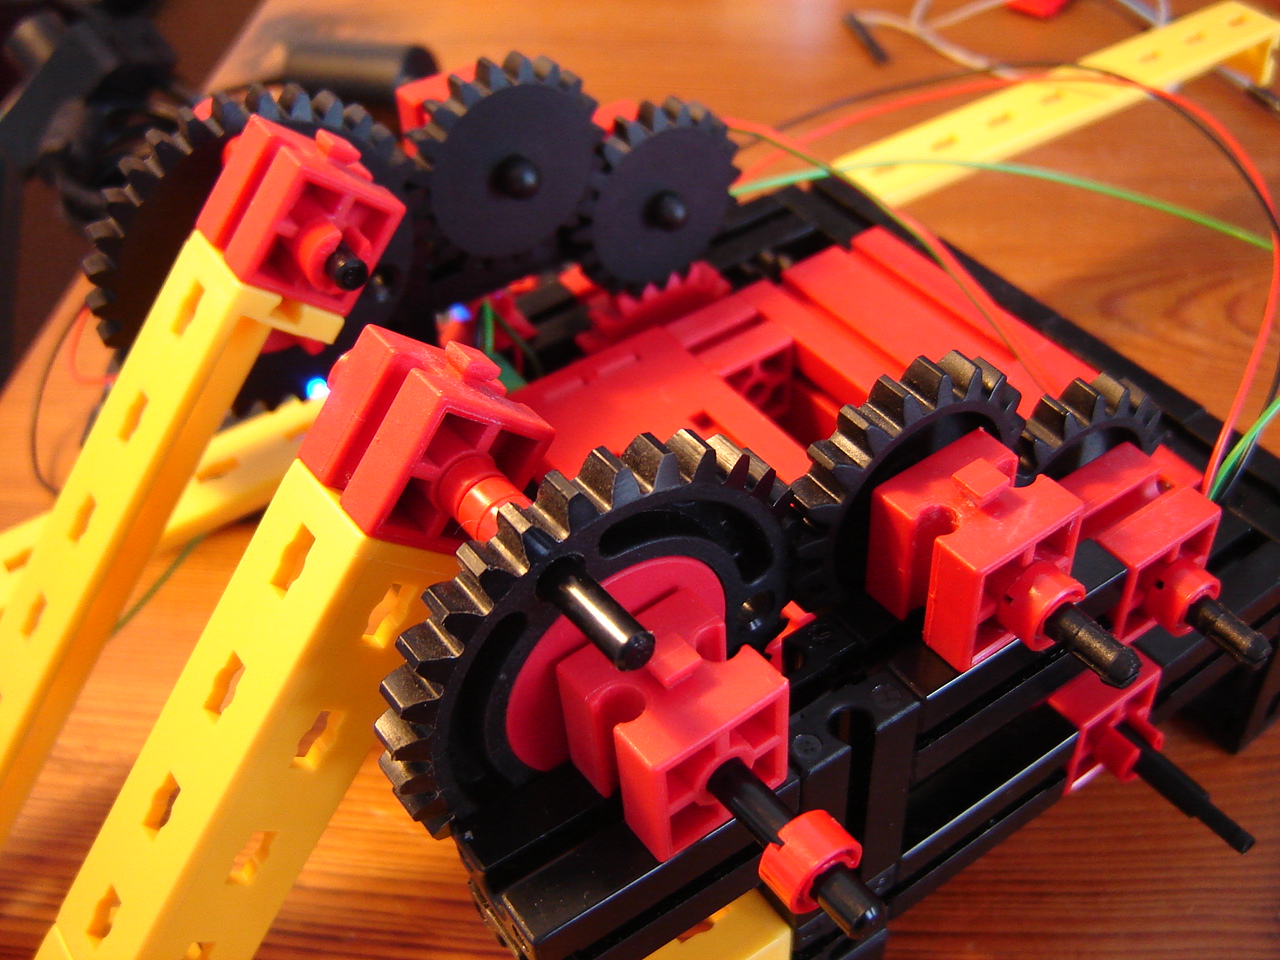
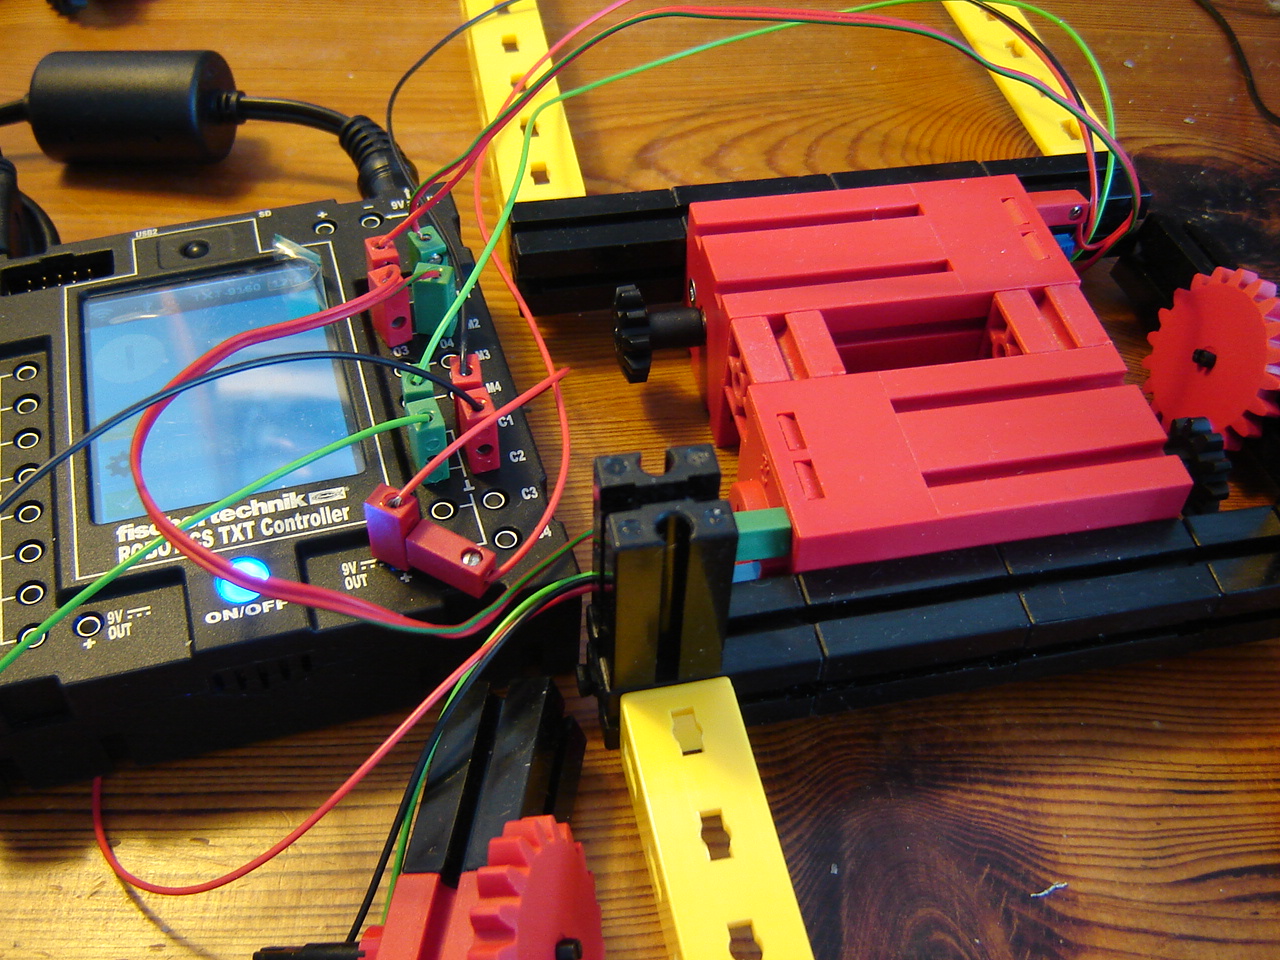
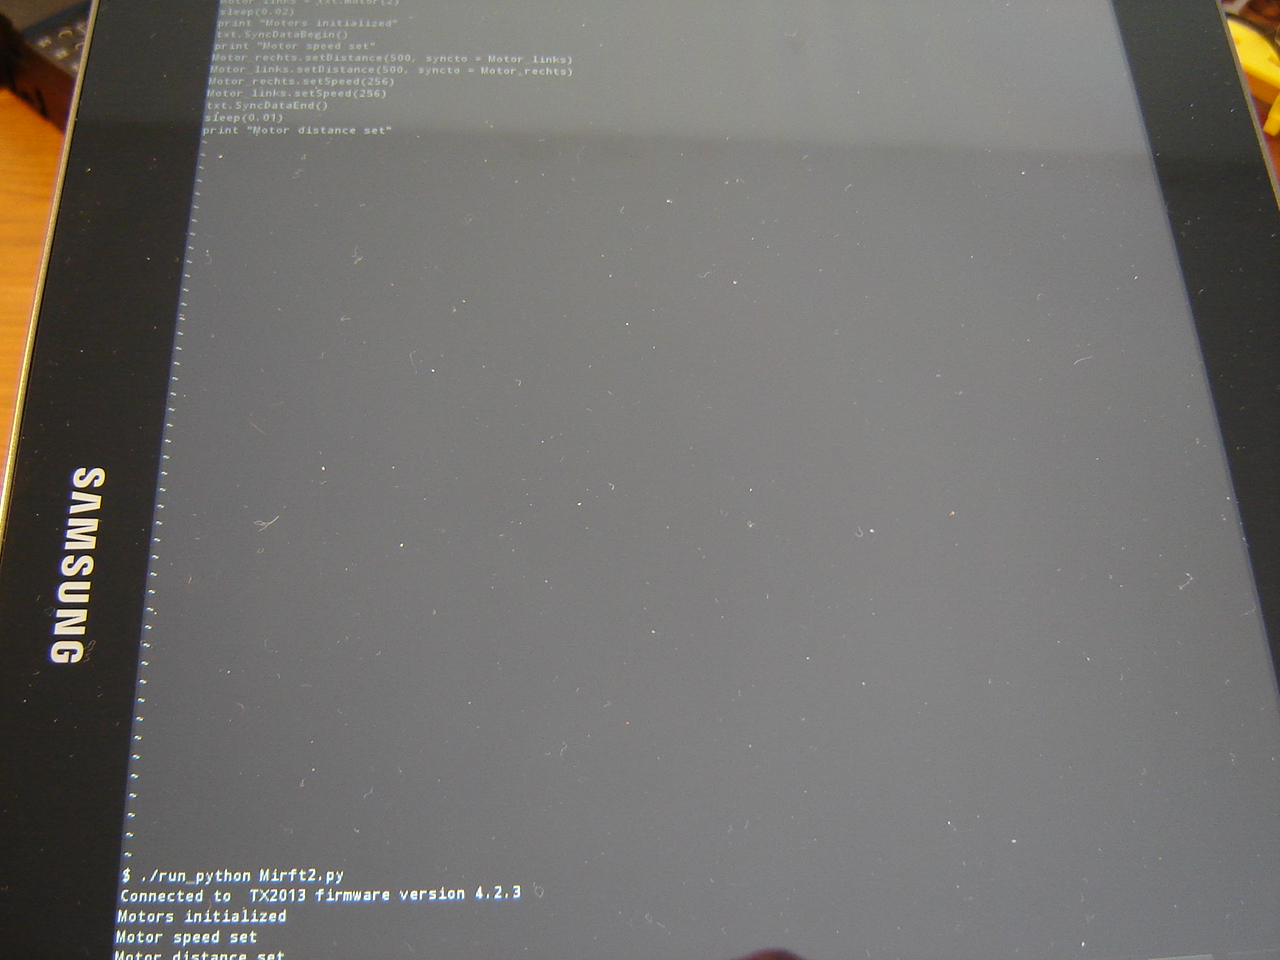
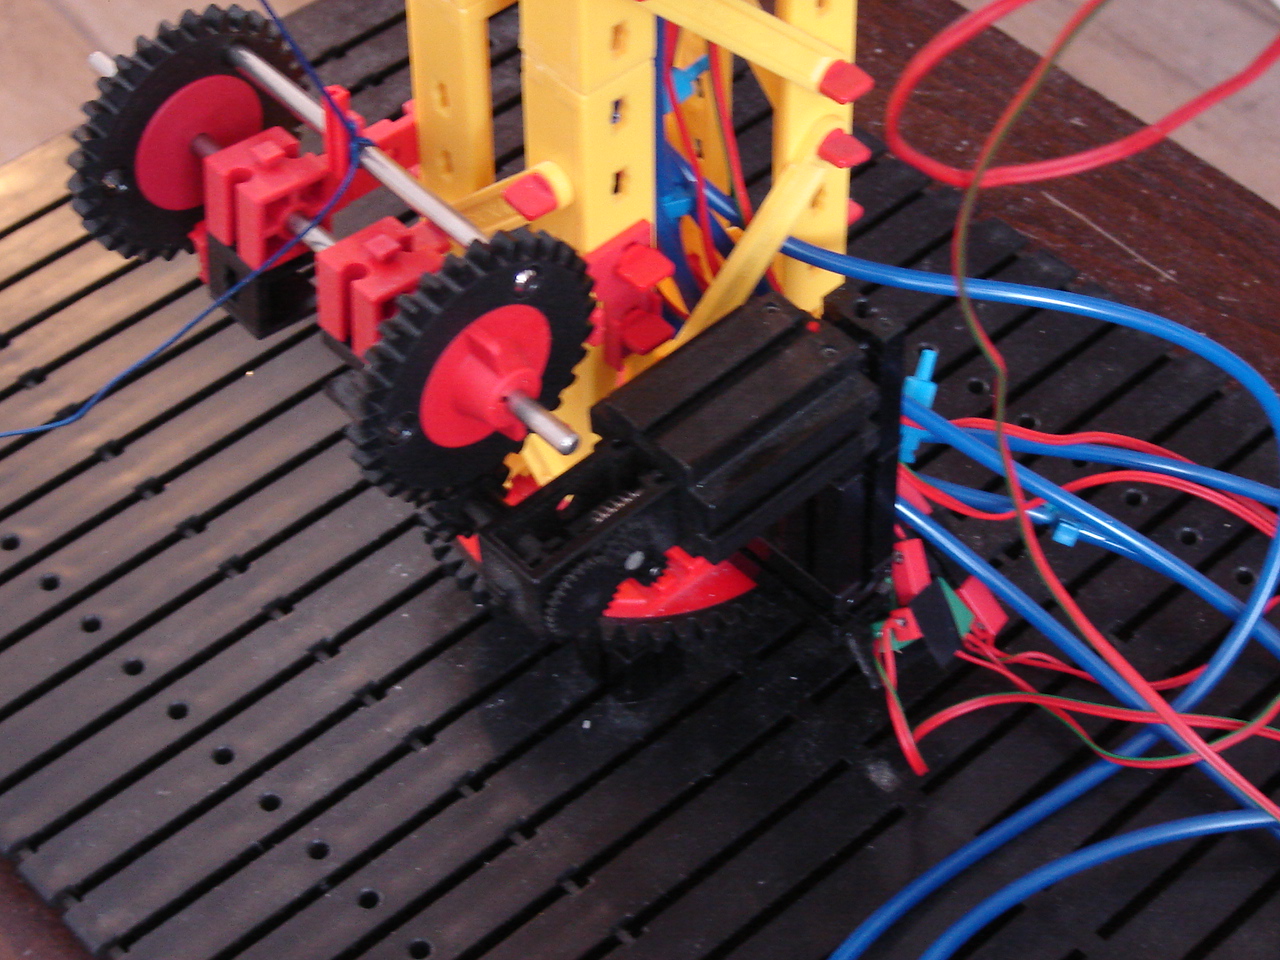
Mirft2: The date is set to 2000-01-01. Oops, battery needs replaced, or? Adding rubber feet proves to be harder than thought. Close inspection of the gears leads to a reconstruction. Then a test: will it work? Click the image to watch the video.

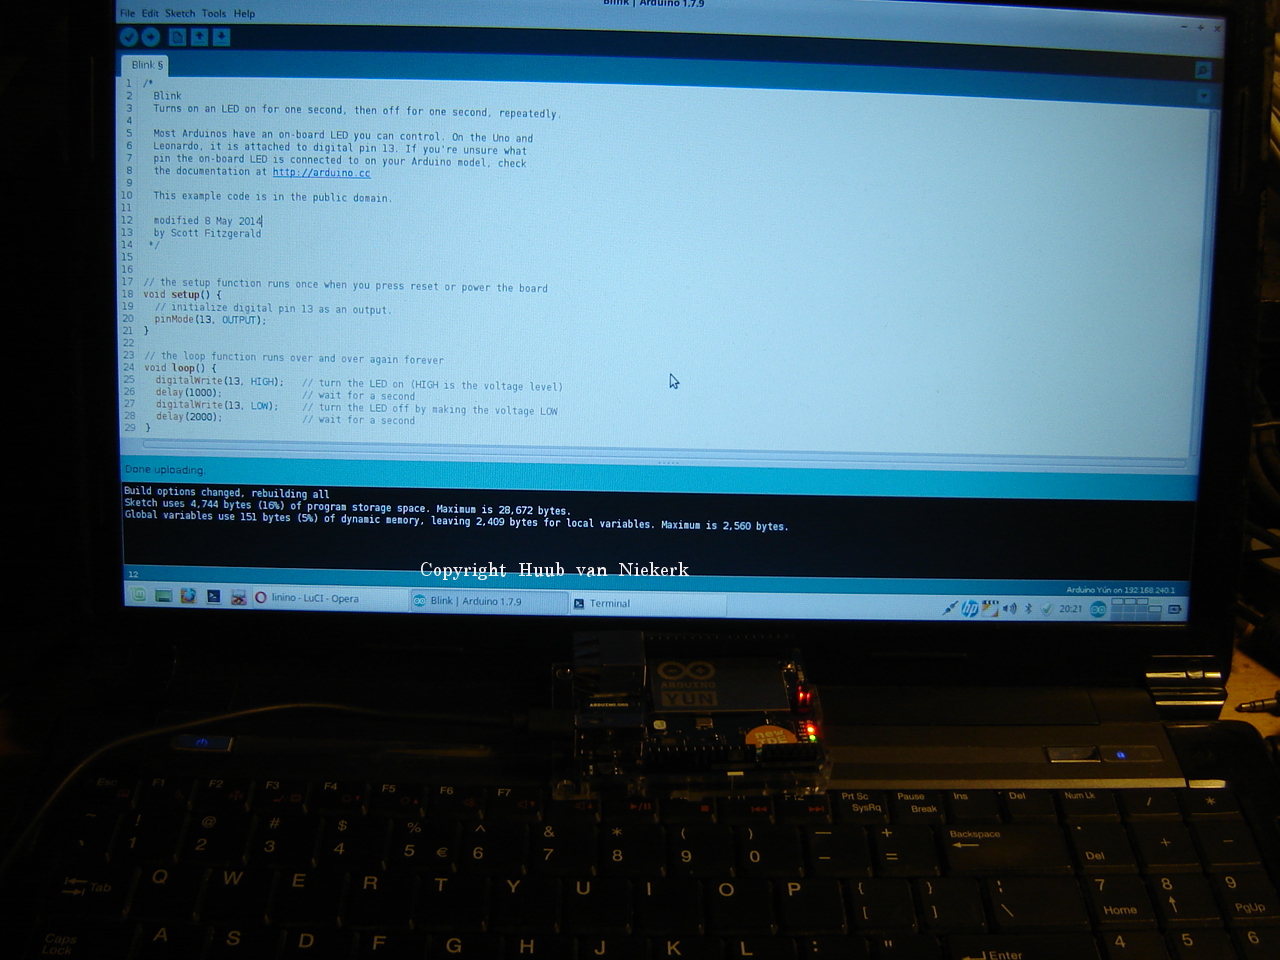
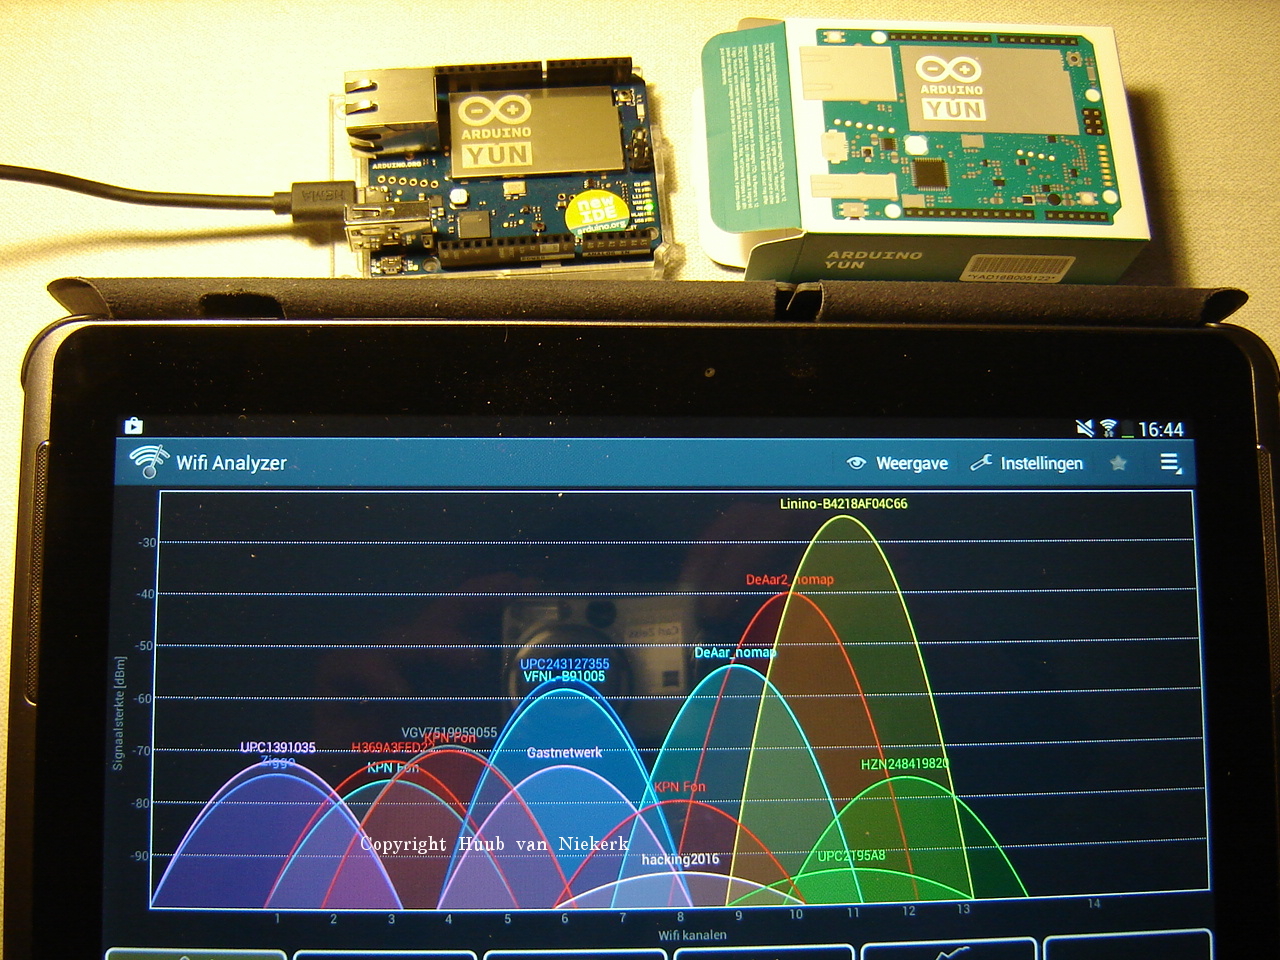
Arduino Yun: Exploring the remote connection and first programming via upload which is different than expected. Click the image to watch the video.
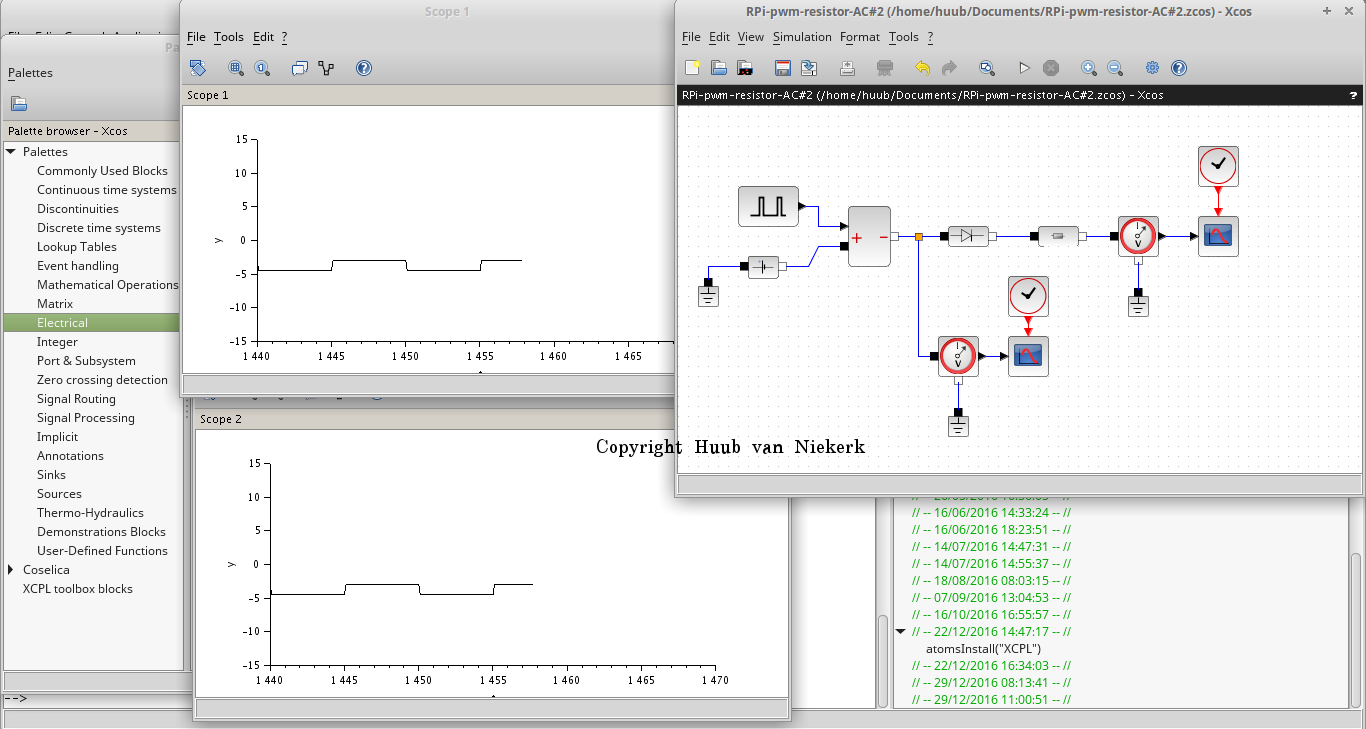
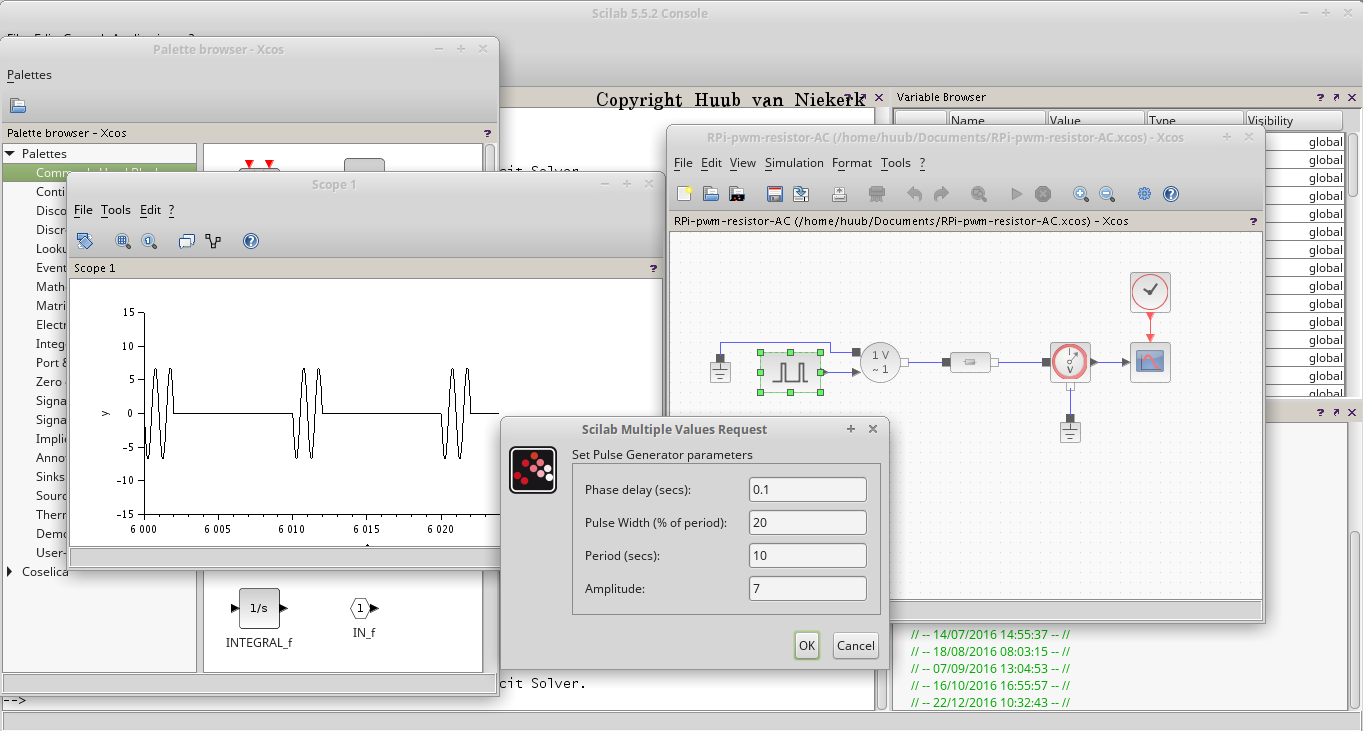
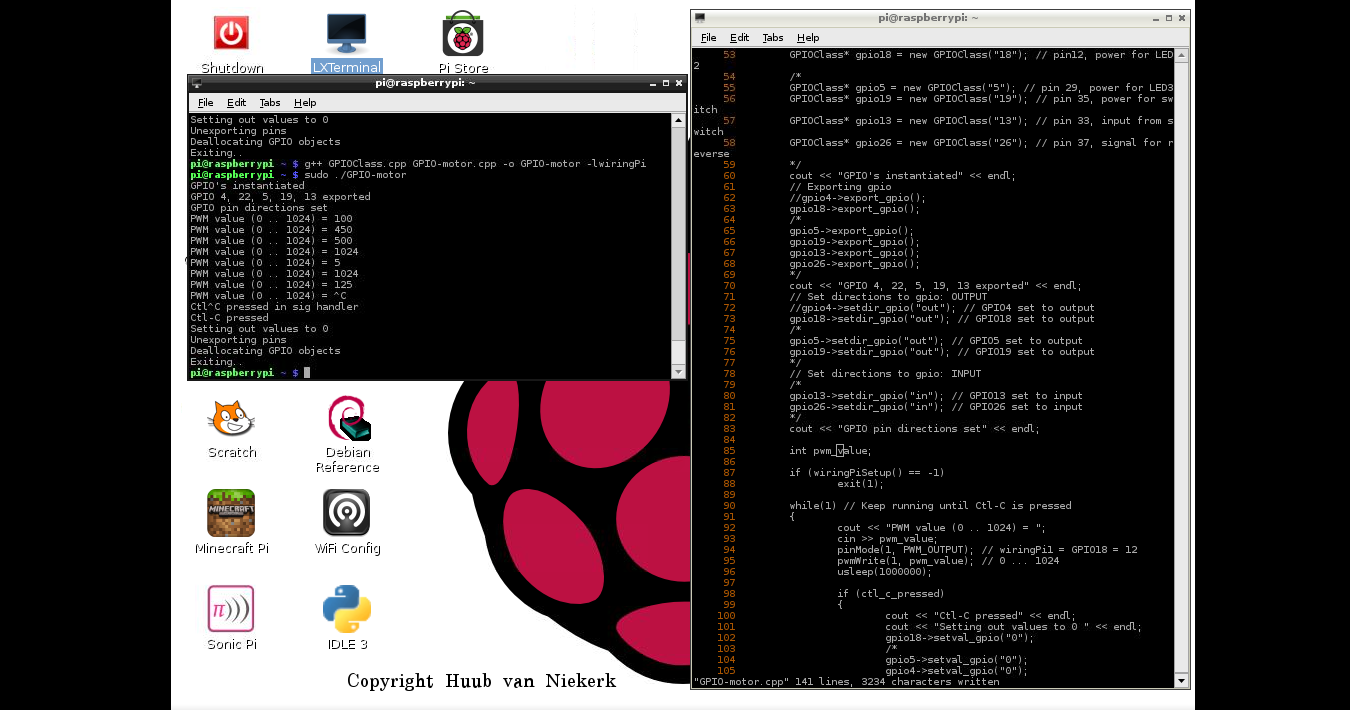
RPi: Continuing with Scilab/Xcos simulation, I realize it's not like the real circuit. So some settings and components need to be changed. Will it work then? Click the image to watch the video.
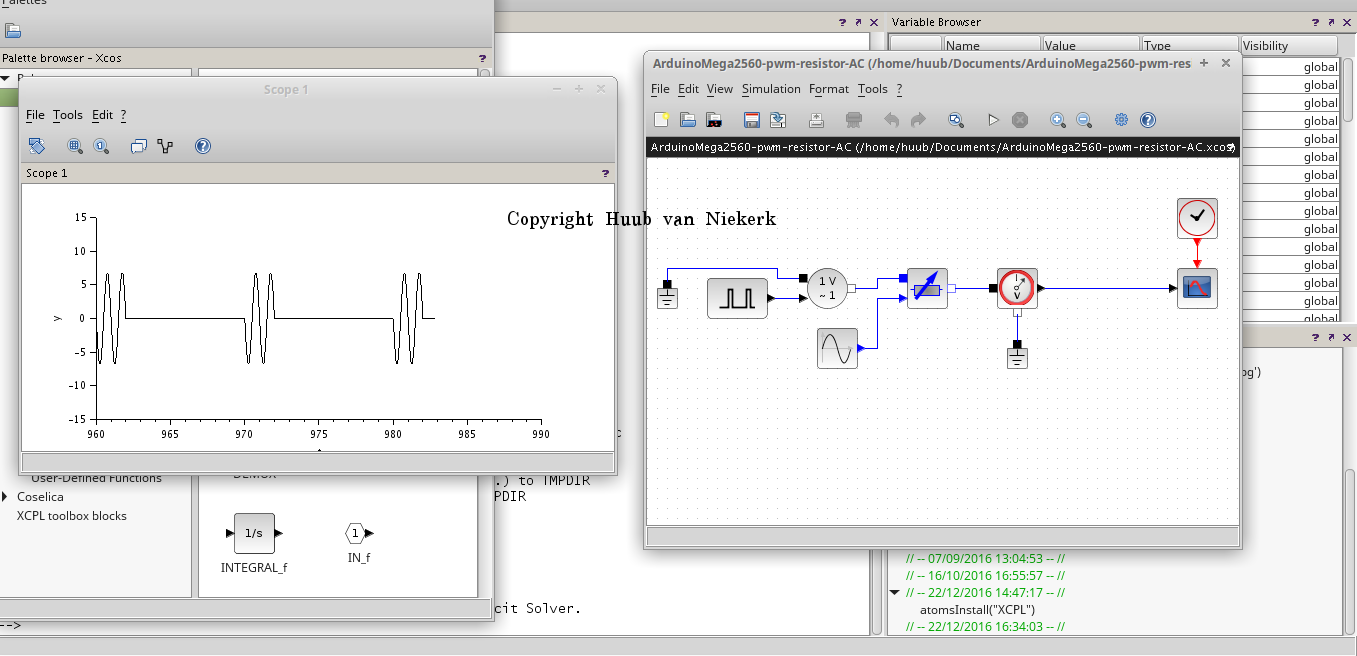
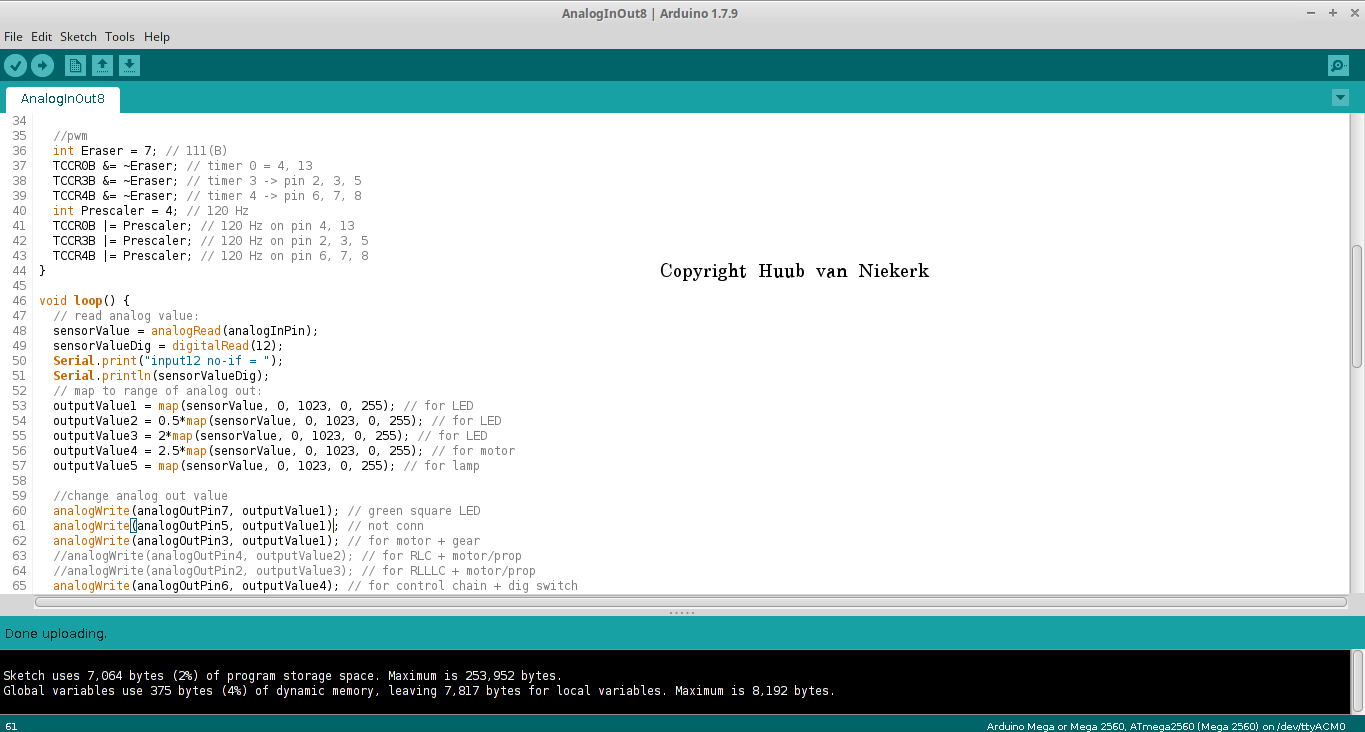
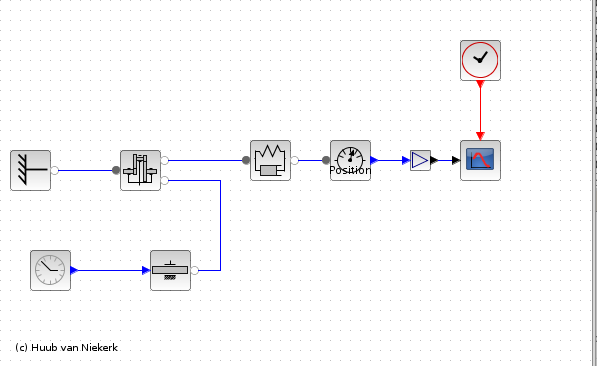
Arduino Mega2560: More simulation using Scilab/Xcos to better resemble the ciruits. This includes a motor with a nice graph... Click the image to watch the video.
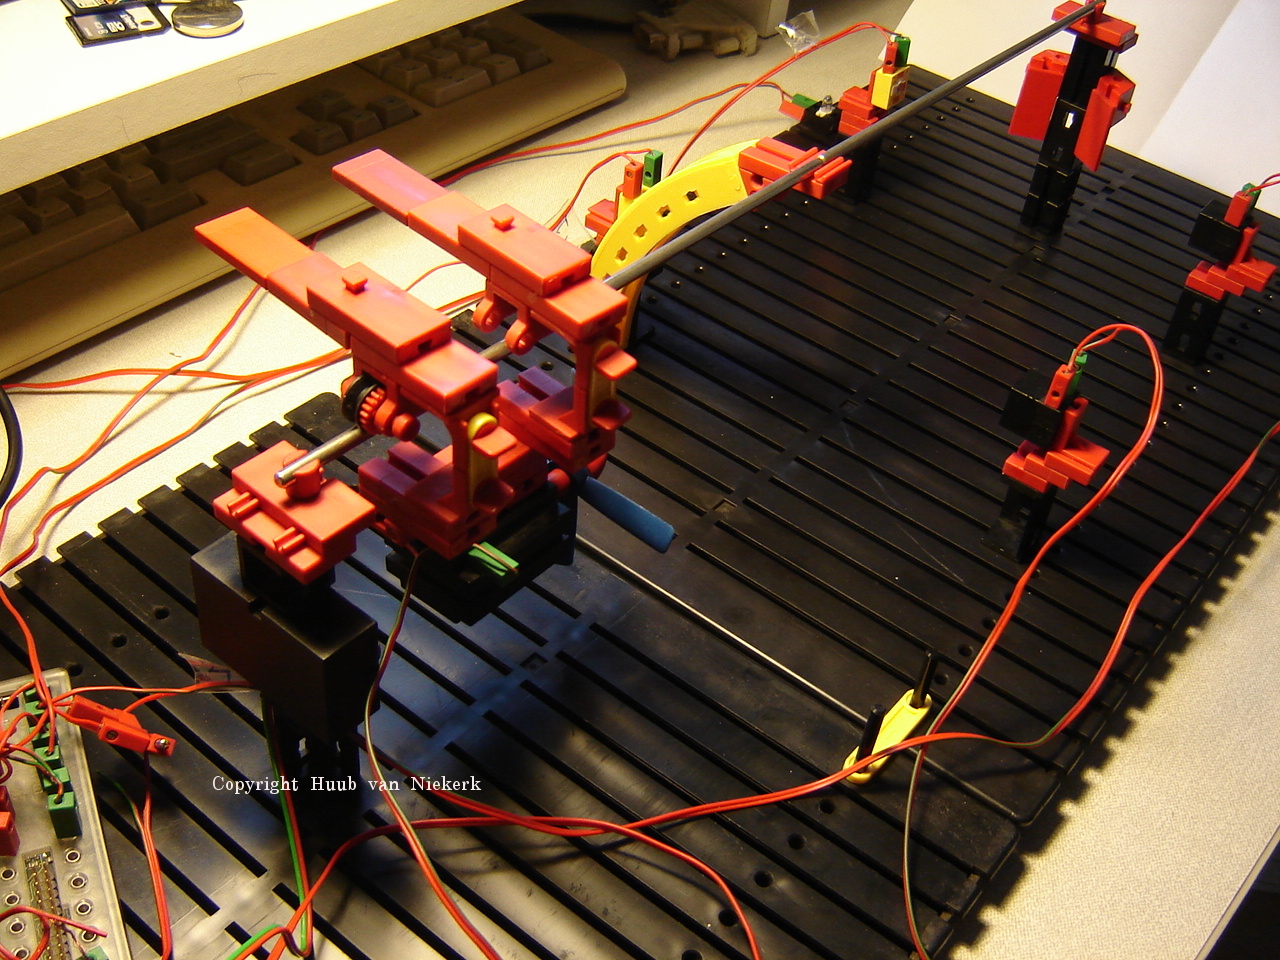
Hand: Time to reconstruct the wrist, which brings some issues and considerations. Will it work? Click the image to watch the video.
23 December
BB: Reconstruction all over again: replacing the support leads to replacing the underground, rewiring and testing. Does it all work? Click the image to watch the video.
Discovery: Trying to get the motors synchronized leads to some more code-changes and some unexpected results. Click the first image to watch the video.

Mirft2: Several issues to deal with: a wheel-rod need clamps, the frame needs a better stabilization, rubber feet need improvement. Some are quick to fix, other need some time (hint: there was a thinking pause between some of the video segments). But is all solved now? Click the image to watch the video.
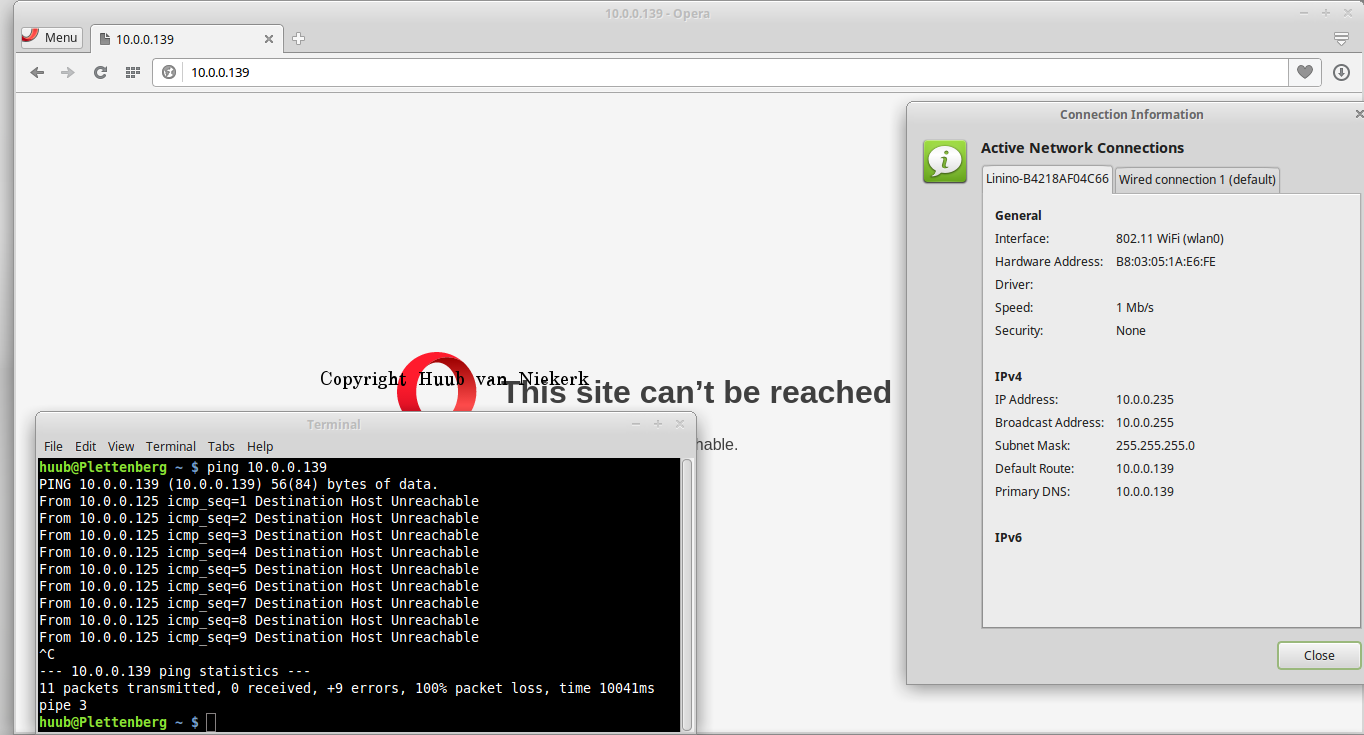
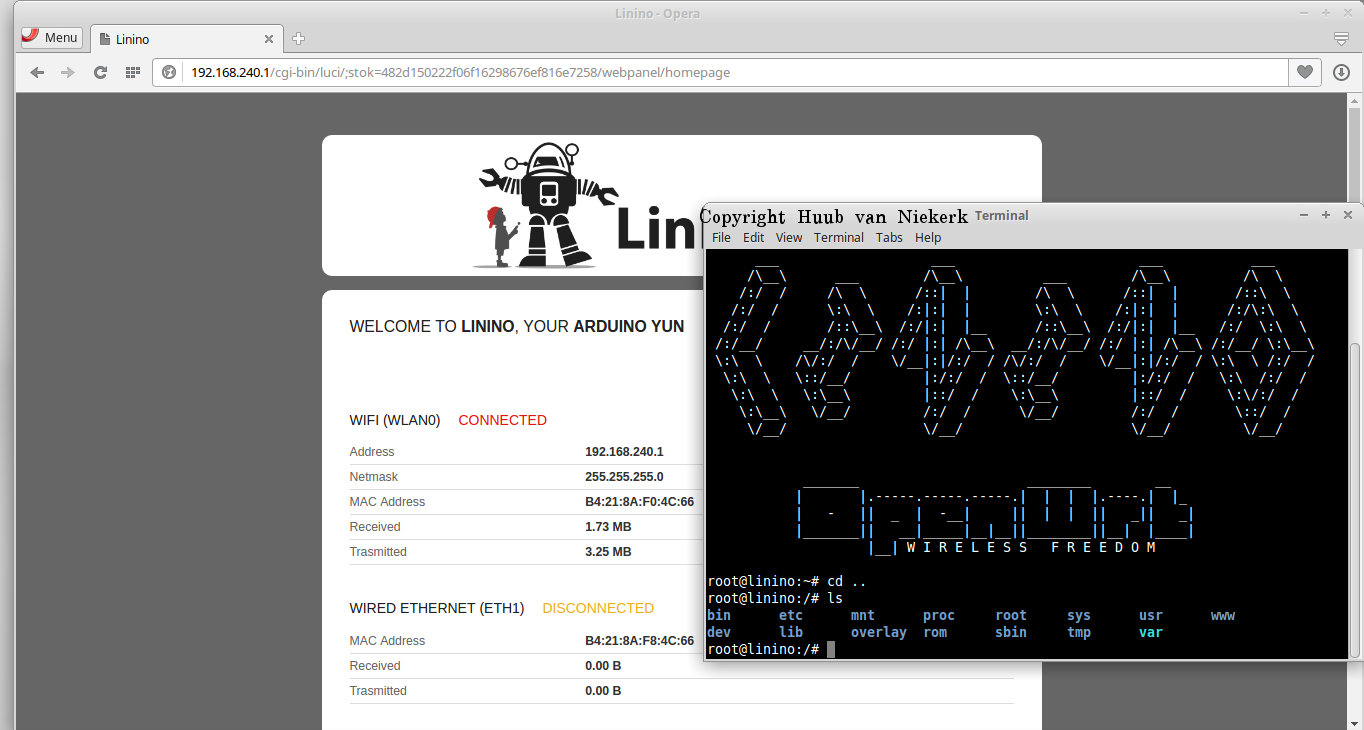
Arduino Yún: Last time I ended up without access to the Yún. So how to restore it? This proves simple enough, so trying to change the IP stuff again. Will it work this time? Then, considering the analog and pwm pins: an attempt to upload some code. Click the image to watch the video.

RPi: It's time to set up a simulation using Scilab/Xcos again. How is this comparable to the real circuit? Click the image to watch the video.
Arduino Mega2560: Checking voltages and frequencies with the motors leads to running a simulation using Scilab/Xcos. This proves to be more difficult than initially thought. Click the image to watch the video.
Hand: A final touch to the pivot motor shows it works, for now. Then a new addition: a rotating wrist. But how to do that? Click the image to watch the video.
16 December
BB: The carriage needs some serious reconstruction. But testing leads to more... Click the image to watch the video.
Discovery: Have to start by setting the time right, then some code change and check followed by motor tests on the floor. Click the first image to watch the video.
Mirft2: With the 2 6-spoke legs (are they still legs?), they need to be more robust. But the gears show that something is not quite right. Click the image to watch the video.
Arduino Yún: Finding my through the graphical interface isn't easy. Using the ssh connection is more familiar, and with some edits everything should be as should be. Click the image to watch the video.
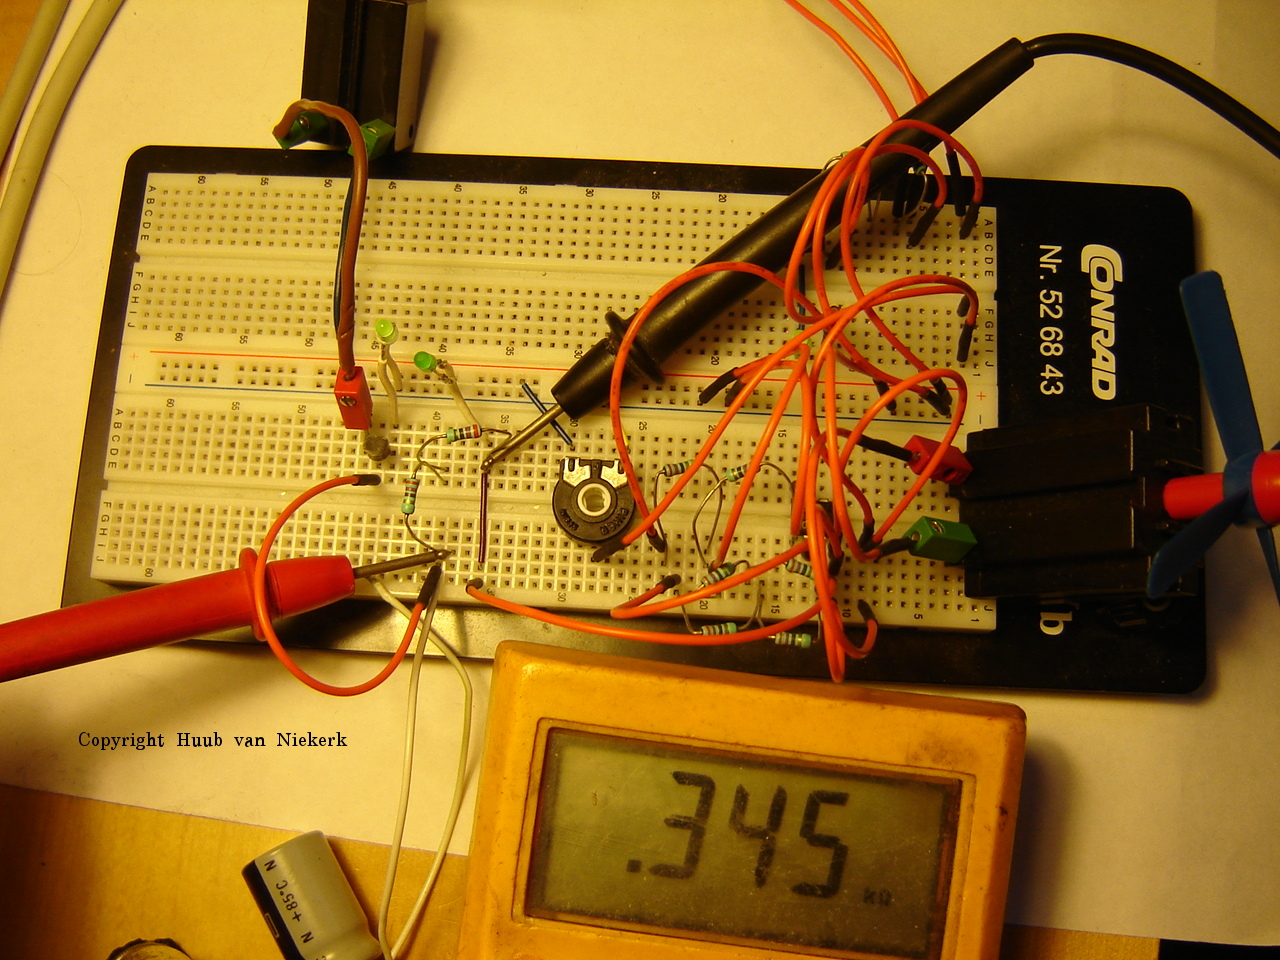
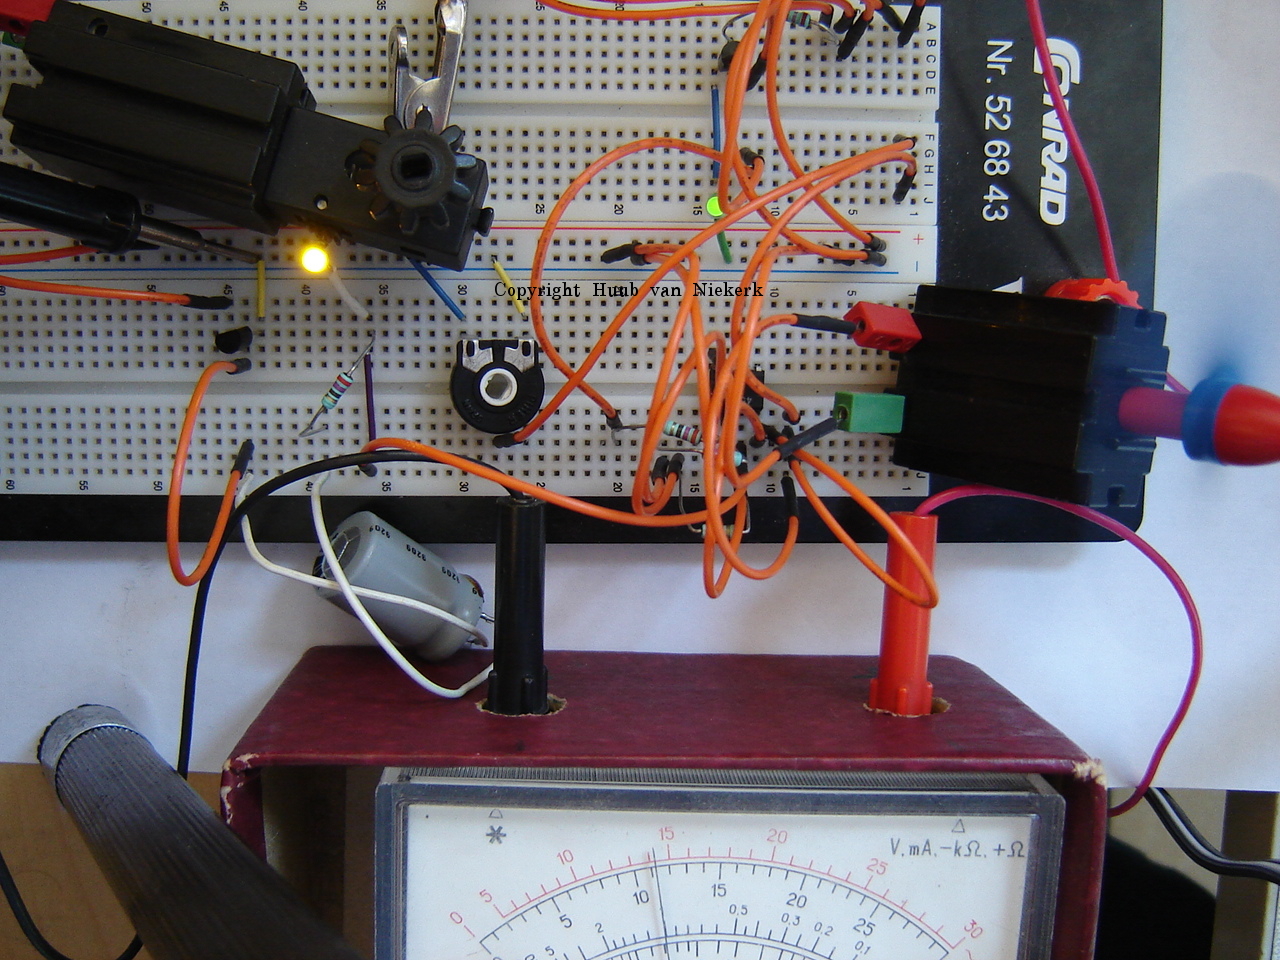
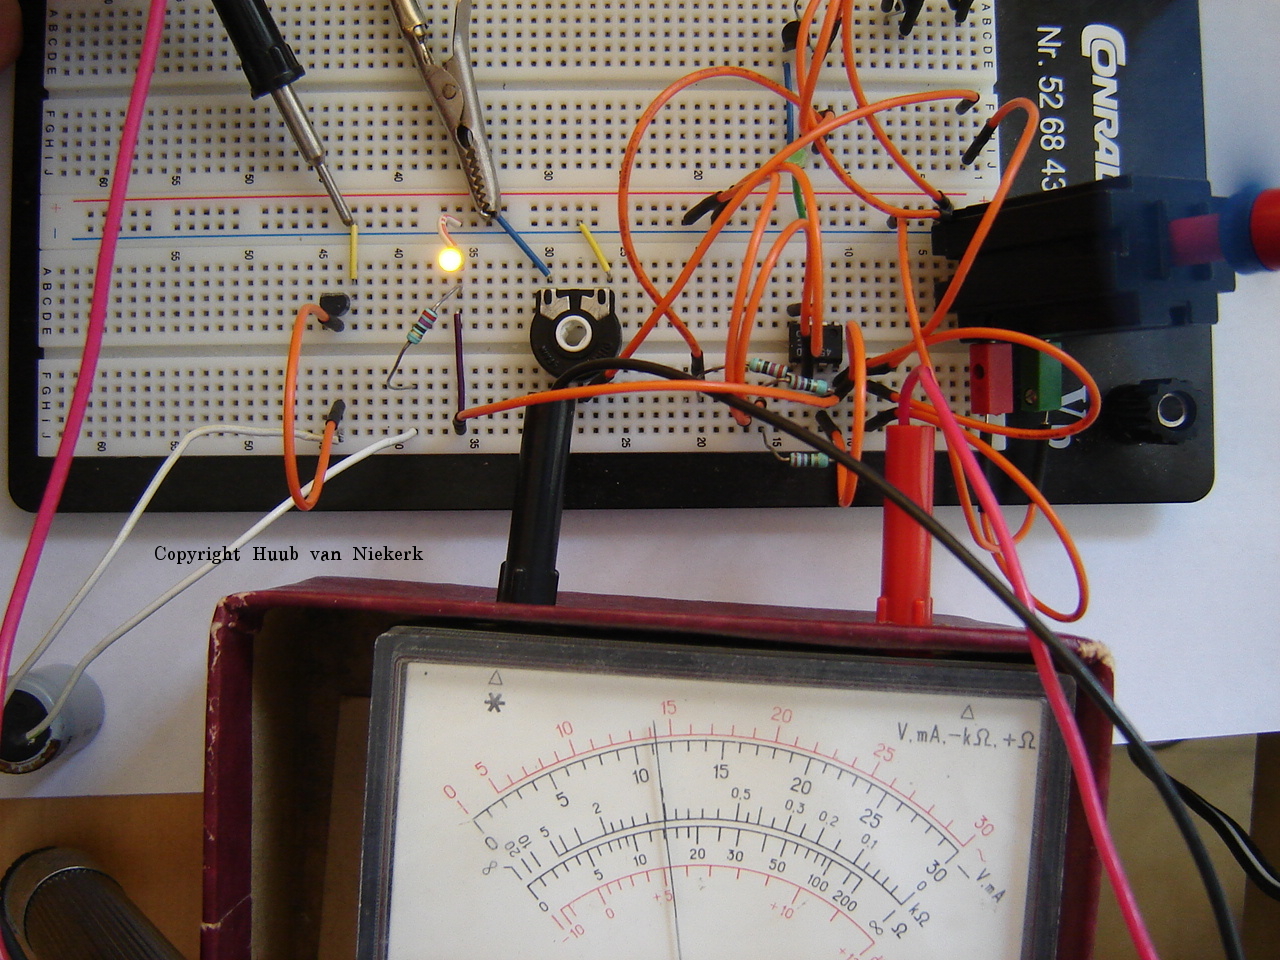
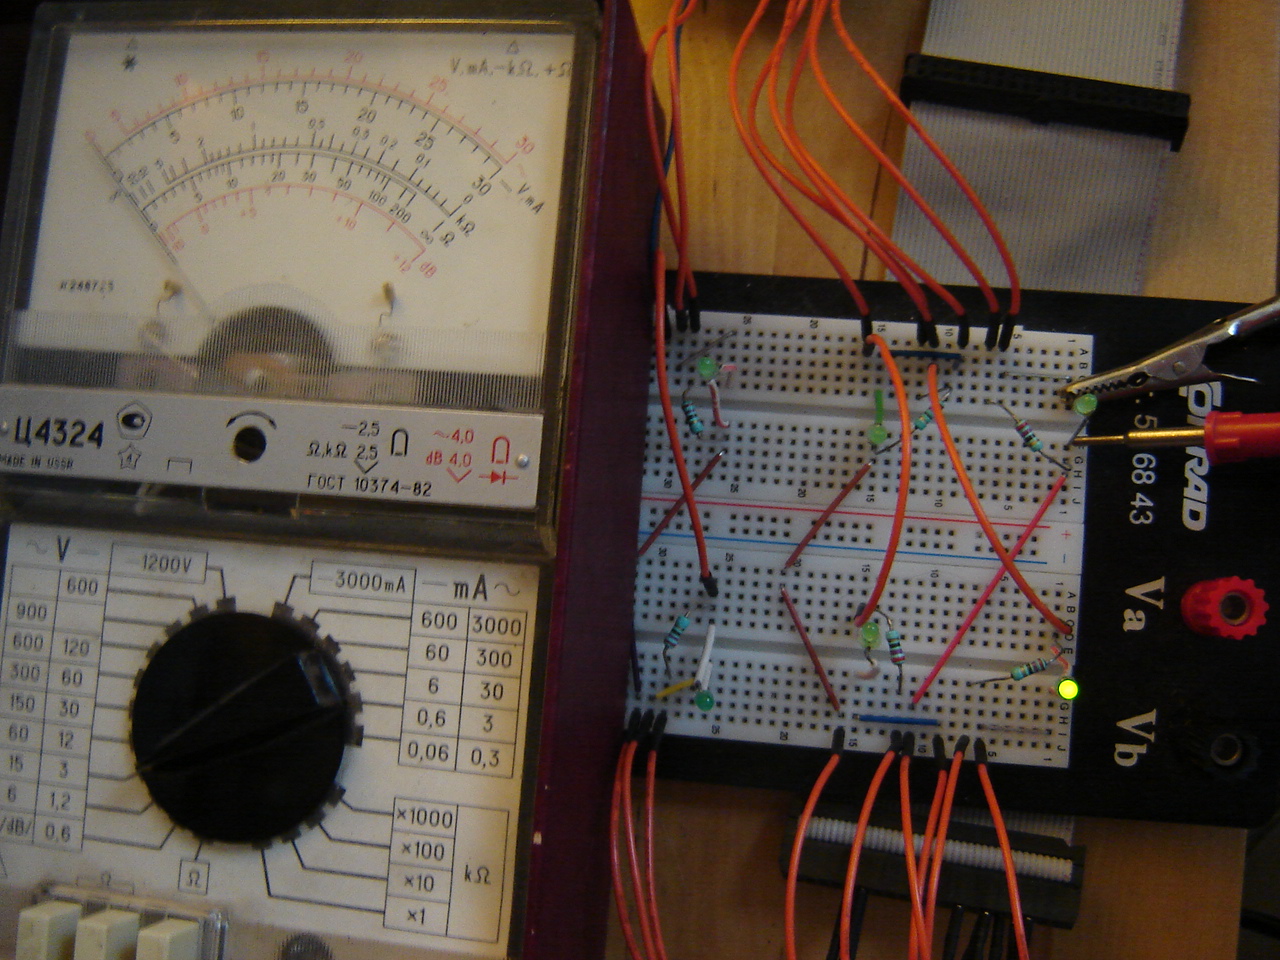
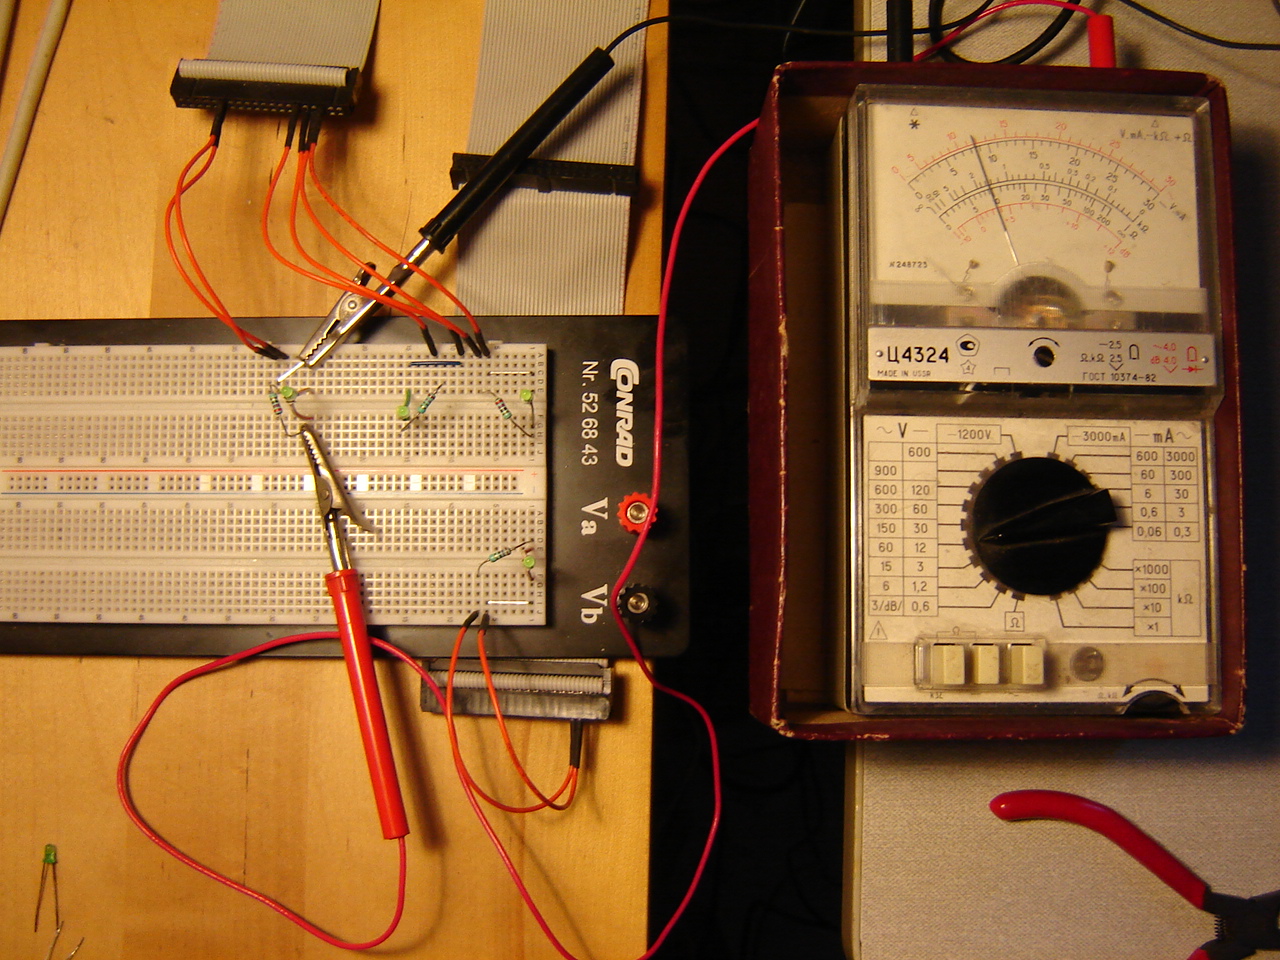
RPi: Measuring resistance leads to finding that it changes with pwm value? Checking the way how to measure resistance and frequencu with the multimeter, show I'm doing it right. Then what about more resistors? Then I understand why I get a "I" instead of a number. Oops. Click the first image to watch the video.
Arduino Mega2560: Some frequency checking and replacing capacitors leads to some nice results. But is it the pwm that actually works? Click the image to watch the video.
Hand: With the 2-way switch having arrived, I can reconstruct the pivot switch. But this causes another reconstruction and test. Will it work? And how about the rest of the arm and hand? Do I need to change the algorithm? Click the image to watch the video.
9 December
BB: Some additional construction is needed for the rail support, and analysis brings some coding as well. Then it seems timing is off, light don't work and the carriage falls apart. Click the image to watch the video.
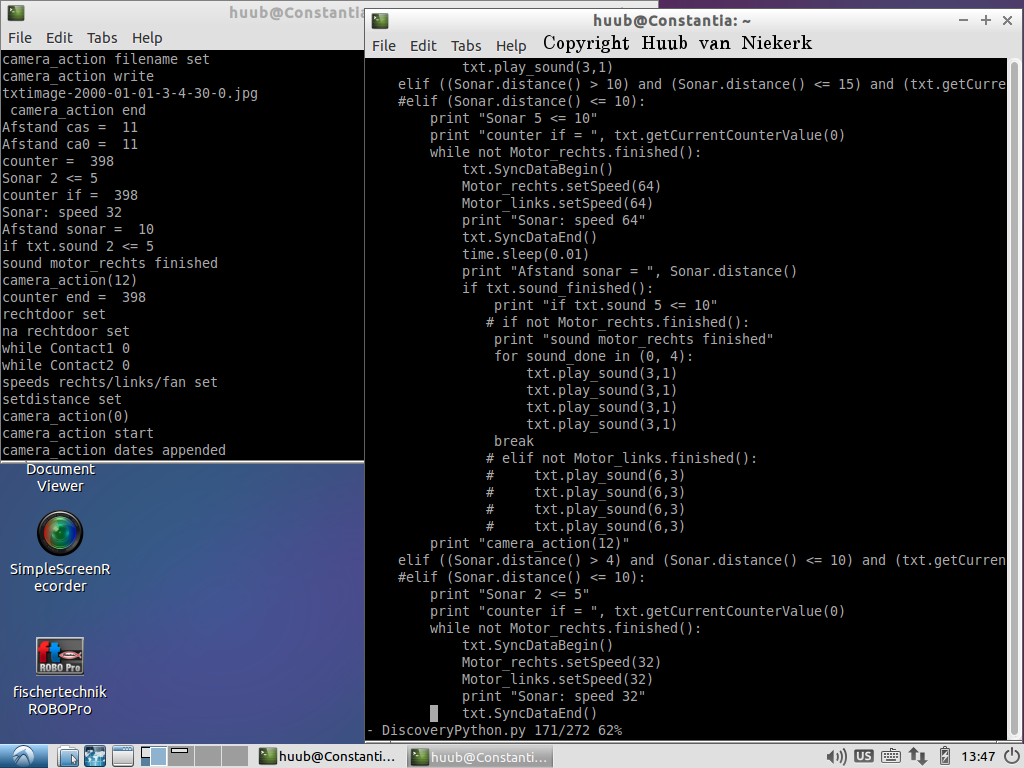
Discovery: Changing the sound in the program to various and finding which sound it taken. Then testing reveals it's working nicely, mostly. But 1 problem really needs to be solved. Click the first image to watch the video.

Mirft2: How would it go when the other front leg is replaced with a 6 part? An instability shows up and needs a solution. And how to solve a gear problem? Click the image to watch the video.
Arduino Yún: Exporing the web-interface, settings and dangers. A big oops and some other stuff. Click the image to watch the video.
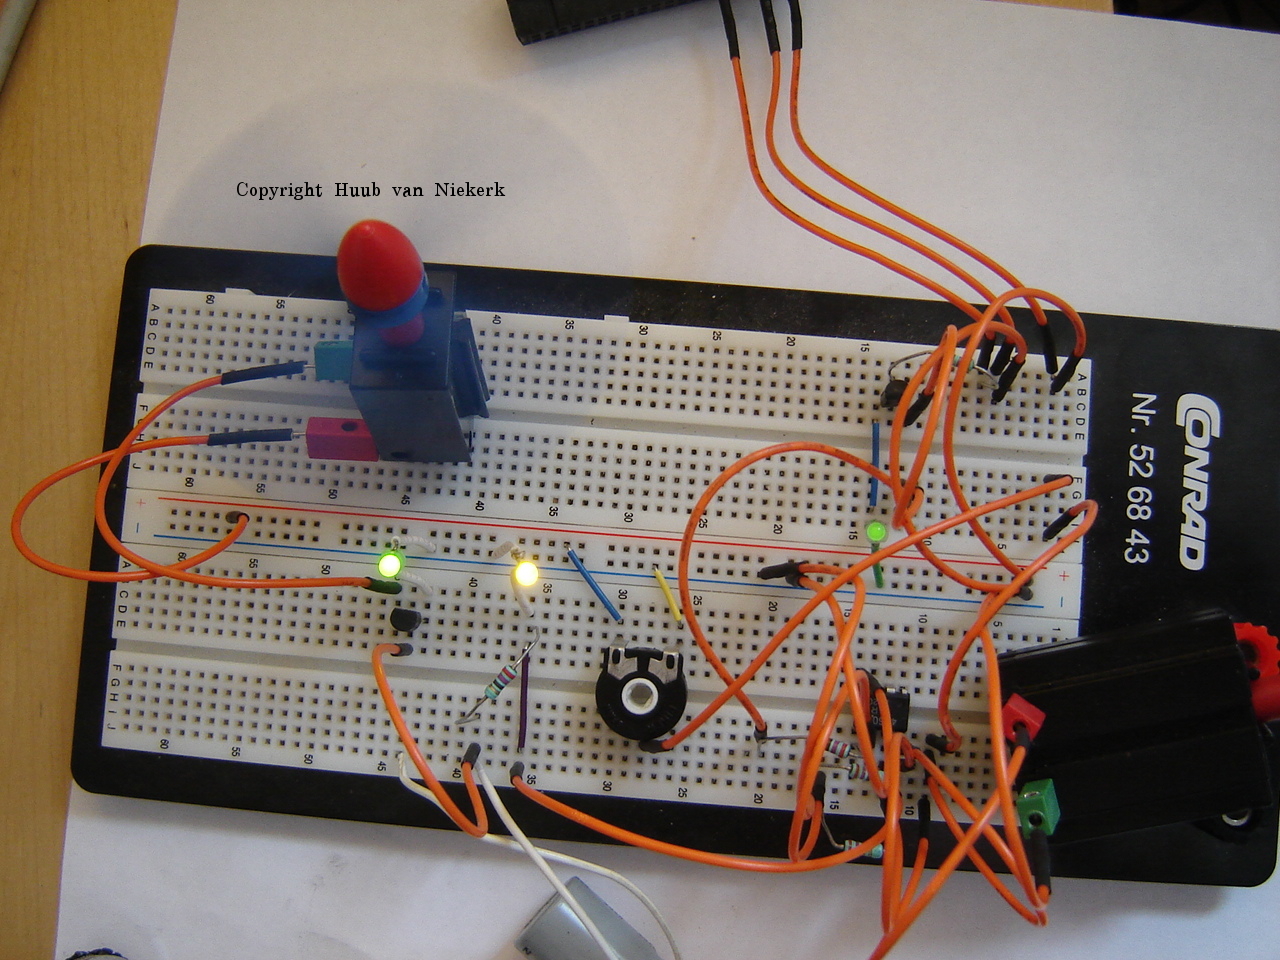
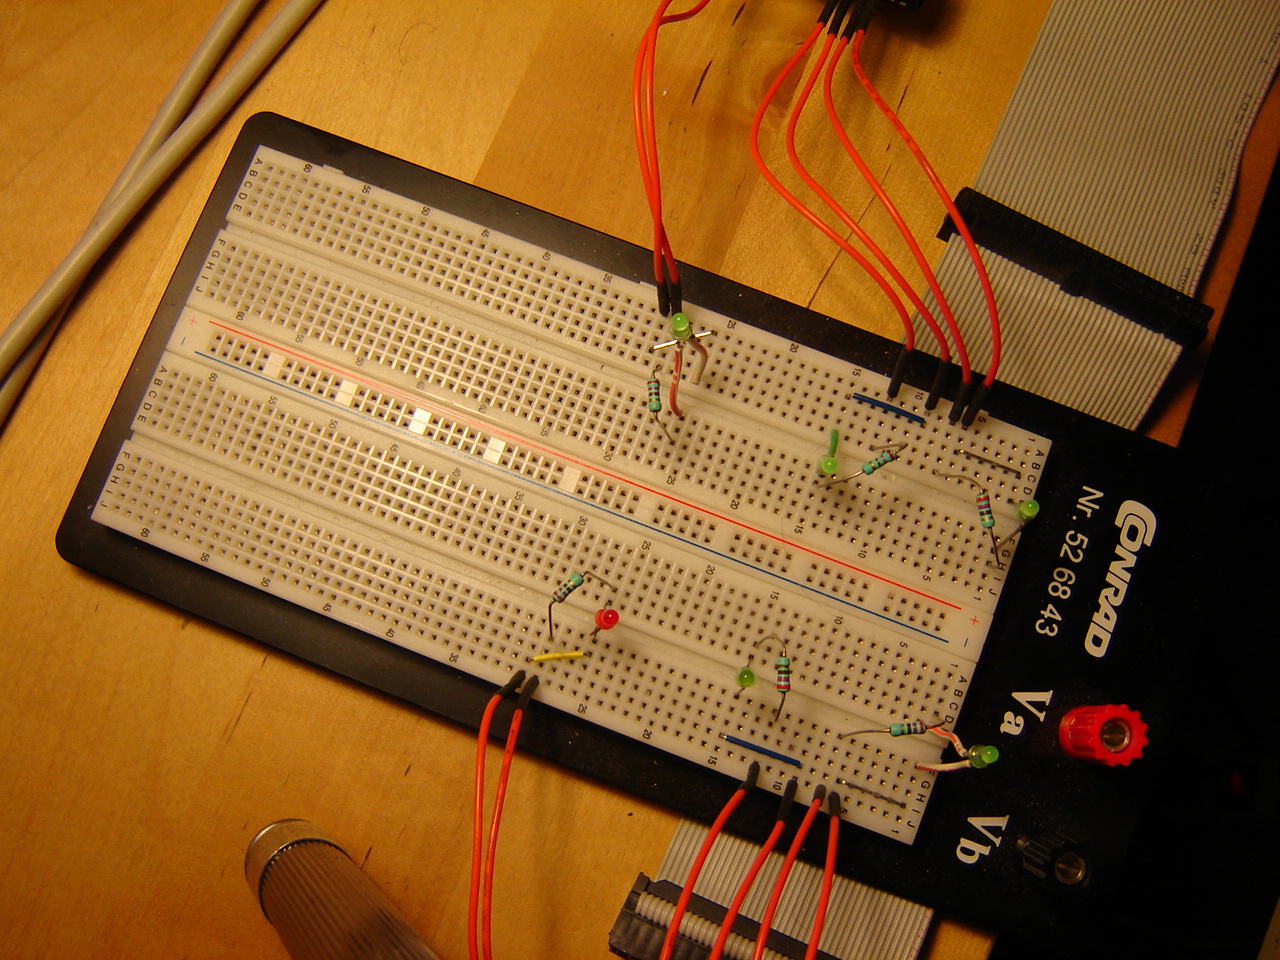
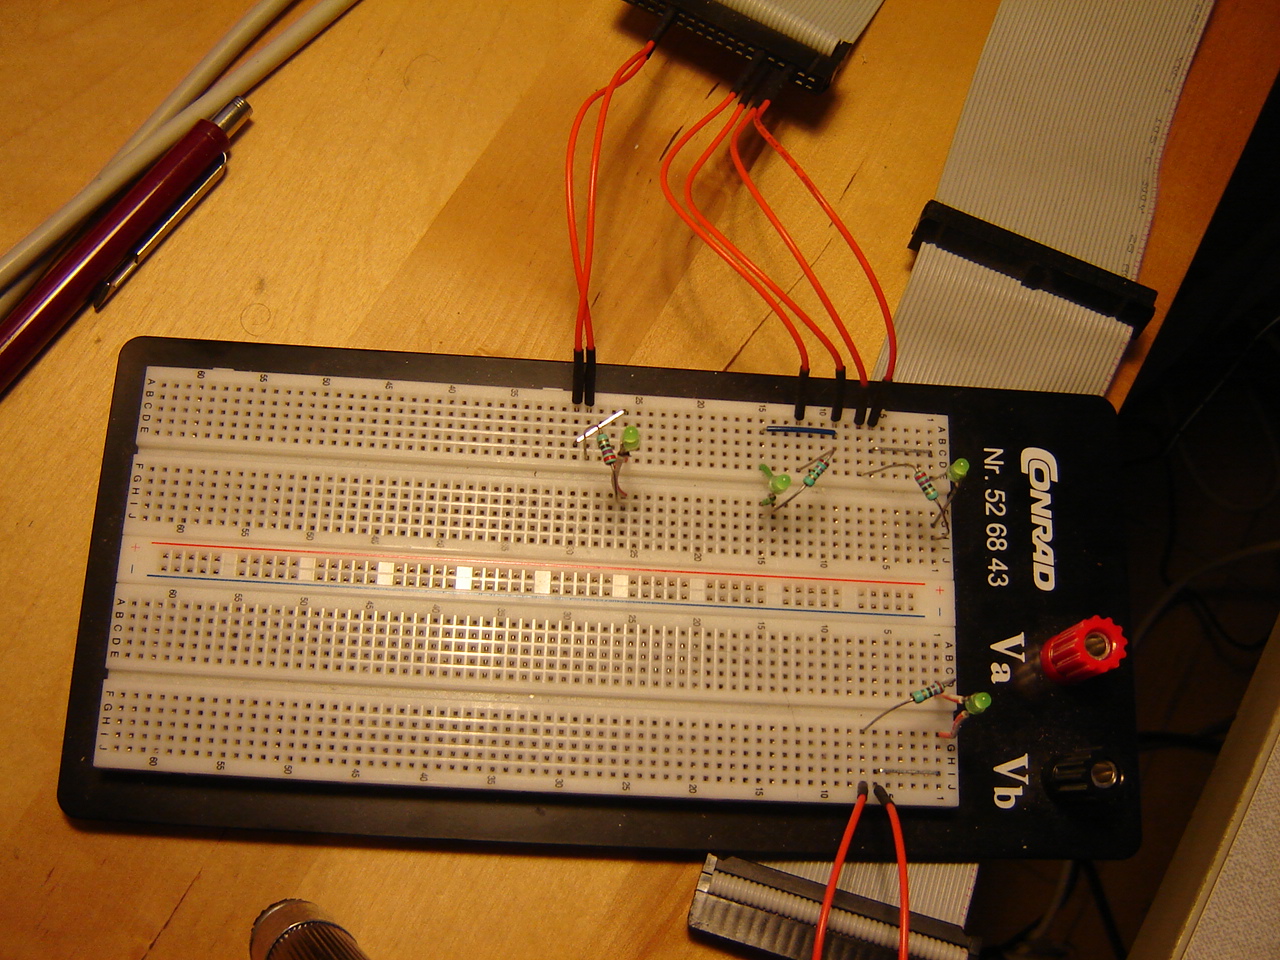
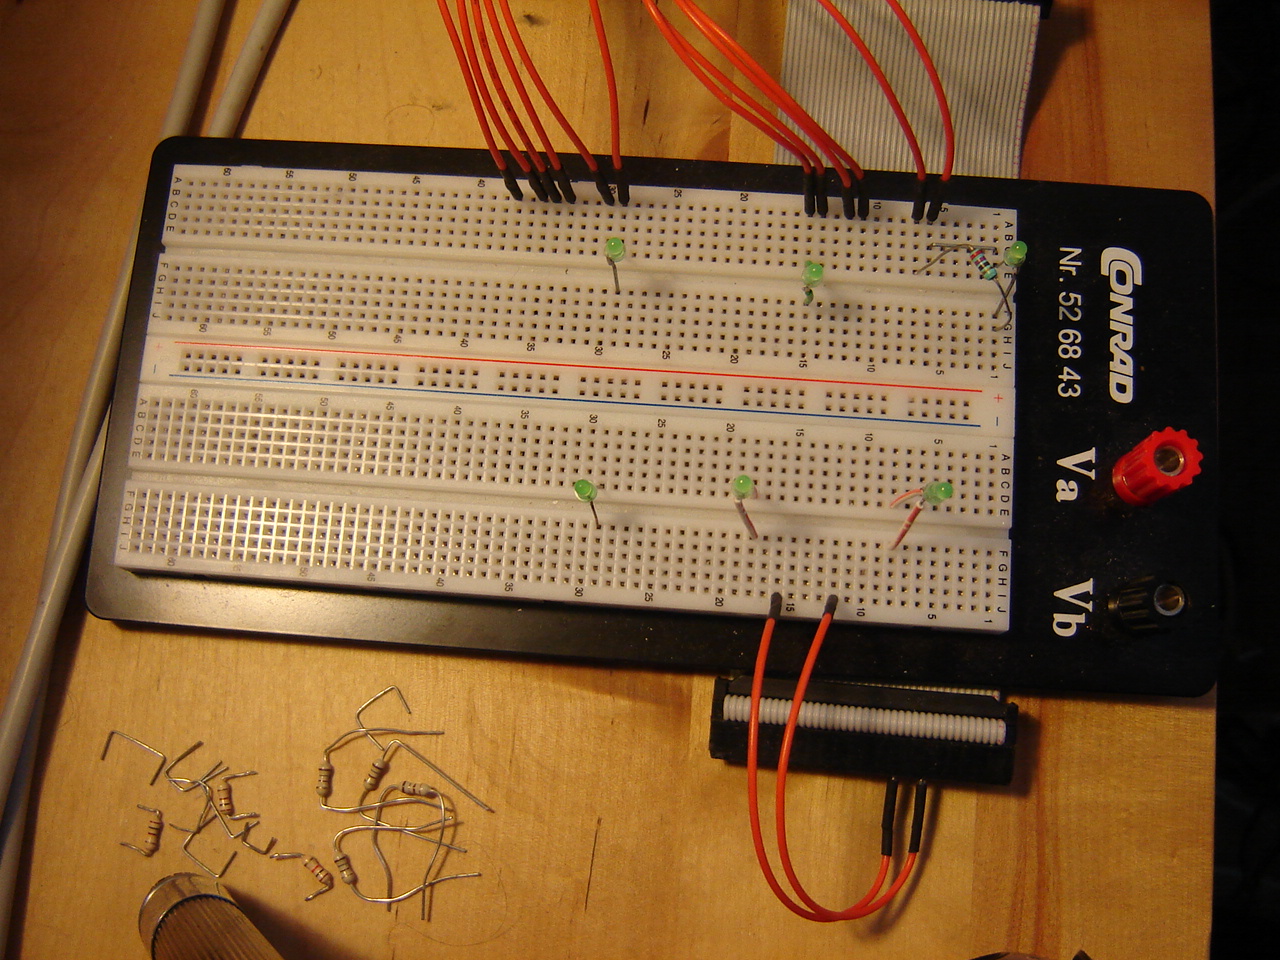
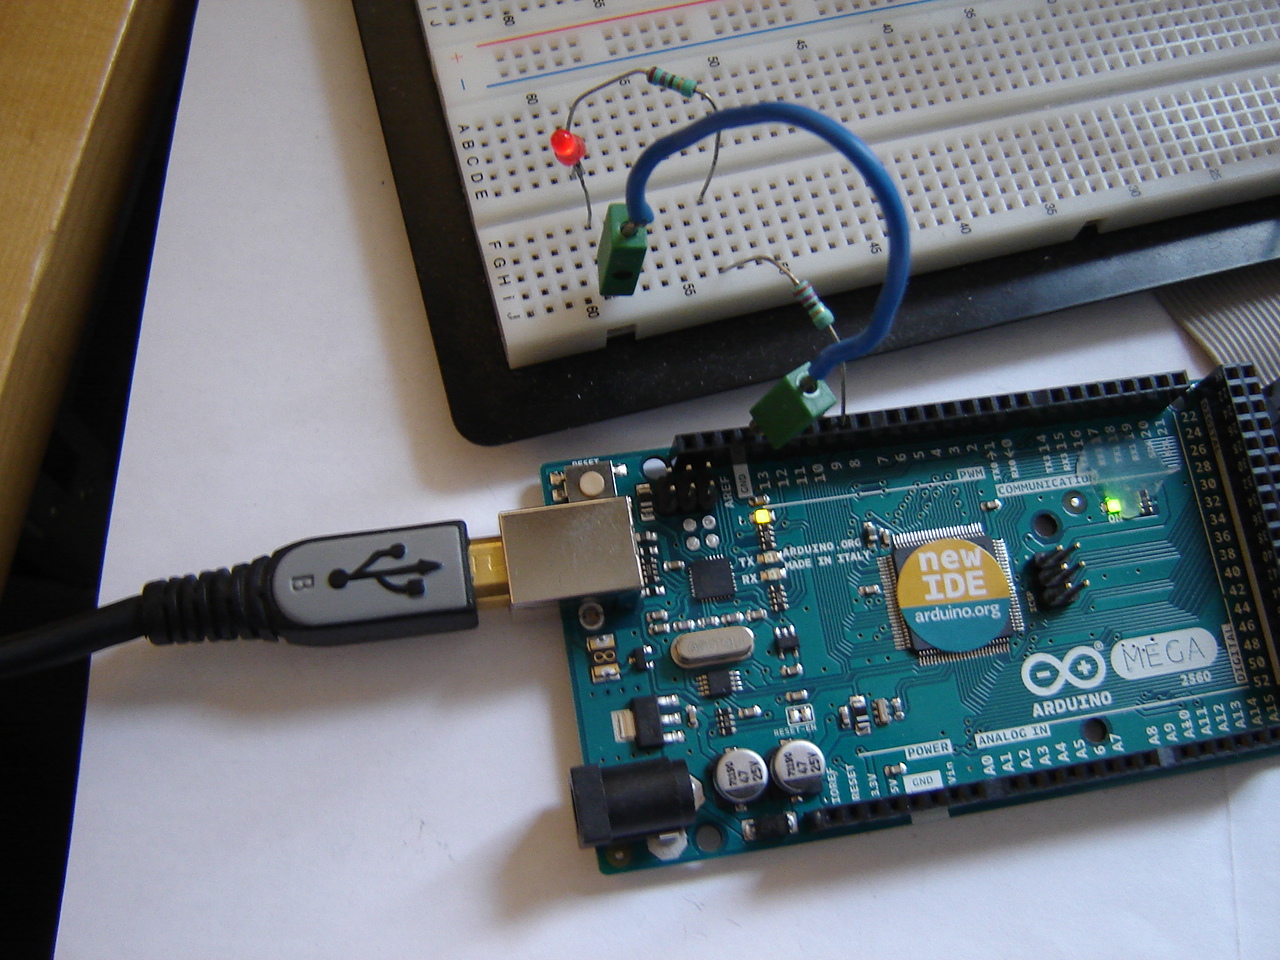
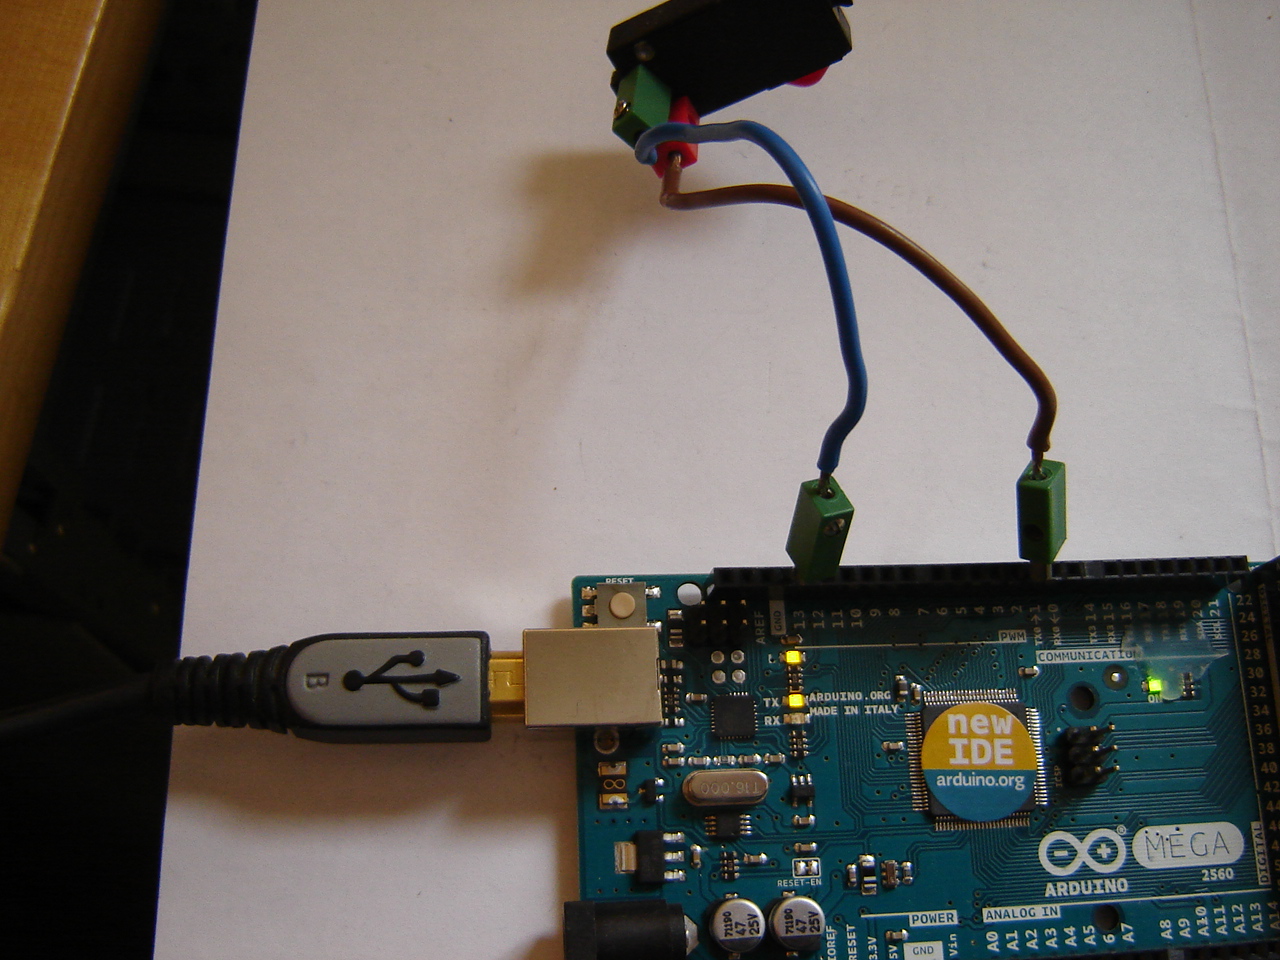
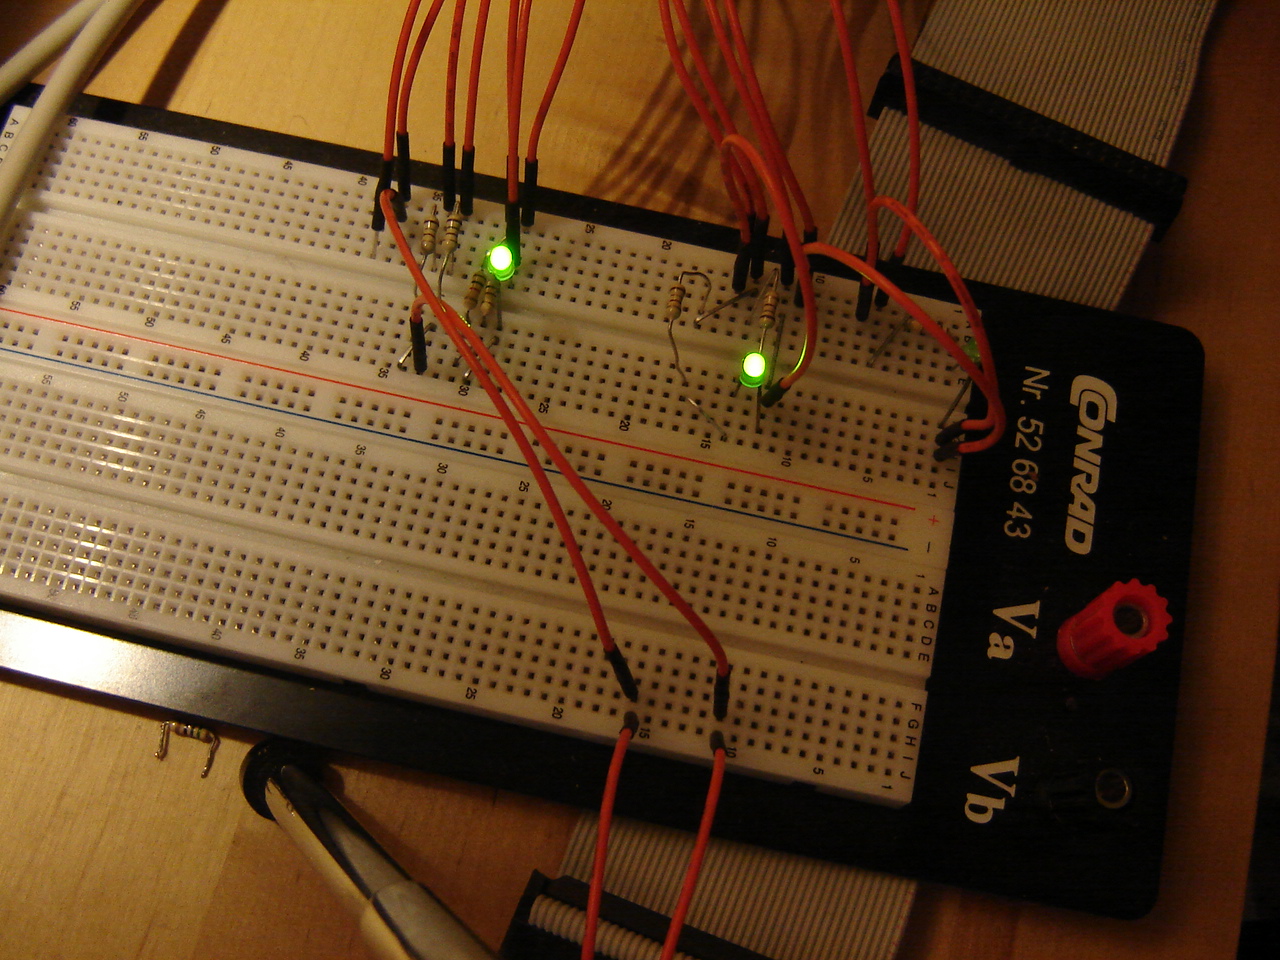
RPi: Simplifying the pwm question by setting up a small circuit with LED and resistors, will that answer questions? According to the earlier shown wiringpi example, it could. Click the image to watch the video.
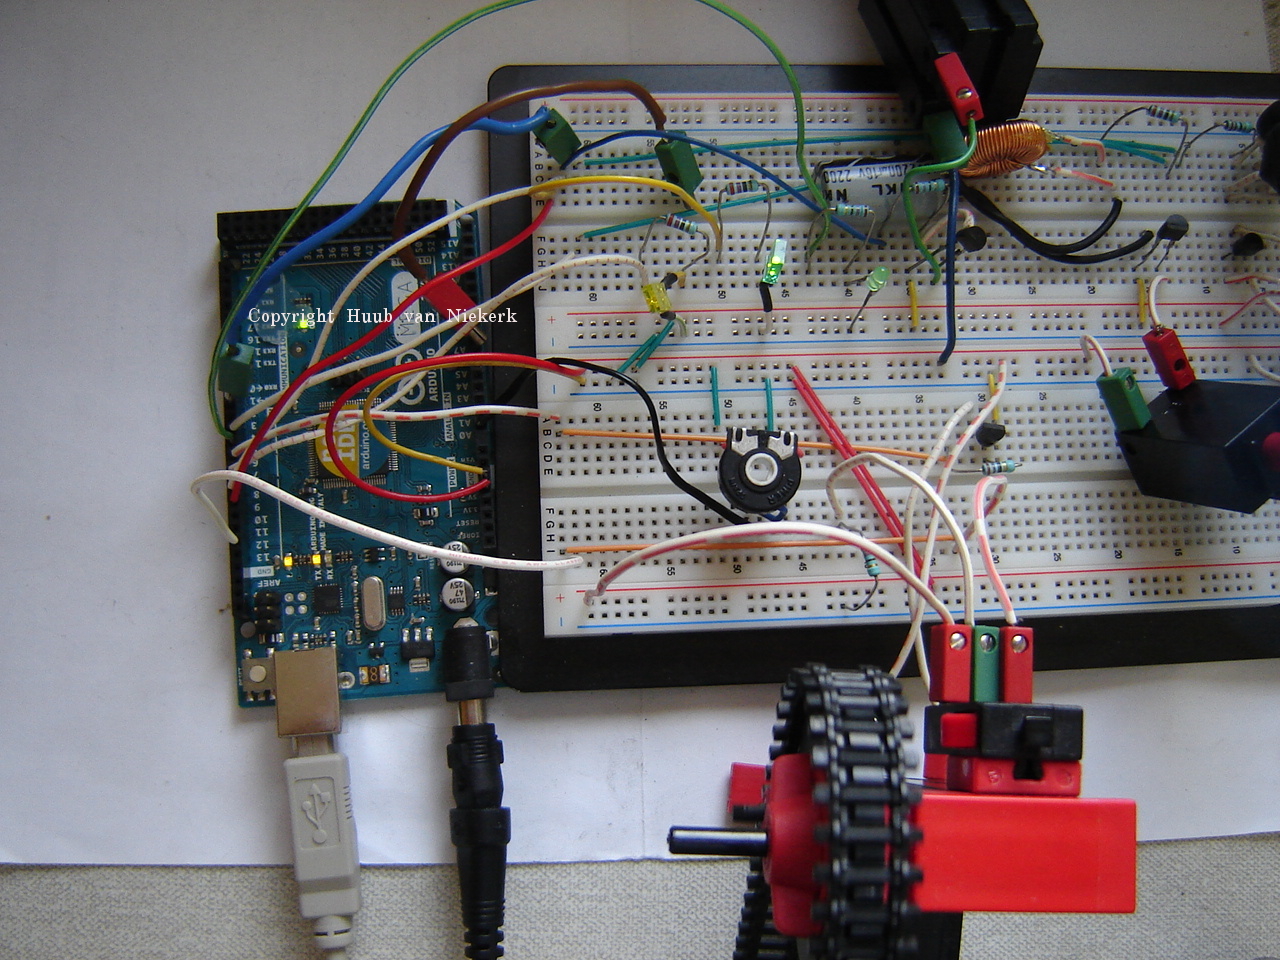
Arduino Mega2560: Measuring frequencies leads to questions and adding a small testing circuit with re-routing. Then also a bit of code-change. Click the first image to watch the video.
Hand: Again trying to get the pivot switches working, with new ideas and a necessary reconstruction on a different place. But will it work and hold? Click the image to watch the video.
2 December
BB: With the extra light+sensor and rail extension, a reconstruction is unavoidable. So both the rail-setup and the carriage are changed. But will it work? Click the image to watch the video.
Discovery: After a very helpful comment from the author of ftrobopy I change the code with respect to the lamp and find there's a port change needed. Time for a floortest which reveals most of the things work now. Click the image to watch the video.
Mirft2: With the problem of a 4-legs leg, I try to add more but will this help? I also find why the motors don't work from Python, and solve it. Click the image to watch the video.
Arduino Yún: Unpacking and first experiences with this Internet-of-Things device which feel a bit chaotic. Click the image to watch the video.
RPi: Additional resistors and pwm frequencies: why don't they match? Checking voltages, resistances, and replacing a motor with something else. But what's the conclusion? Click the image to watch the video.

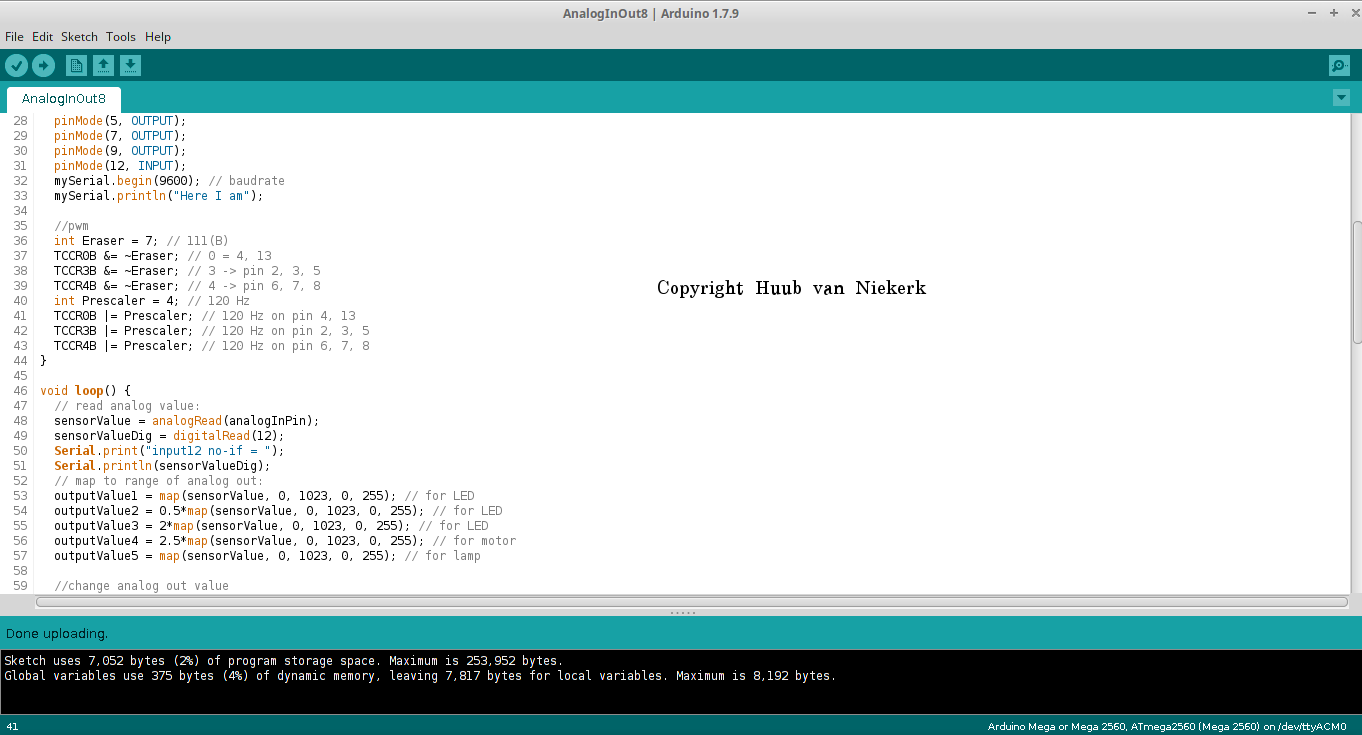
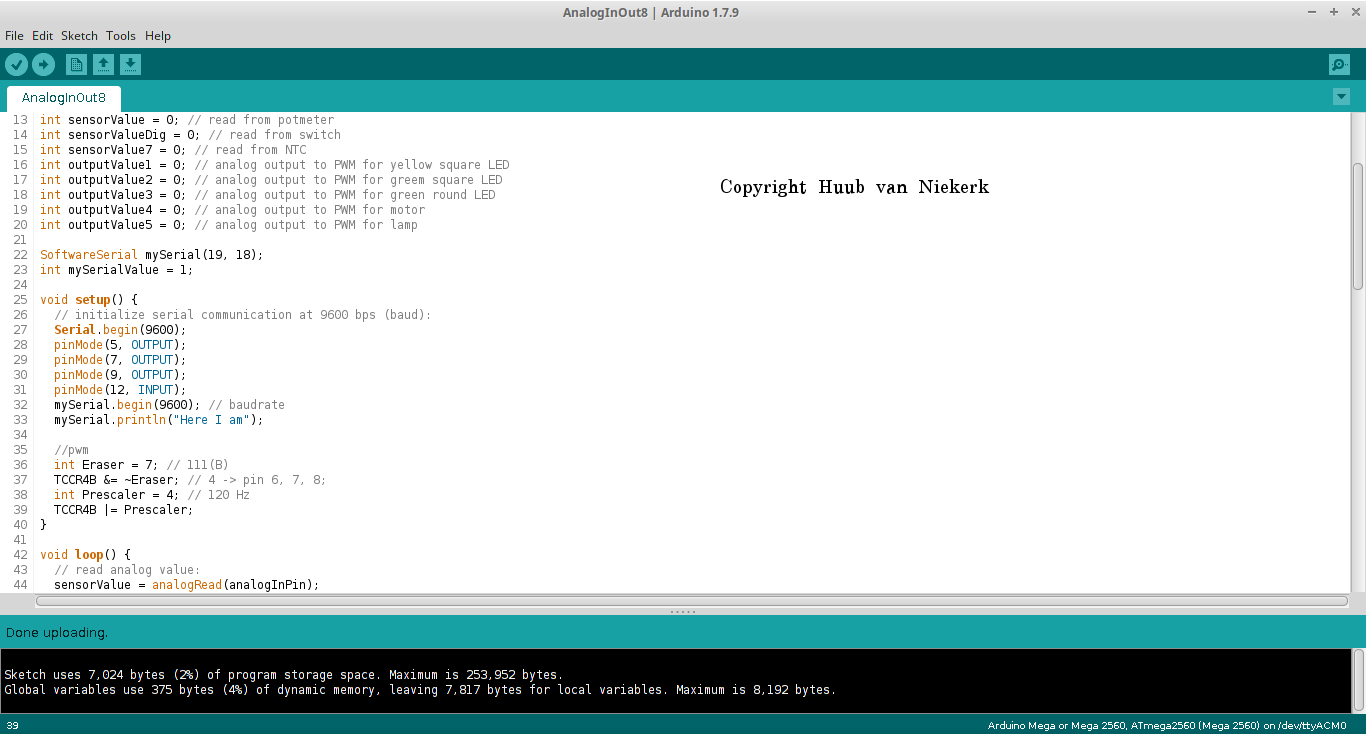
Arduino Mega2560: Adding resistors doesn't help, so what about changing code? It's not the real change to 120 Hz, but it's coming closer. Click the image to watch the video.
Hand: To get a better pivot setup, I decide to change the configuration. With this, I also have to reconstruct the way they are switched. Will this work out? Click the image to watch the video.
25 November
BB: Some recoding makes that the direction of the carriage is determined both by the sonar and by the light sensor. However, things don't work very smoothly and testing reveals some caveats. Also some reconstruction is needed. Click the first image to watch the video.
Discovery: Getting on with testing, I add some for-loops and find that only the lamp really won't work via Python. Bu why not? Click the image to watch the video.
Mirft2: With the gears not holding the 45 degrees difference and the motors not working, I need ROBOPro to test. This leads to the need of another computer and a reconstruction. But will it help? Click the image to watch the video.

RPi: After last time, I have to add more resistors in series to increase the value, and measure again. But will it help? Click the image to watch the video.
Arduino Mega2560: Checking and trying pulsewidthmodulation again with some re-wiring and adding resistors, but not much consistency. So back to code and try some more. What will the results be? Click the image to watch the video.
Hand: Focussing on the pivot switches, I find that I have to find another way. This results in a reconstruction, but also brings a weak spot forward. So how to solve this? Click the image to watch the video.
18 November
BB: Checking on the results of last time reveals a little reconstruction is needed and special attention to the wires stays necessary. Then a new idea requires a major recontruction, but will it work? Click the image to watch the video.

Discovery: Since it didn't go well last time..why? Time to test using ROBOPro and find out that most works and some not. Change kernel, check again. Change back and test again. What works (suddenly) and what doesn't? A few minor code changes are needed. Click the image to watch the video.
Mirft2: First I have to fix a rubber foot, which takes quite some effort. Then I try to reposition a front leg, but that turns out to be much easier said than done. Finally, I change the speed in the code, and that brings some unexpected results. Click the image to watch the video.
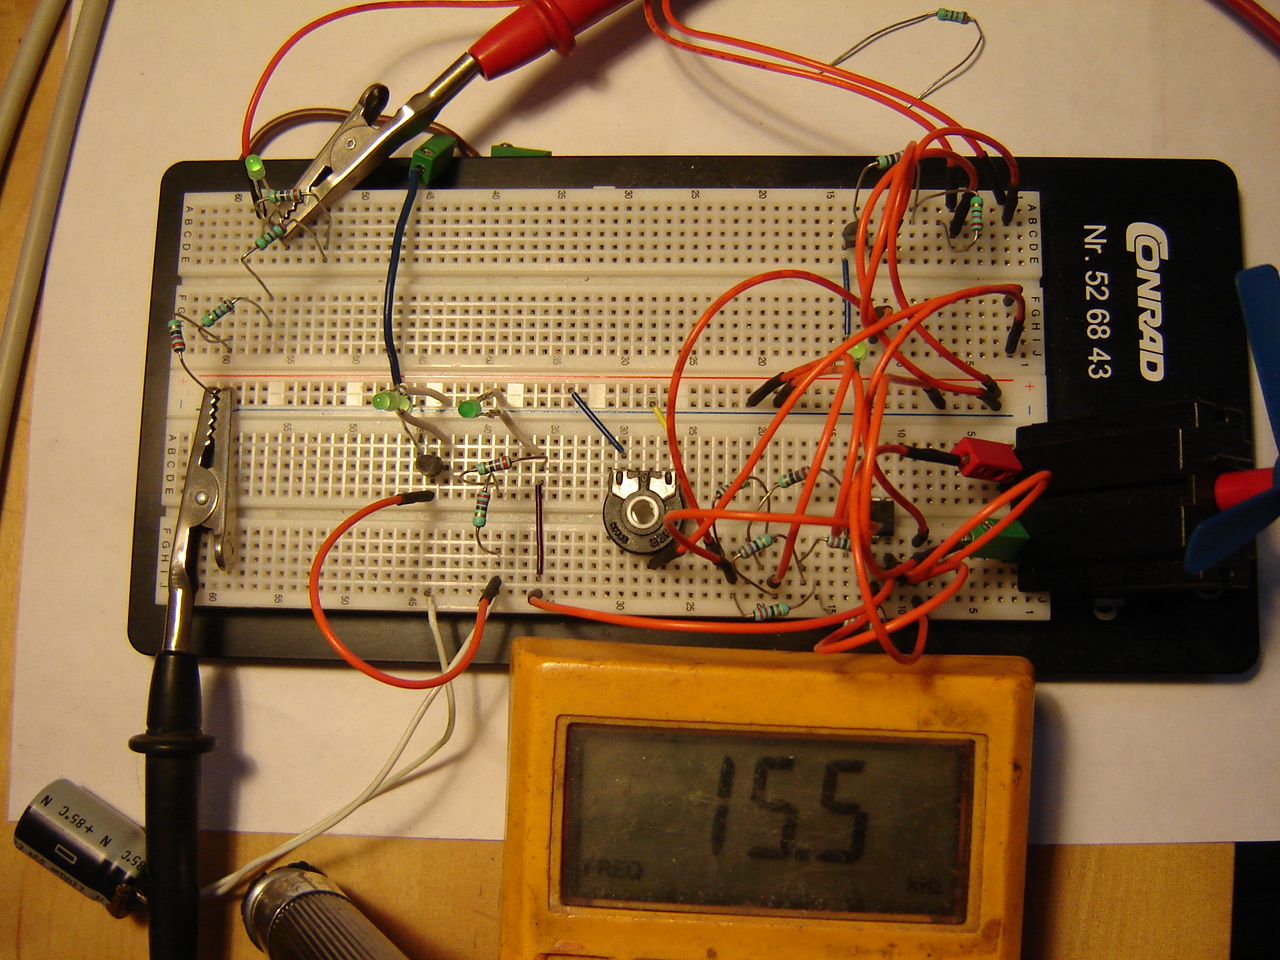
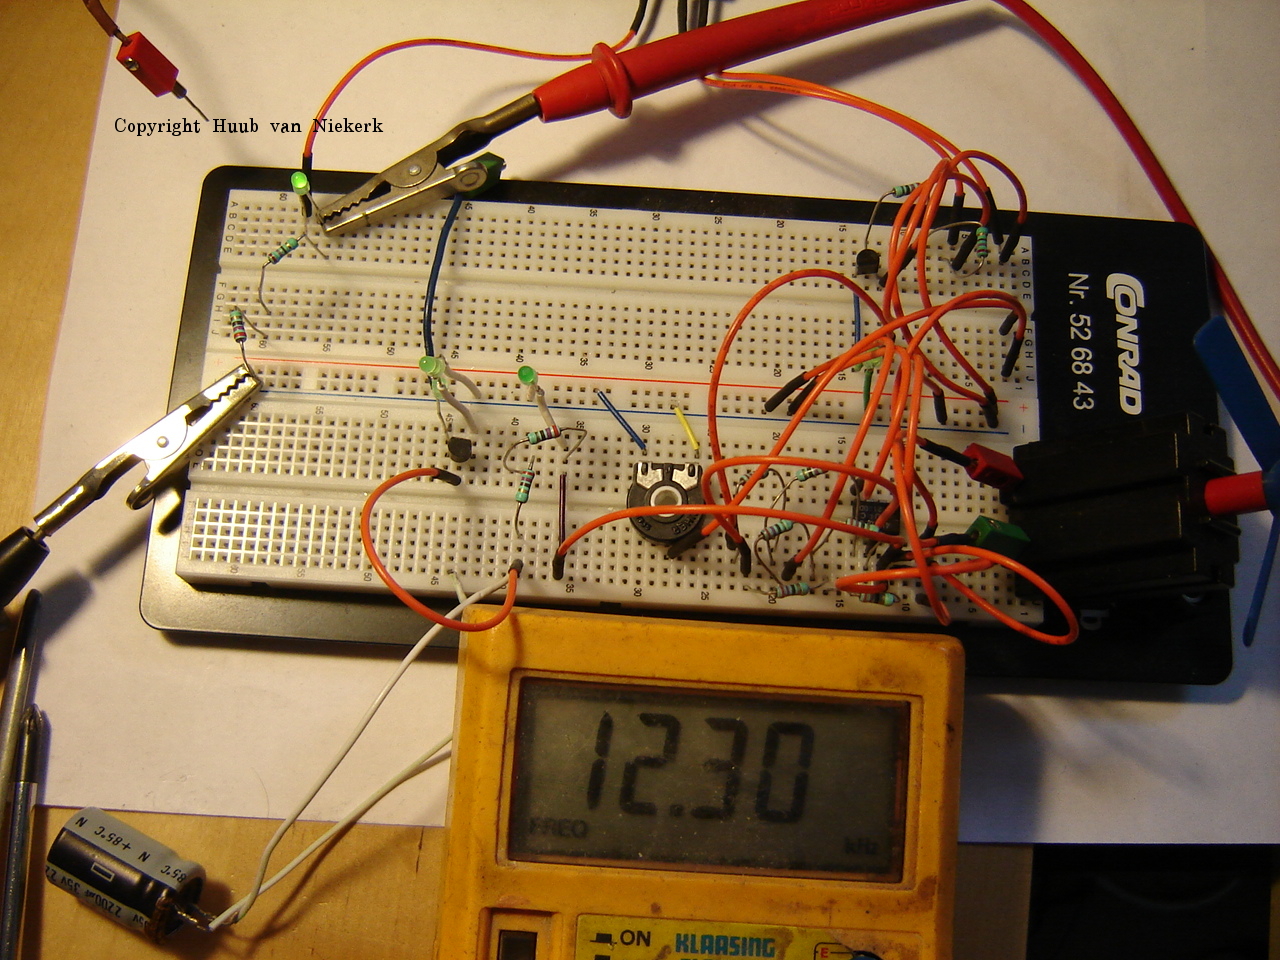
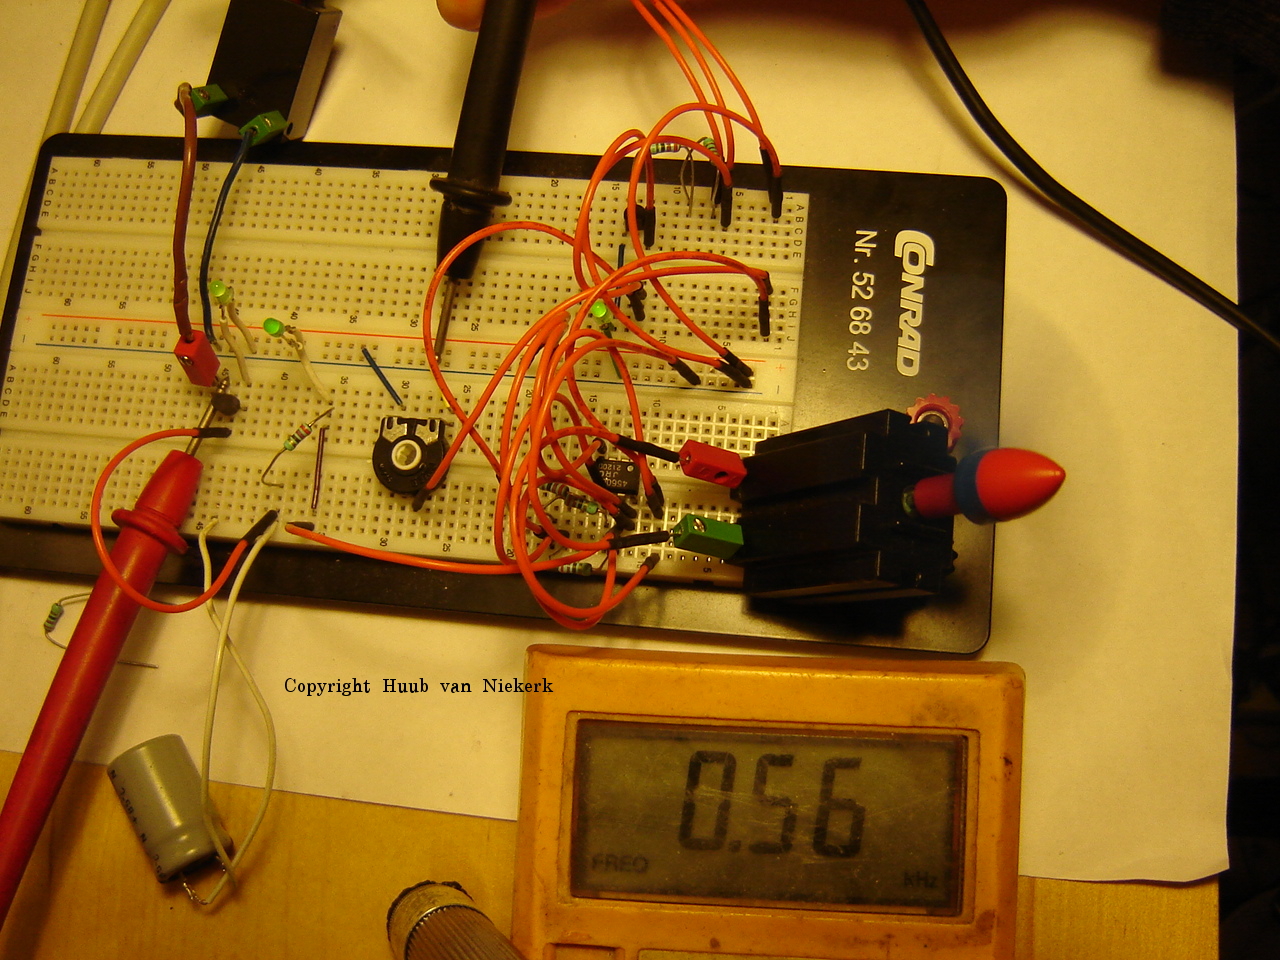
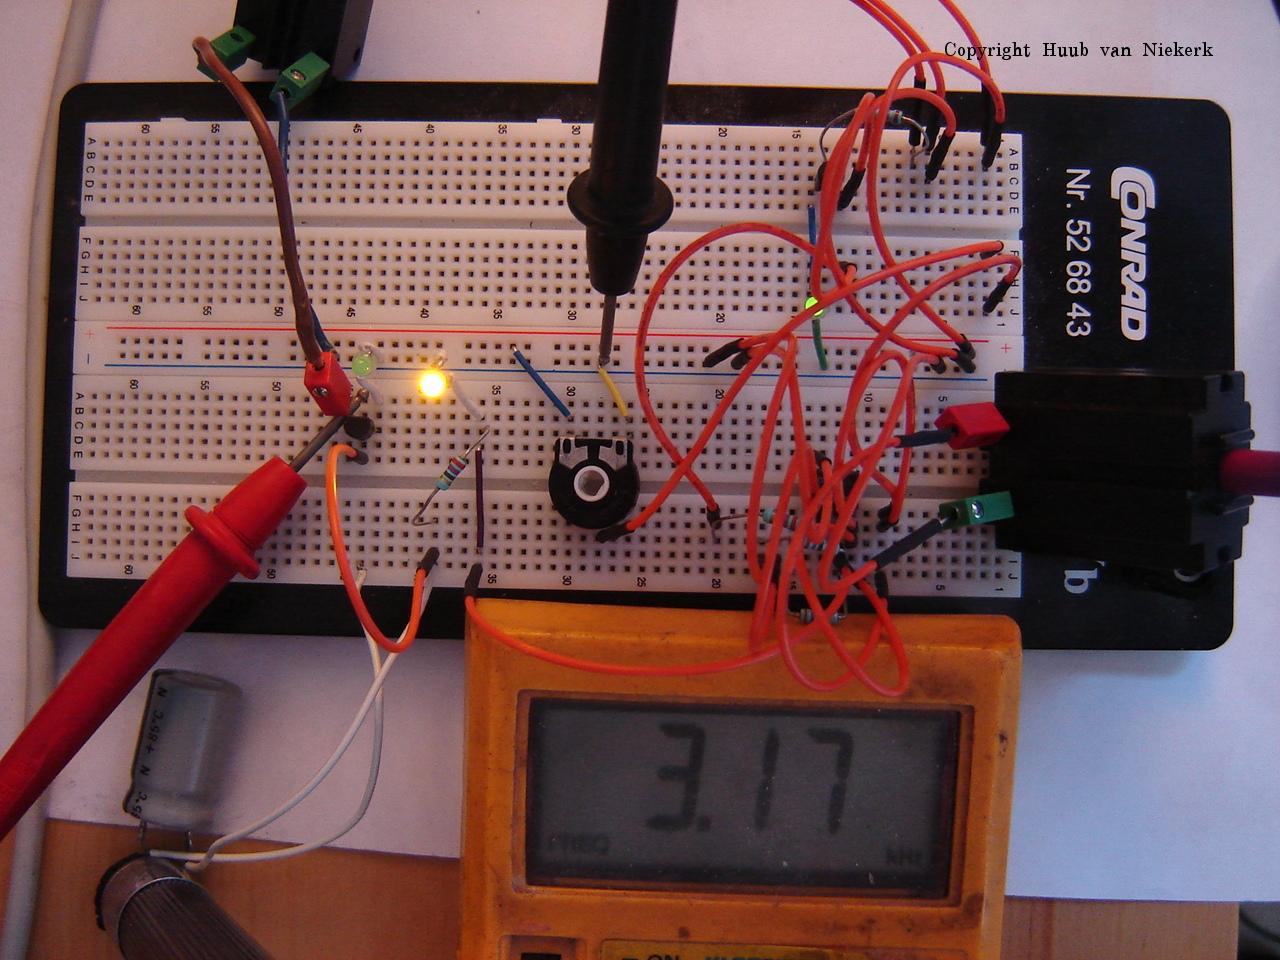
RPi: Measuring the frequencies requires comparing. Since I use pwm motors from fischertechnik (ft), I use an ft power-controller and measure the frequencies: 40 - 120Hz. Ouch: the lowest on the circuit is 700Hz. Time to find out how to change this. Click the image the watch the video.
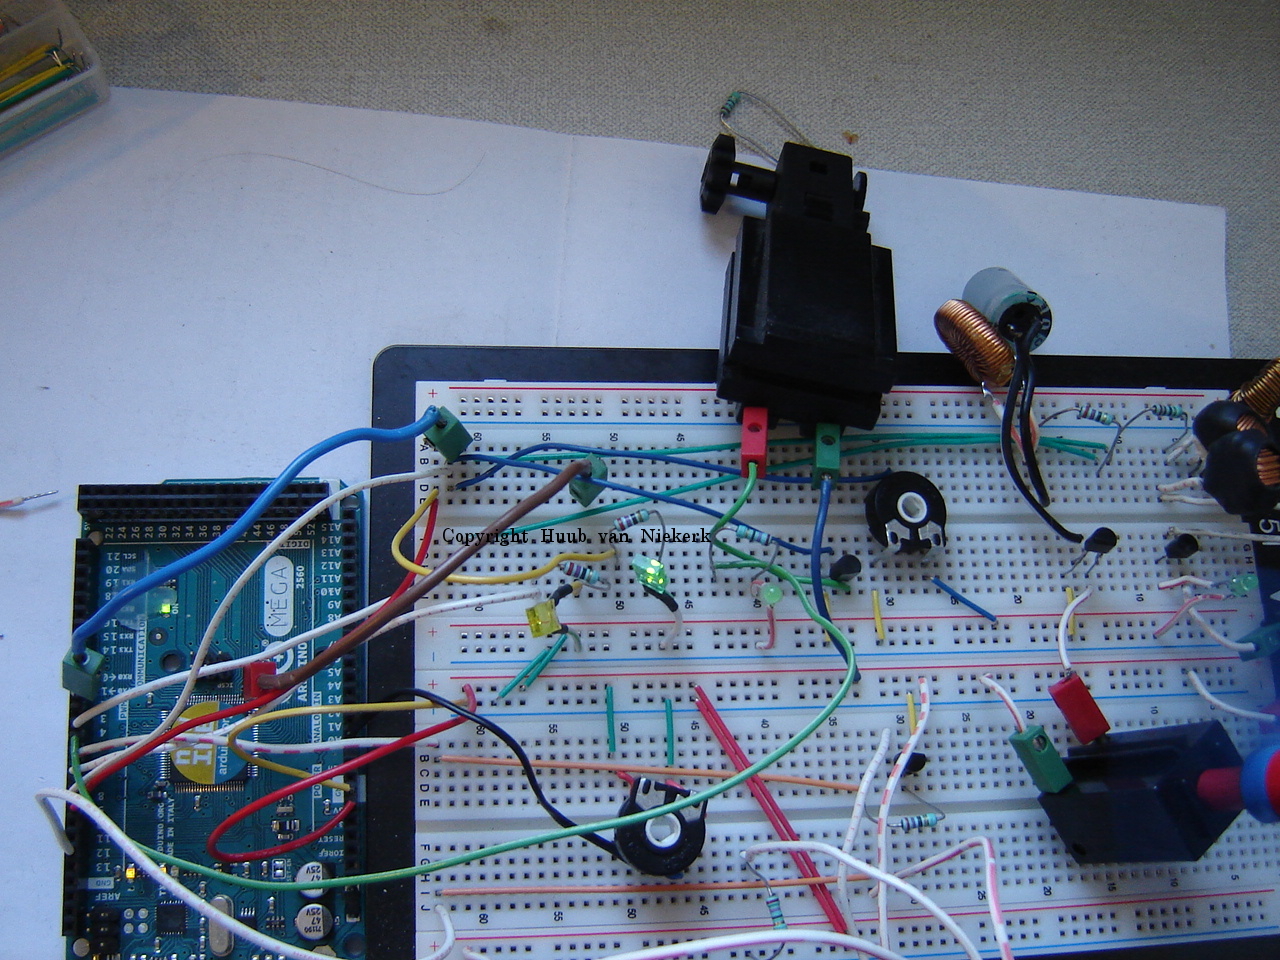
Arduino Mega2560: With the knowledge of the frequency range needed for ft motors, I change the code using this info: pwm But measuring the values brings some unexpected results. How to solve this? Click the first image to watch the video.

Hand: The pivot direction switch needs to be changed, but by lack of a 2-position switch I have to combine 2 3-position switches. A nice idea, but will it work? Click the image to watch the video.
11 November
BB Using manual control, the sonar seems totally off. Looking at the construction of the monorail, the sonar may be too high and the powercord to the motor may give false data. So reconstruction is needed. But will this bring improvement? Click the image to watch the video.
Discovery: At the convention, I had to use the standard kernel and had rsa issues. Now, back to the community kernel, I have to solve the rsa issues. After some trying, I finally find what the cause is, and get it going again without password etc. However, does the rest (sonar, sensors, motor, light, sound) work? Click the image to watch the video.
Mirft2: The front legs need improvement, and the gears act up.First, I "stabilize" the legs, then find that I lack some parts or need a major reconstruction. Will both be solved? Click the image to watch the video.
RPi: Changing the pwm code so I can change the value without having to re-compile. Then measuring on various points show something odd. Click the image to watch the video.
Arduino Mega2560: PulseWidthModulation is common on the Arduino. So measuring it should be easy. Turns out to be confusing: what is wired? Values have to be changed, but what are the results? Click the image to watch the video.
Hand: The current switch for the pivot motor direction isn't up to its job. But with what should it be replaced? Trying a different switch requires a minor reconstruction and comes close, but isn't really it. Click the image to watch the video.
4 November
ft Convention Schoonhoven 2016 I've created 2 compilation videos, #1/2 and #2/2, of the convention. Some pictures are here. Hope you enjoy.
BB: Analysis shows that the time for the propeller to change direction is about 4 seconds at the side of the sonar while the code clearly says 0.25 seconds. So what's up? Do changes in the setup or code make a difference? Click the image to watch the video.
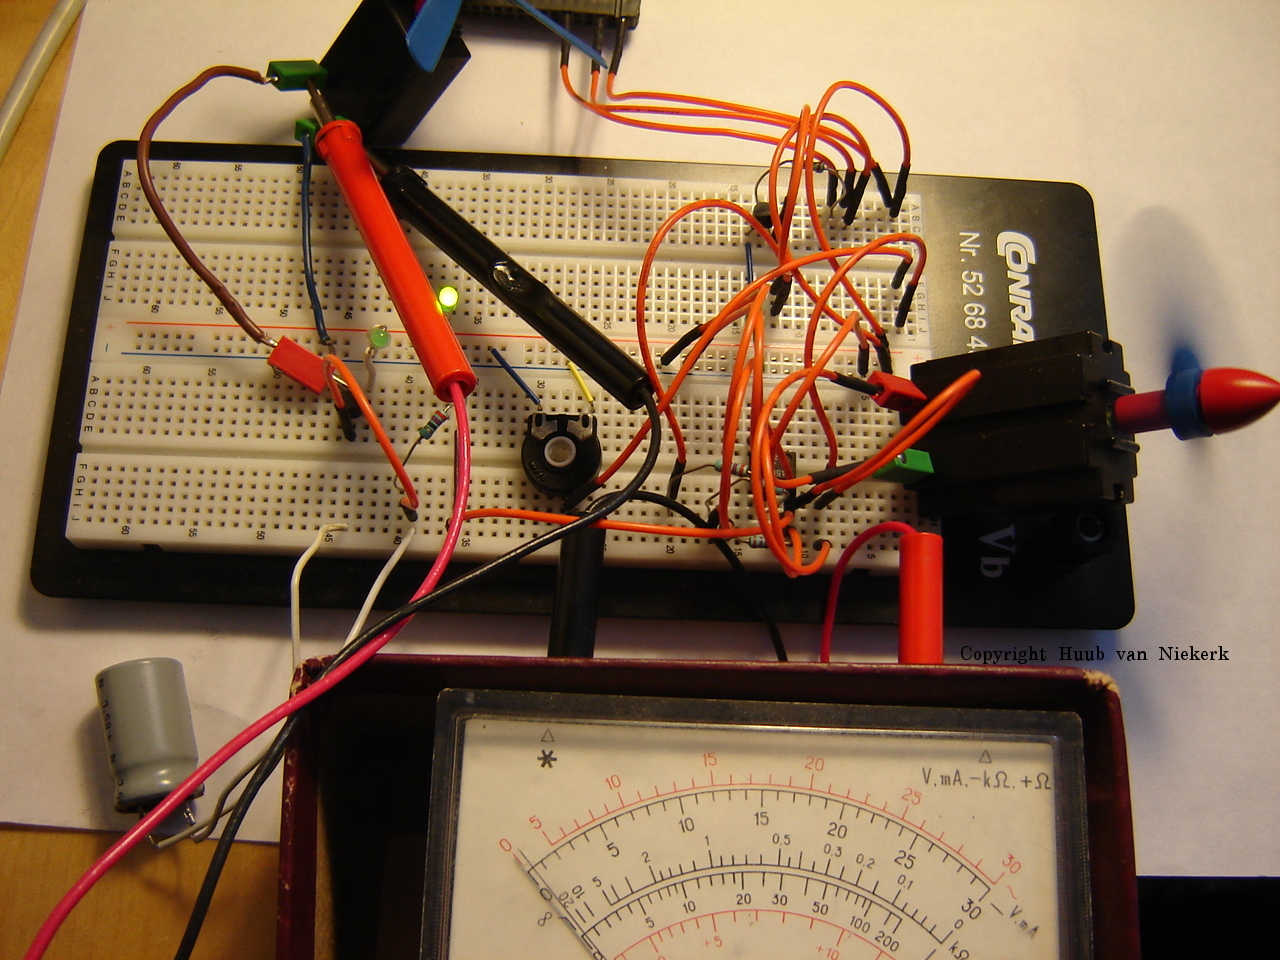
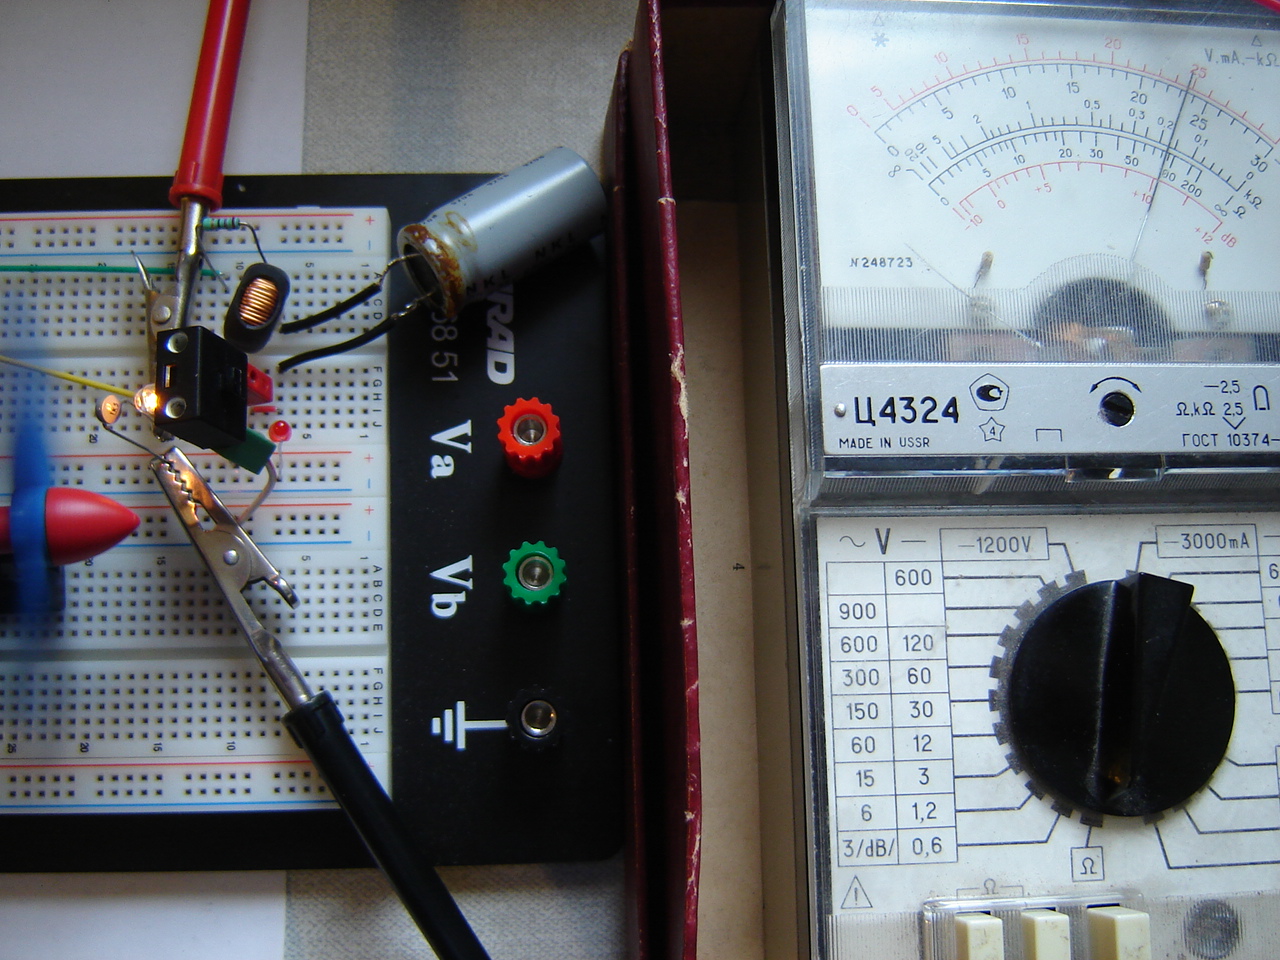
RPi: After reading about measuring pwm, I need another multimeter since it can measure frequency. This turns out the change: the lower the pwm, the higher the frequency. Click the image to watch the video.
Hand: Since the programmed 1 second for the pivot obviously doesn't work well, I decide to use a switch instead and have the program respond to that. I also reinforce the pivot gears. But does it work? Click the image to watch the video.
Mirft2: While testing the front legs, I decide to limit the number of sounds first. After that, I have to fix the connection of the legs to the frame to prevent them from falling off. This requires a minor reconstruction of the frame. Question is: does it work? Click the image to watch the video.
Arduino Mega2560: Trying out the extra serial connection meets with problems and some unexpected results. Will it work somehow? Click the image to watch the video.
28 October
Discovery: The copying of images to the laptop doesn't work, so the firewall needs to be adjusted. Then, the ssh connection needs improvement. This only succeeds partially. But why? Click the image to watch the video.

BB: The rocking property has to be eliminated. So what to do? Extra wheels? Extra rail? Or catching the propeller-cone and hold it? It's the fastest to test. After that, the carriage seems to stay at each end longer than 1 second. Can I test or change that to less? Click the image to watch the video.
RPi: Testing voltages again makes me wonder if it really just takes 1.5V to make motor 2 run. Also taking a look at the code: is it ok? Would the RPi2 react the same? Click the image to watch the video.
Mirft2: In an attempt to improve walking I decide to replace the front legs but I find I also need to increase the speed then. Will it work? Click the image to watch the video.
Hand: Continuing with the pivot gear: further analysis en test shows that more reconstruction is needed. Also, how come the software acts up? 1 second is 1 second, right?! Click the image to watch the video.

21 October
Discovery: Time to fix a few things: a sensor going wrong, images not being copied. Will things work out? Click the image to watch the video.
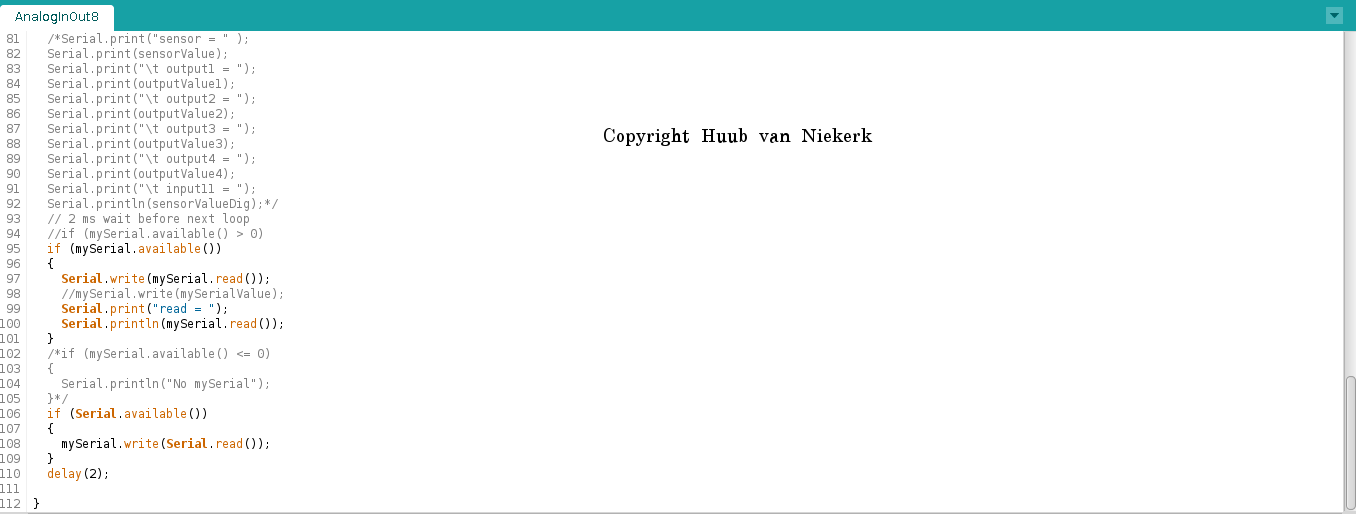
Arduino Mega: It should be possible to do data aquisition using serial communication. But the Serial Monitor has no options. So I need to add a serial connection, but will it work? Click the image to watch the video.
BB: More experiments: wiring, propeller speed, code changes, interface checks and motor setup. Will something improve? Click the image to watch the video (which is a bit longer than intended..)
Hand: Taking a close look at the pivot motor setup, it clearly needs improvement: gears are not aligned, the motor doesn't hold position, etc. Time to make changes..again. Click the image to watch the video.
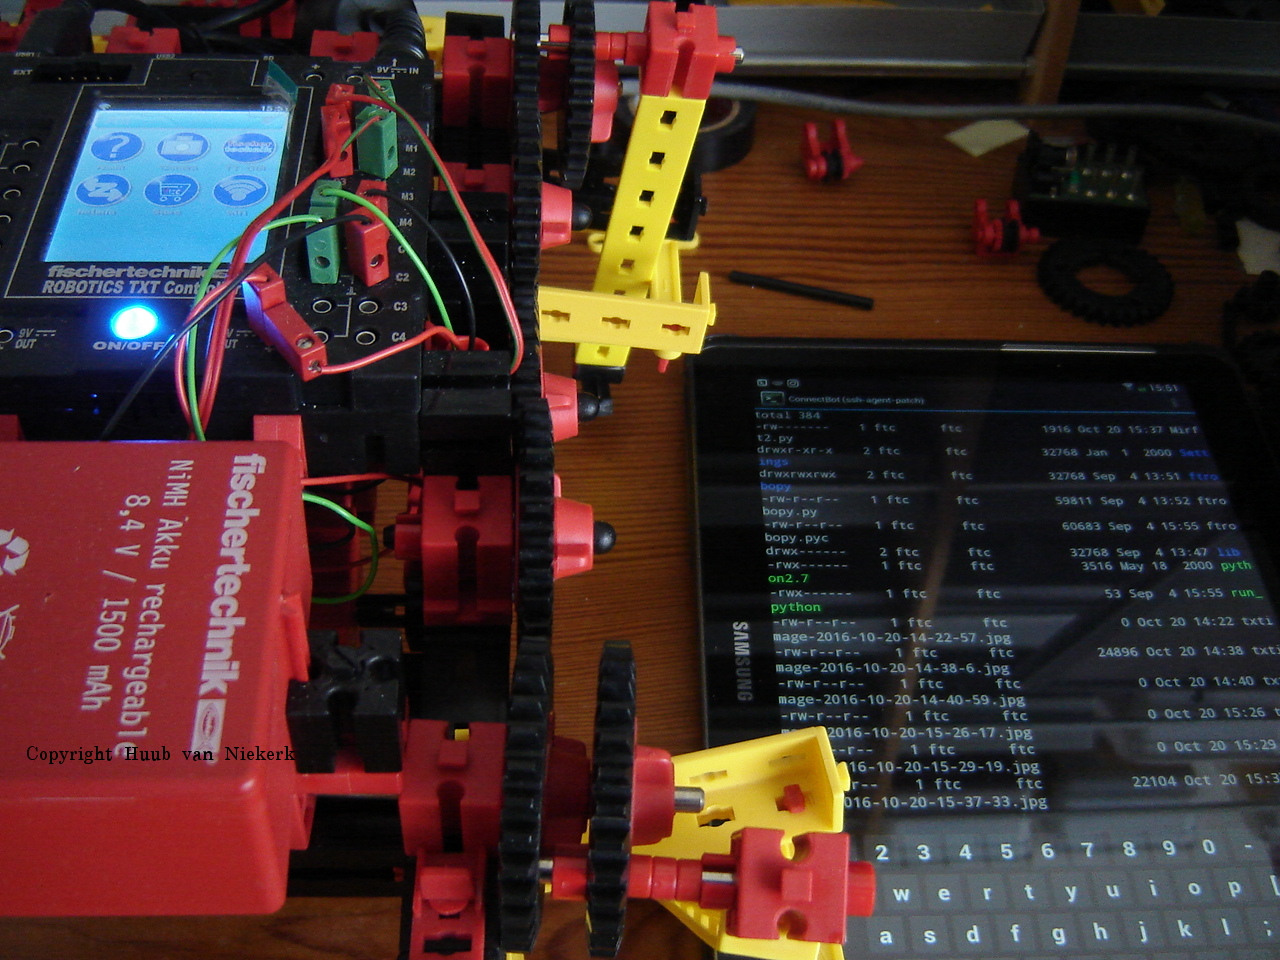
Mirft2: With focus on interaction between the controller and the laptop, I have to generate rsa keys, change IP address in code and alter the firewall. After that, things go better. Changing the code to limit the time for sound shows to be less easy than thought. And finally, getting rid of the manual ssh confirmation... Click the image to watch the video.
RPi: Picking up from the 16 Sept. blog: checking the motors and the software. It turns out that the motors run, even without the PWM software. Eh? Measuring shows some remarkable outcomes with some questions to be answered..
14 October
BB: Focus today is on: sonar wire, motor-wire and speed. Starting with the latter 2, reversing the motor setup shows an improvement, but requires some recoding. The sonar wire is easy to solve, but watching the carriage I notice something odd. Why does this happen? Click the image to watch the video.
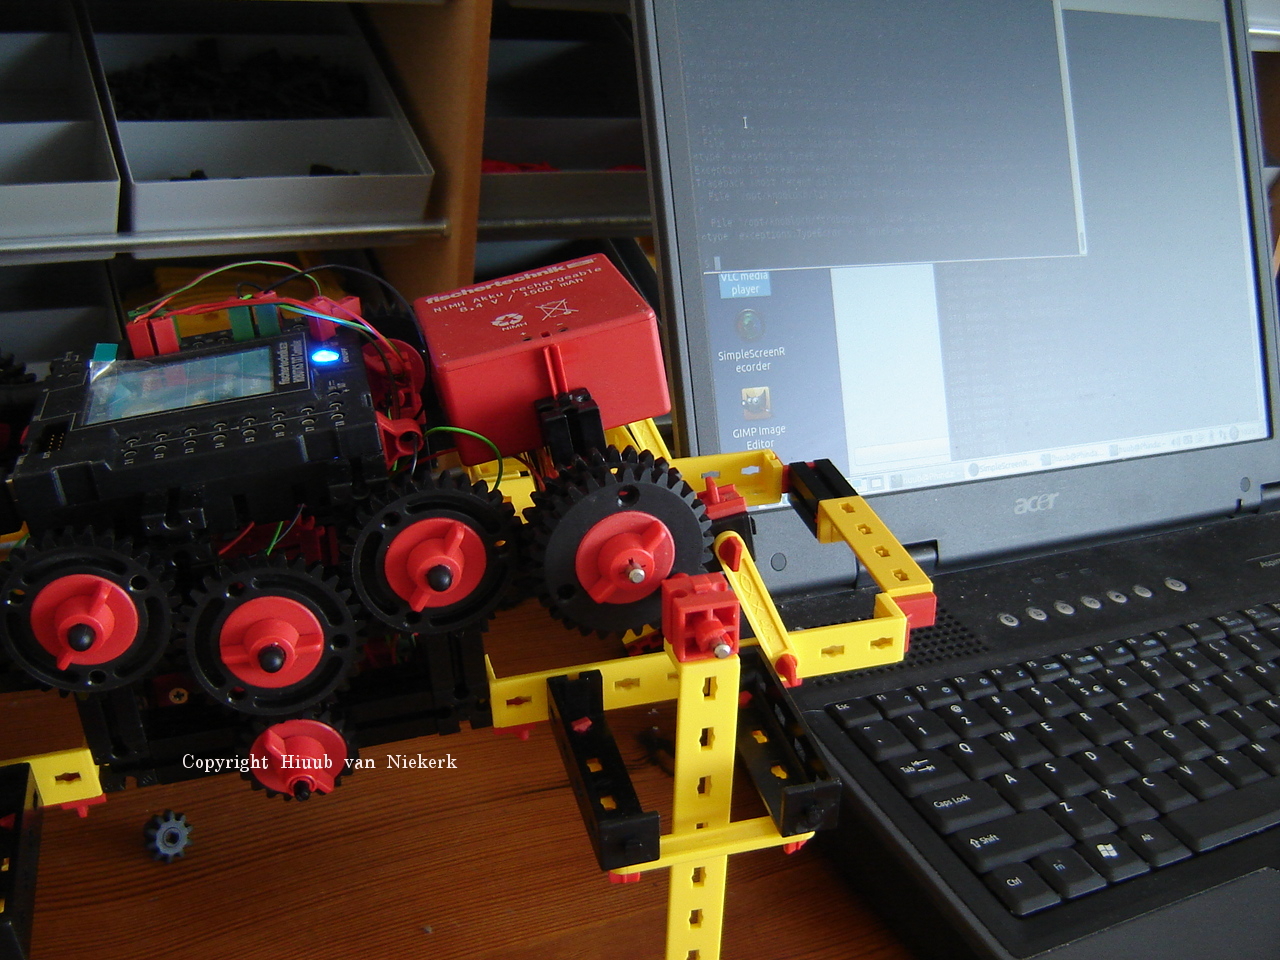
Mirft2: Since I don't know how long the (very old) pcmcia network adapter will keep working, I decide to put the community kernel on the TXT. After some (prior) preparation and adaptation, it's time for a test. Will this work? Click the image to watch the video.

Hand: More attempts to increase the stability and working of the pivot motor. Will any work? Click the image to watch the video.
30 September
ft convention: At 24-09, the annual fischertechnik convention took place in Dreieich, Germany again. Due to the number of videos I made, I've split them between 2 compilation videos: 1st (~30 minutes) and 2nd (~20 minutes).
Discovery: Due to hassle with dhcp, I want to change to static IP. Then, some more tests using the community kernel. Click the image to watch the video.
Mirft2: Now that I don't need a WiFi adapter on the laptop for the Discovery robot, what would be the effect if I use that adapter on Mirft2? Then, I also need to fix a leg. Click the image to watch the video.
Hand: Time to replace the pivot motor. Will it help? Click the image to watch the video.
22 September
TBD: At 17-09, the 9th edition of robotmc TeamBuildingDay (website in Dutch) took place. I made 2 compilation videos: challenge 1 + 2 and challenge 3 + 4.
BB: Changing the direction of the wheelset on the side of the light sensor should prevent derailment. Then a reconstruction of the hanging is badly needed. Finally, the sonar cord should be out of the way. Finally, the speed is a problem...Click the image to watch the video.
Hand: Focus is on the pivot motor: how do I get it working without problems. Good question. Click the image to watch the video.
Arduino Mega2560: For some reason 1 motor doesn't work anymore. Time to check everything: wires, components, voltages. Click the image to watch the video.
16 September
BB: Extending the track, the sonar is in the way. Or is it? Changing the setup brings derailment. Why? Click the image to watch the video.
Discovery: Last time, there seemed to be problems with the touch sensor and sonar when using the community kernel. So this time a closer look to those. Click the image to watch the video.
Mirft2: With new parts, I can improve the robot. Then it's time again to test sound giving some odd results. Click the image to watch the video.
RPi: Trying the 2nd motor again, what's up? Checking facts again show a problem that has happened before. Oops. Then trying gets the motor running, sort of. But why? How? Click the image to watch the video.
Hand: Testing the hand and arm, show timing, motor and weight issues. Changing the timing isn't hard, but which timing to change? Weight can be added, but will it help? The motor shows to be a bigger issue than thought. But how to solve it? Click the image to watch the video.
9 September
BB: How would it work when the carriage was upside down? This proves not easy. Click the image to watch the video.
Discovery: Trying the community kernel agian. After meeting with some problems, it looks like it's getting somewhere. Time for serious tests with a surprise after recording the video: floor image directed into the light actually shows a good image. Click the 1st image to watch the video.

Mirft2: The feet need some attention, and back to sound. What's different between my code and the demo? Click the image to watch the video.
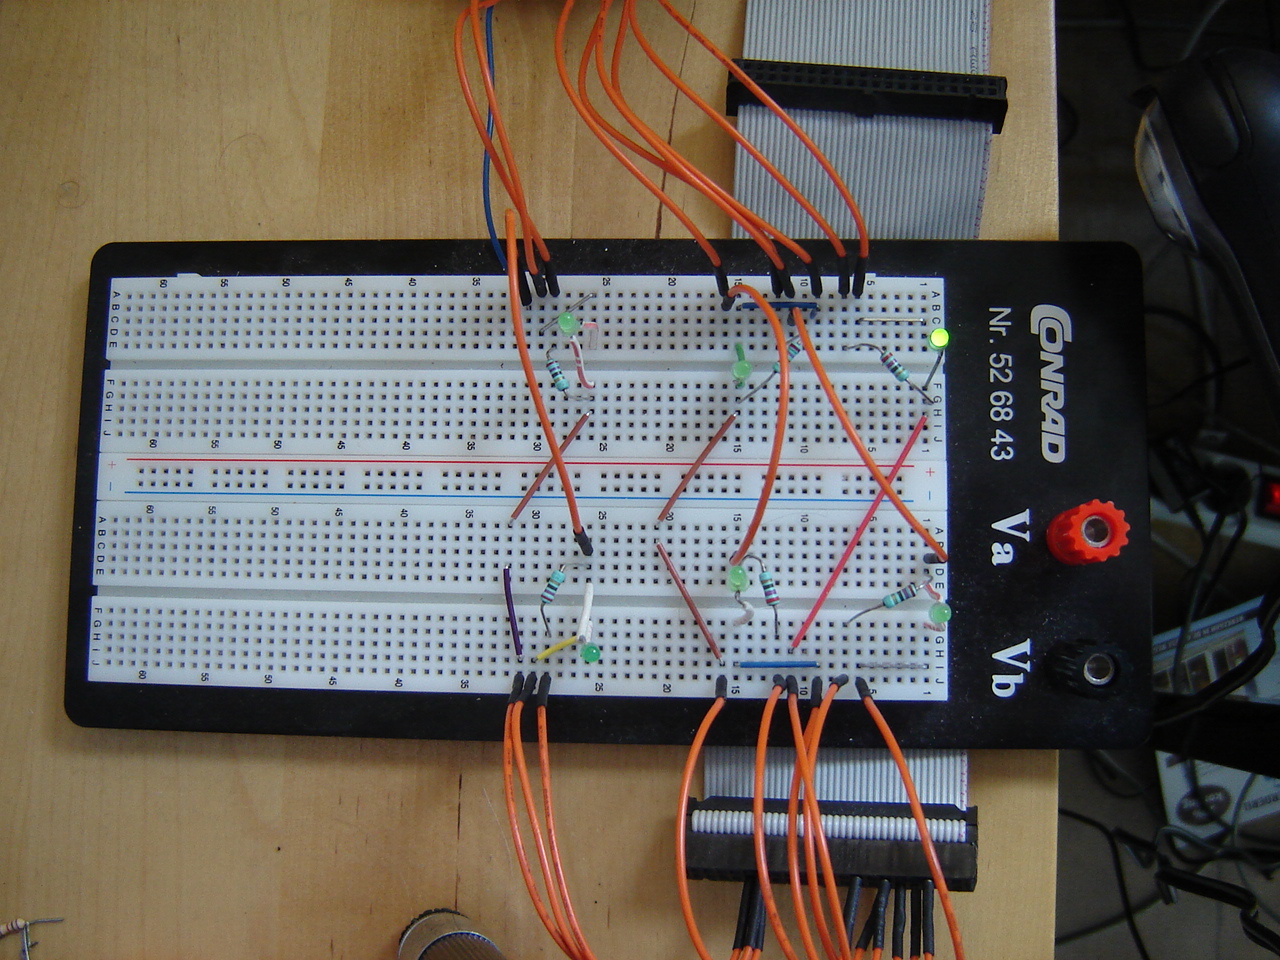
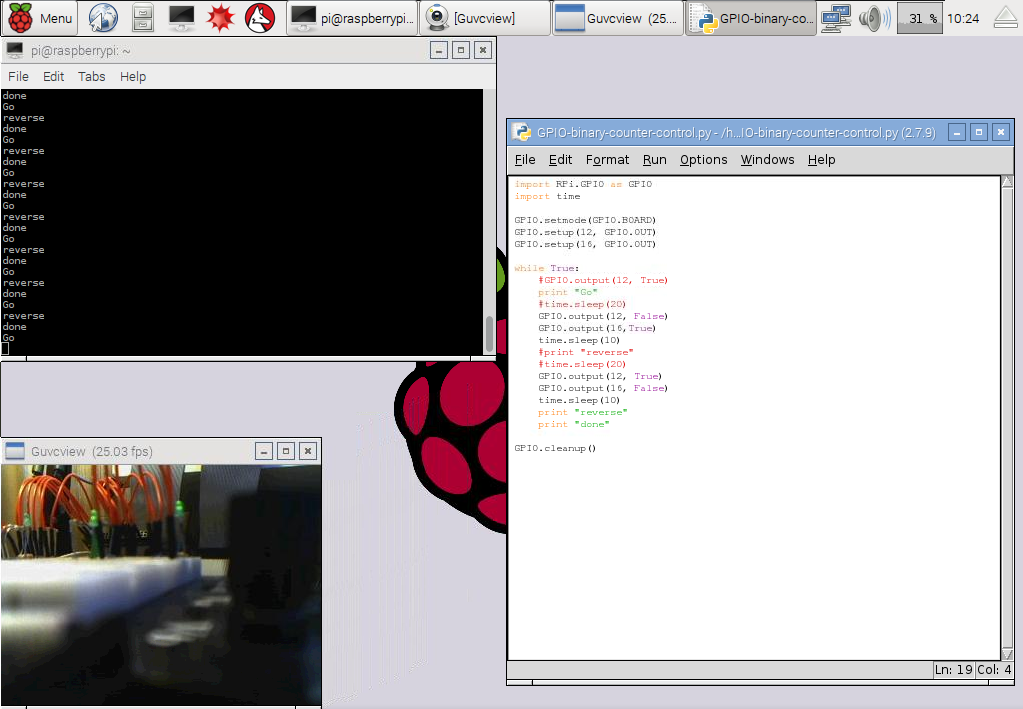
RPi: Testing LEDs, transistors and motors: why does the RC circuit work but not that? Click the image to watch the video (an oops for the shakiness..)
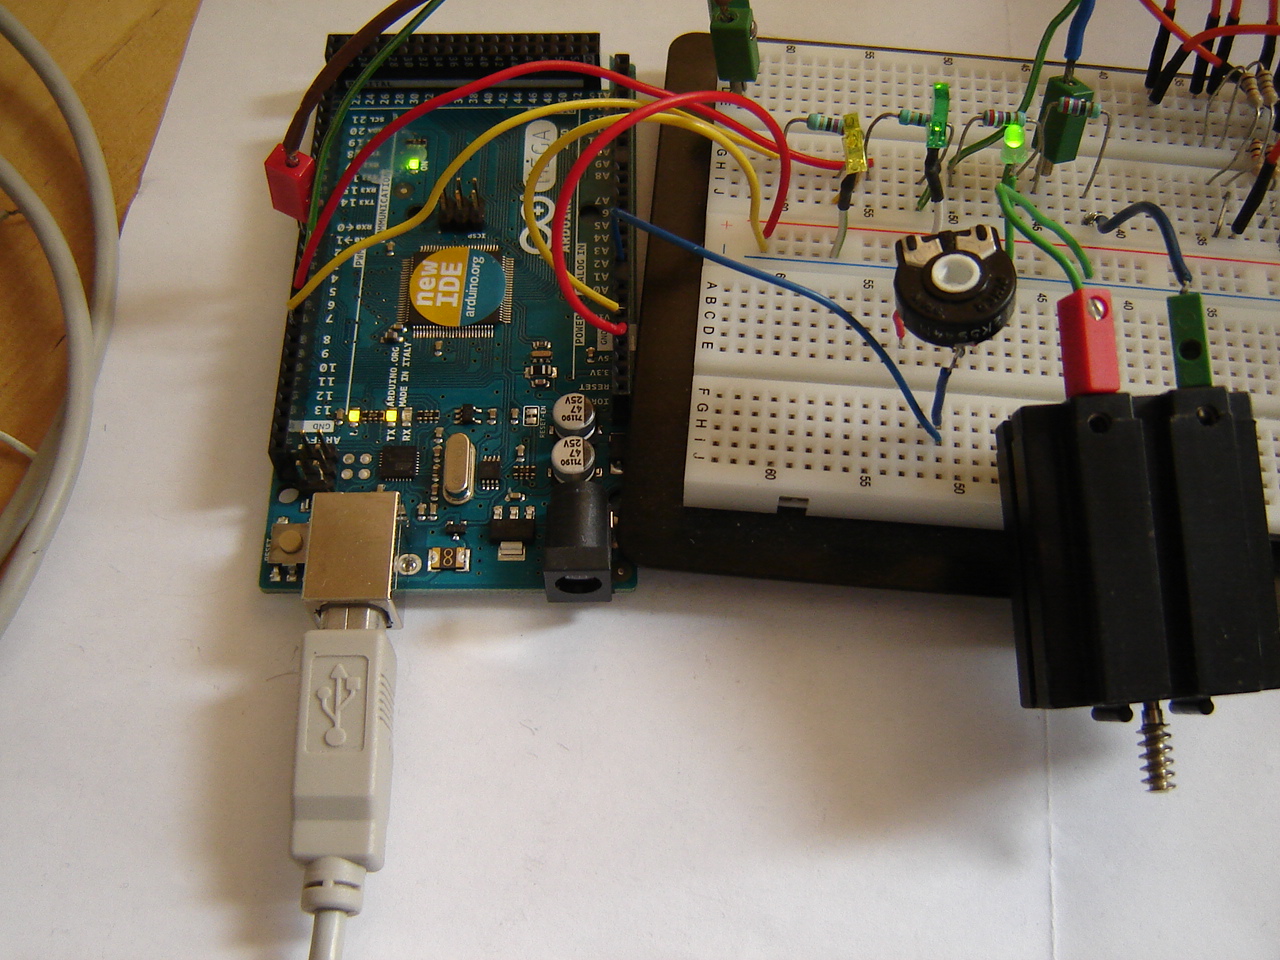
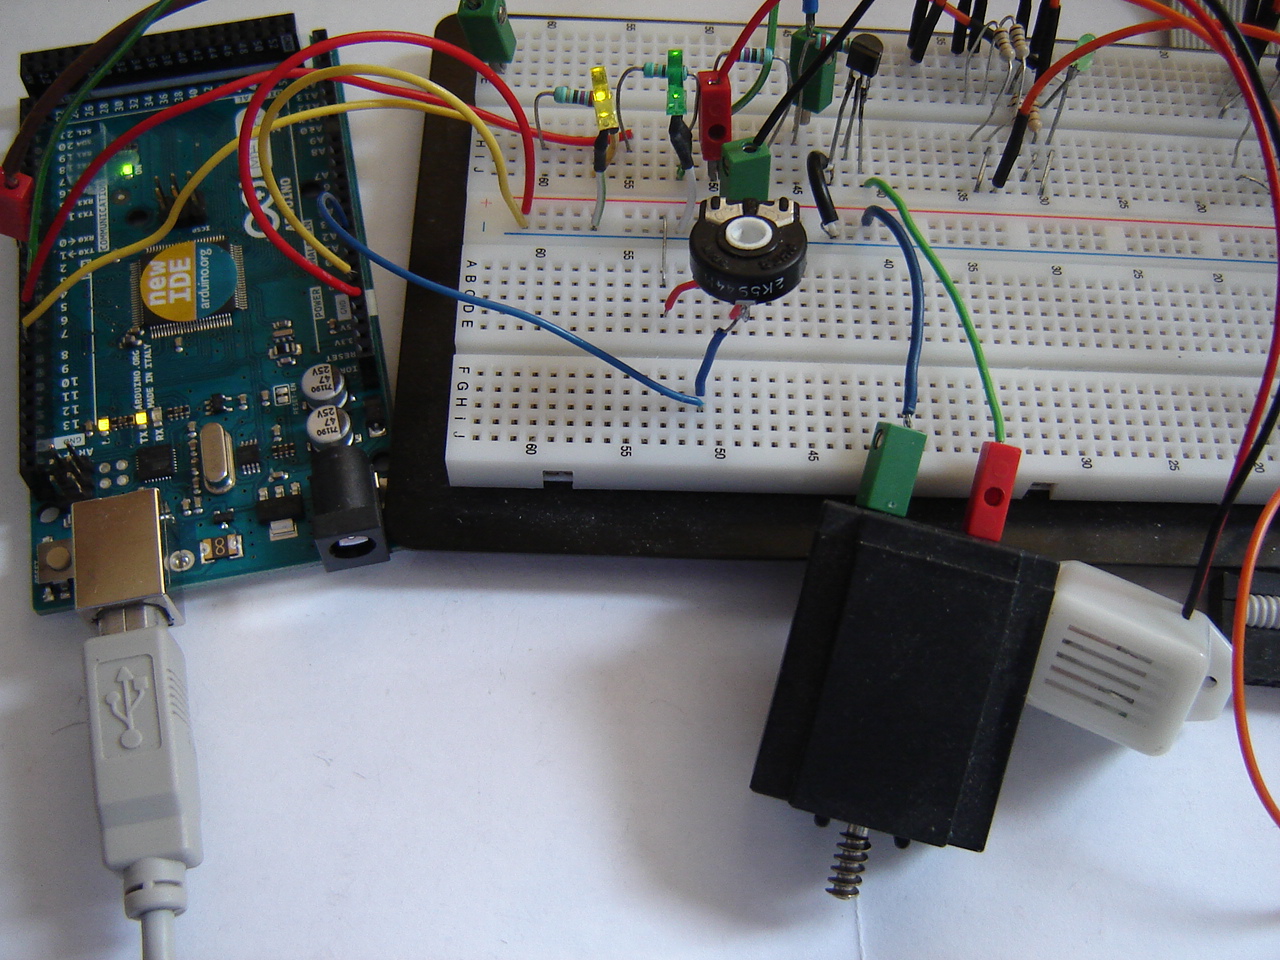
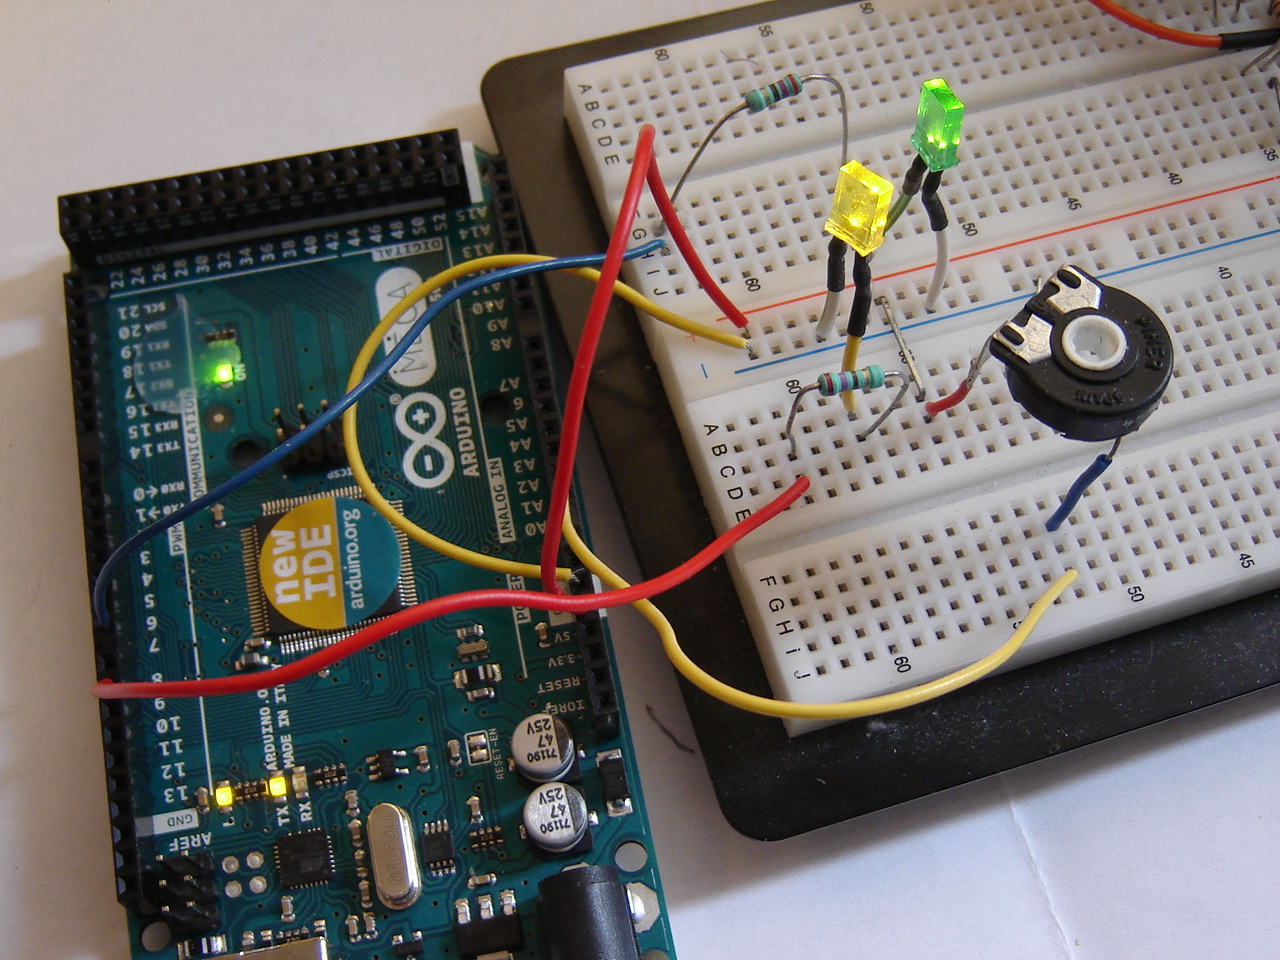
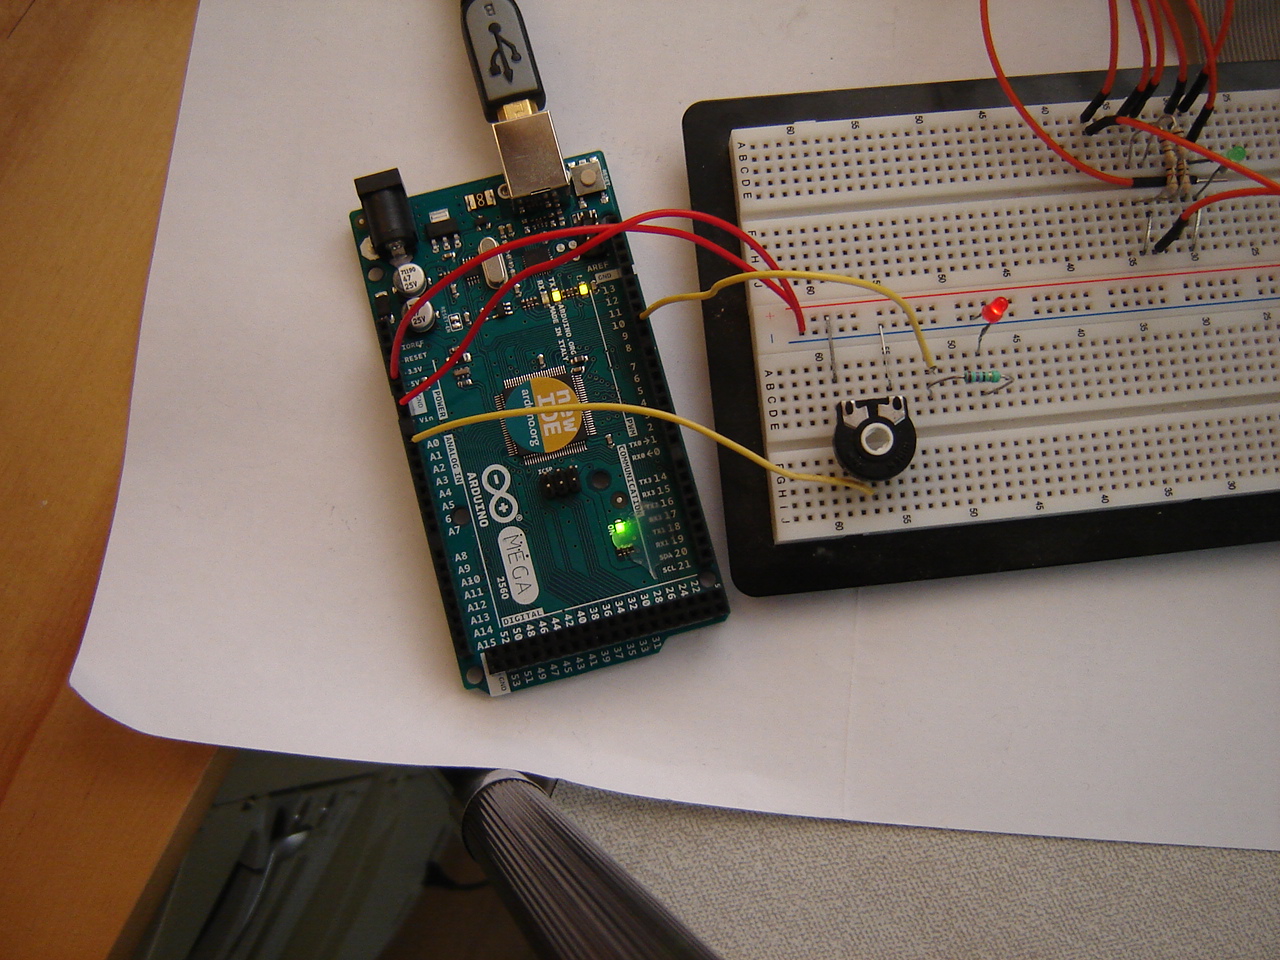
Arduino Mega2560: I need to check on an LED and a motor...and decide to replace a resistor with a potmeter. This requires some rewiring. Click the image to watch the video.
Hand: A rather motoric episode: reconstruction of a motor support, change of power supply and a rather big issue showing up. But how to solve it? Click the image to watch the video.
2 September
BB: Now the setup mostly works, it's time to elevate. But how? Will it work? Click the image to watch the video.
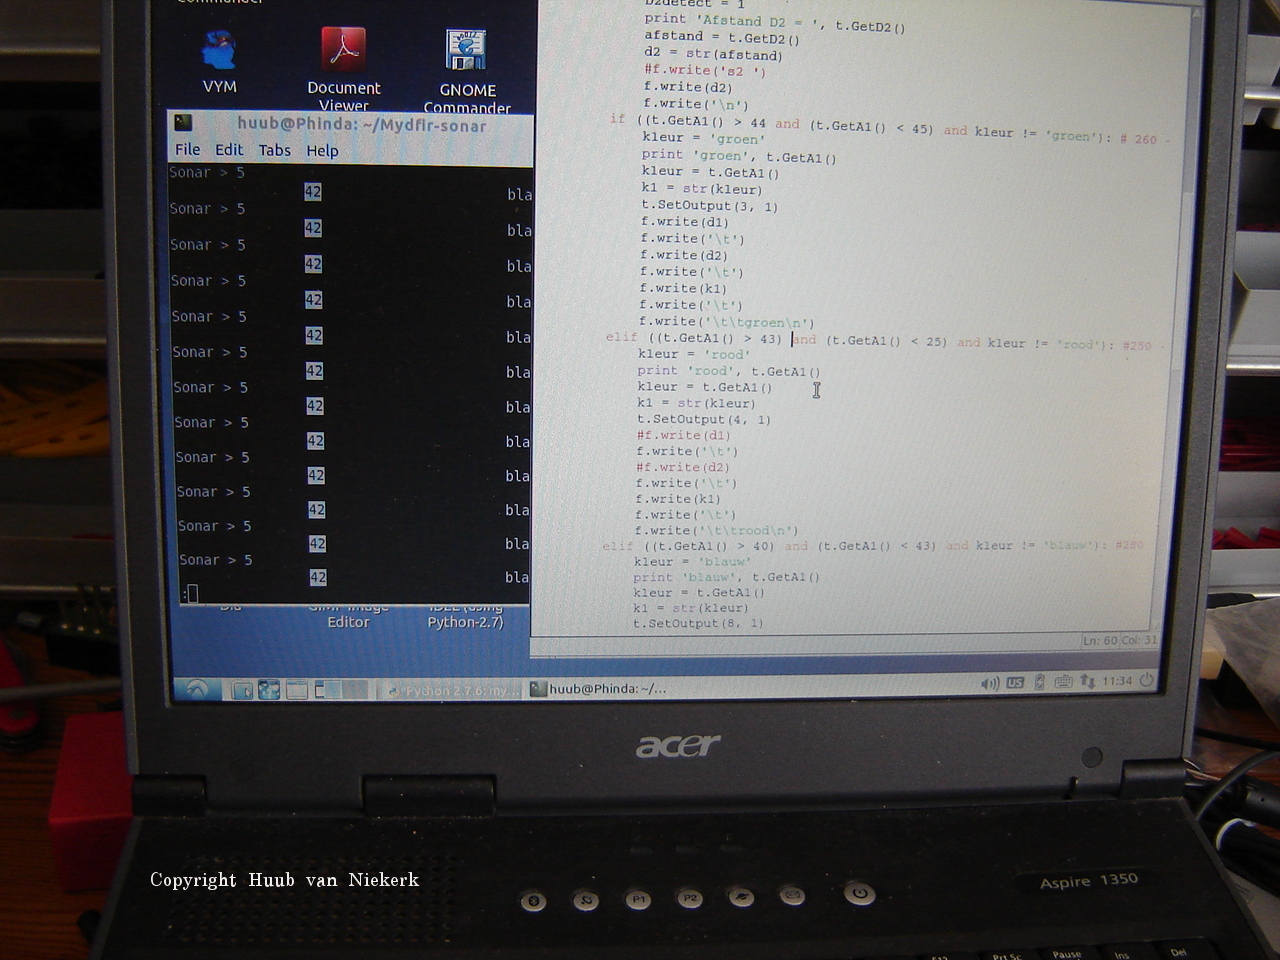
Discovery: Another attempt to do colour recognition using ROBOPro. This time it looks like it works, but not in all situations. Click the image to watch the video.
Mirft2: Testing the legs for knees: will this work out? Then back to sound. Solving some errors and getting weird results. Some efforts work, some not. But why?! Click the image to watch the video.
RPi: Testing the motor without pwm shows an interesting result. Then extending the circuit with an LED and RC circuit with LED shows an unexpecting result. Click the image to watch the video.
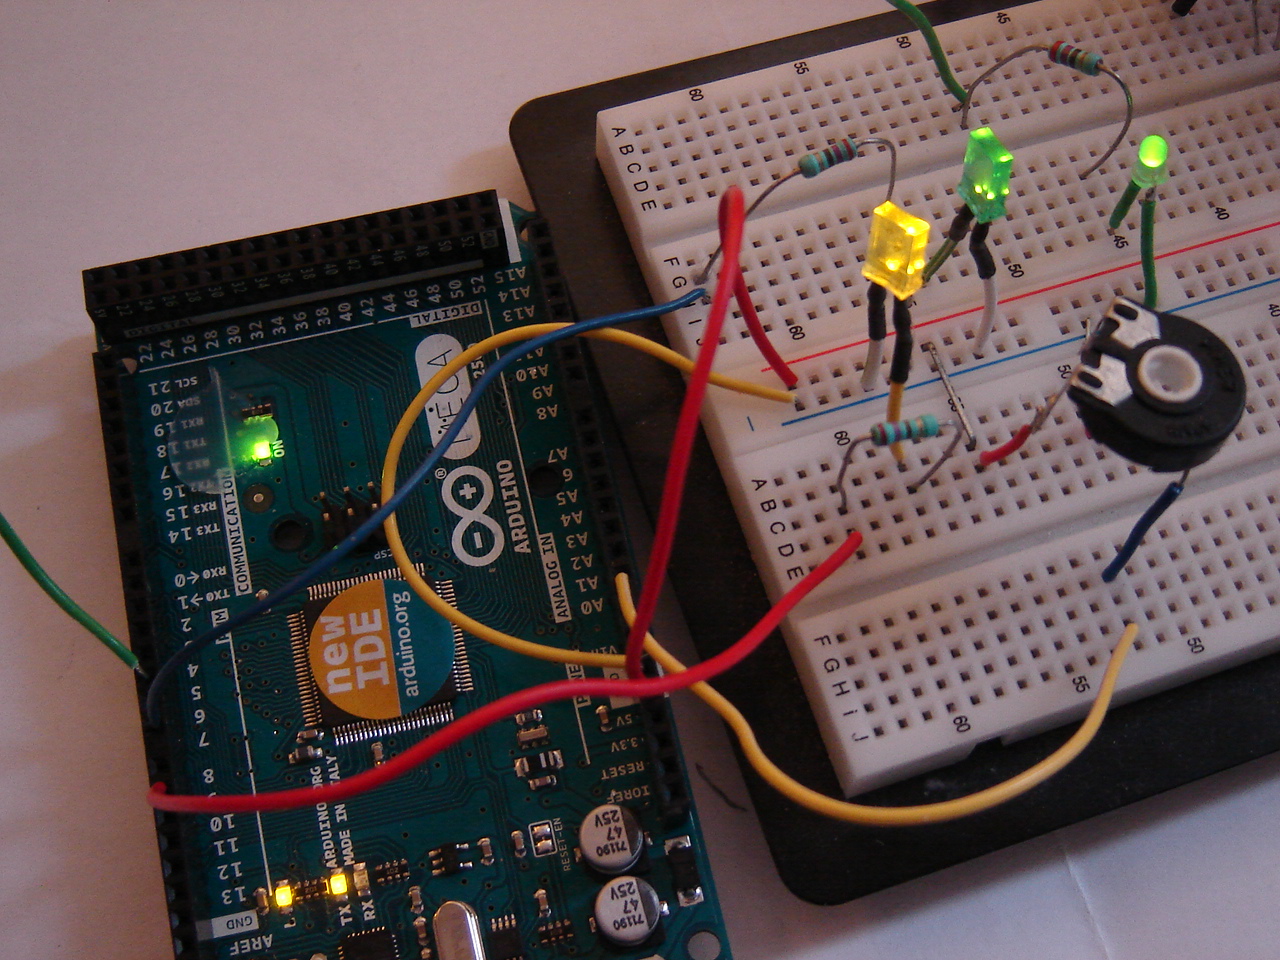
Arduino Mega: The square green LED is nice to have to opposite way of working to the square yellow LED. This gives some problems though. After solving them, I want another LED in row blinking fast but this doesn't work out quite that way. Click the image to watch the video.
Hand: Changing the setup of the pivot motor, shows other problems as well. How to deal with them? There may be a solution, although with a catch. Click the image to watch the video.
26 August
BB: Continuing with the light sensor. Checking wires, timing and using ftdiagnose, I get it to work. kind of. Click the image to watch the video.
Discovery: A new experiment: trying the community kernel. After quite some preparation (microSD and TXT controller ready), how will it go? Then back to sound. What's going on?! Click the image to watch the video.
Mirft2: I have to change the new rubber feet, because some end up at the side of the legs. Then an old gear problem shows up which I fix for now (will it hold?). Trying out sound, which works some way..and doesn't in another. Click the image to watch the video.
RPi: After some more research, I find I need to relocate and rewire the OpAmp. After testing and some more rewiring and adding a component...things work. Kind of. Click the image to watch the video.
Arduino Mega: Rewiring of the switch is needed, but how? Then back to the code and serial monitor. Some changes seem needed, but will it work? Click the 2nd image to watch the video.

Hand: After adding the pivot motor, it's time to do things software-wise. First tests are great, but then it turns not so great. Click the image to watch the video.
19 August
BB: Checking out the light sensor should be an easy one: just riding, blocking light, etc. Then the other light goes on and off, etc. again. But does it? ftdiagnose makes me wonder what's wrong. Checking wires too. Click the image to watch the video.
Discovery: Testing sound, I encounter some odd events. Somehow it clearly works, but it also doesn't. Why? Click the image to watch the video.

Mirft2: Using the broken rubber tire to walk... how well does that work? Ducttape and something else bring a (temporary?) solution. Then sound? This brings a big oops and more. Click the image to watch the video.
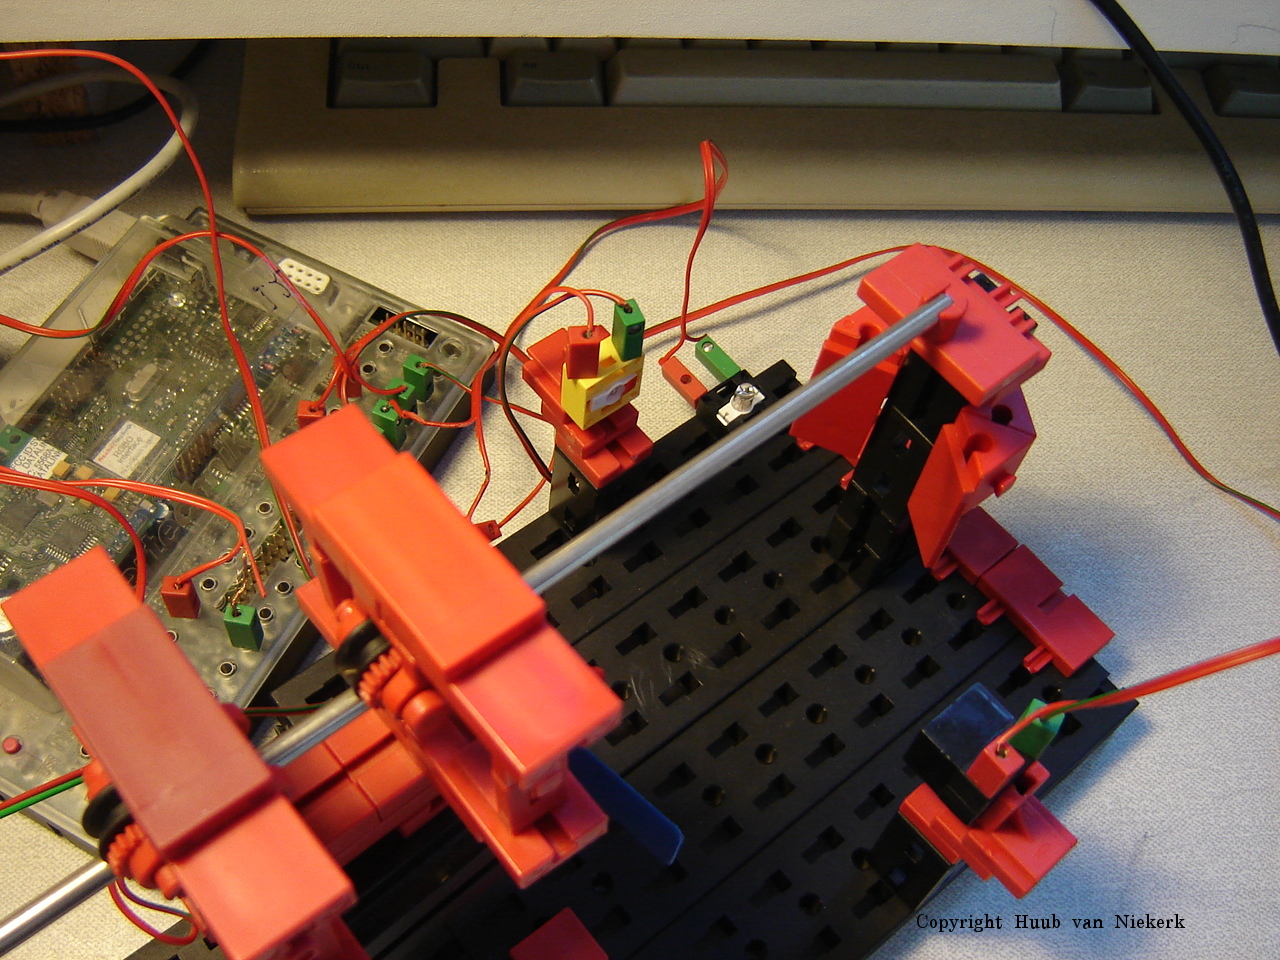
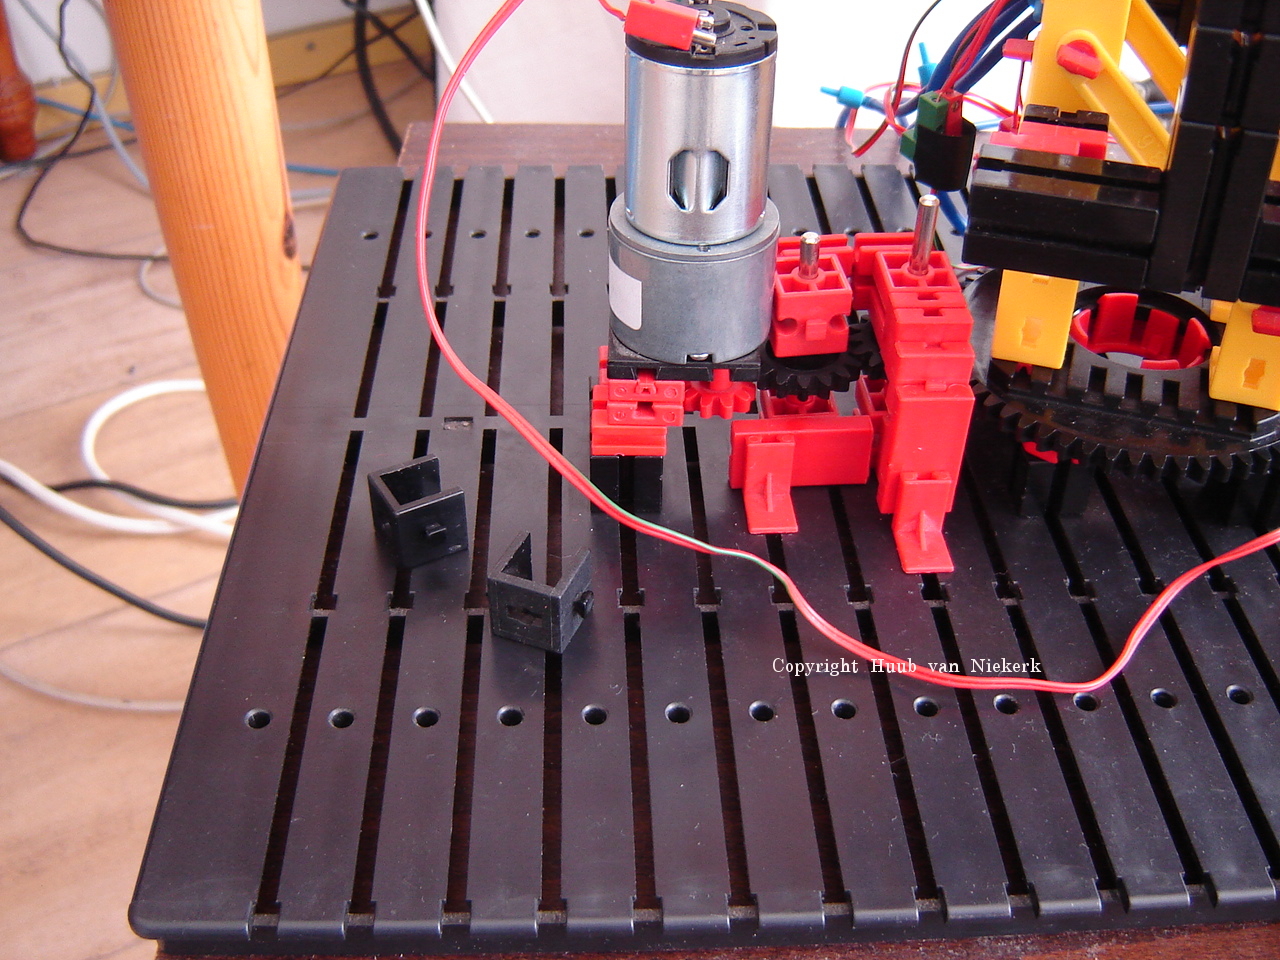
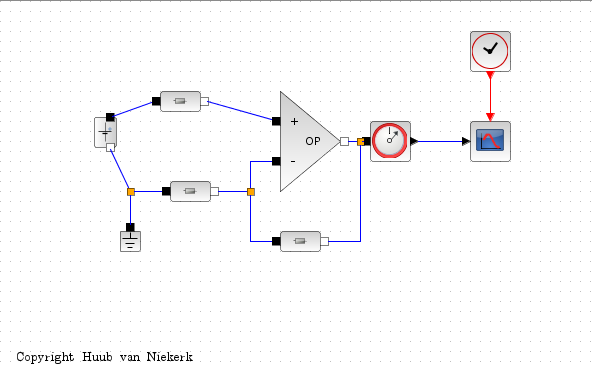
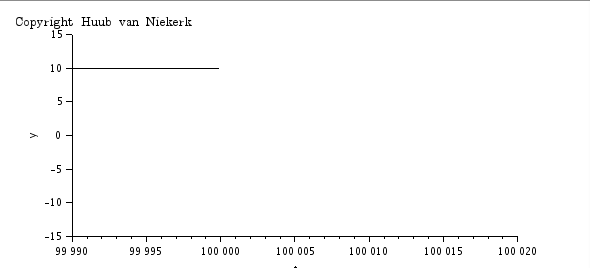
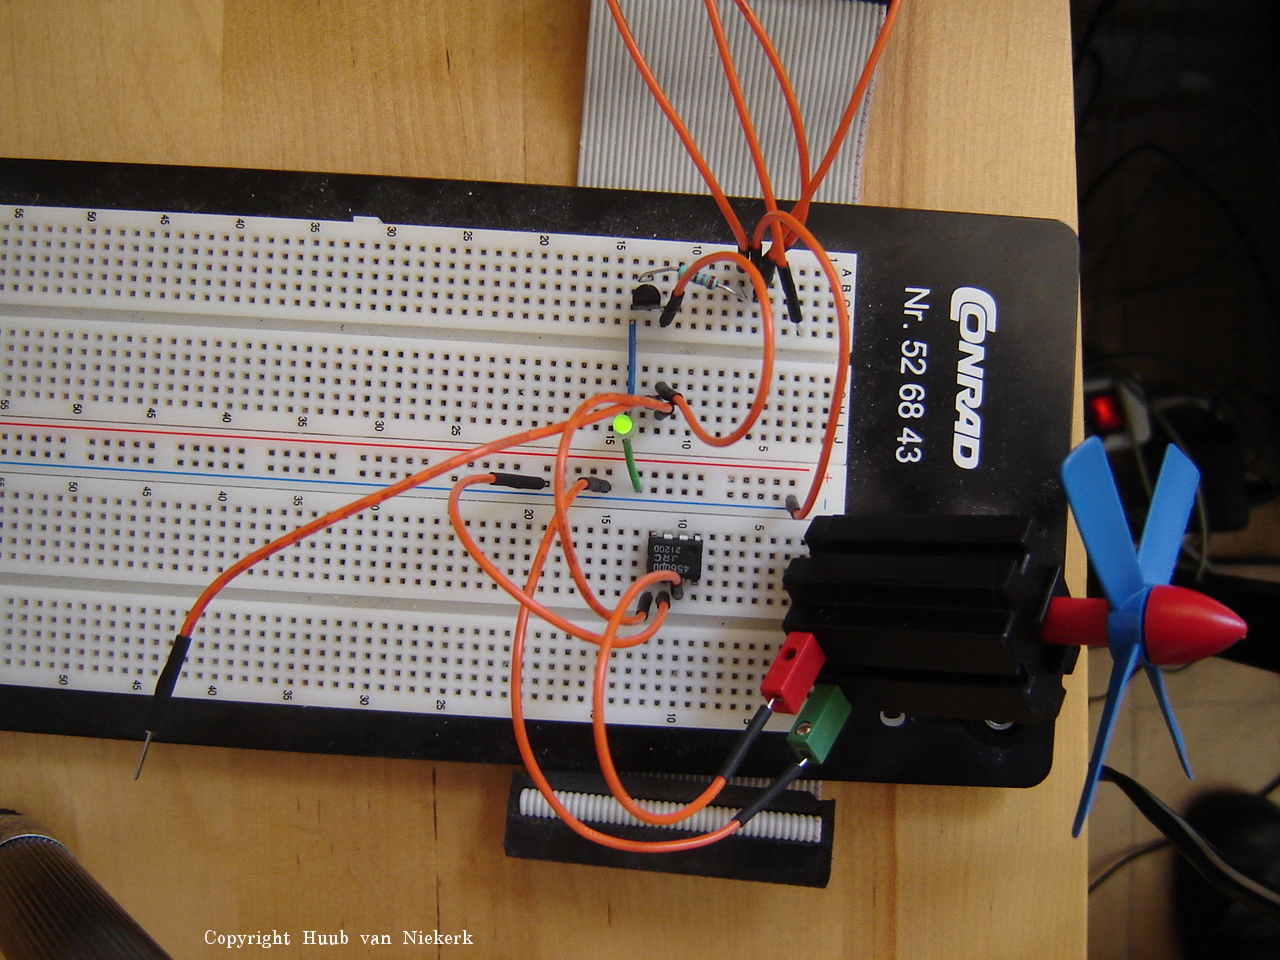
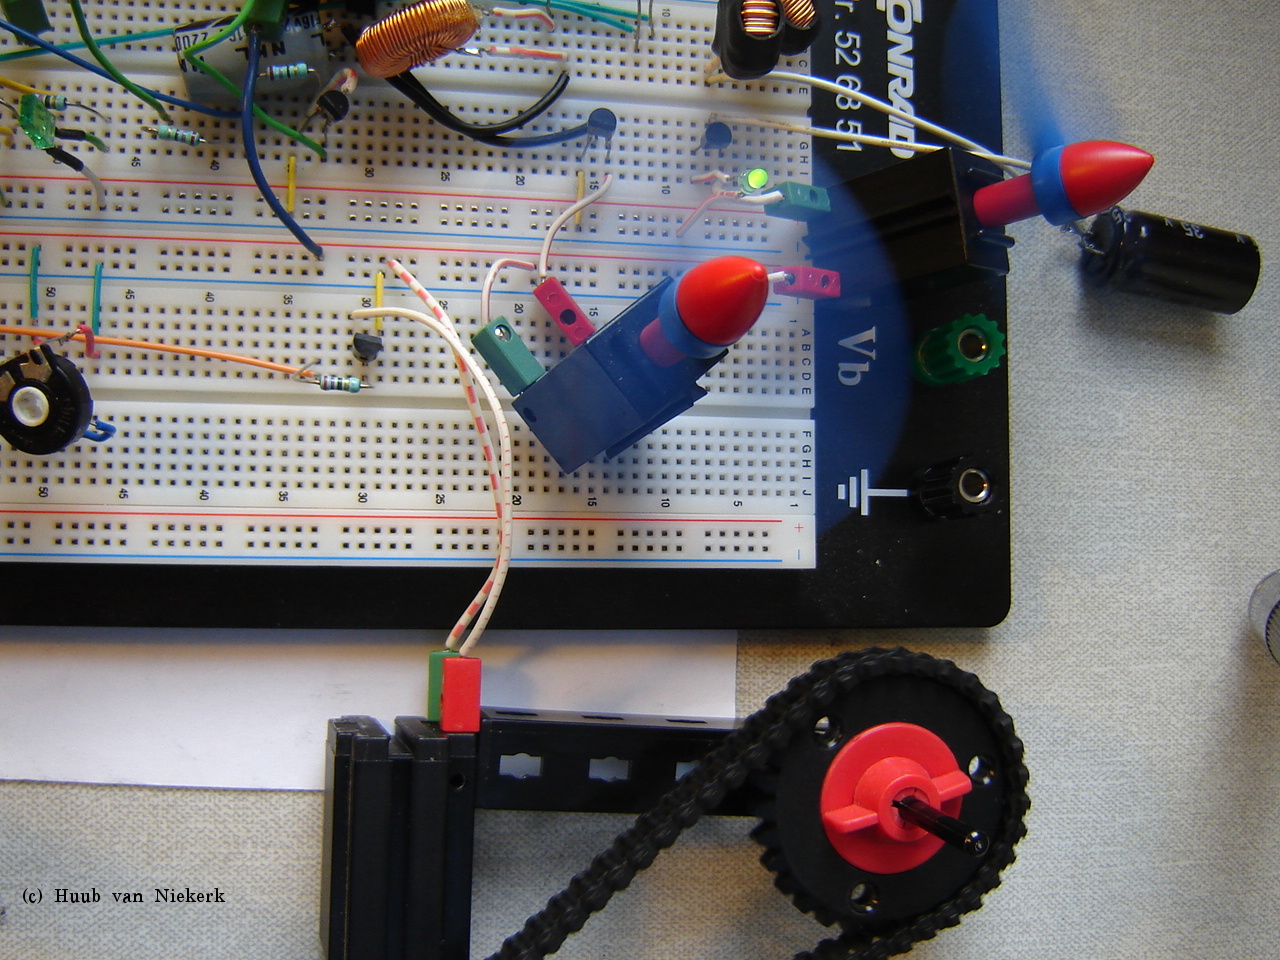
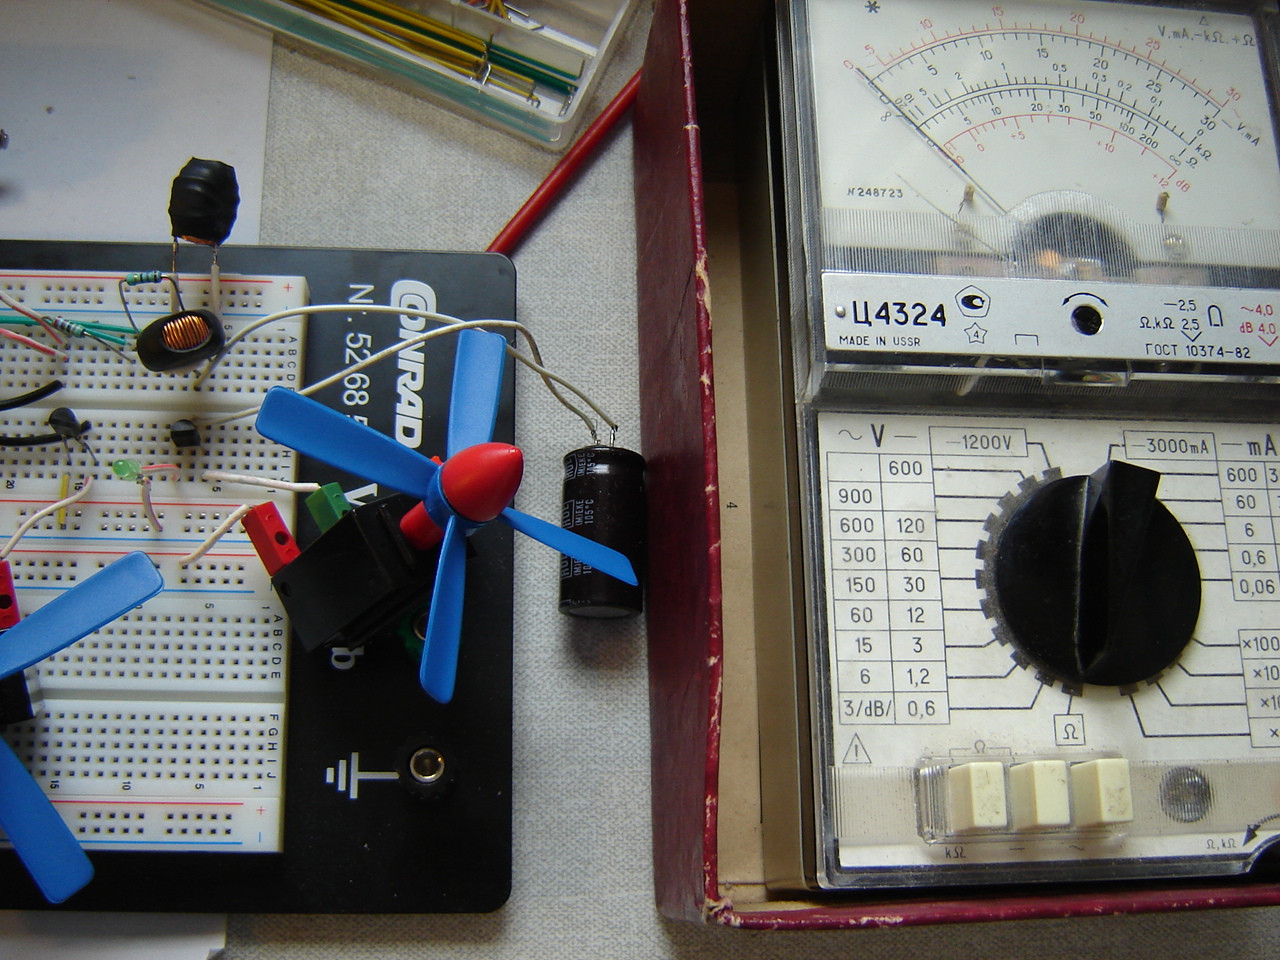
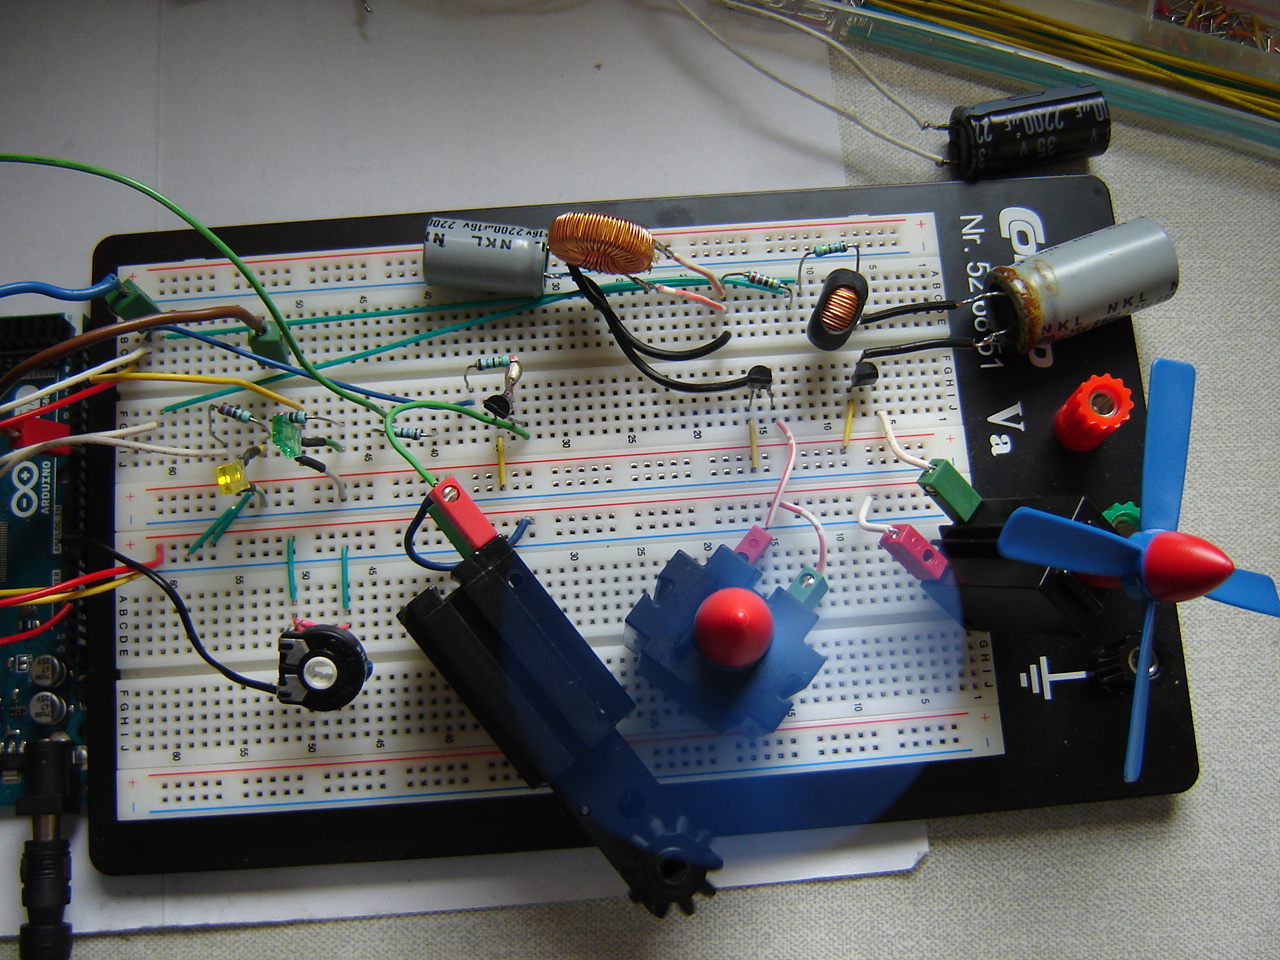
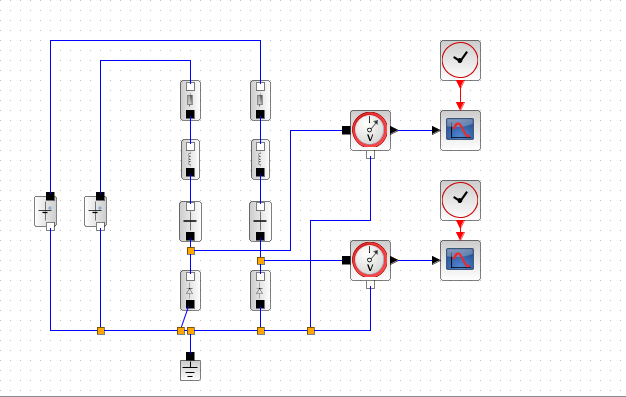
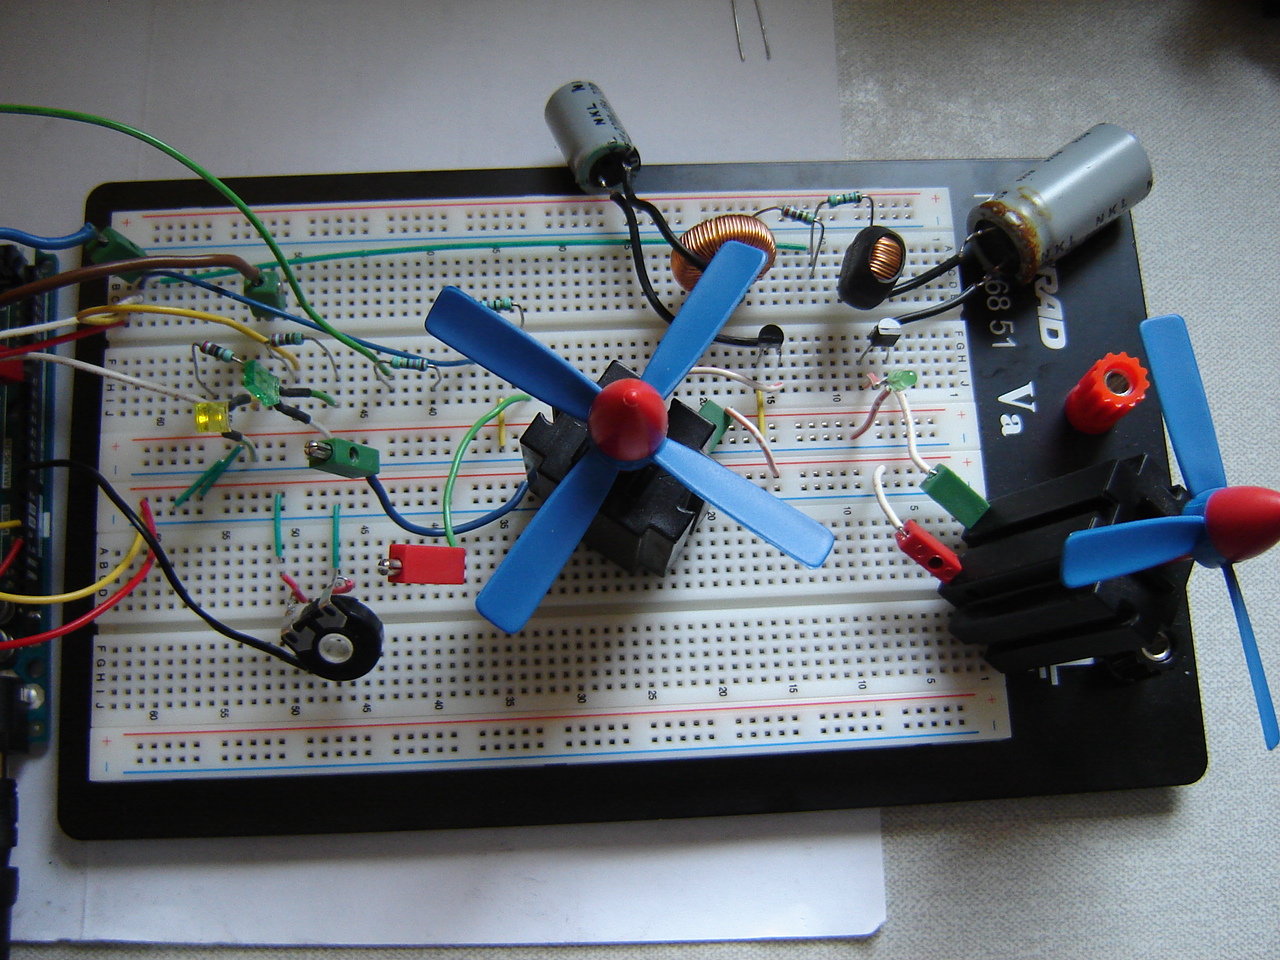
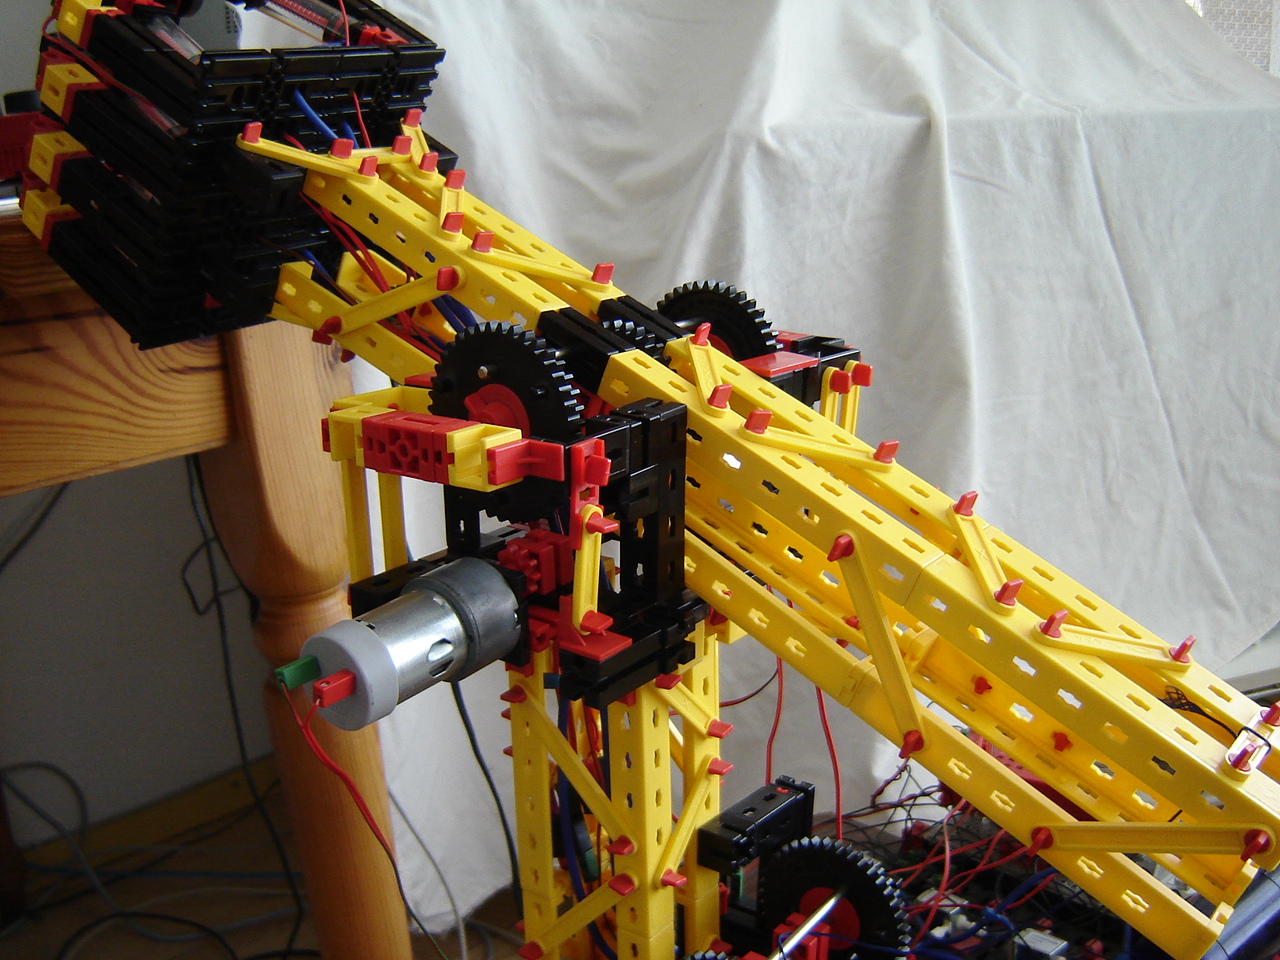
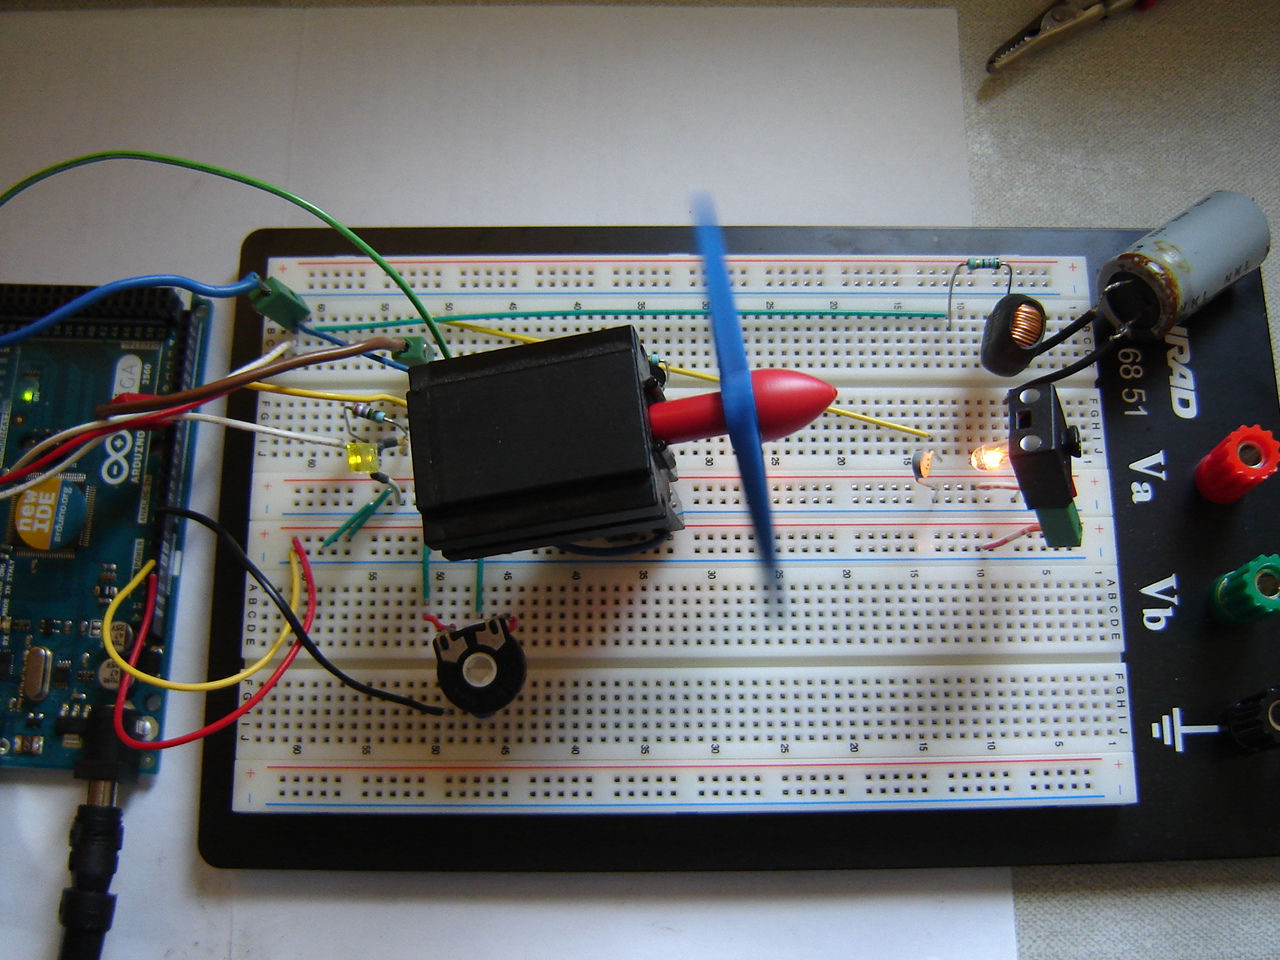
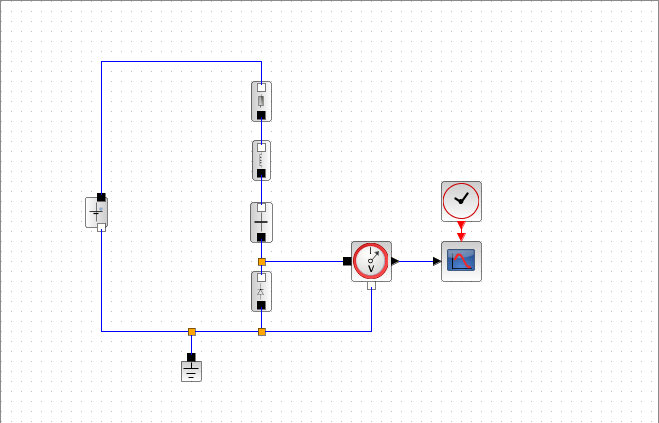
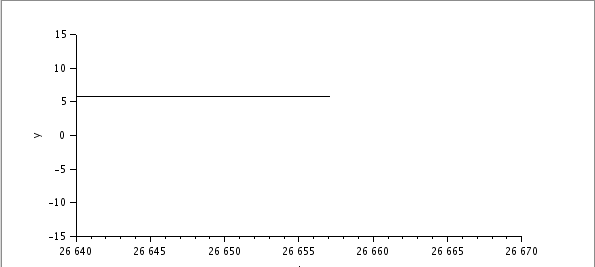
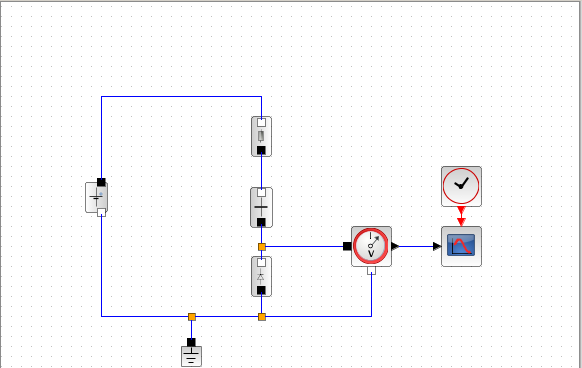
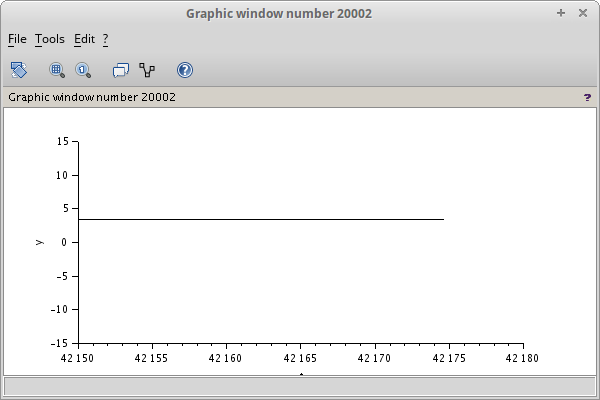
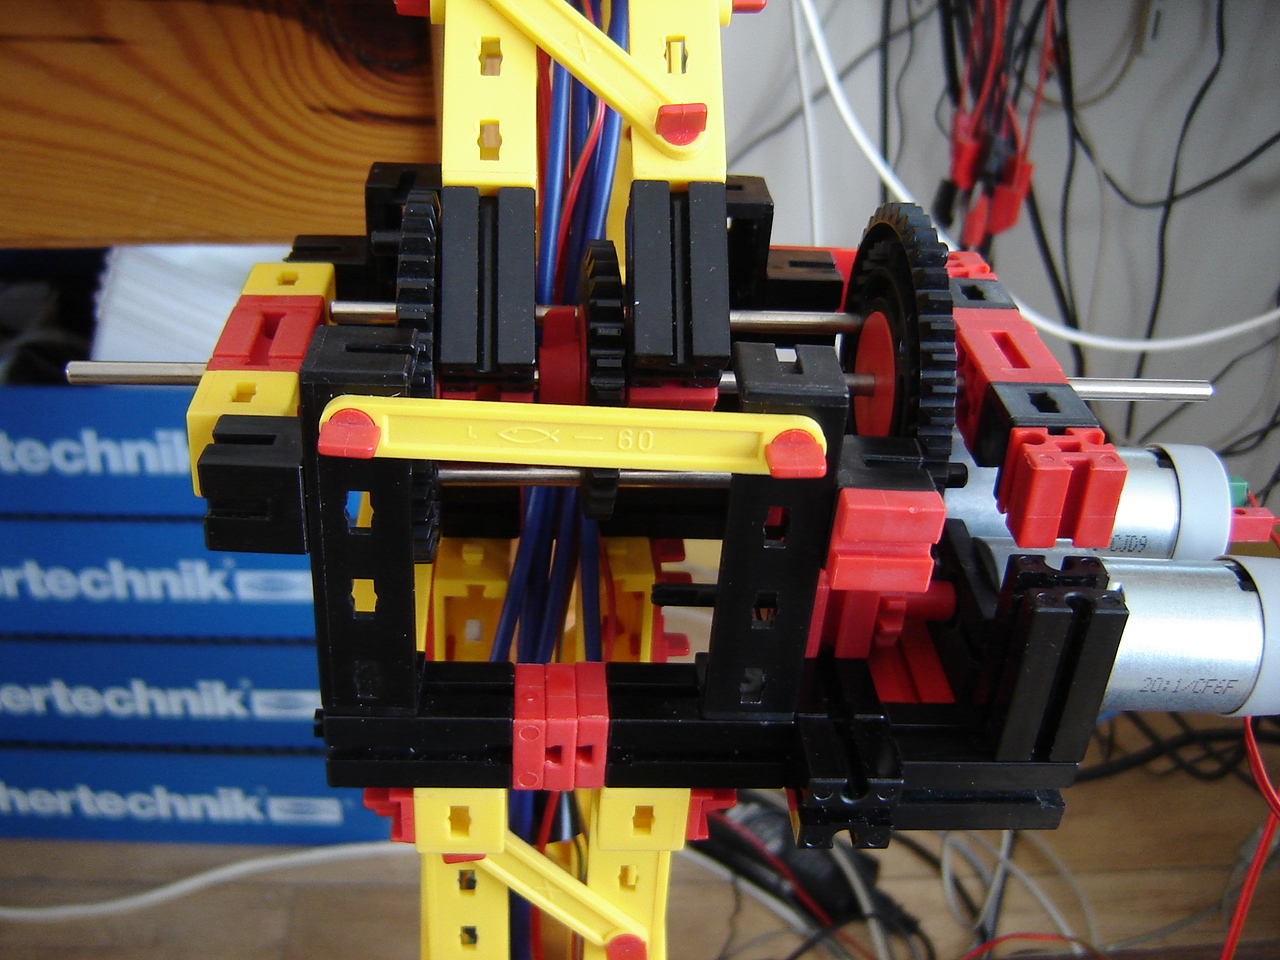
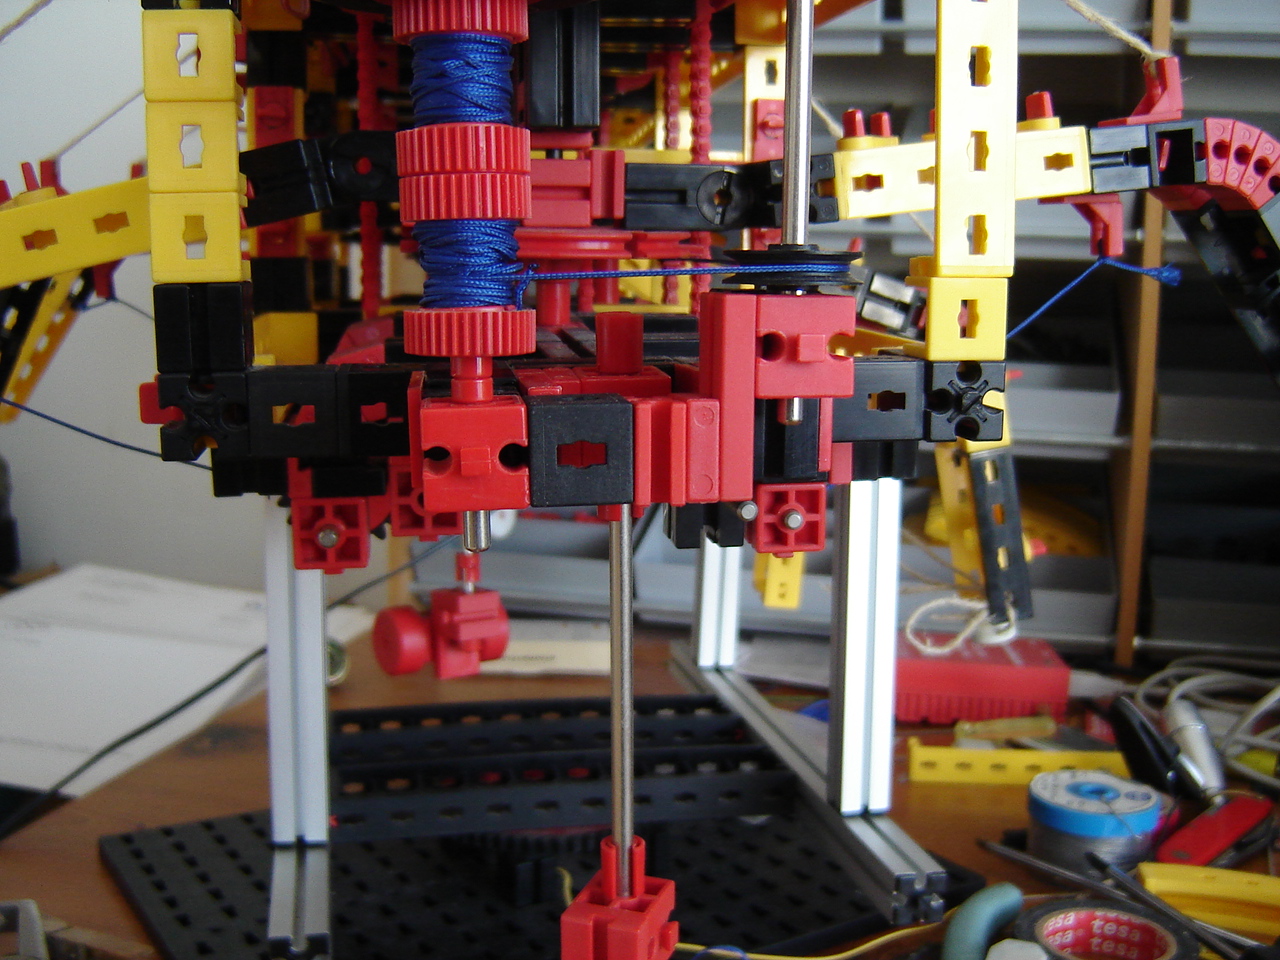
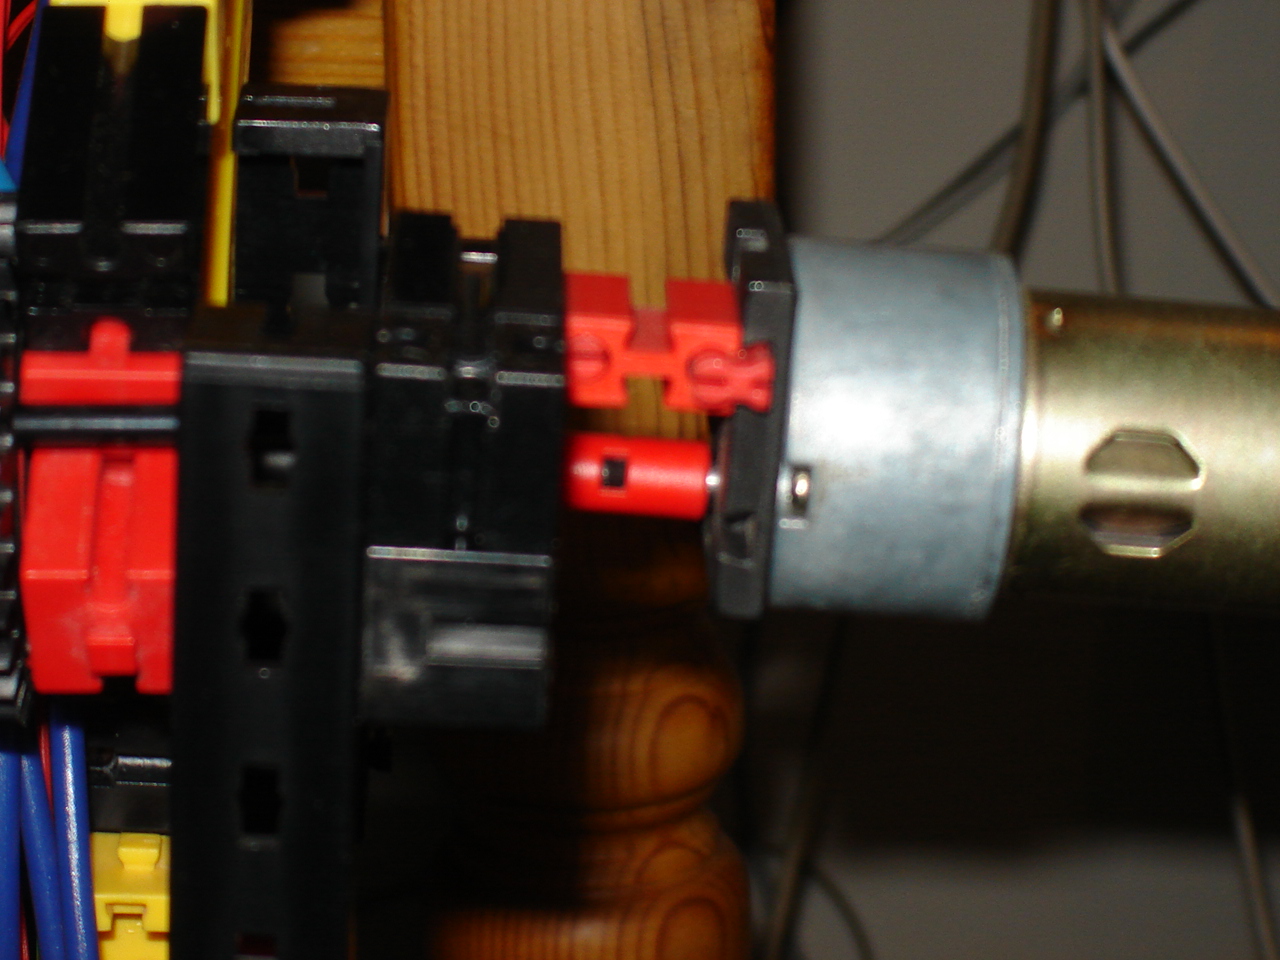
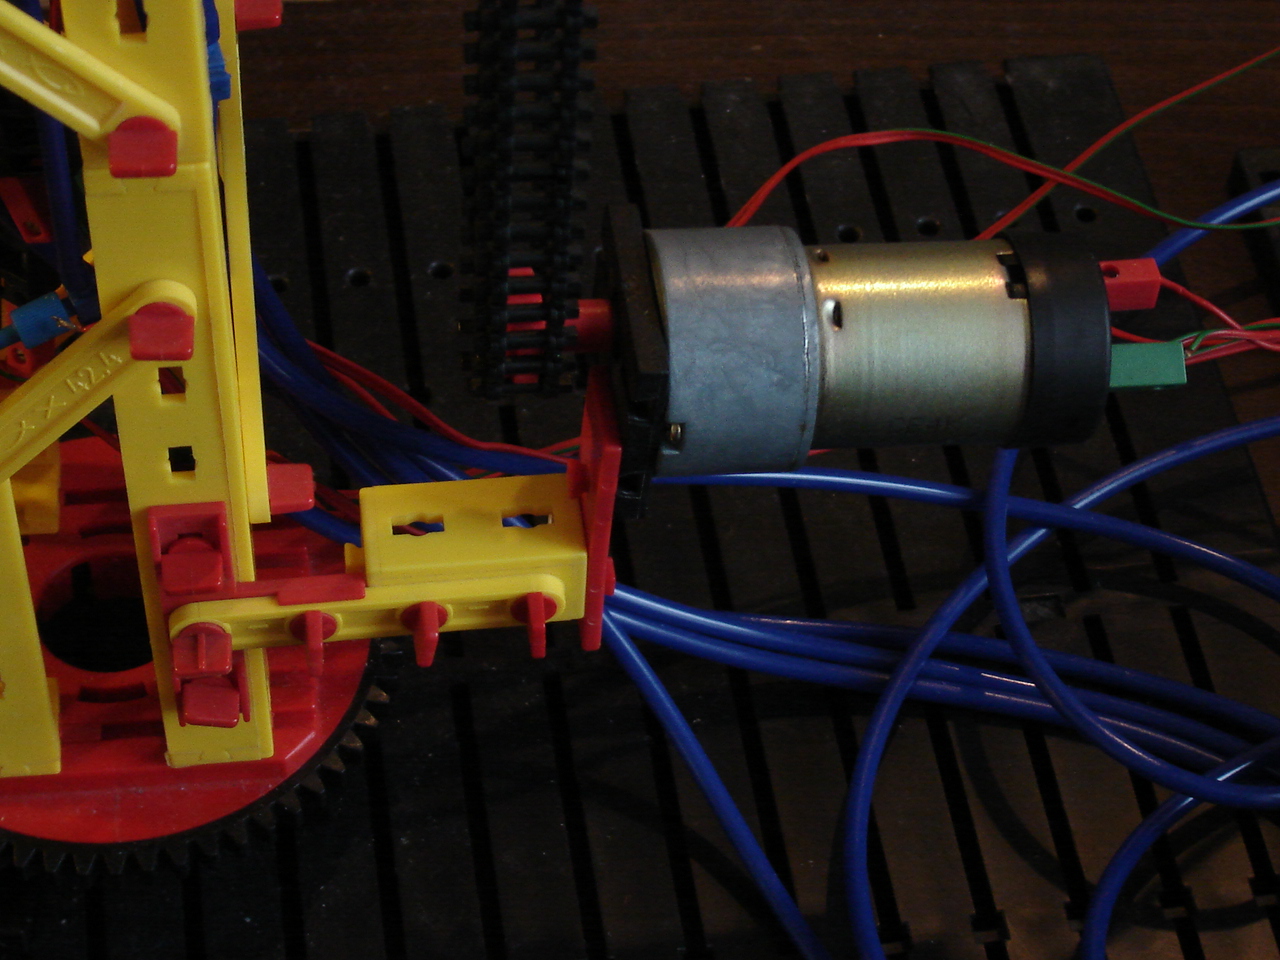
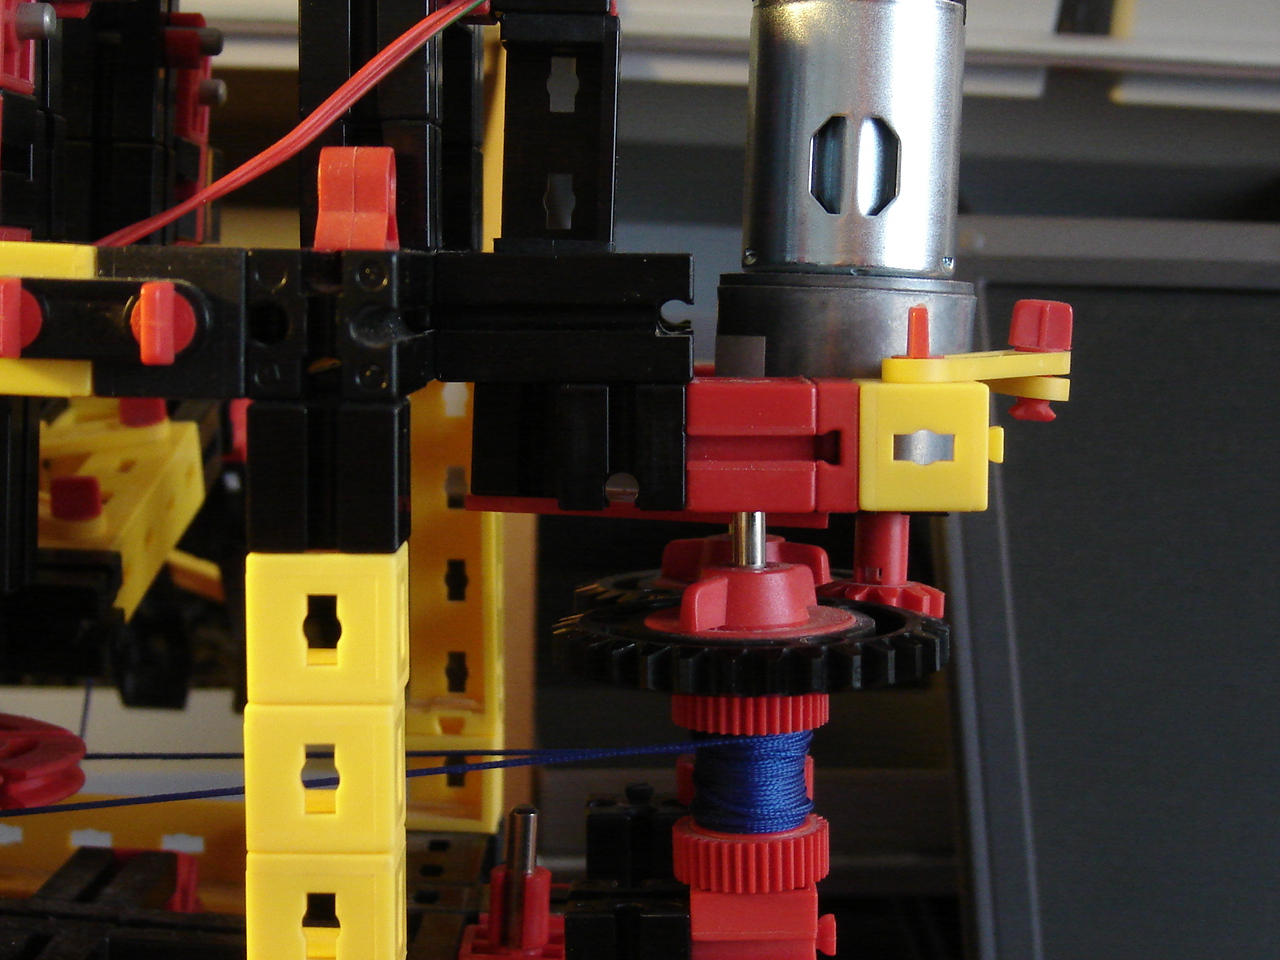
RPi: The compiler-error from wiringPi turns out to have a simple solution. After that, I have to increase the voltage level. To solve this, I use Scilab Xcos simulation again and this shows how it in theory can work out nicely by using an OpAmp. But will this work? Click the image with motor to watch the video.
Arduino Mega: Trying to control an LED by a switch: recoding, rewiring, etc. Will it work or can't it work? Click the image to watch the video.
Hand: Checking the gears, a simple solution is found. Then, I want to use a motor to pivot the arm-base. This needs a reconstruction. Click the image to watch the video.
12 August
BB: The iron tracks are fast and the carriage unstable. What to do? Also, the touch sensor bounces. Time to replace it. Click the image to watch the video.
Discovery: Checking the software doesn't reveal errors, so what causes the frequent misbehaviour? Some more tests off and on camera... Click the image to watch the video.
Mirft2: I need to stabilize the frame, which looks nice afterwards. The gear gives a problem and is only partially fixed. Then the walking...how I can solve that?! Click the image to watch the video.
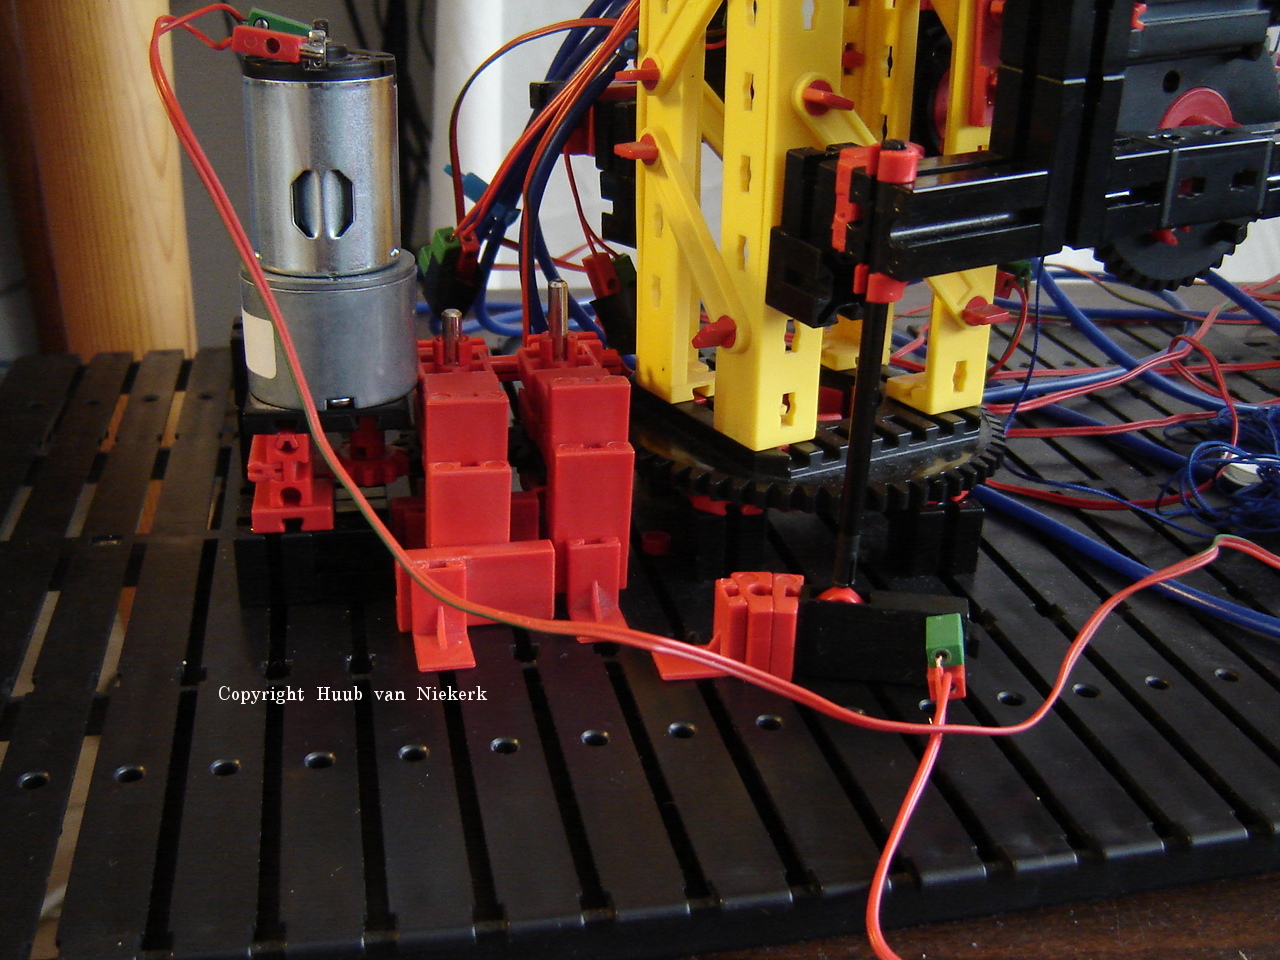
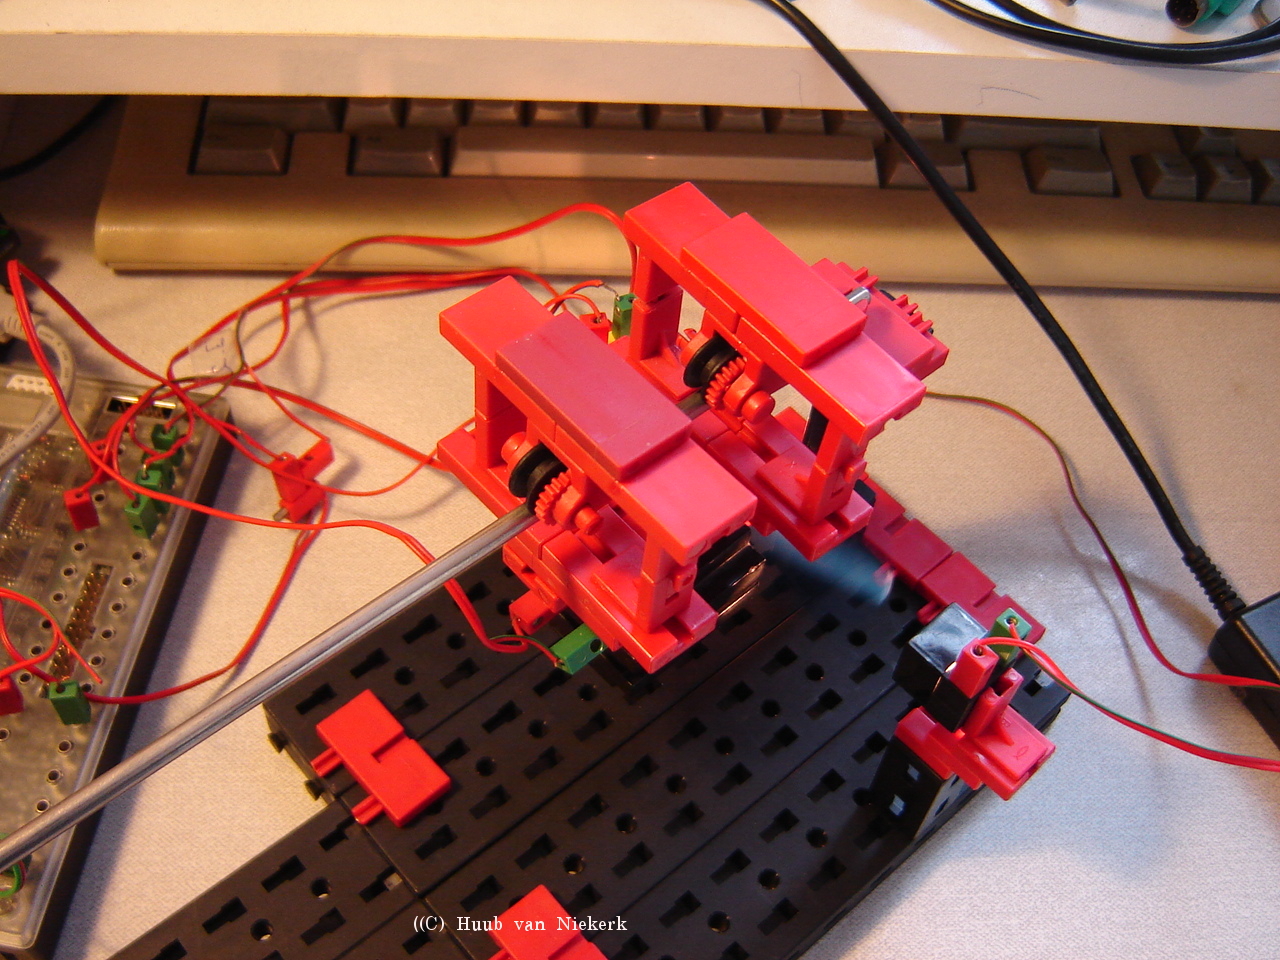
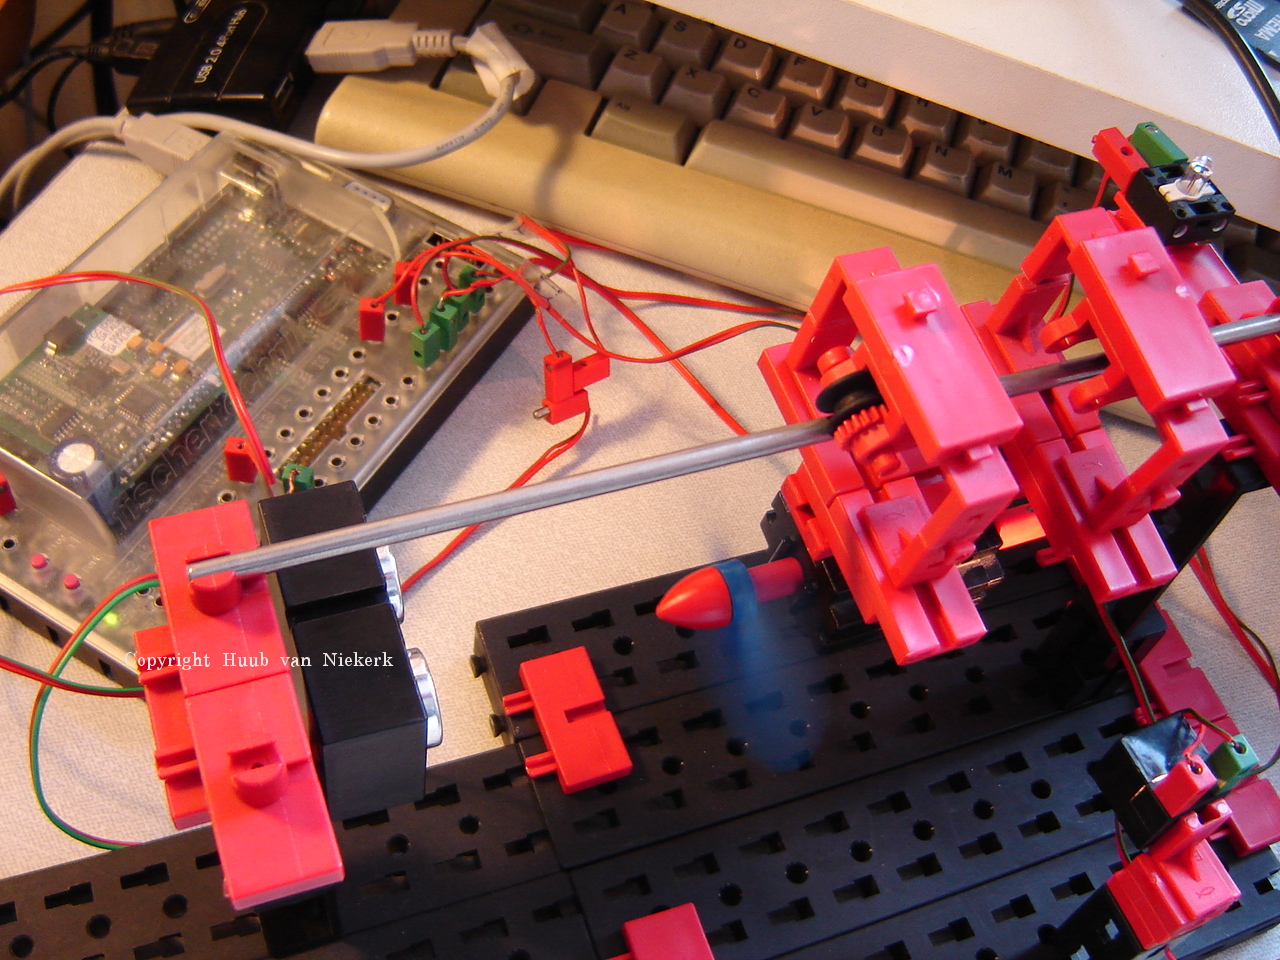
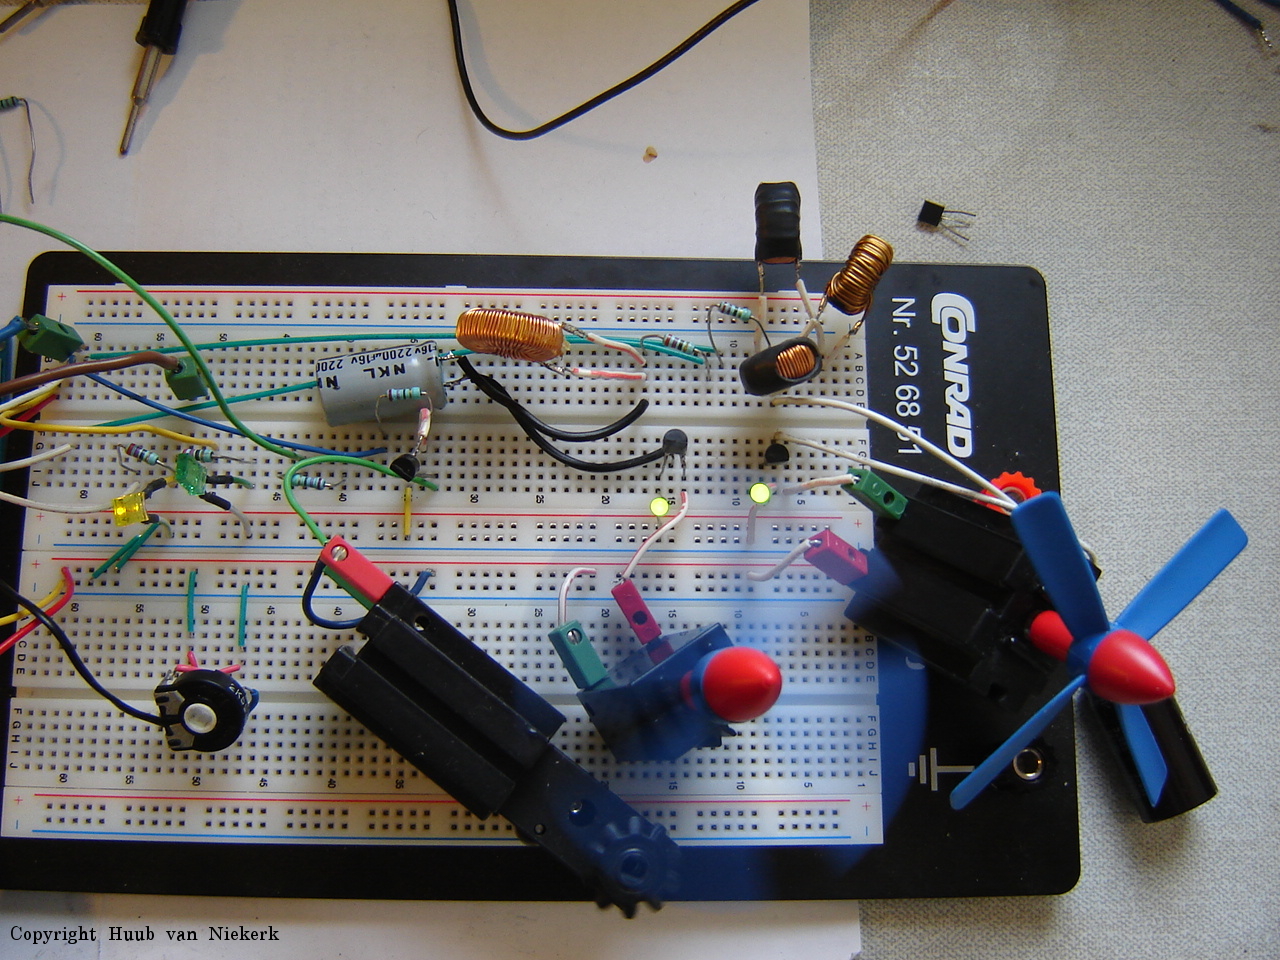
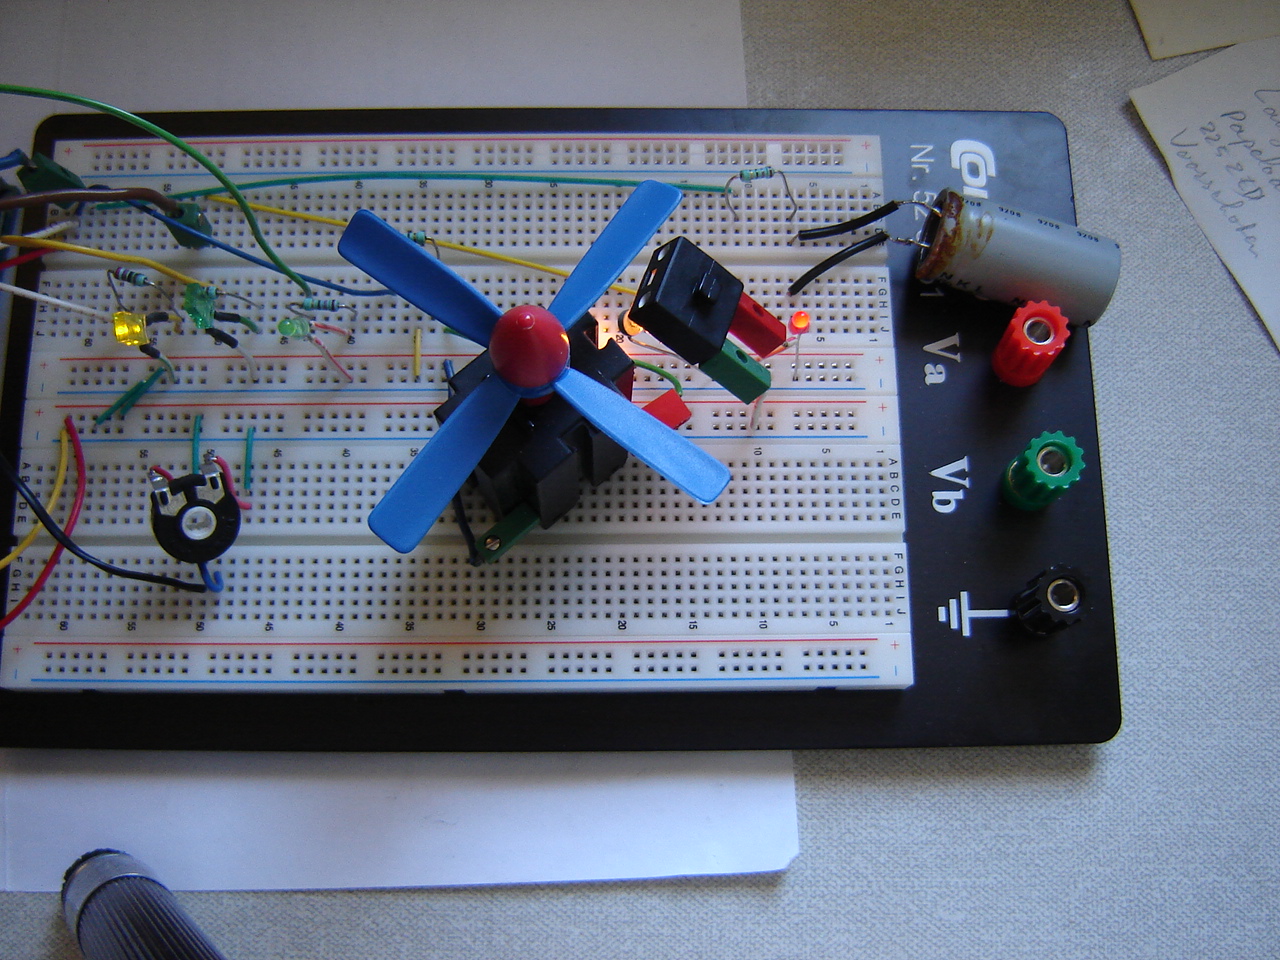
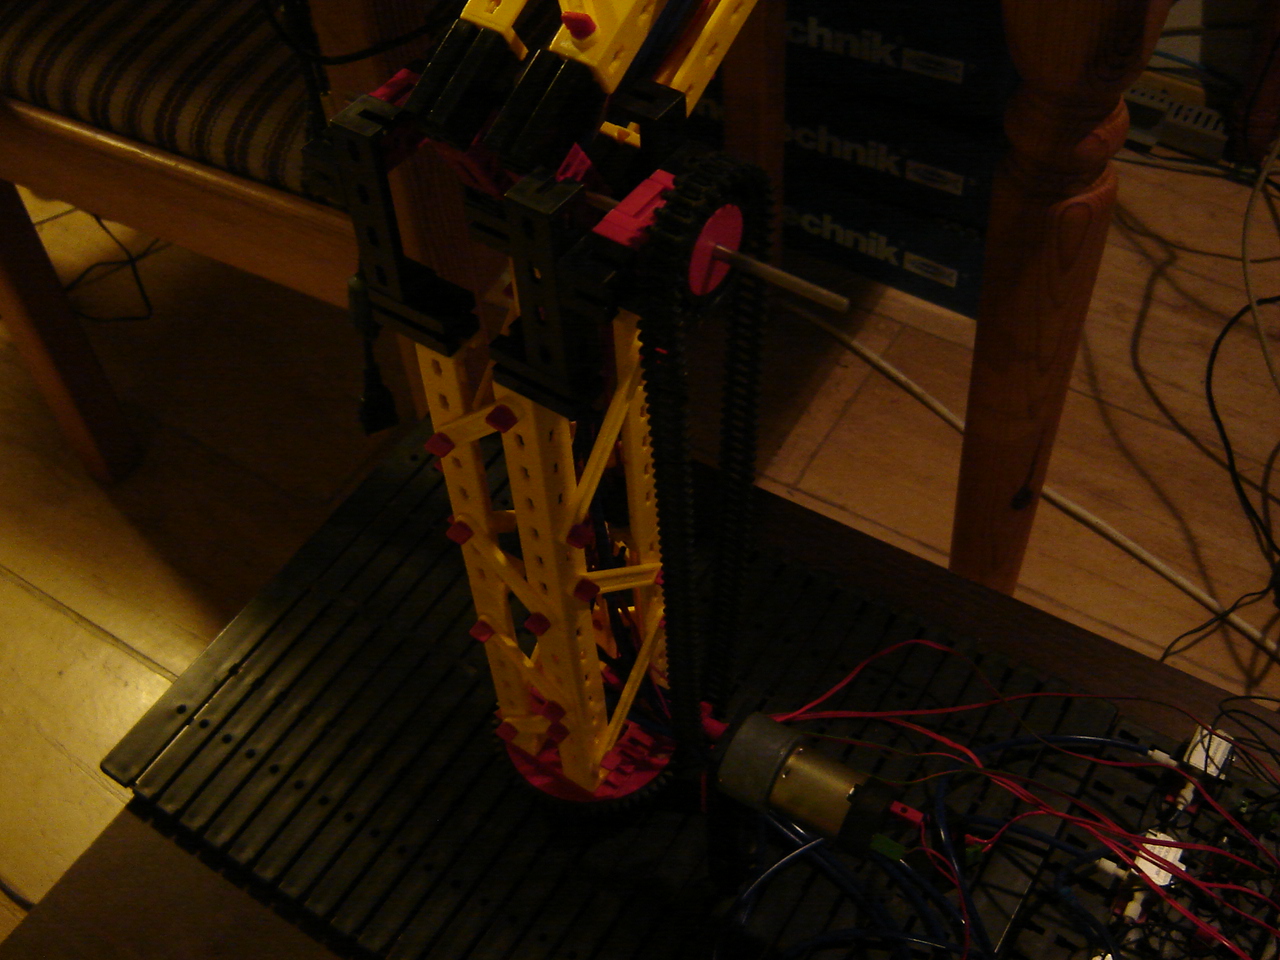
RPi: I'm going back to a former idea: controlling a motor. My earlier attempt was based on a wrong setup. Now that I've got experience via the Arduino, why not do the same way here: resistor, transistor, mass and some power. Then things get a turn: I have to use pulse-width modulation! Click the image to watch the video.
Arduino Mega: Why doesn't the digital input work? And the chain motor? Some recoding is needed and some refit of electronics. But will it all work? Click the image to watch the video.
Hand: Checking the whole hand and arm reveals 2 gear problems. But how to solve them? Click the image to watch the video.

5 August
BB: Trying to stabilize the carriage brings some tests: tilt, elevation and other. Some improvements, some not. Click the image to watch the video.
Discovery: Testing sonar again, with slightly different setup and code changes. This leads to new insight. Also testing with ROBOPro gives a remarkable result. Click the image to watch the video.
Mirft2: Trying to improve the flexibility of the framework gives nice results. However, tests show also that gears have some problems. Camera images are not all good: most are 0 bytes. Why? Click on the image to watch the video.
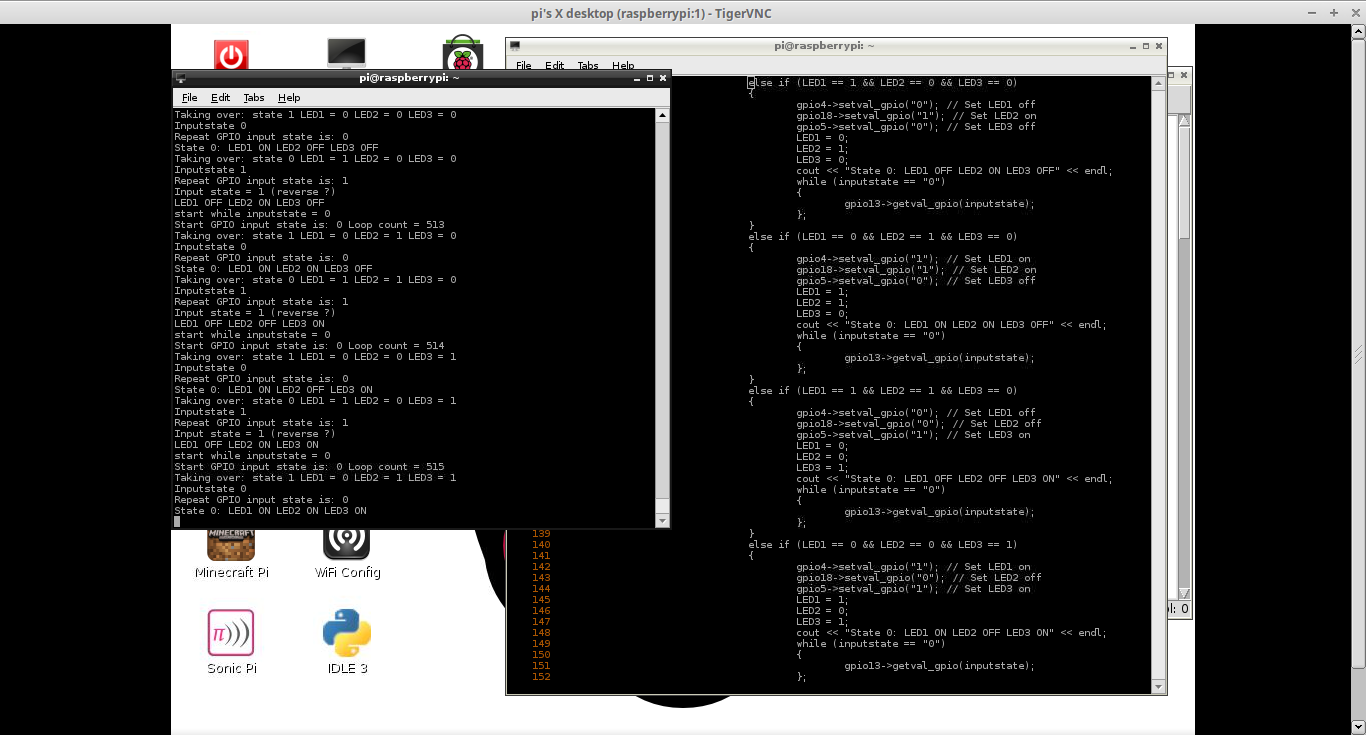
RPi: Since synchronous LED won't work, I try replacing the if's by while's. But will this work? Click the image to watch the video.
Arduino Mega2560: The digital input riddle: why does an onboard LED burn when a breadboard LED is activated? Several code experiments.... does it work? Click the image to watch the video.
Mydfir: After some more tests, I decide to check the hardware which turns into an oops. After that, I get better results but still not everything is logical. Click the image to watch the video.
Hand: The gears have to be improve so the arm gets lower but also the upper gear sensor isn't working properly. While this last one isn't very hard to solve, how about the gear construction? Click the image to watch the video.
29 July
BB: Will the yellow tracks help or not? The algorithm seems fine. Some improvements seem fine, but does all work consistently? Click the image to watch the video.
Discovery: Further testing on sound and sonar with several different setups. Time for changes? Click the image to watch the video.

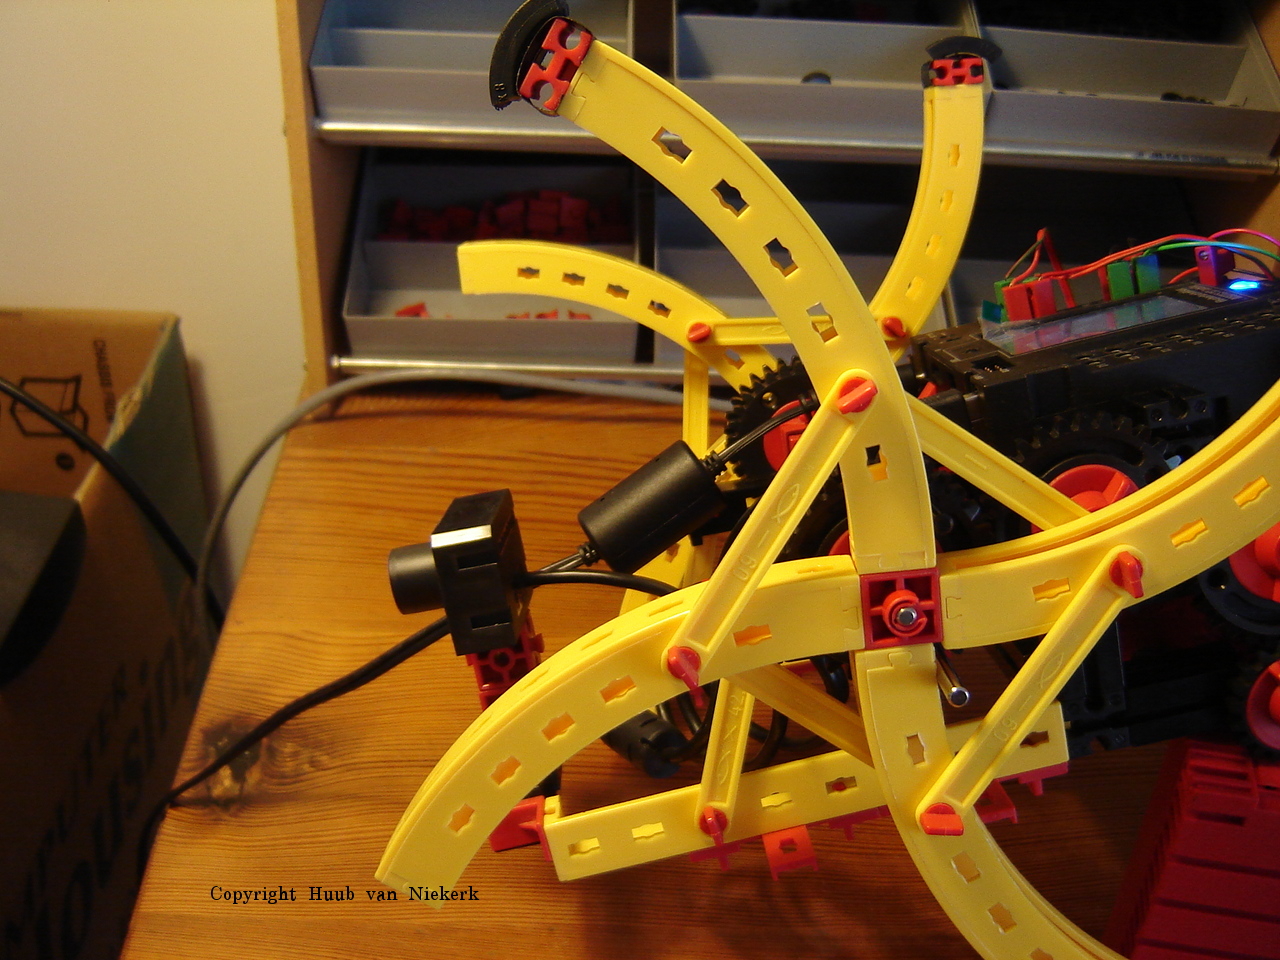
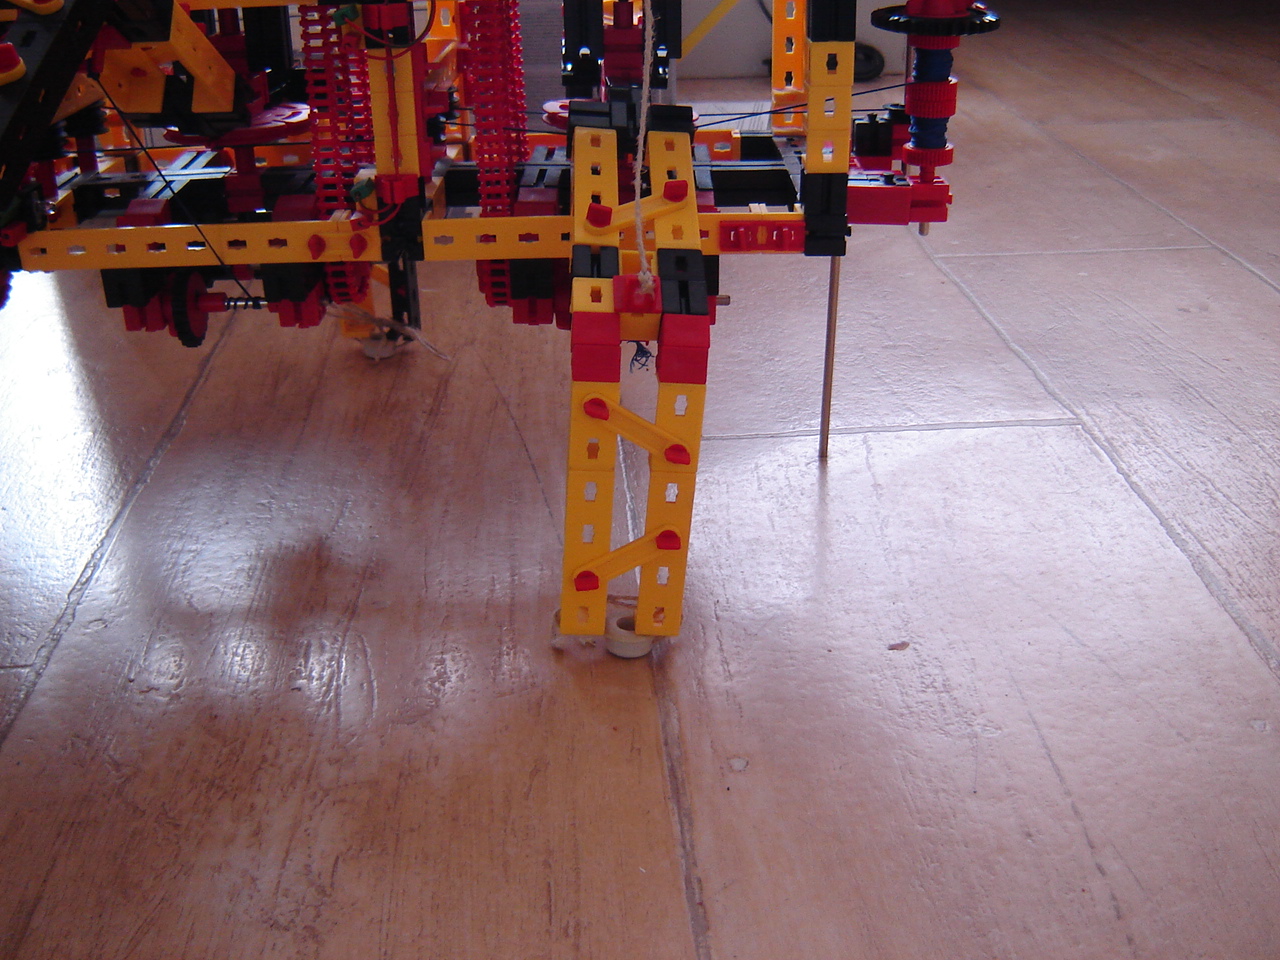
Mirft2: Several issues to solve: gears, guides construction, running time and battery pack. After fixing a gear, close observation shows that the guides may have to be changed. Running time is distance, and this makes the walking. However, with the current setup, will this really work? And how can I add a battery pack? Click the image to watch the video.
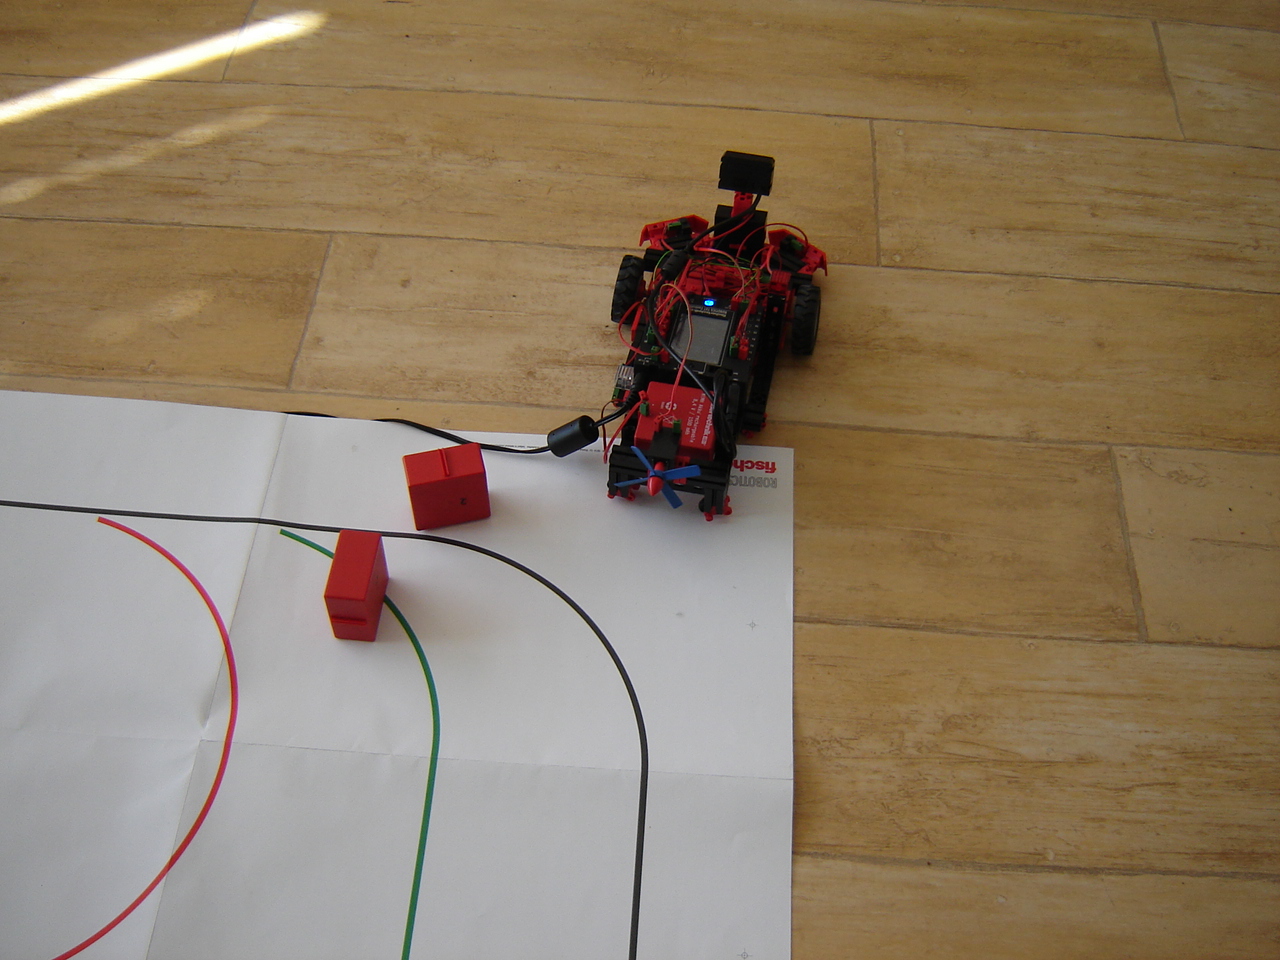
Mydfir: Testing my first driving robot to test the lights again, reveals that they don't work. Changing the algorithm a bit and looking the data file reveals some issues. But it gets stranger. Click the image to watch the video.
RPi: Going on with ssh to play the python side via remote and find some issues. What's the best solution? Click the image to watch the video.

Arduino Mega: With the digital switch not working, that's the focus for this time. Some research show that I have to use a different instruction, but somehow it has a different effect than I anticipated. And how does it really work? Click the image to watch the video.
Hand: After the "poor man's solution" of the upper sensor, the question is if the elbow range can be used fully. For this, I try another frame extension but will it help? Click the image to watch the video.
22 July
BB: With the results of last time, what to do? Some more testing shows that the green track are a bottleneck. So what to do? A drastic solution may be an answer. Click the image to watch the video.
Discovery: why doesn't the sound work? Should do with sonar... so focus this time on sound. Some changes in the algorithm but will it work? Click the image to watch the video.
Mirft2: First, an experiment with the distance. Then, given the limited space for the gears to turn, I change those. Then some insights lead to some reconstruction, but with a result that leaves more questions than answers. Click the image the watch the video.
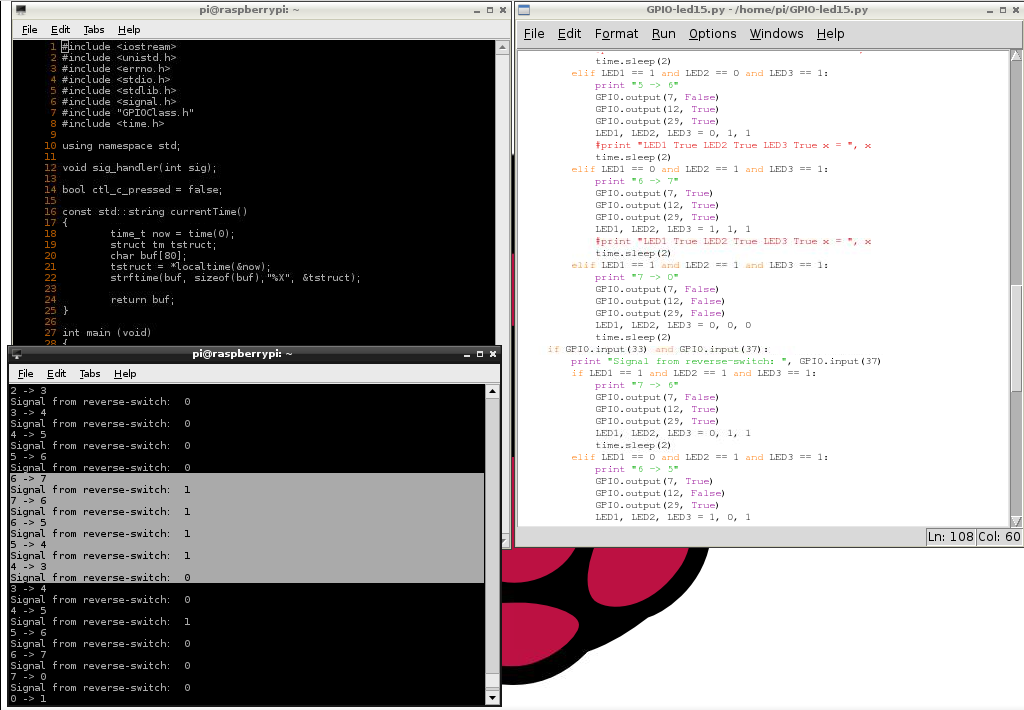
RPi: Since the screen output wasn't the same as the piscope output, some coding needs to be changed. Also, it is desirable that both sides are started at (almost) the same time. Chosen to be from C++, this needs some experimenting. Click the image to watch the video.
ArduinoMega: With the chain added, I can also add a switch to have an LED burn. This requires some recoding and rewiring. As usual, some issues show up. Click the image to watch the video.
Hand: Big issues: sensors are not responding properly. Should I change the algorithm, the hardware or what? Click the image to watch the video.
15 July
BB: Somehow it doesn't work the way it should So it time to look at friction, stability, height and the sensor again. Click the image to watch the video.
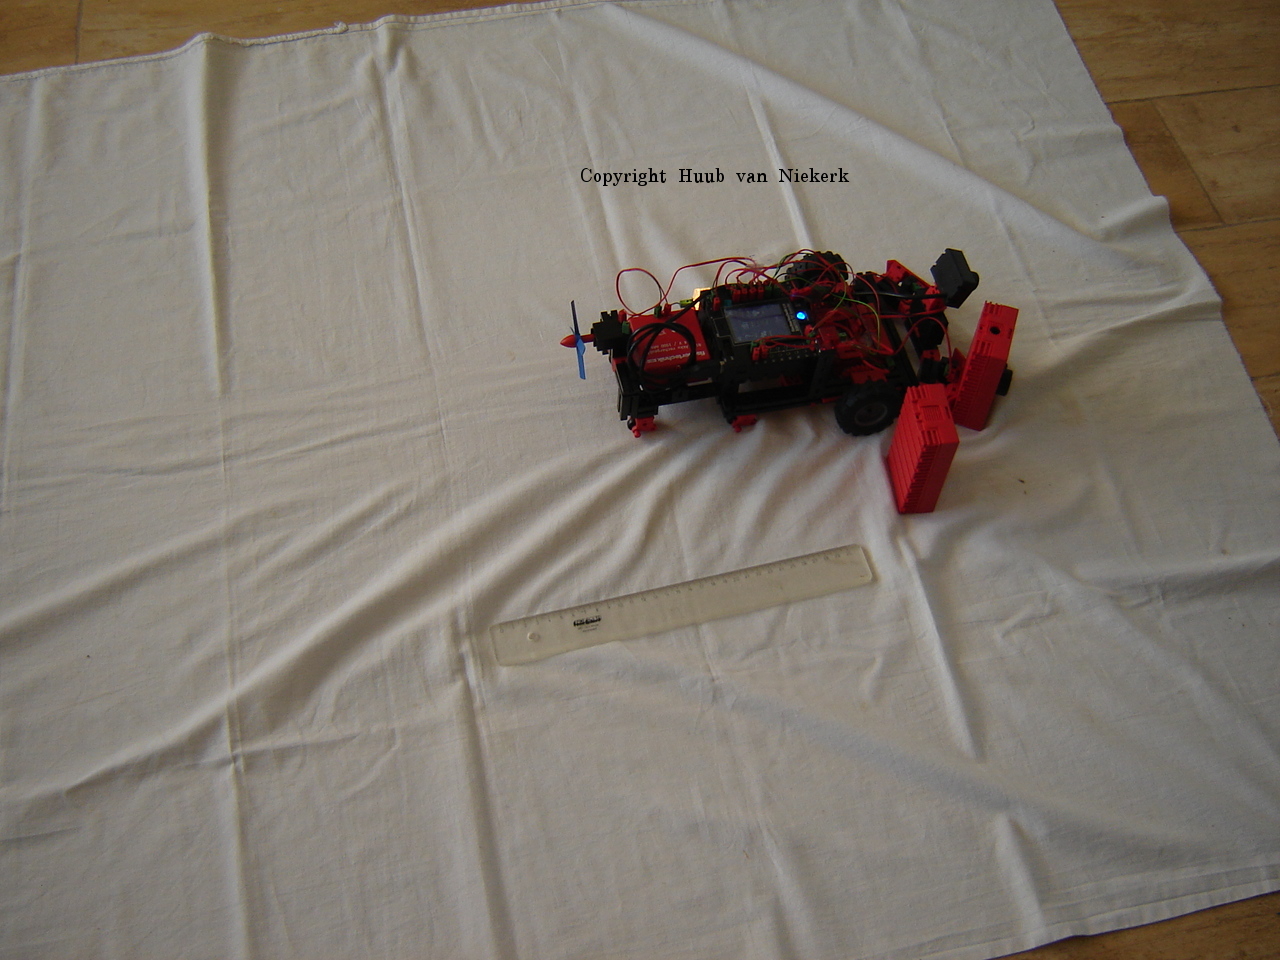
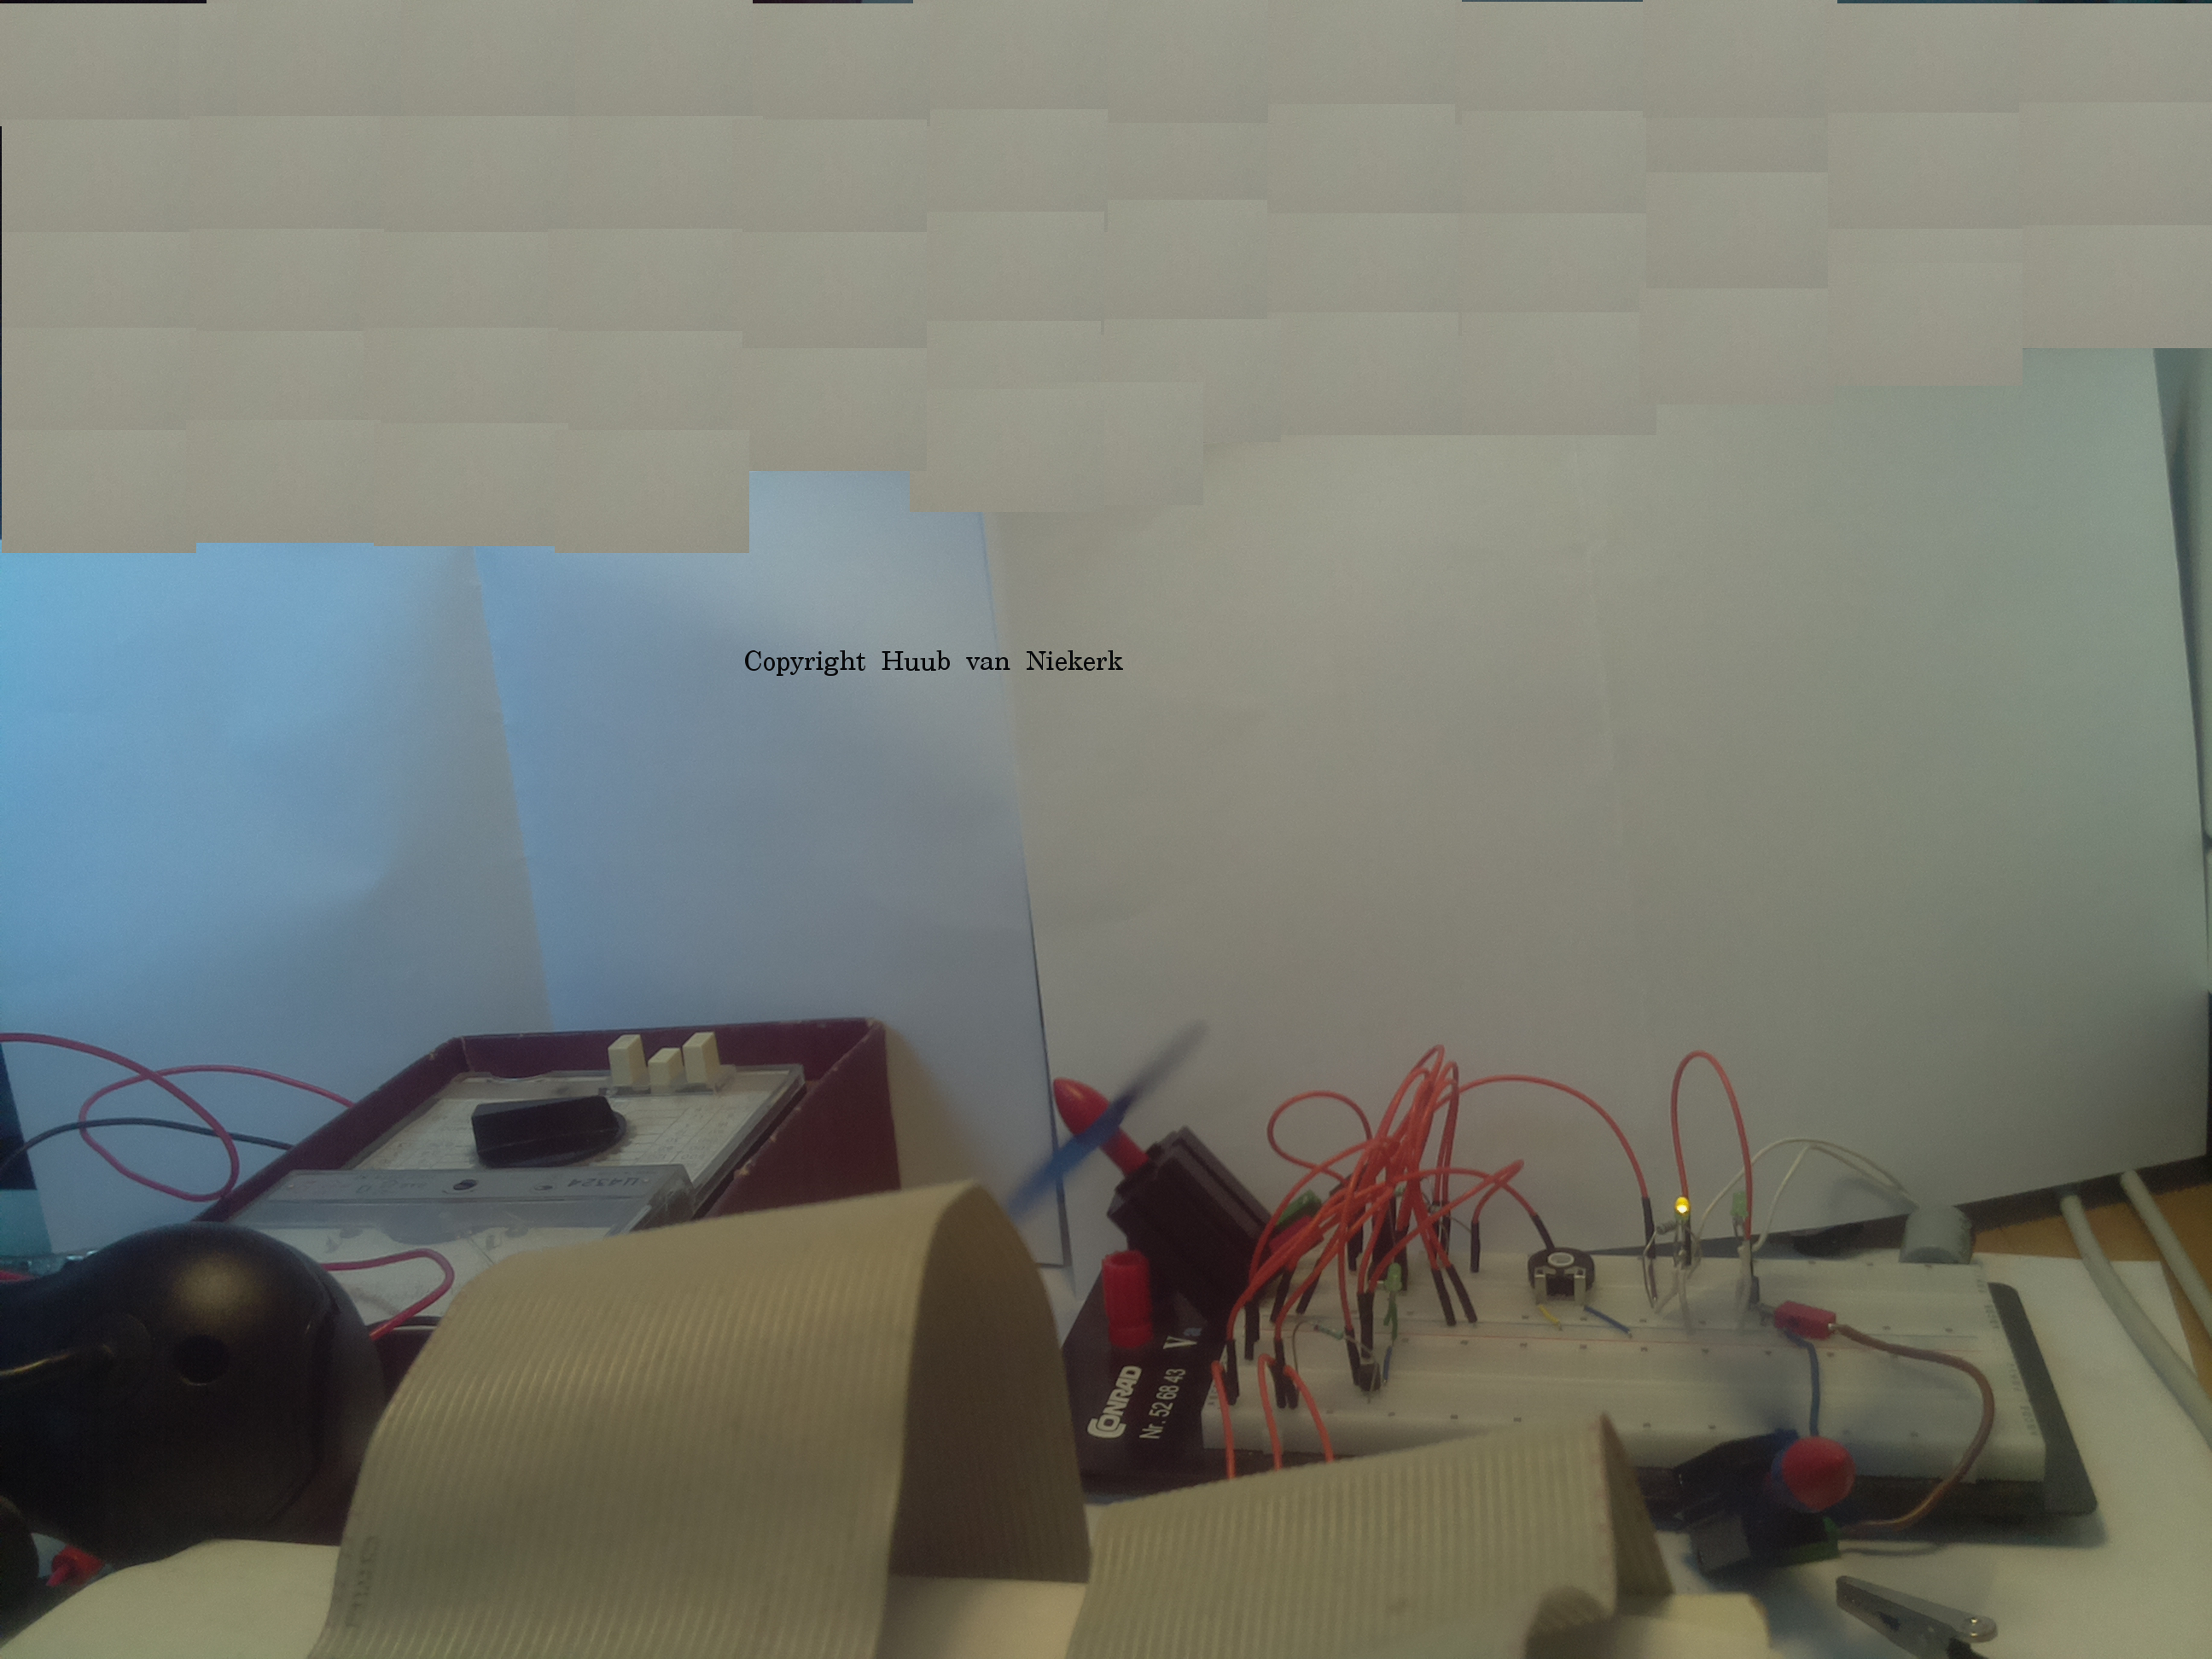
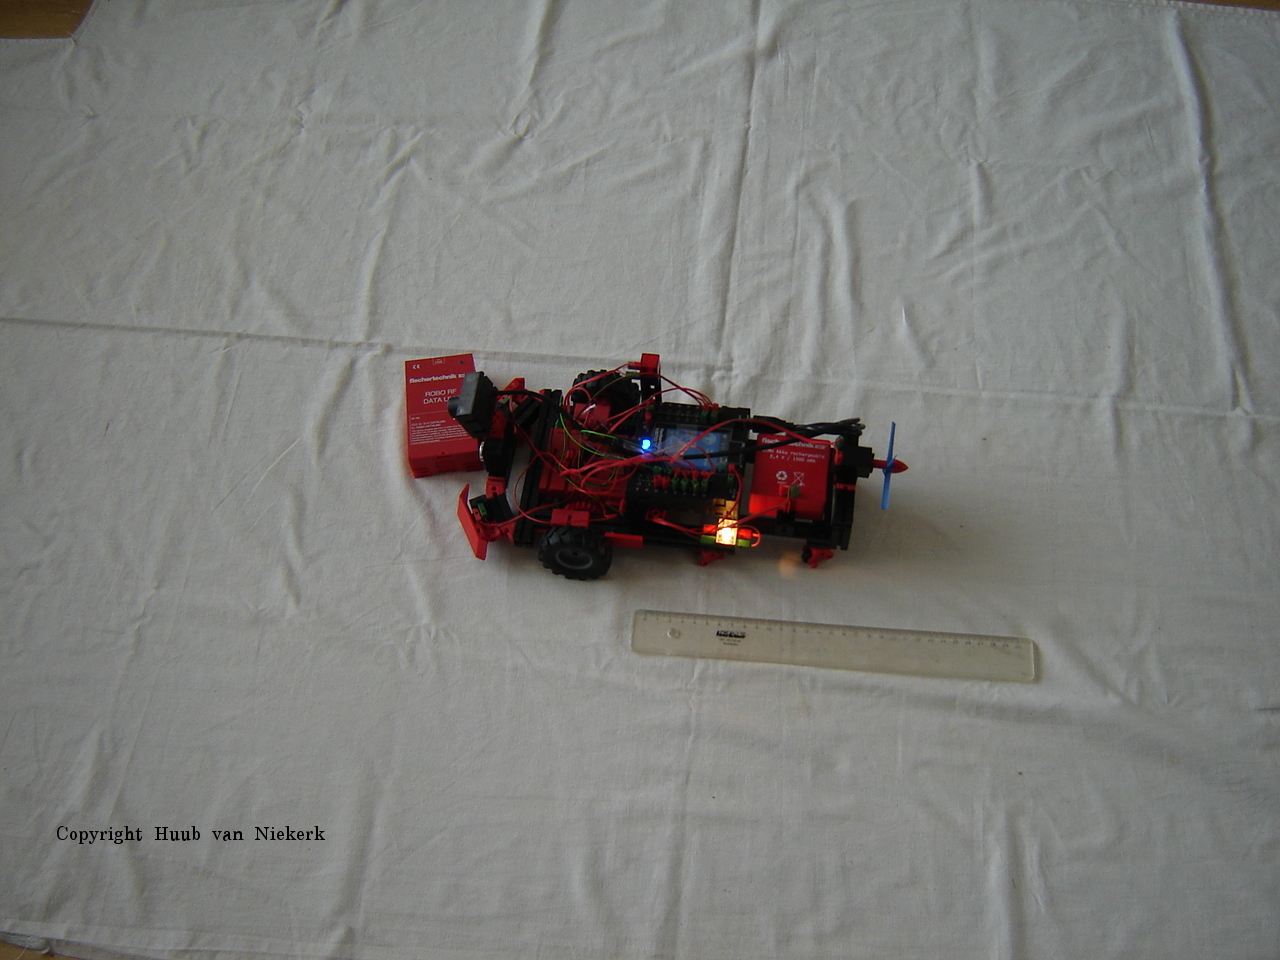
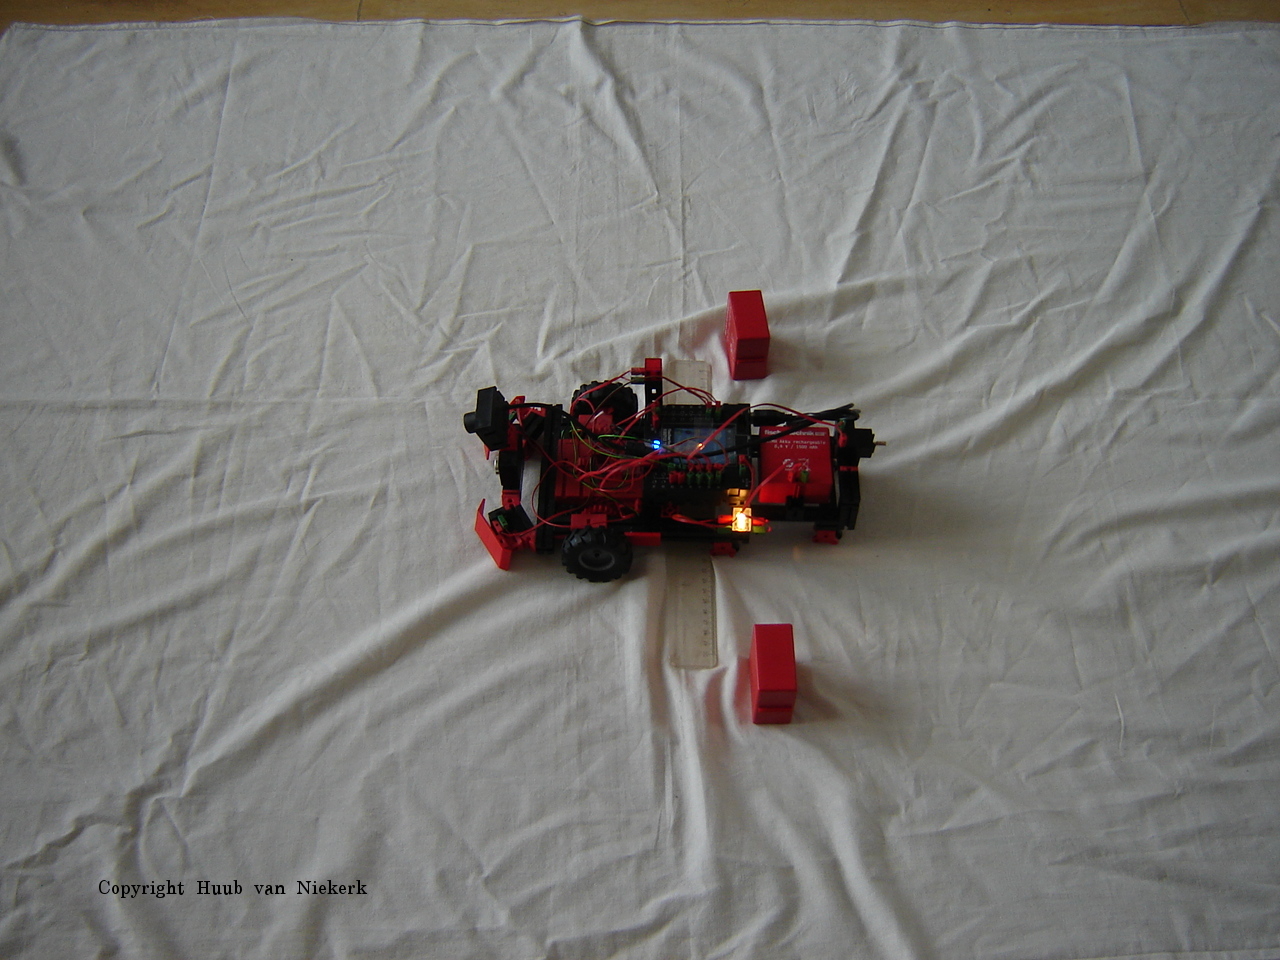
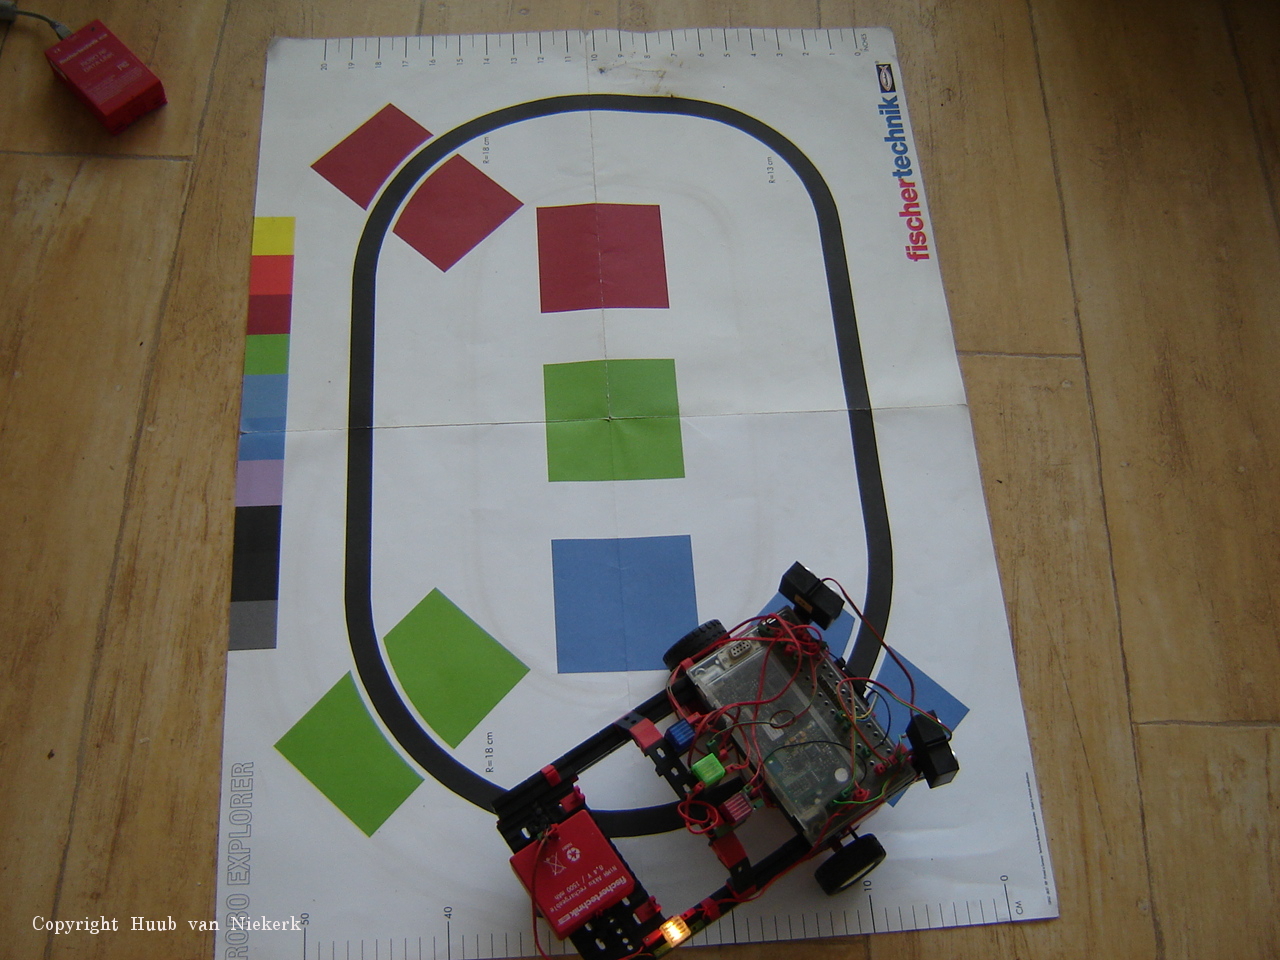
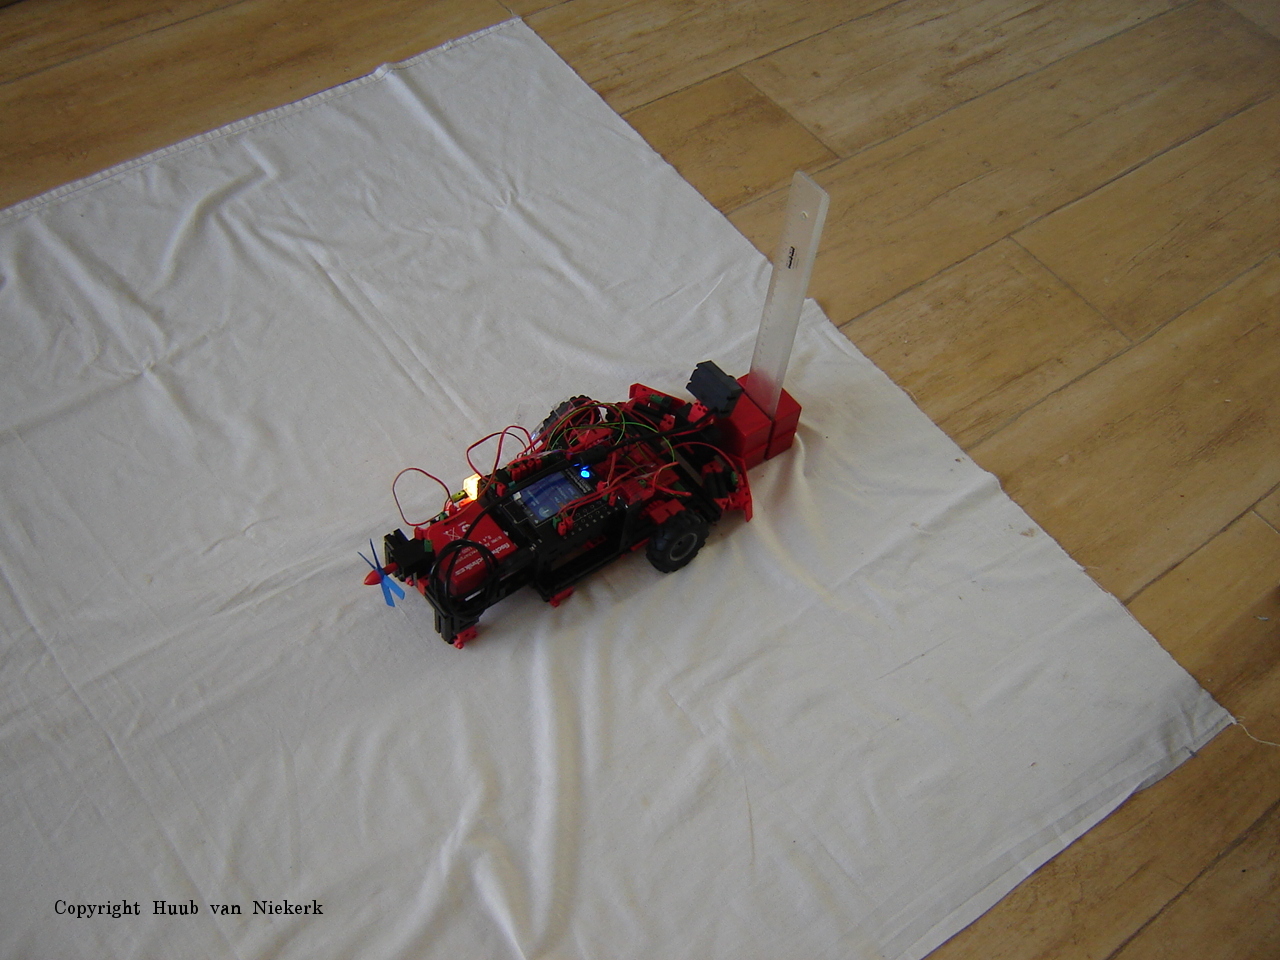
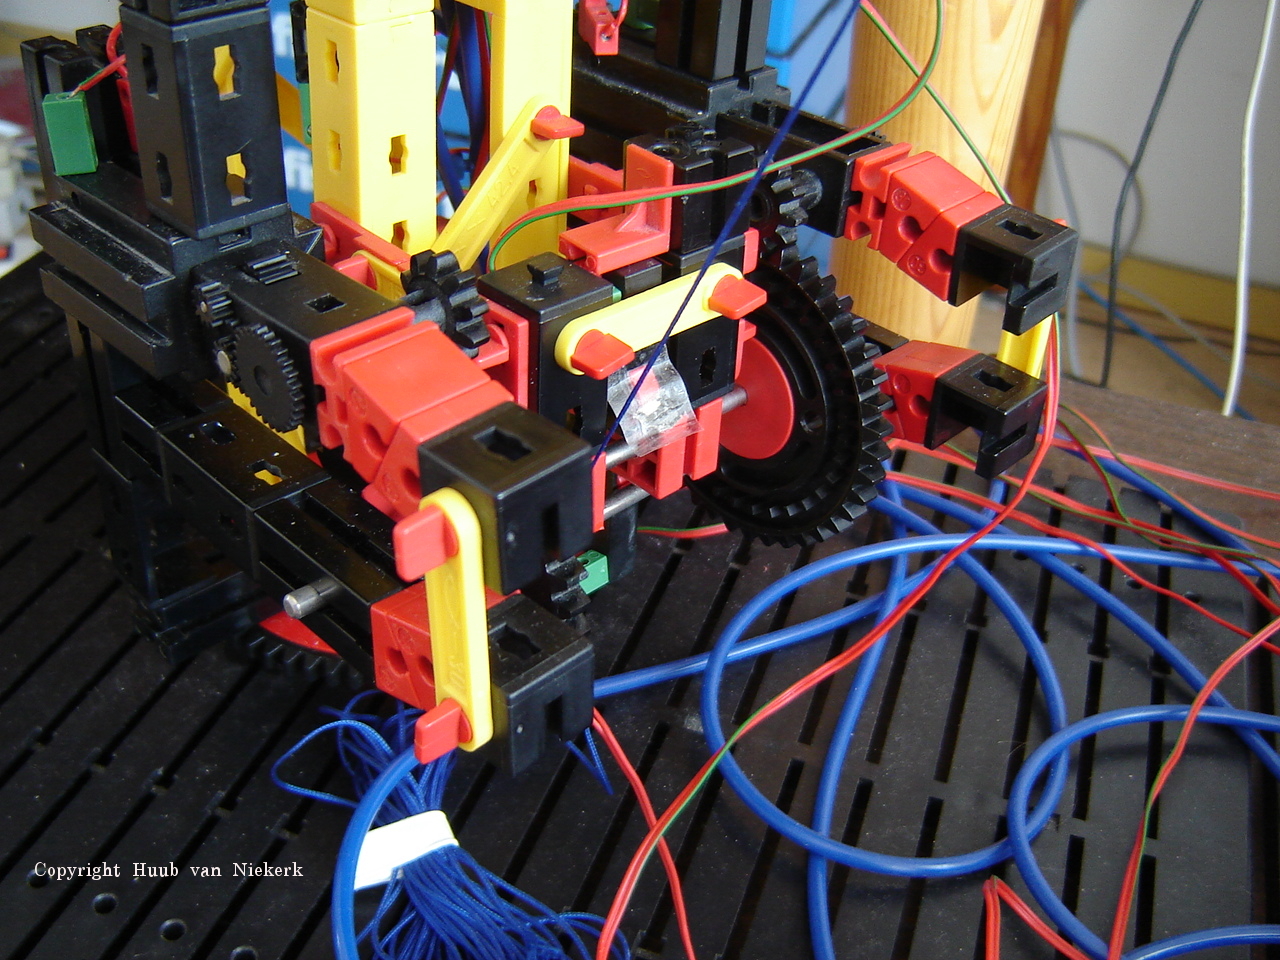
Discovery: After updating the ftrobopy to 0.96-test, I hope for some nice things. With a reconstruction for the sonar in mind, some tests with interesting results. Measuring reveals detailed info. Still questions about why things go the way they do. Click the 1st image to watch the video. The 2nd image is taken by the TXT camera and show the ruler between the batterypacks.
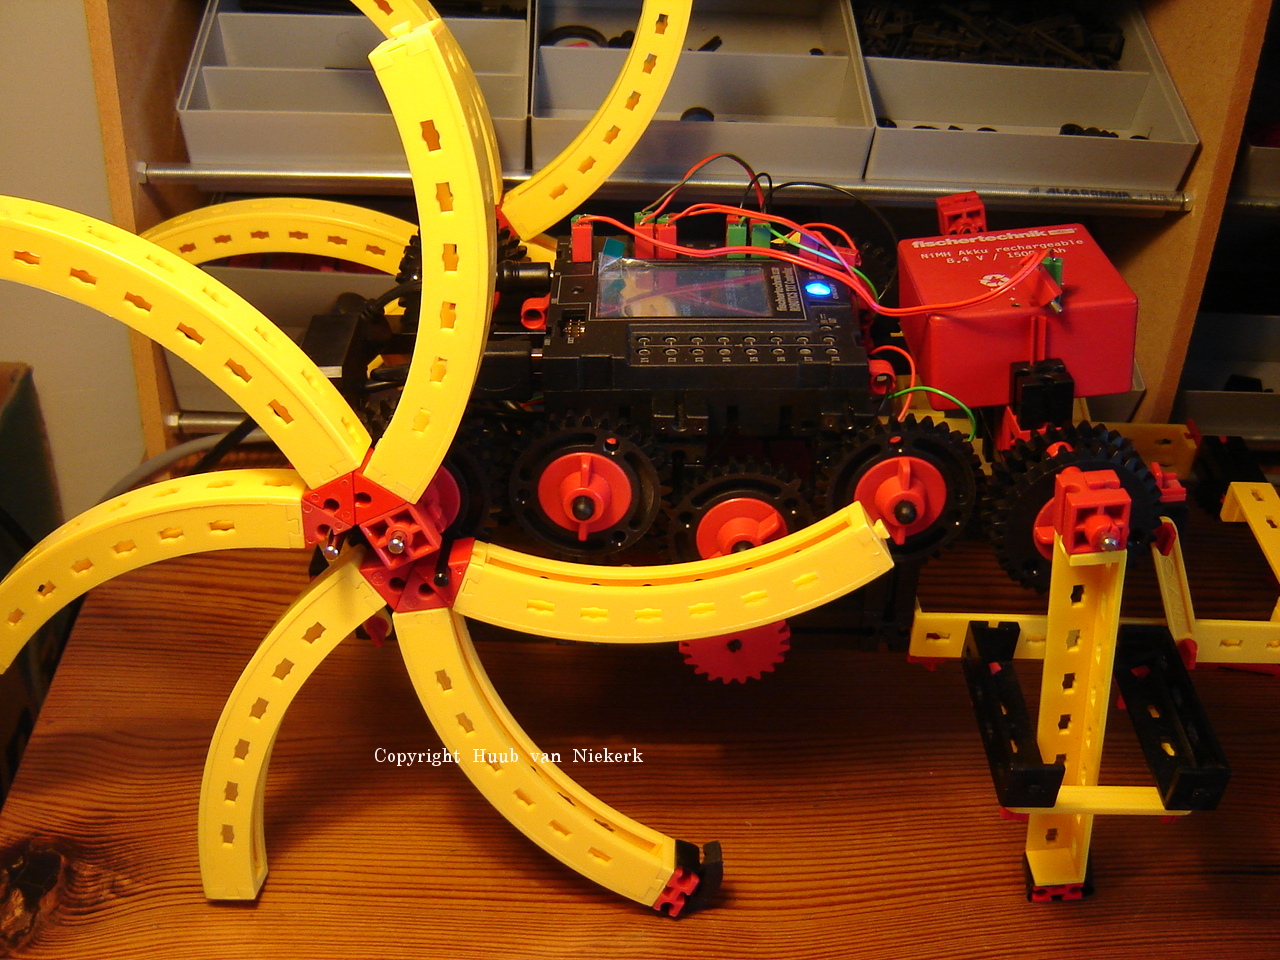
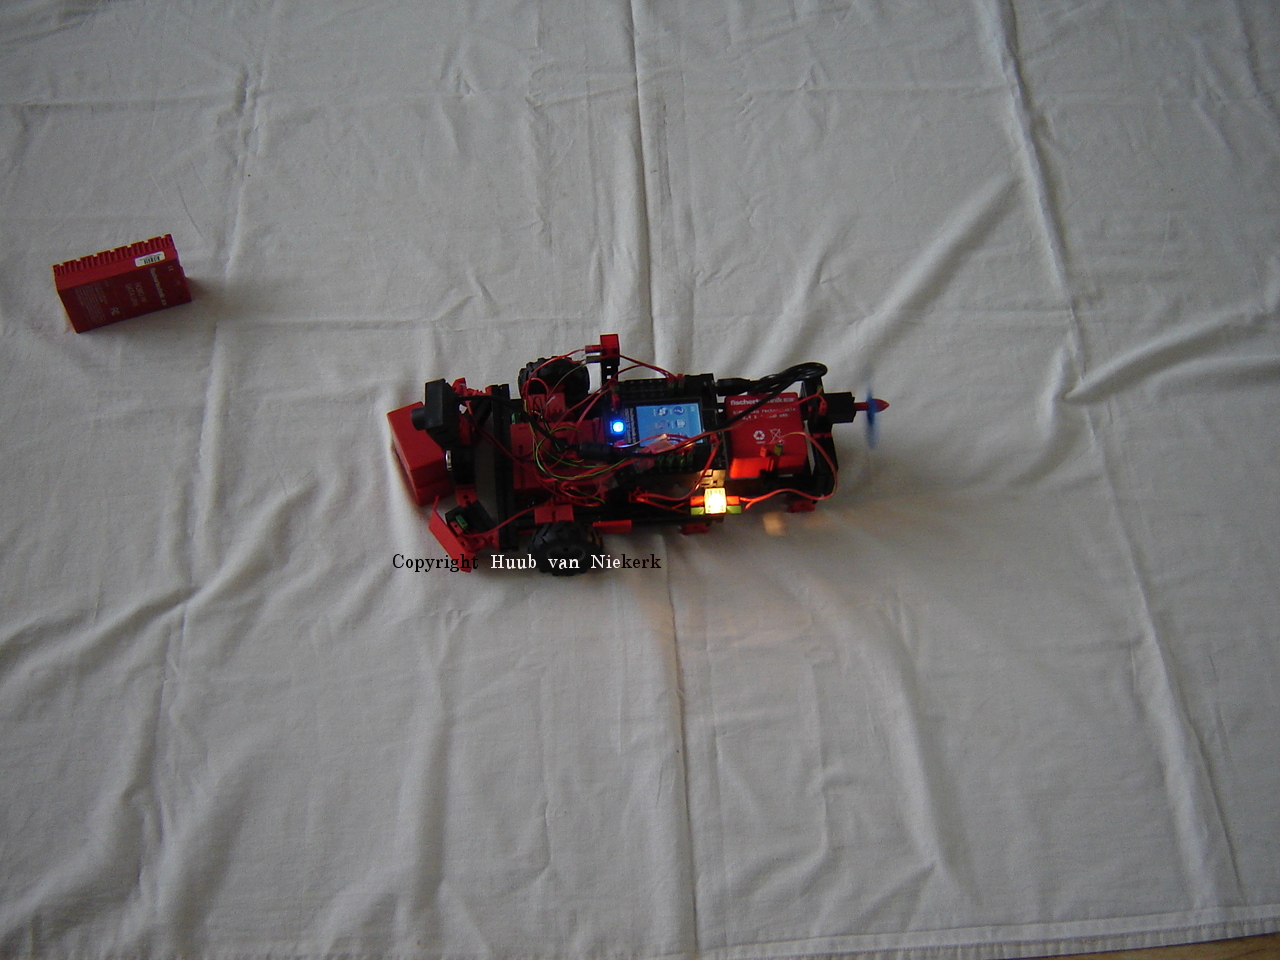
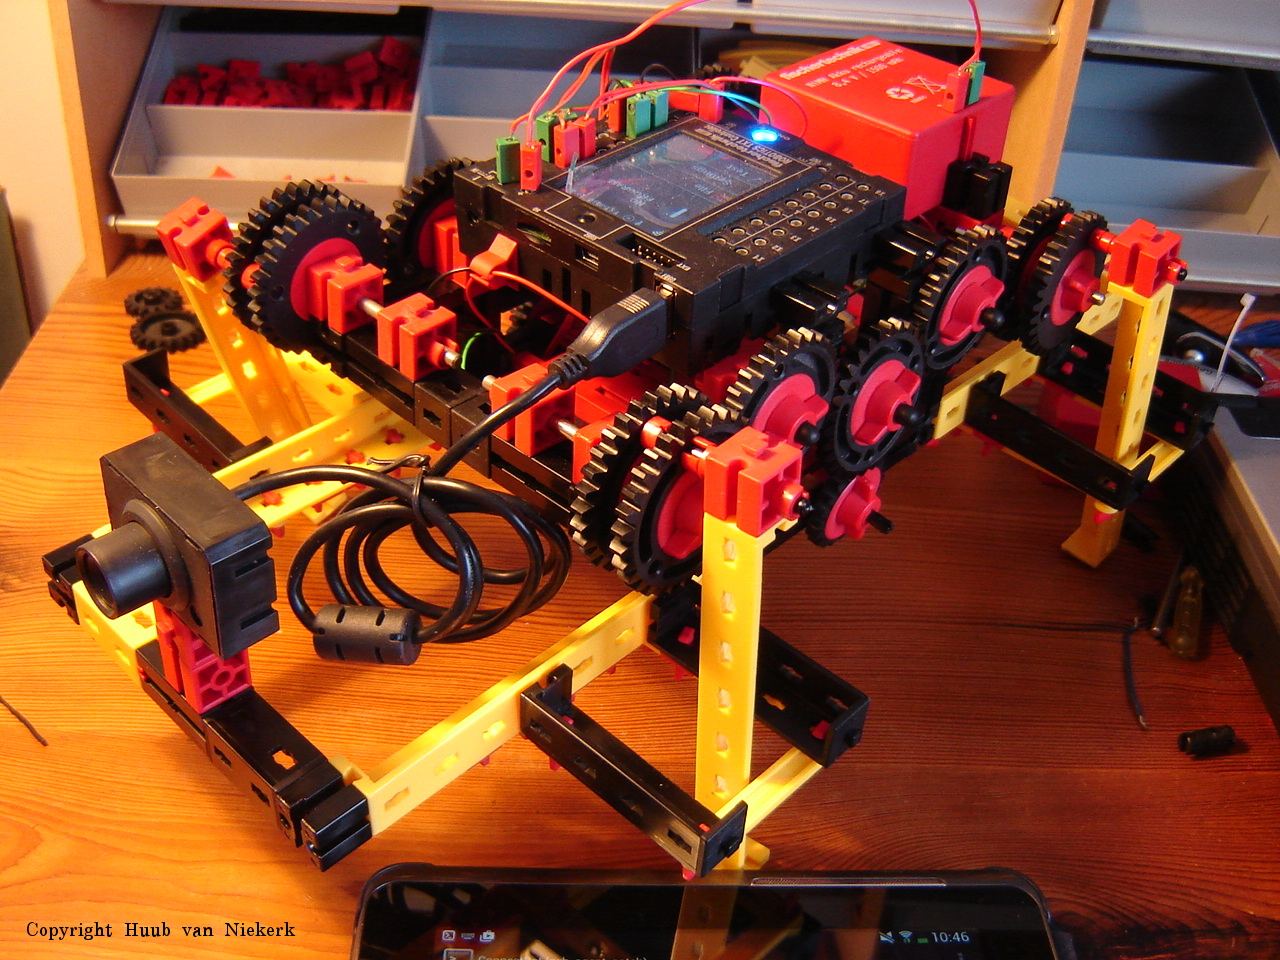
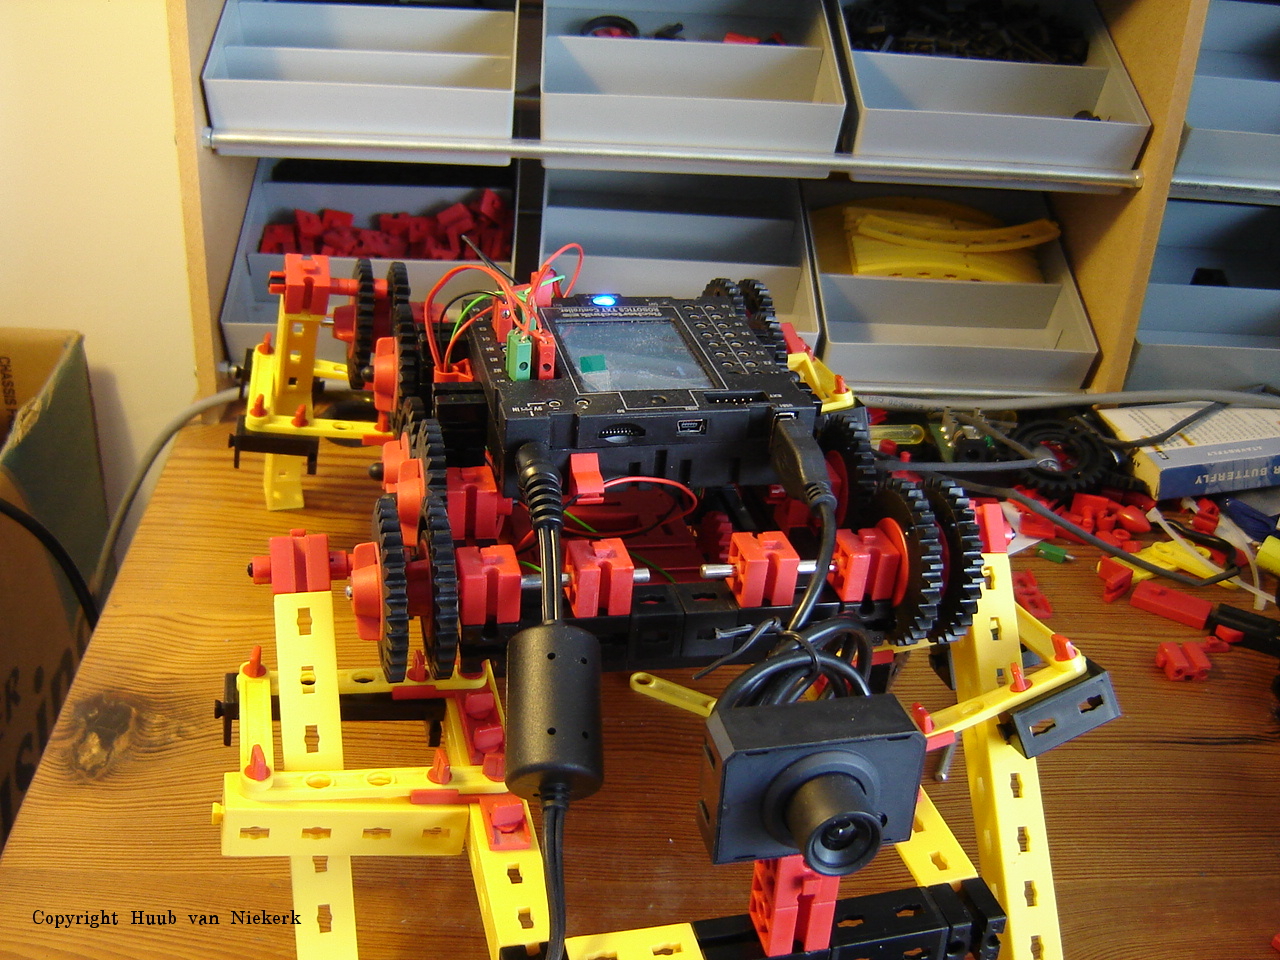
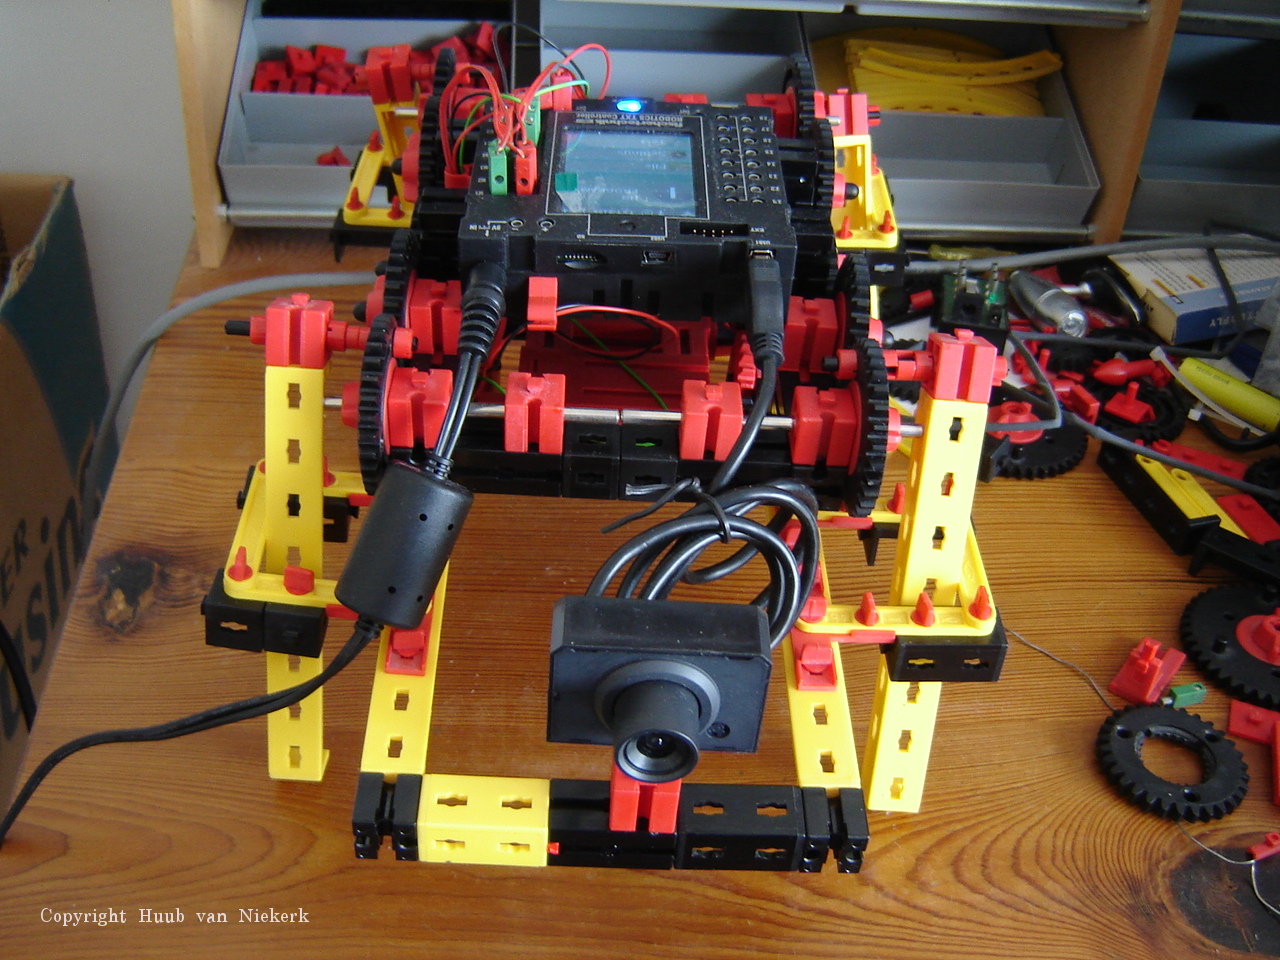
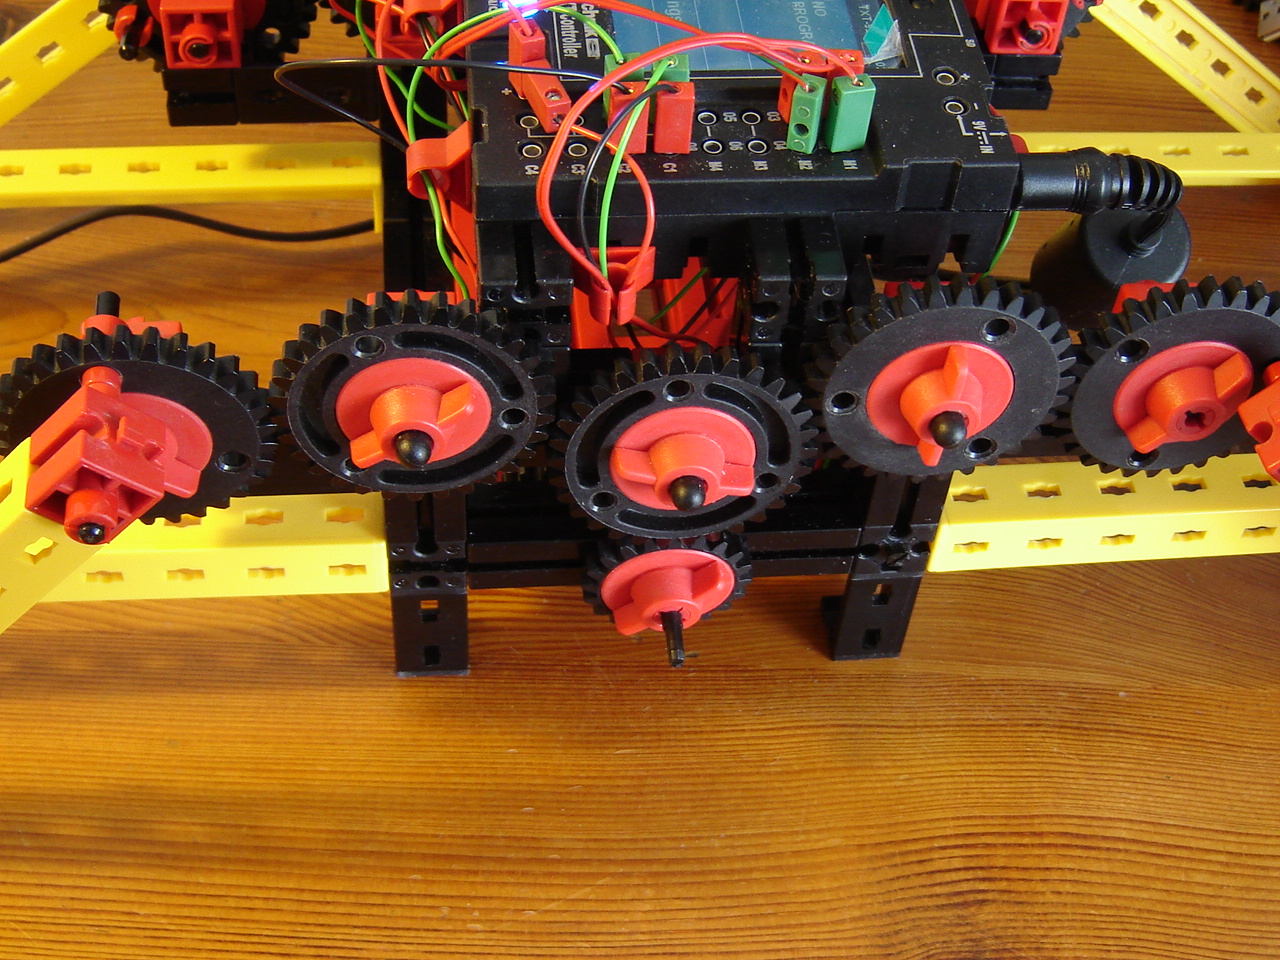
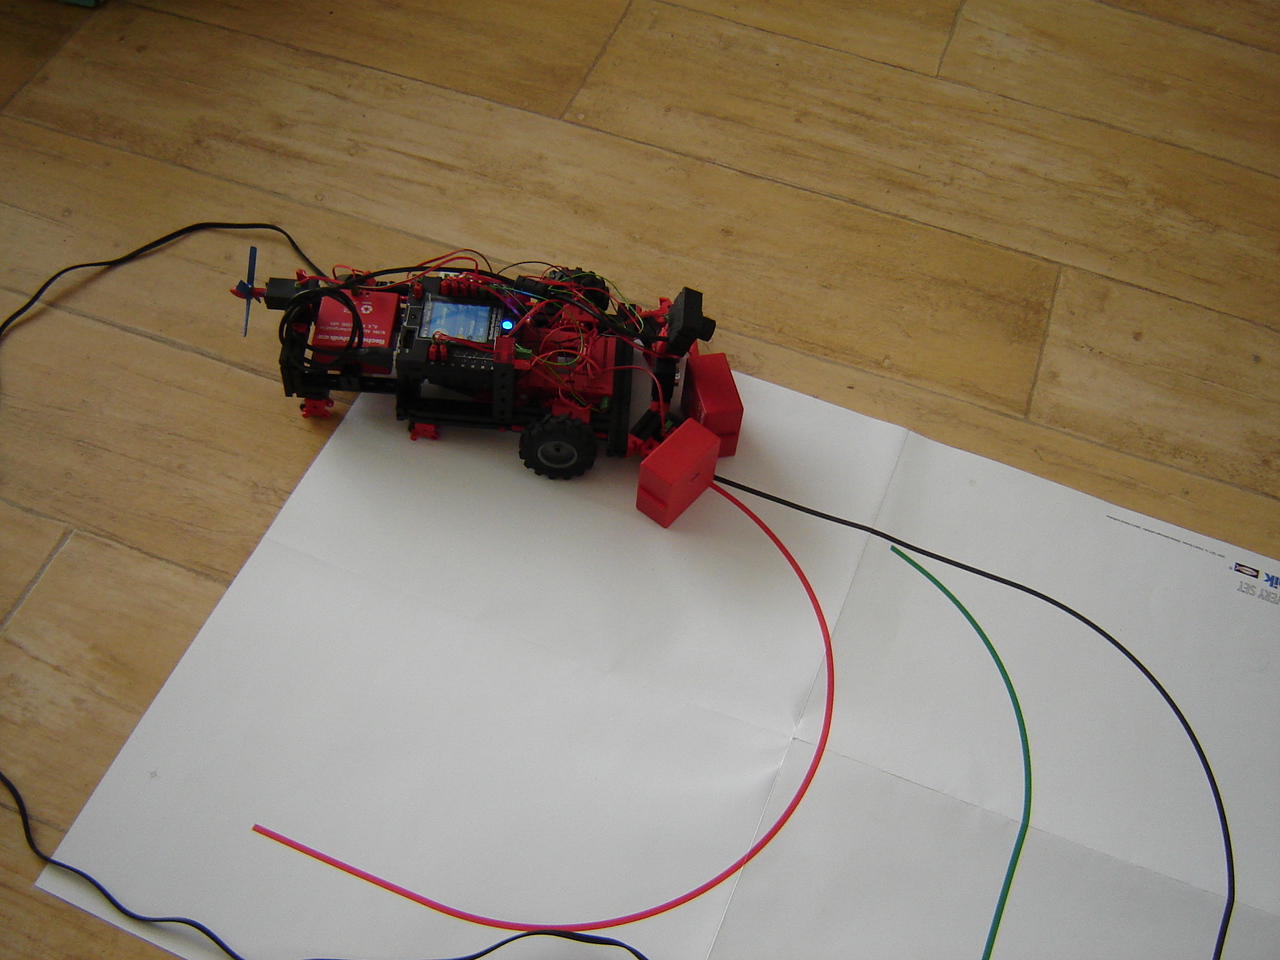
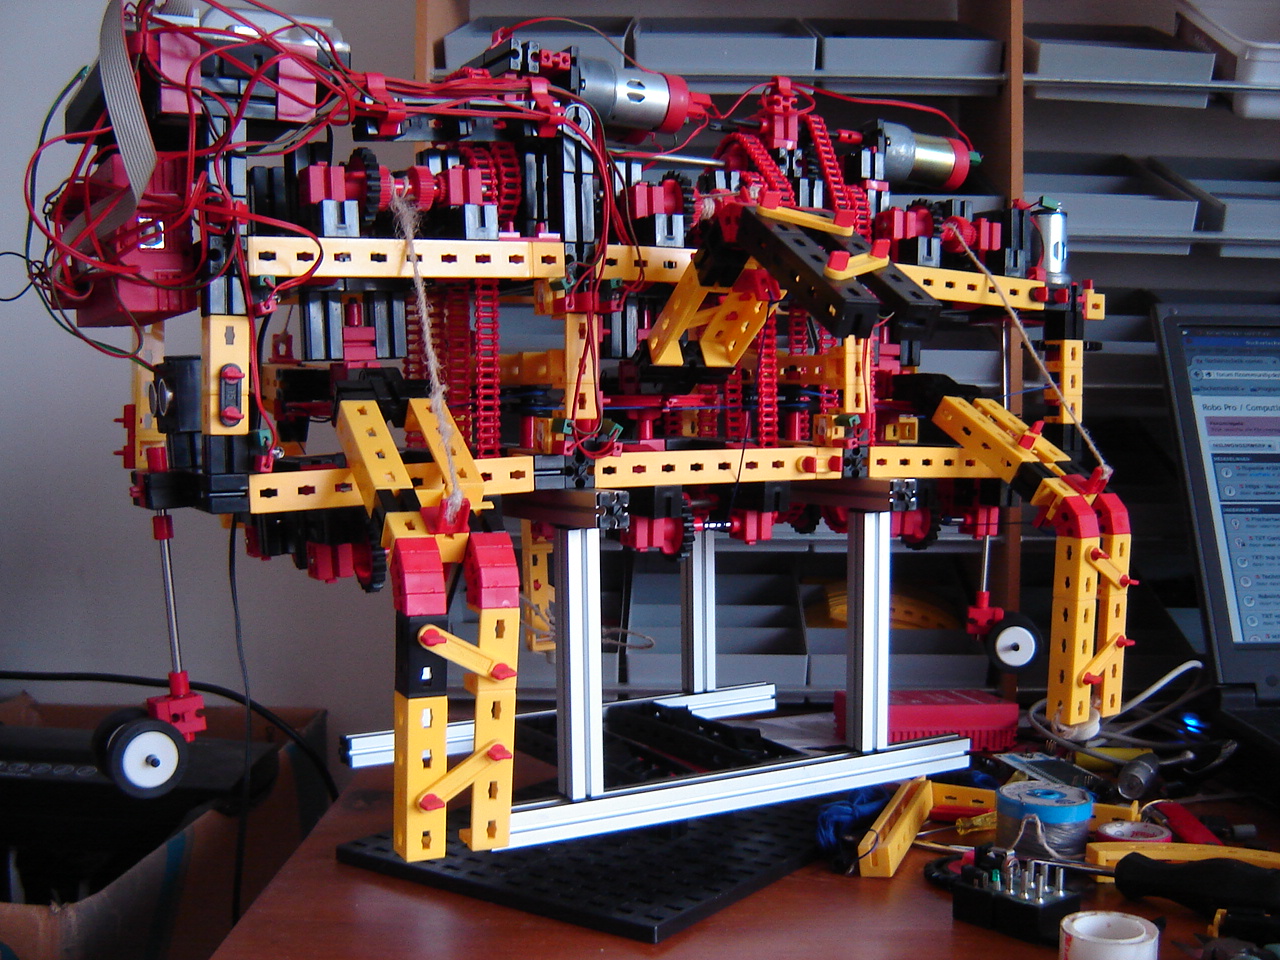
Mirft2: After a suggestion to change the speed of the motors, things improve. But also leads to new insight. Then a leg shows a problem...replace? Then the recurring issue of the connection. Will this be solved? Click the 1st image to watch the video. The 2nd image is with the USB camera and shows the support for Mydfir and the rear-end of Discovery.
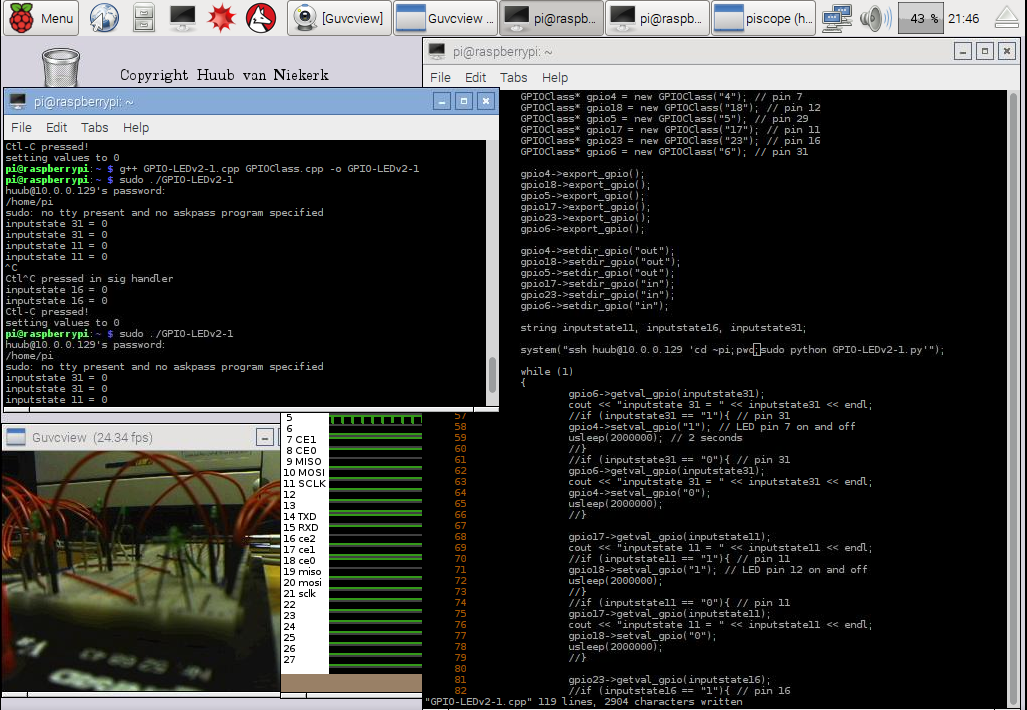
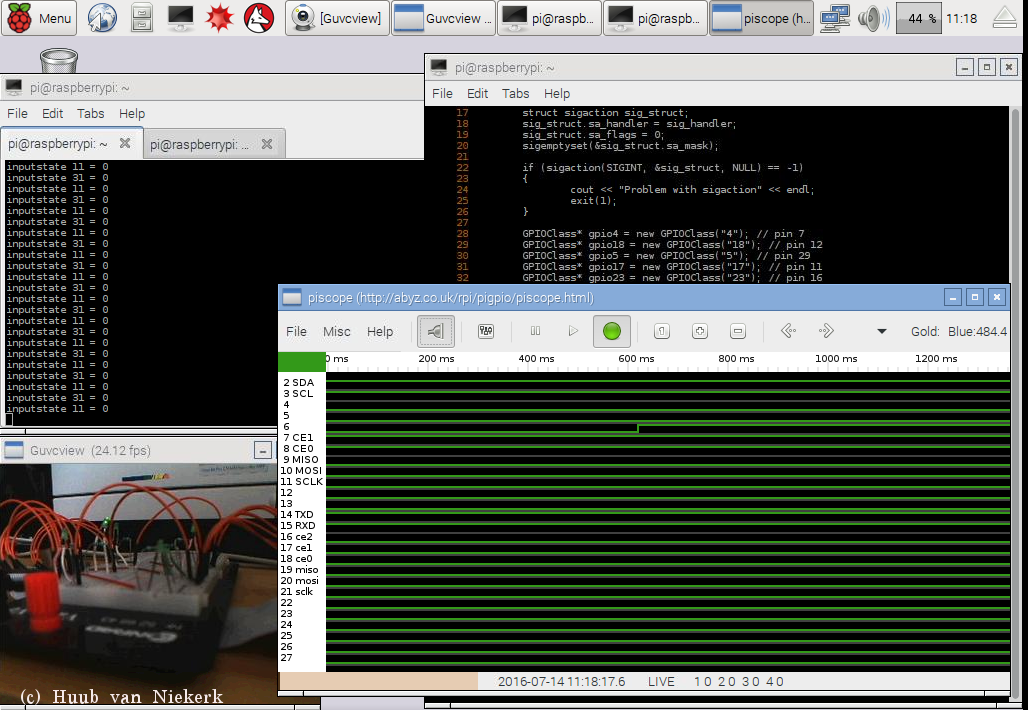
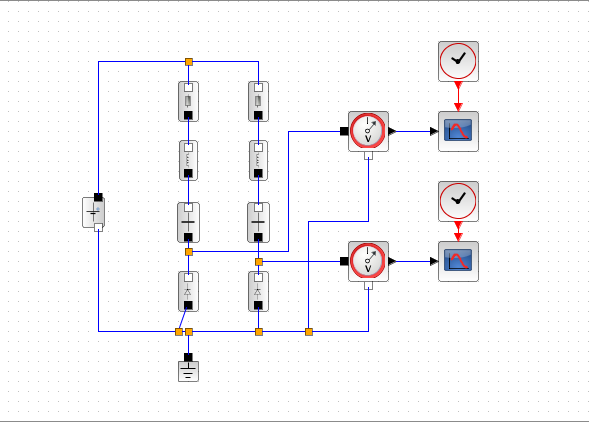
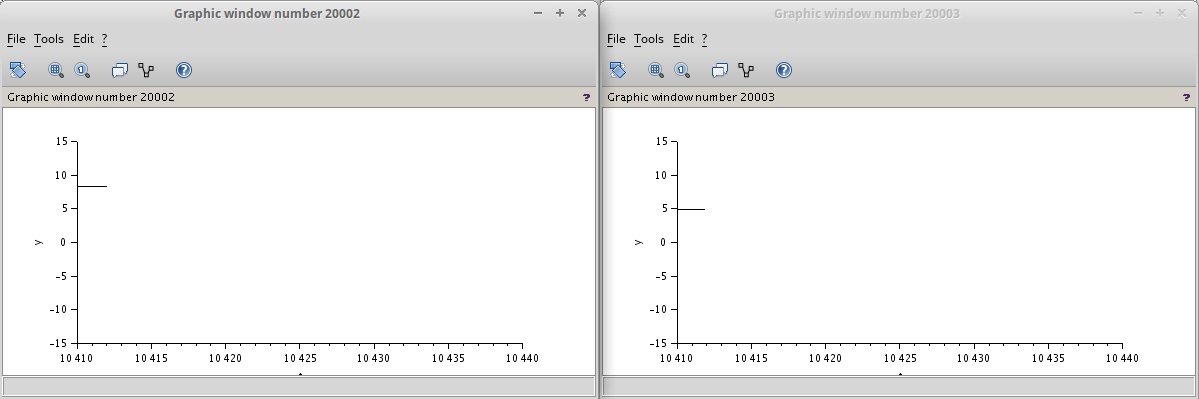
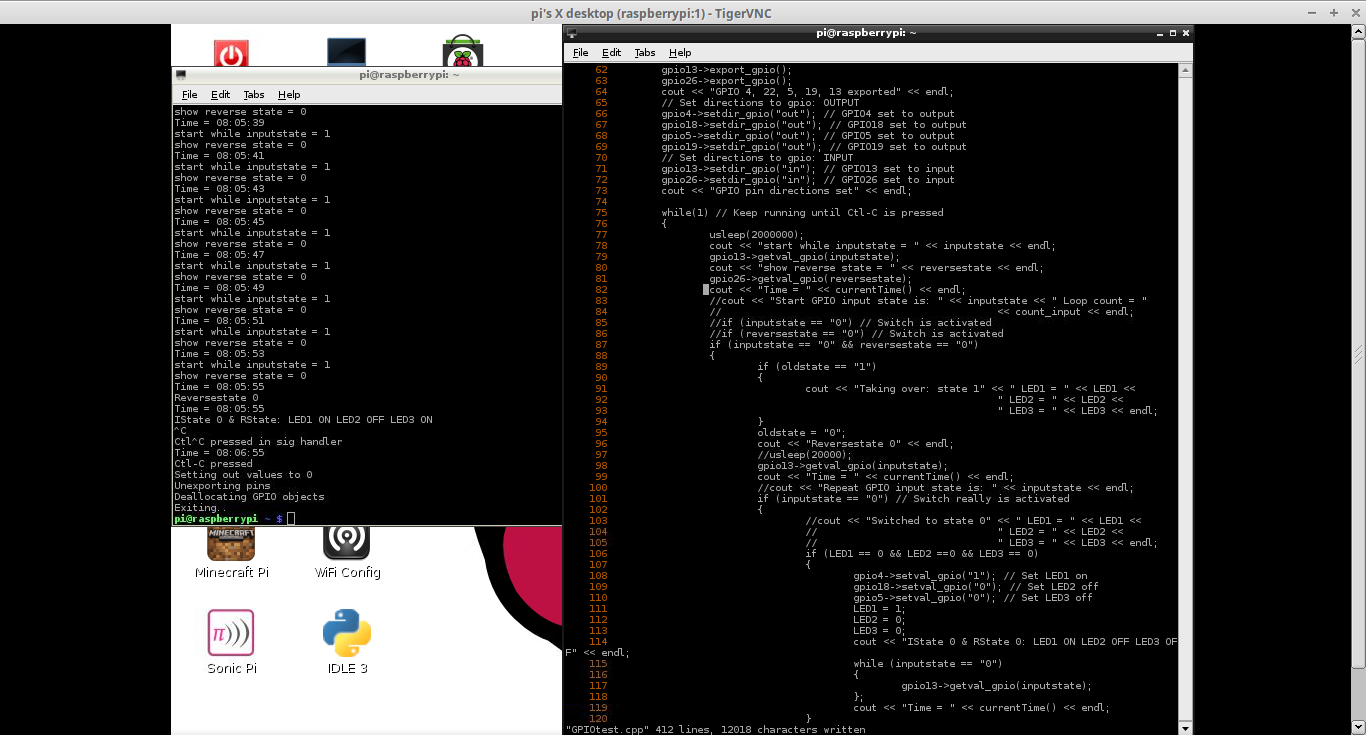
RPi: After installing piscope, comparing RPi1 and 2 shows a timing problem on the 2 side. A close look is needed and reveals something odd: picscope shows a signal change while the screenoutput doesn't?
Arduino Mega: Last time I added motor 4, which didn't run. After a closer look at the circuit, the errors become clear and solved: 4 motors running. This brings a new idea forward and a new simulation in SciLab/XCos. But it turns out that a new star can be tough. Click the 1st image to watch the video.
Hand: Time for some programming. After a nice start, it turns out there's a problem in the algorithm, but in the hardware as well. Oops. How to solve this? Click the image to watch the video.
8 July
BB: Since the sensor isn't touched, it better be placed in a different way. Also, in which way is the fan force better: pushing or pulling? Reconstructing and testing. Click the image to see the video.
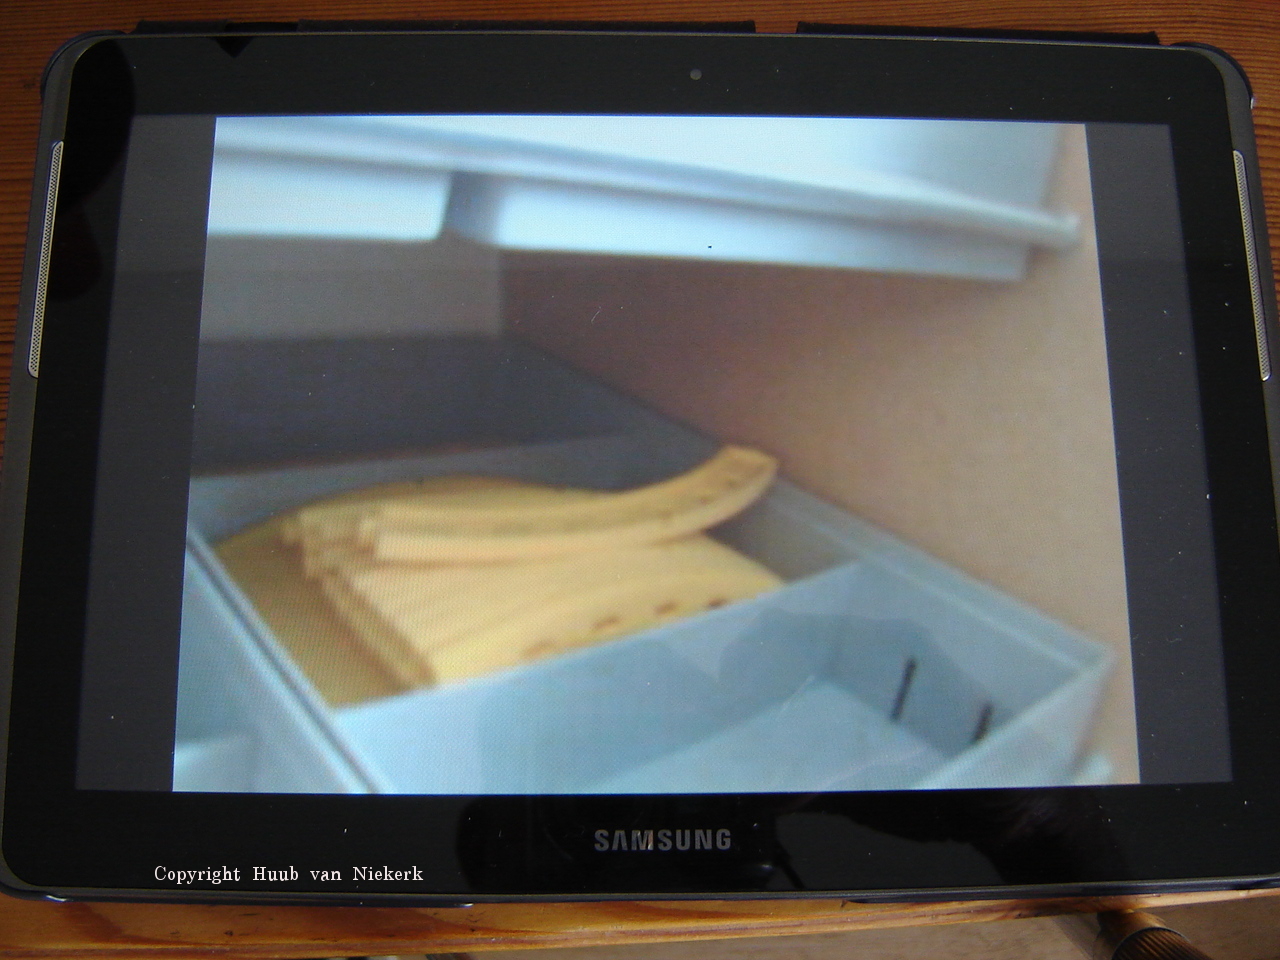
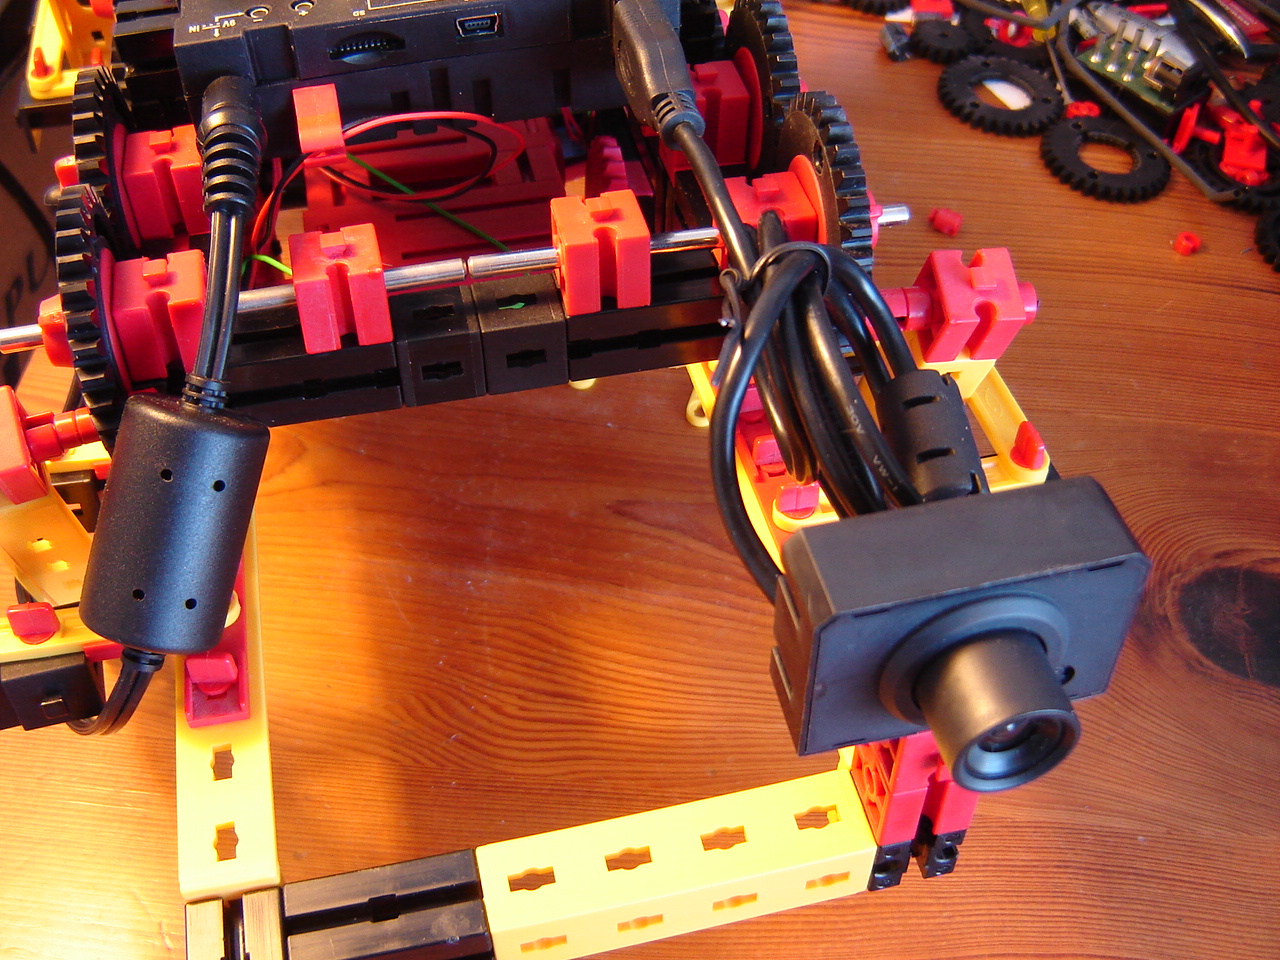
Discovery: On request by fischertechnik support, I made a short video showing how things go wrong the same way as with the original controller. Click the 1st image to see the video. Then I do some tests again, first without accessing the camera. Click the 2nd image for that video.
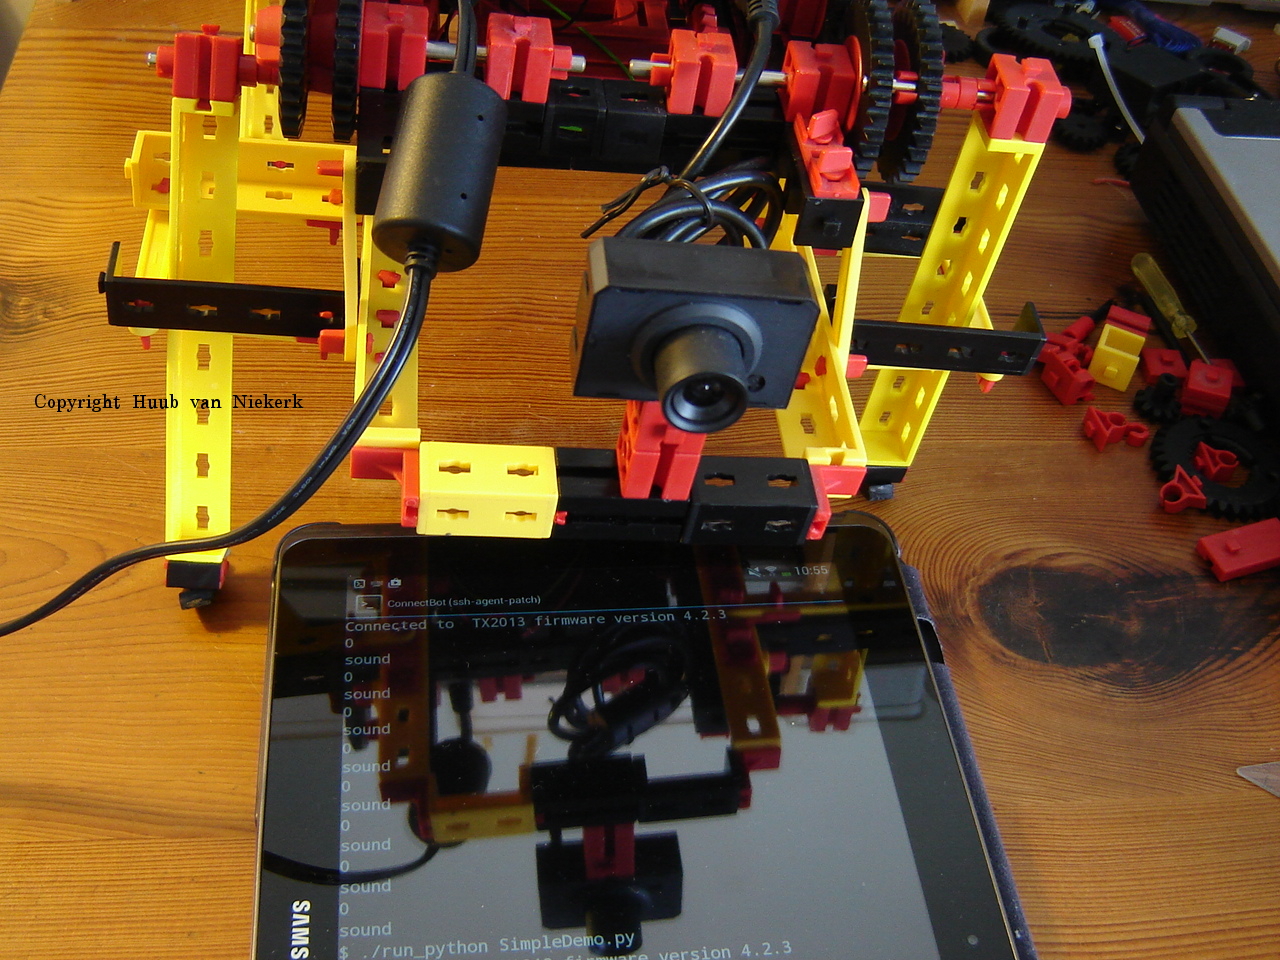
Mirft2: Support got back to me: they'll test a bit later. The creator of the ftrobopy library released a test-edition of a new version. Since both Discovery and Mirft2 use the TXT controller, I use Mirft2 for this test. After installing it (github/scp/....), there are actually some nice results. Click the 1st image to watch the video.
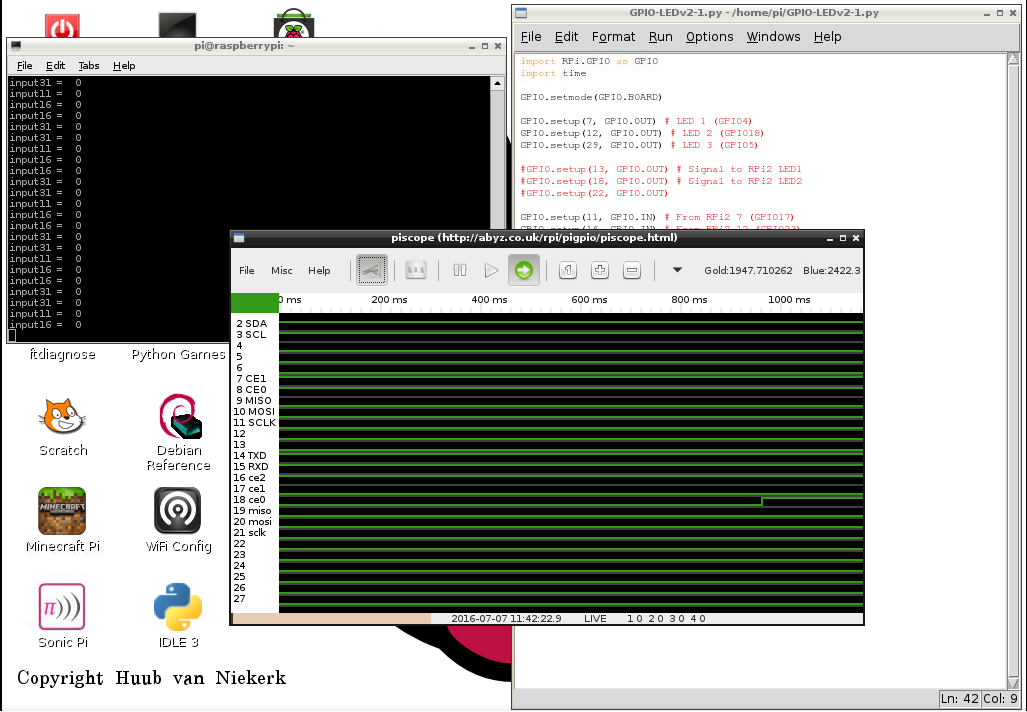
RPi: Due to odd results, testing the RPi2. Then I find piscope which gives a nice view, but with a slight twist. Also, some LEDs work again.... Click the 1st image to watch the video.

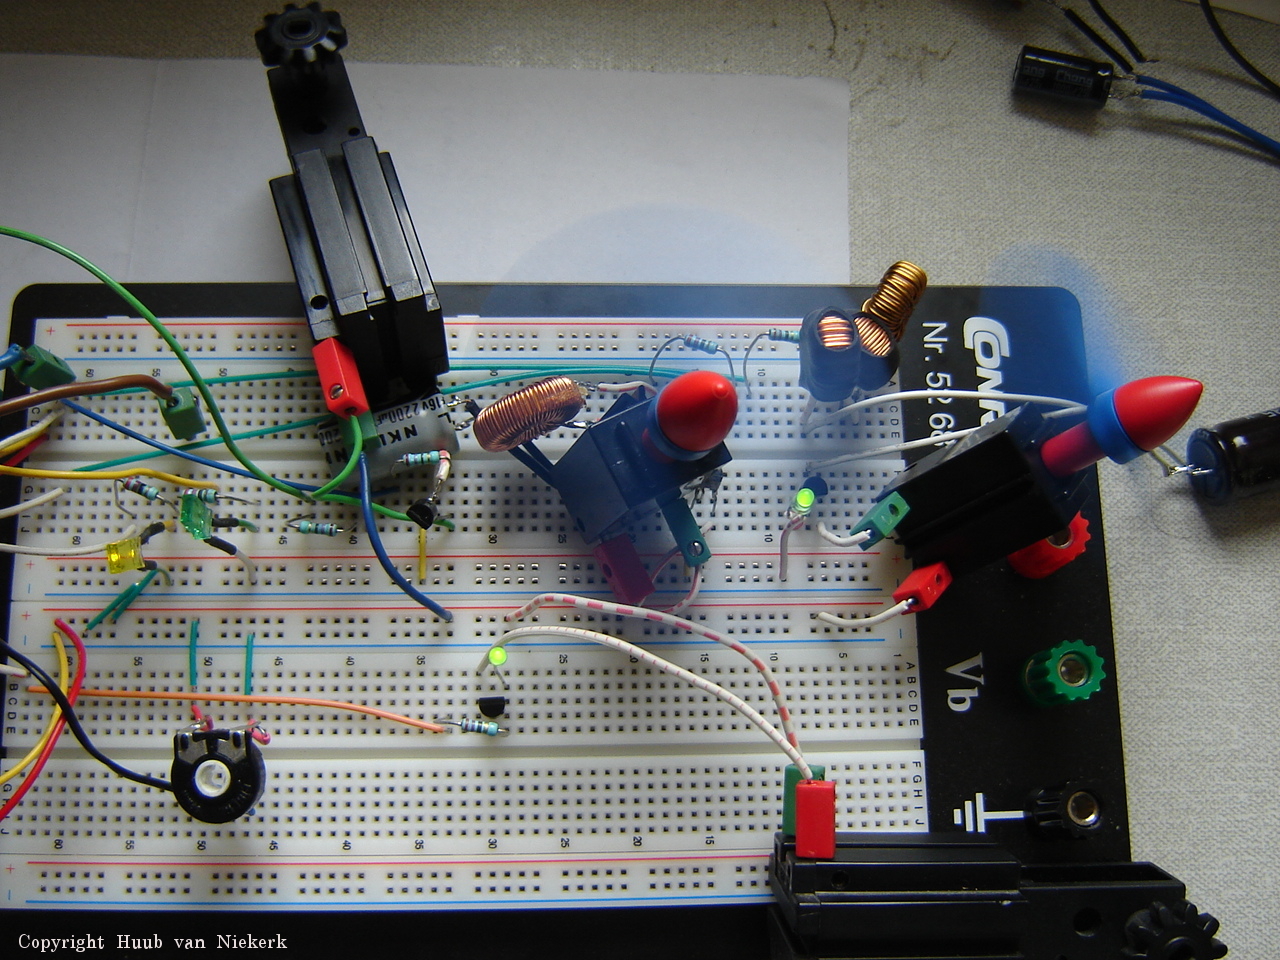
ArduinoMega: After some more experimenting with inductors and motors..it works, somehow. This leads to the question: can I add another one? Click the image to watch the video.
Hand: 3 focusses this time: replacing the elbow pivot axis, somehow placing the sensors for the lower gear and fixing the movement of 2 fingers. One proves to be easy, one less easy and one...what to say about that. Click the image to watch the video.
1 July
BB: Last week ended with 2 questions: is the DataLink causing delay and why is the touch sensor not working? Testing gives answers and more and a reconstruction is needed. Click the image to see the video.
Discovery: After preparing the replacement controller, it's time to test. Will it perform better? Some revealing code issues (oops...) as well. Click the image to see the video.
Mirft2: With the camera test, it isn't flawless. The code hangs for some reason, so time to seriously debug. Which doesn't goes flawless either. So what's up? Click the image to see the video.
RPi: Time to debug... or rethink the setup. With the vnc server refusing to act properly again but this time more stubborn than other times..what to do? Then things go an unexpected way, so time to debug the hardware more thoroughly. Click the image to see the video.
ArduinoMega: Why is that 2nd RLC motor not working? Measuring voltage gives a clue, but will recoding, rewiring and replacing/adding components solve it? Click the image to see the video.
Hand: After the last tests with the lower gear, the elbow motors are obsoleted. The sensors in the lower gears bring on a problem. Another reconstruction.... Click the image to see the video.
24 June
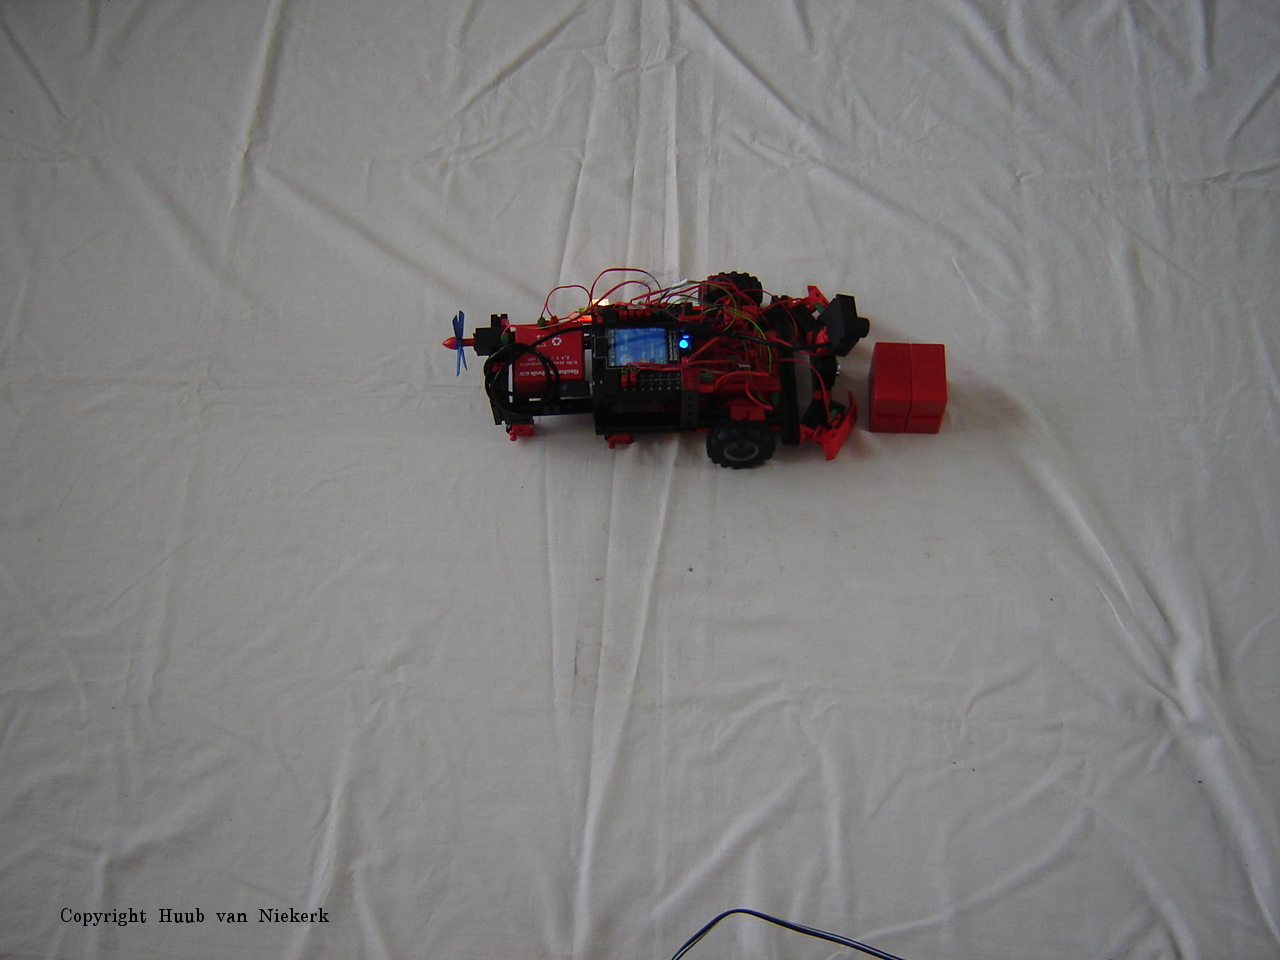
BB: After the first test of last week, a step further is to mount the motor/fan, use the sonar and a set of rails. It shows a remarkable effect. Adding a touch sensor to let the lamp burn works...kind of. And what's the effect of the DataLink? Click the image to see the video.
Discovery: With the TXT controller being sent away for replacement, nothing I can do. Except for taking this picture...a sad sight.
Mirft2: With the guides mostly done, I have to finish them and notice a small detail that has to be fixed. Checking the gears, some small corrections are needed but that doesn't seem the cause of the movement problems. Then it's time for a camera test. Click the image to see the video.
RPi: After last time, a code change showed it hardly works. So will another code change improve? Is wiring the culprit? Then the experiment goes really weird... Click the image to see the video.
ArduinoMega: Since 1 of the motors in the RLC circuit still won't work, I decide to add an inductor in series. In the end, I change some more things, but does this solve the problem? Click the image to see the video.
Hand: After the changes last time, the lower gear seems to be working but needs some improvement. Also, some other issues and ideas come up. Click the image to see the video.
17 June
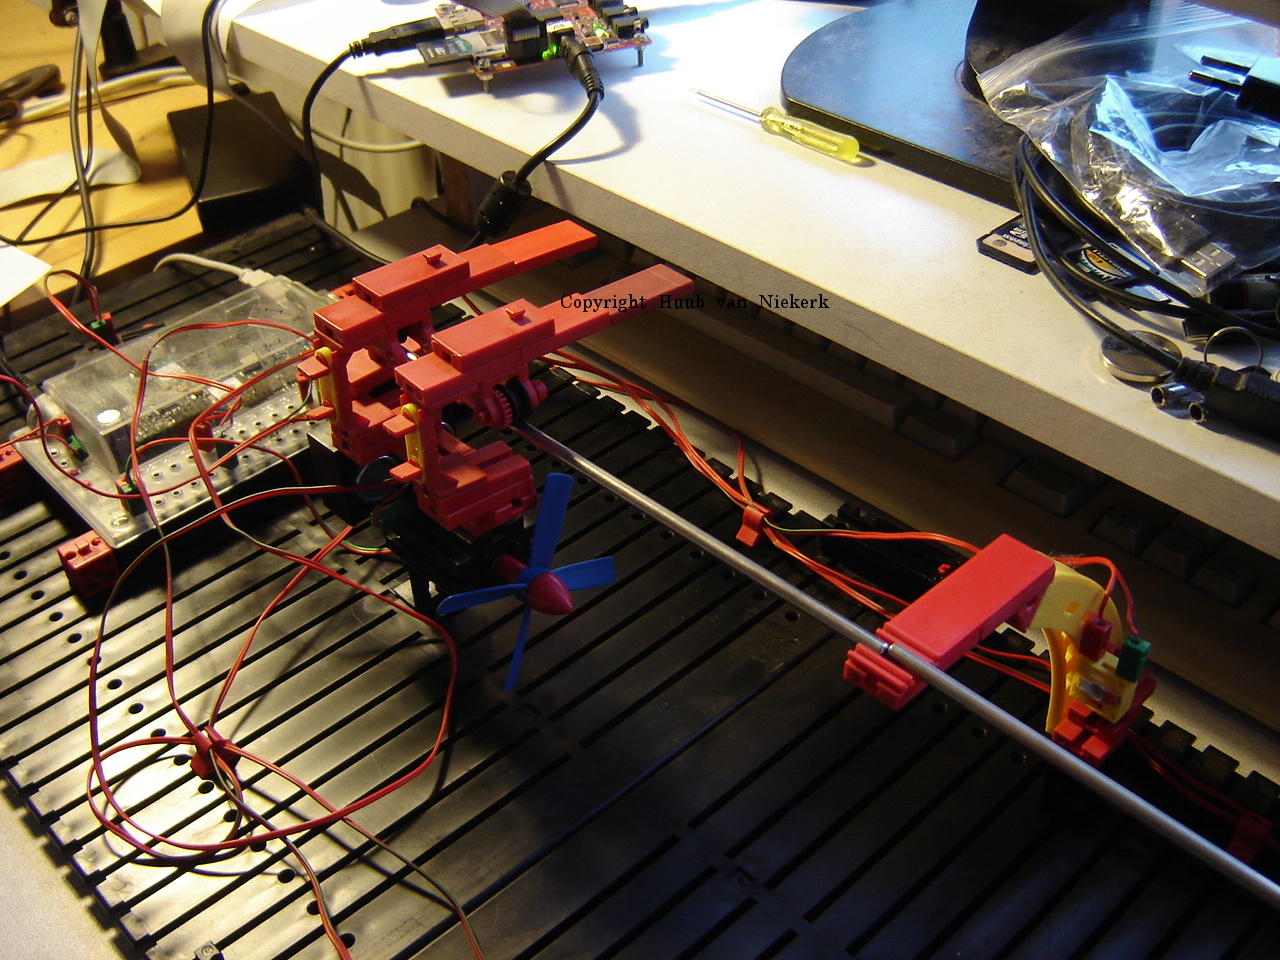
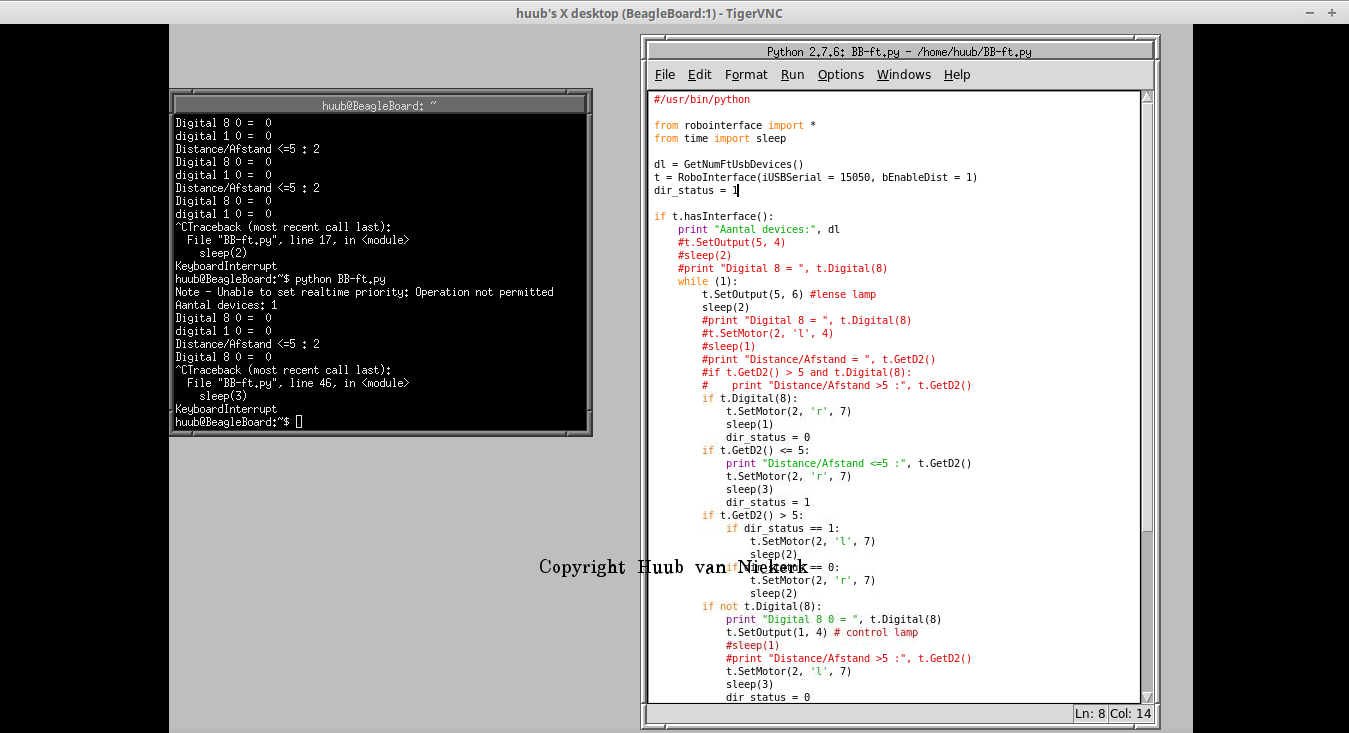
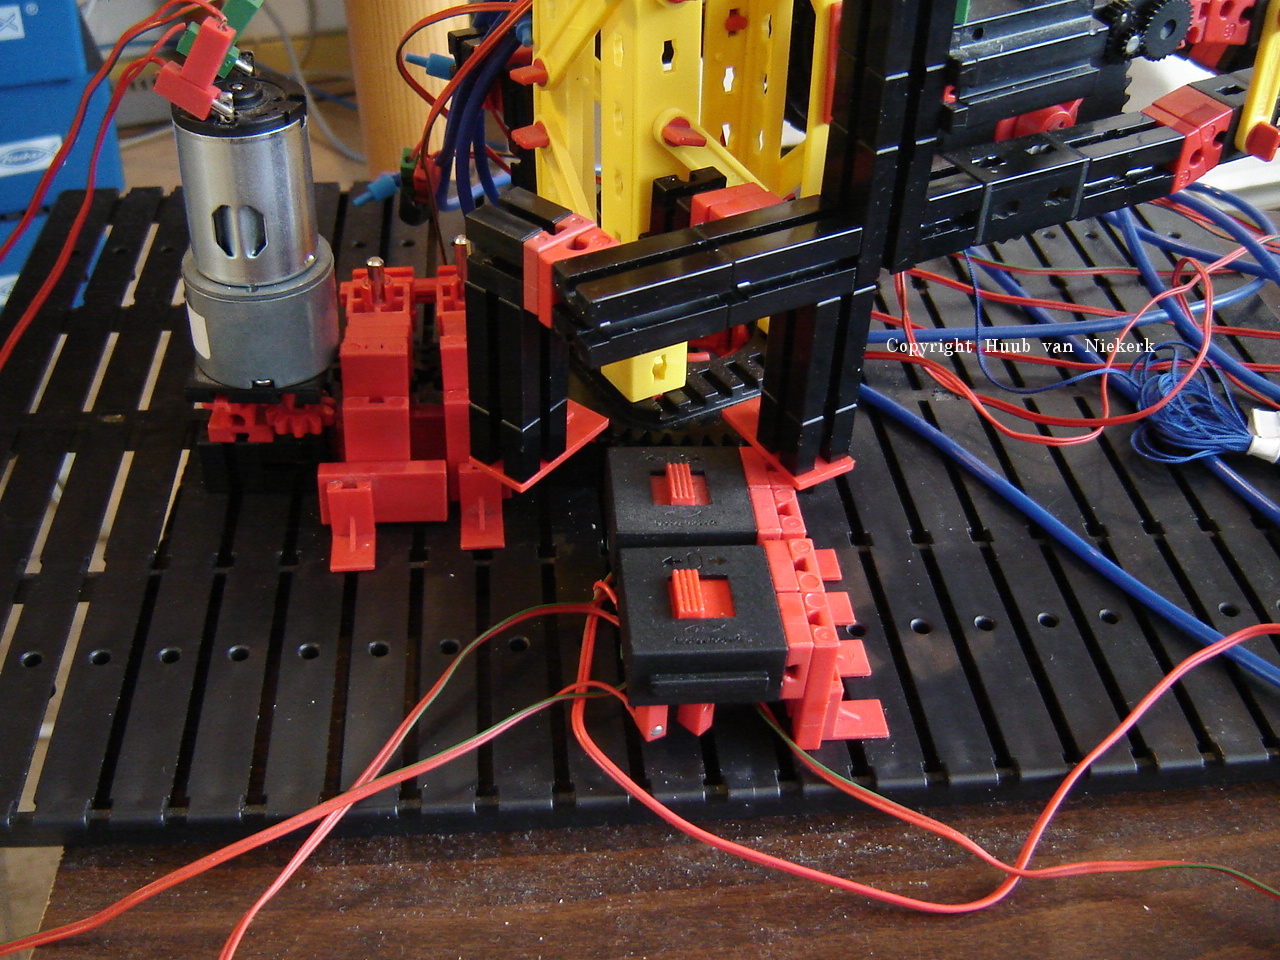
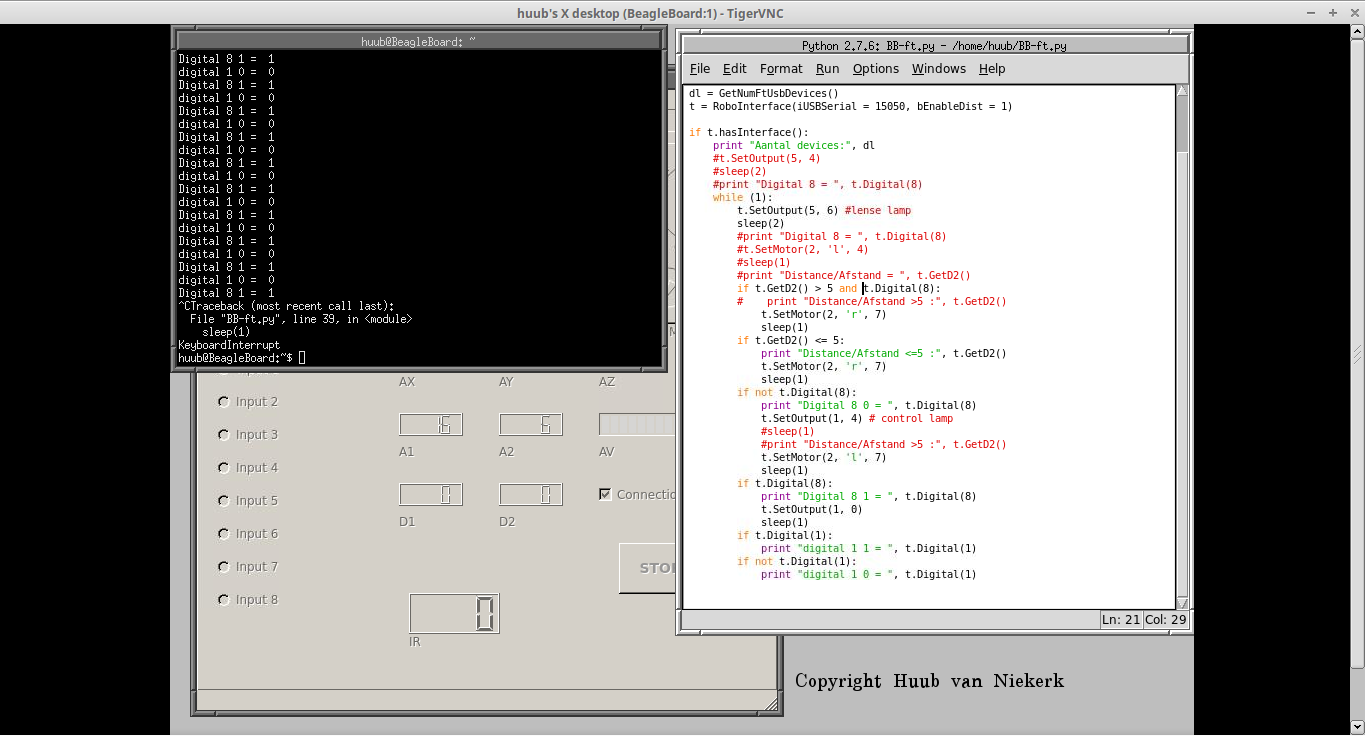
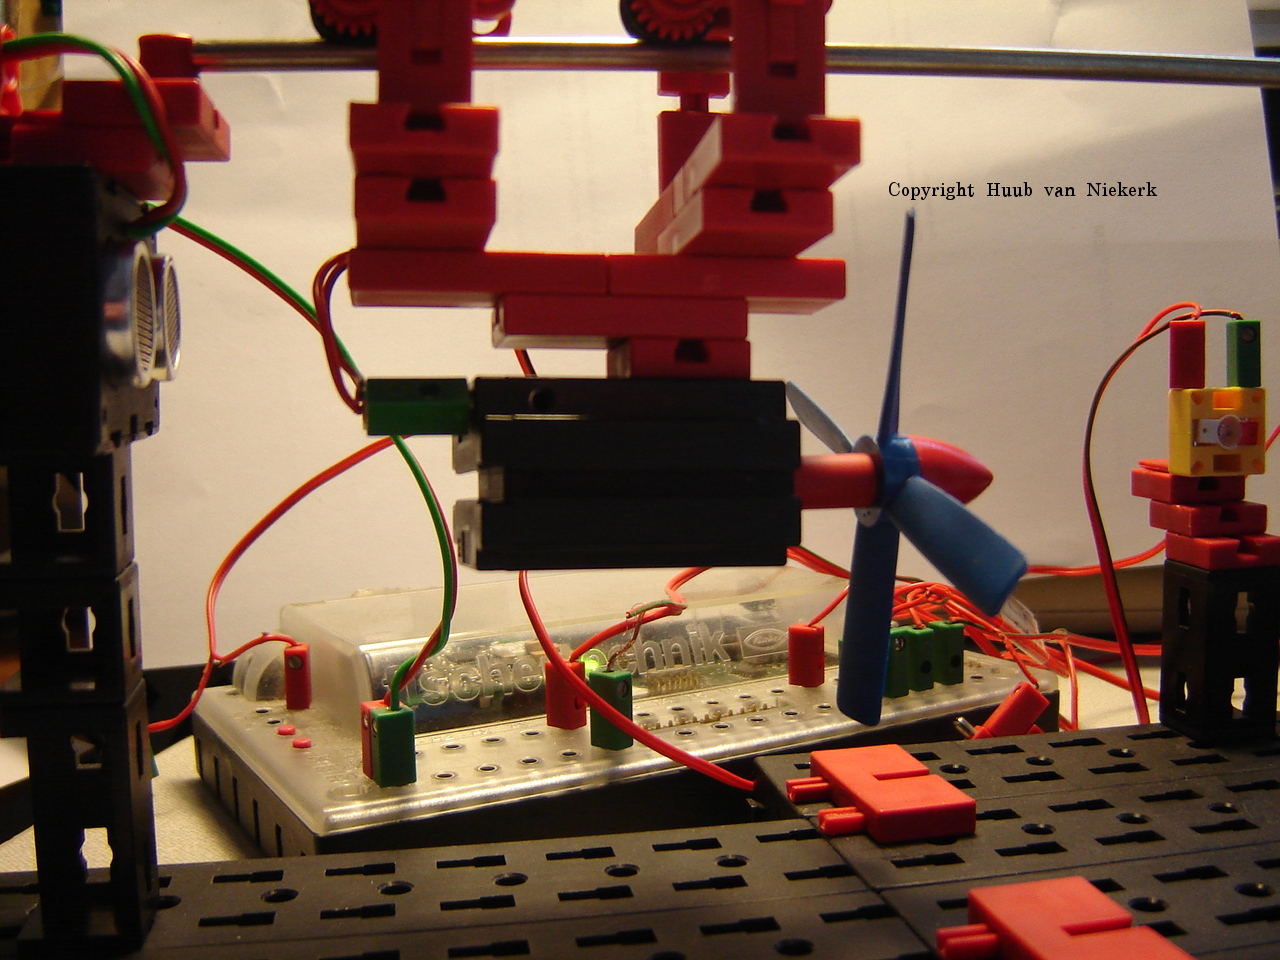
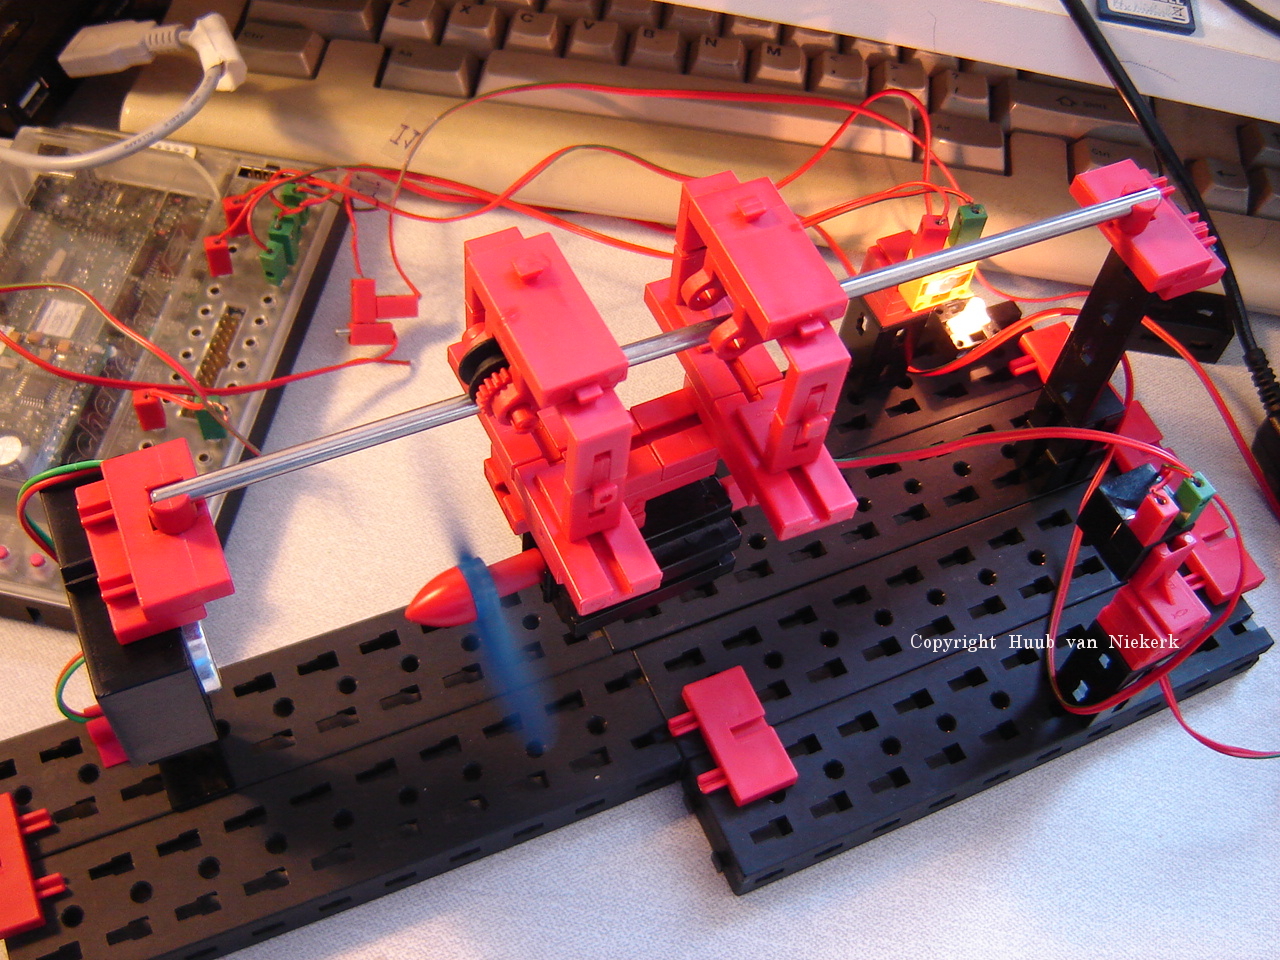
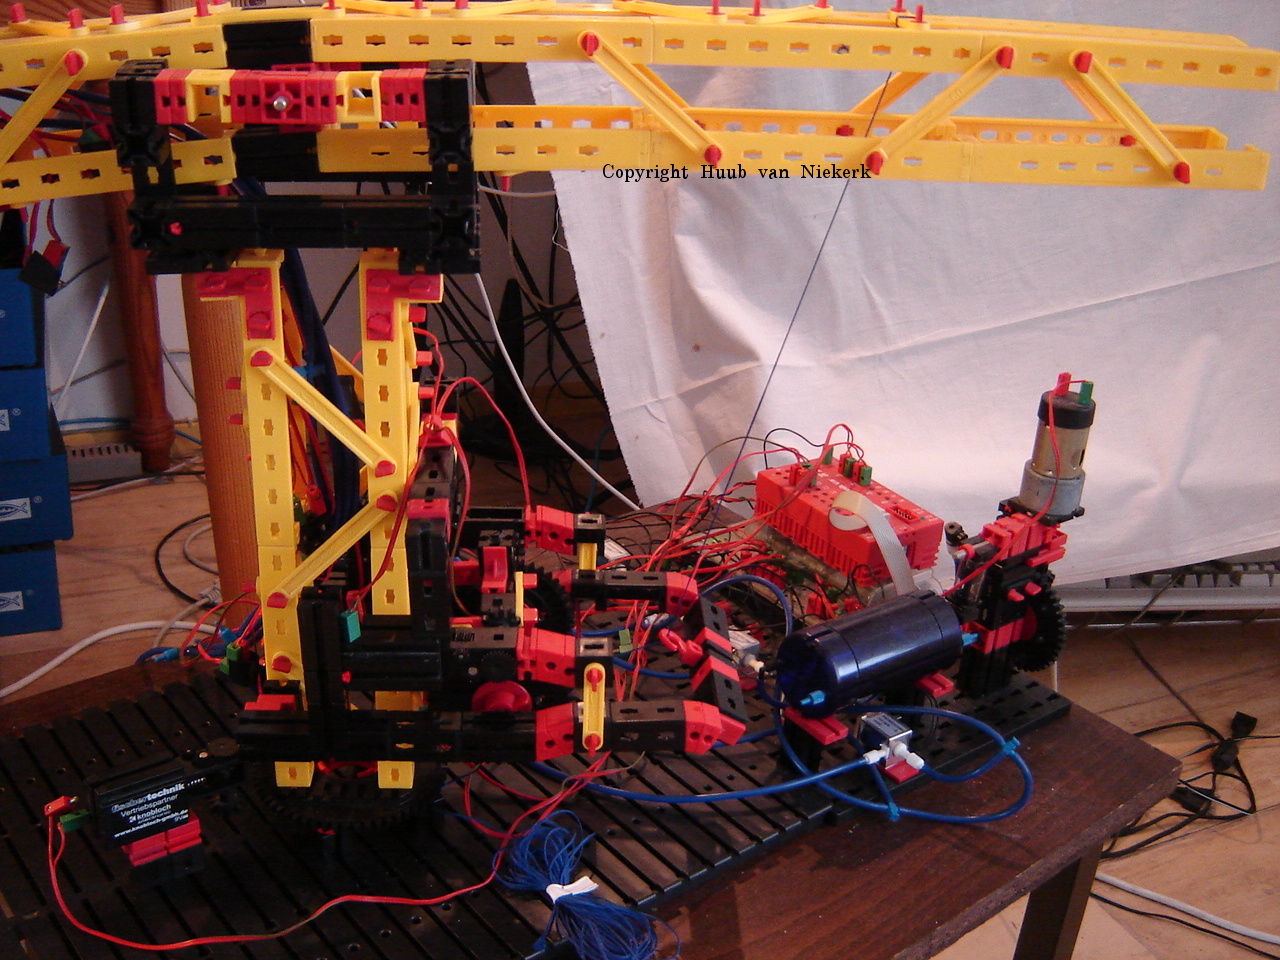
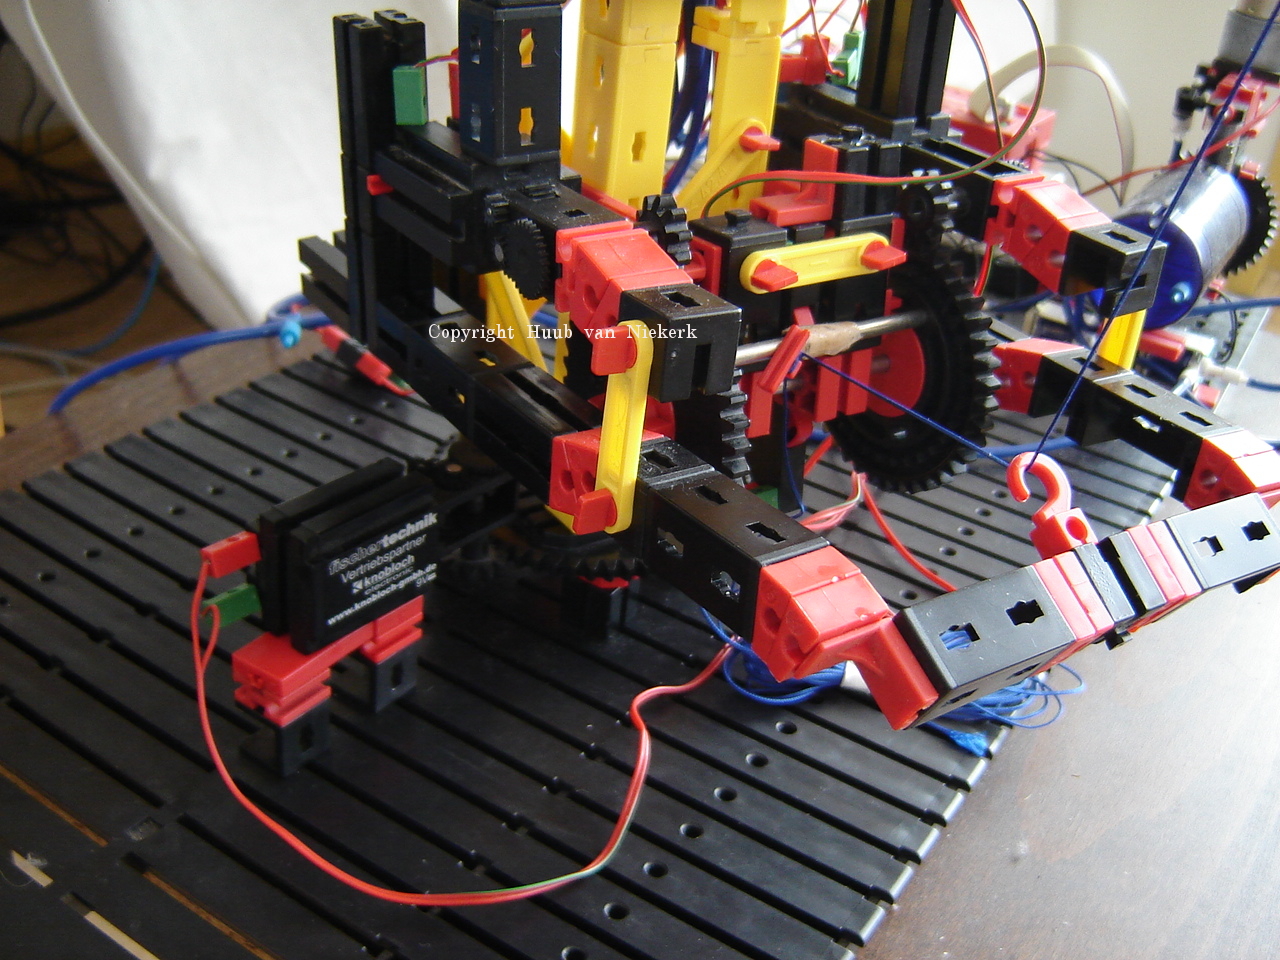
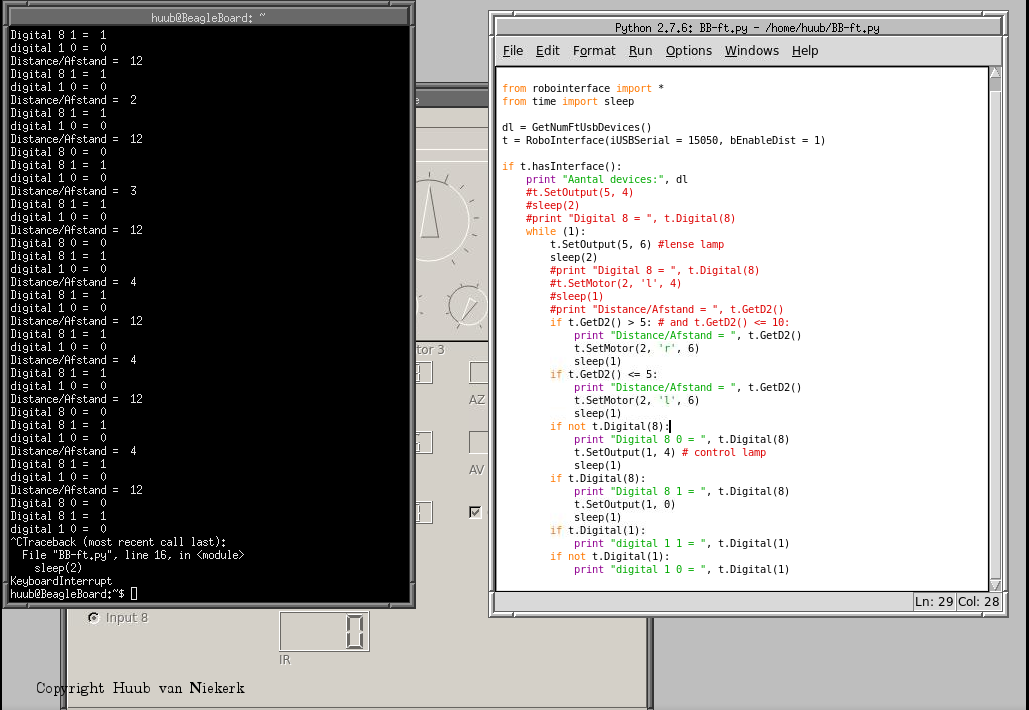
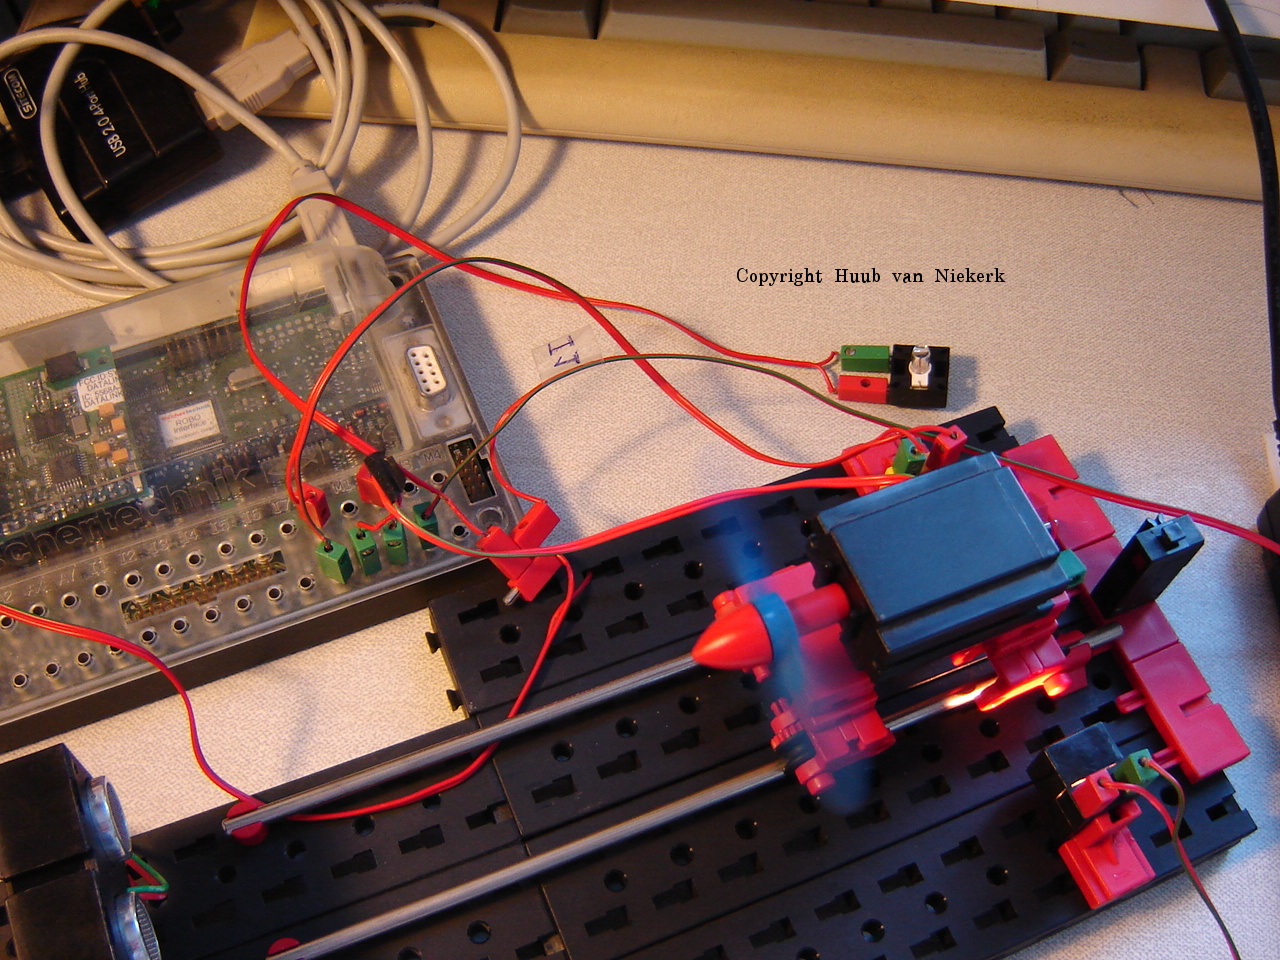
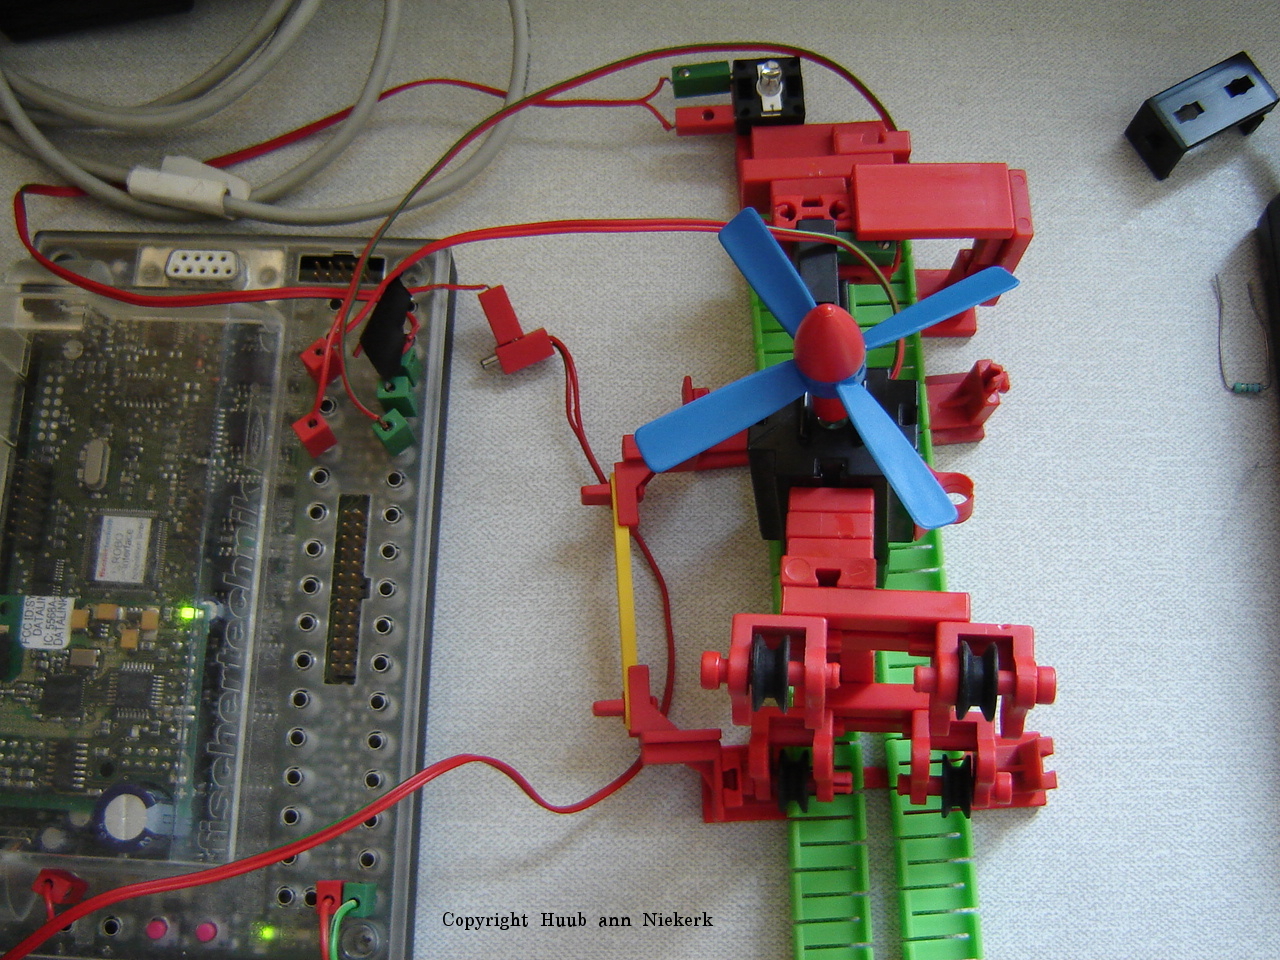
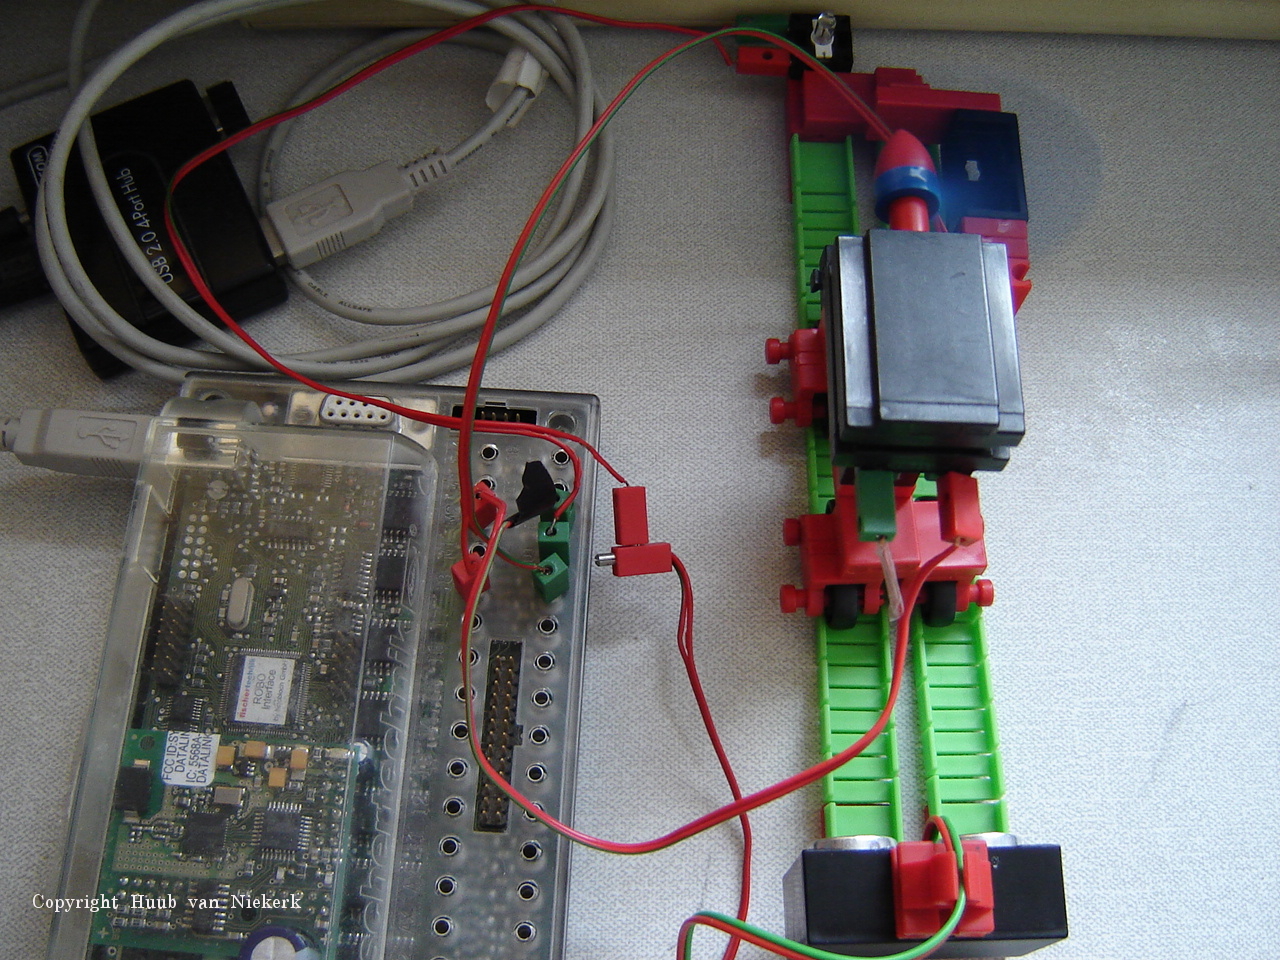
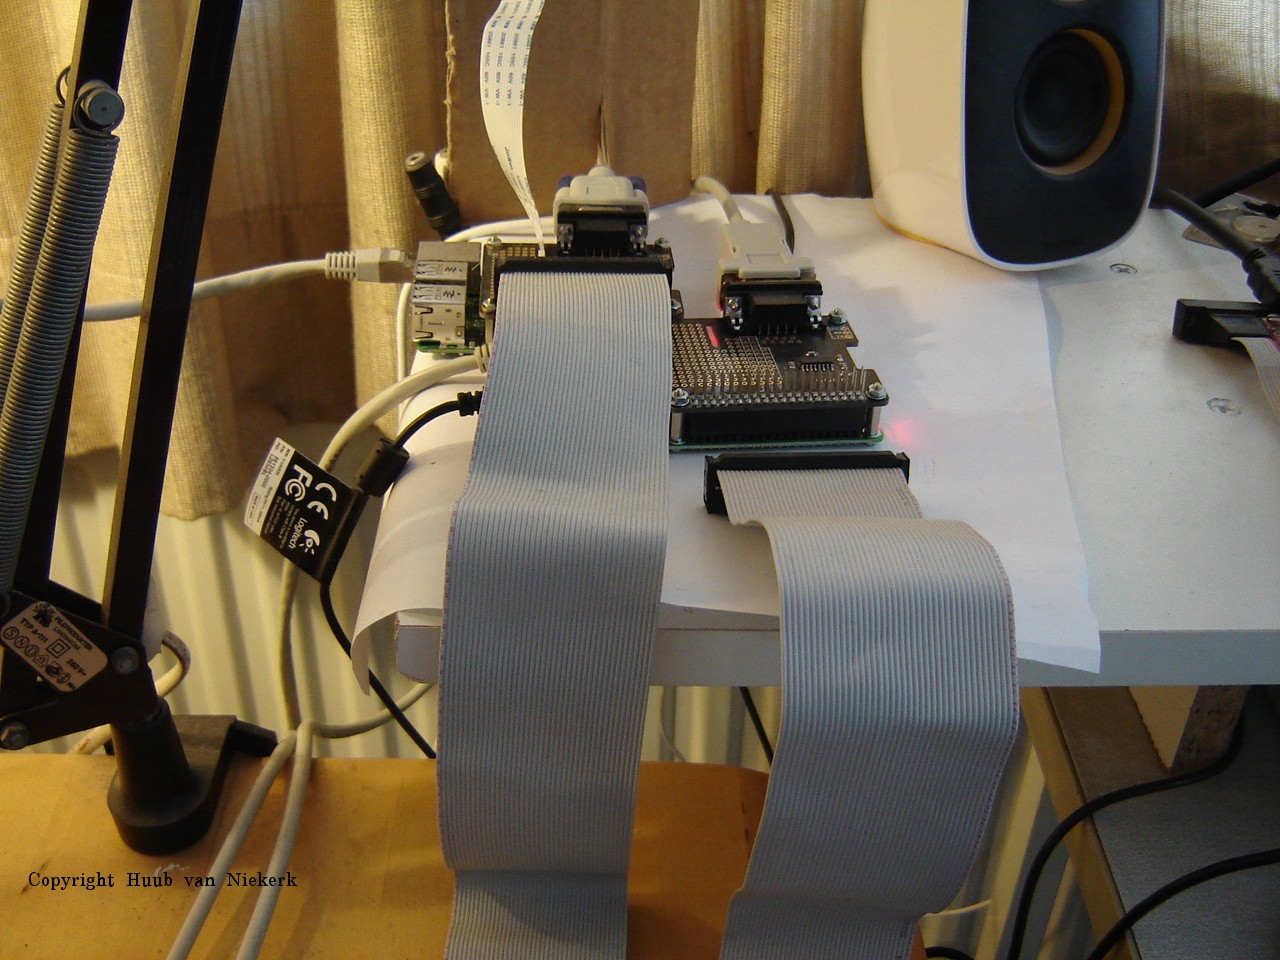
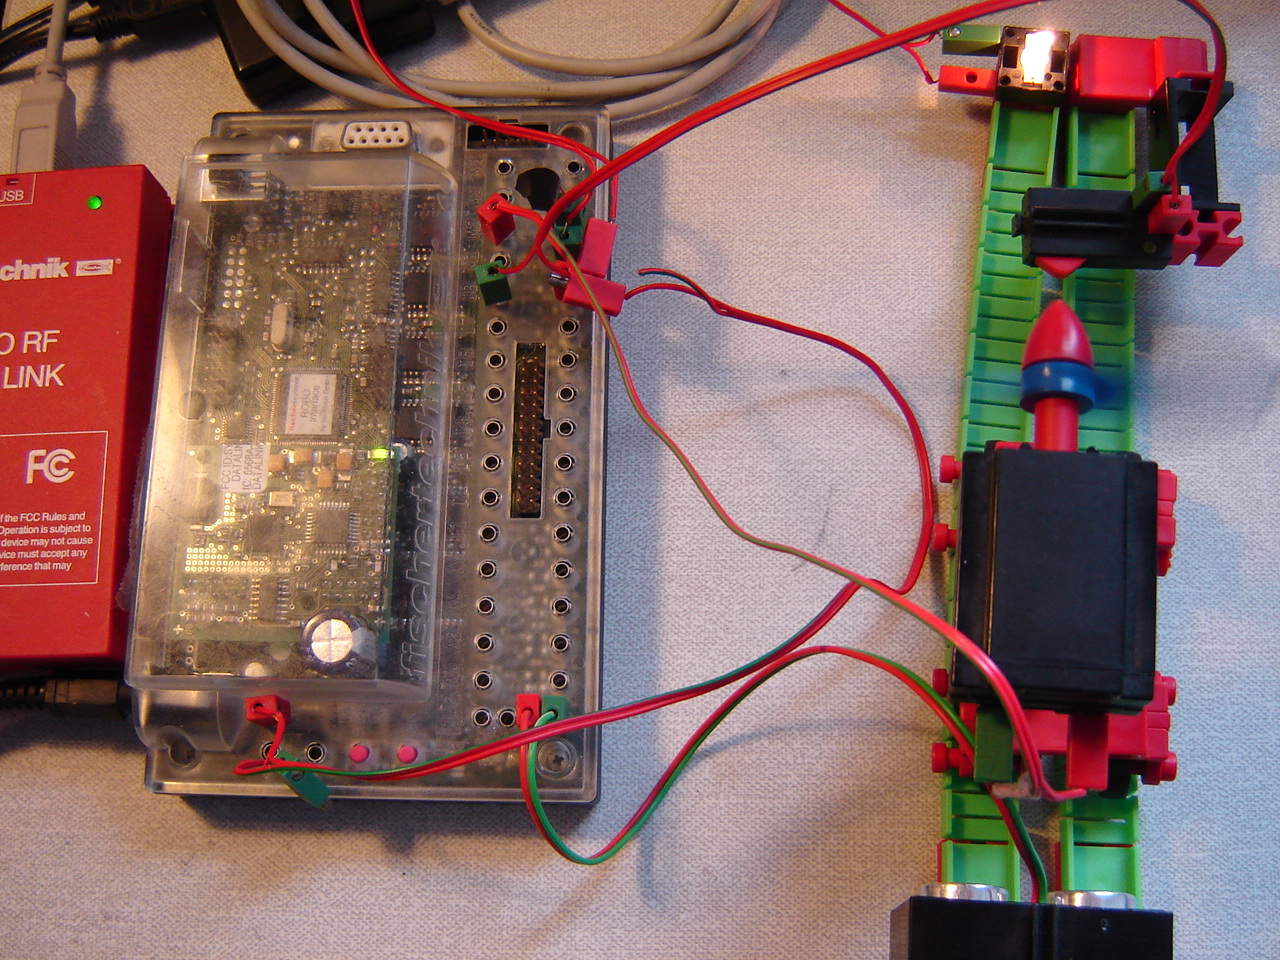
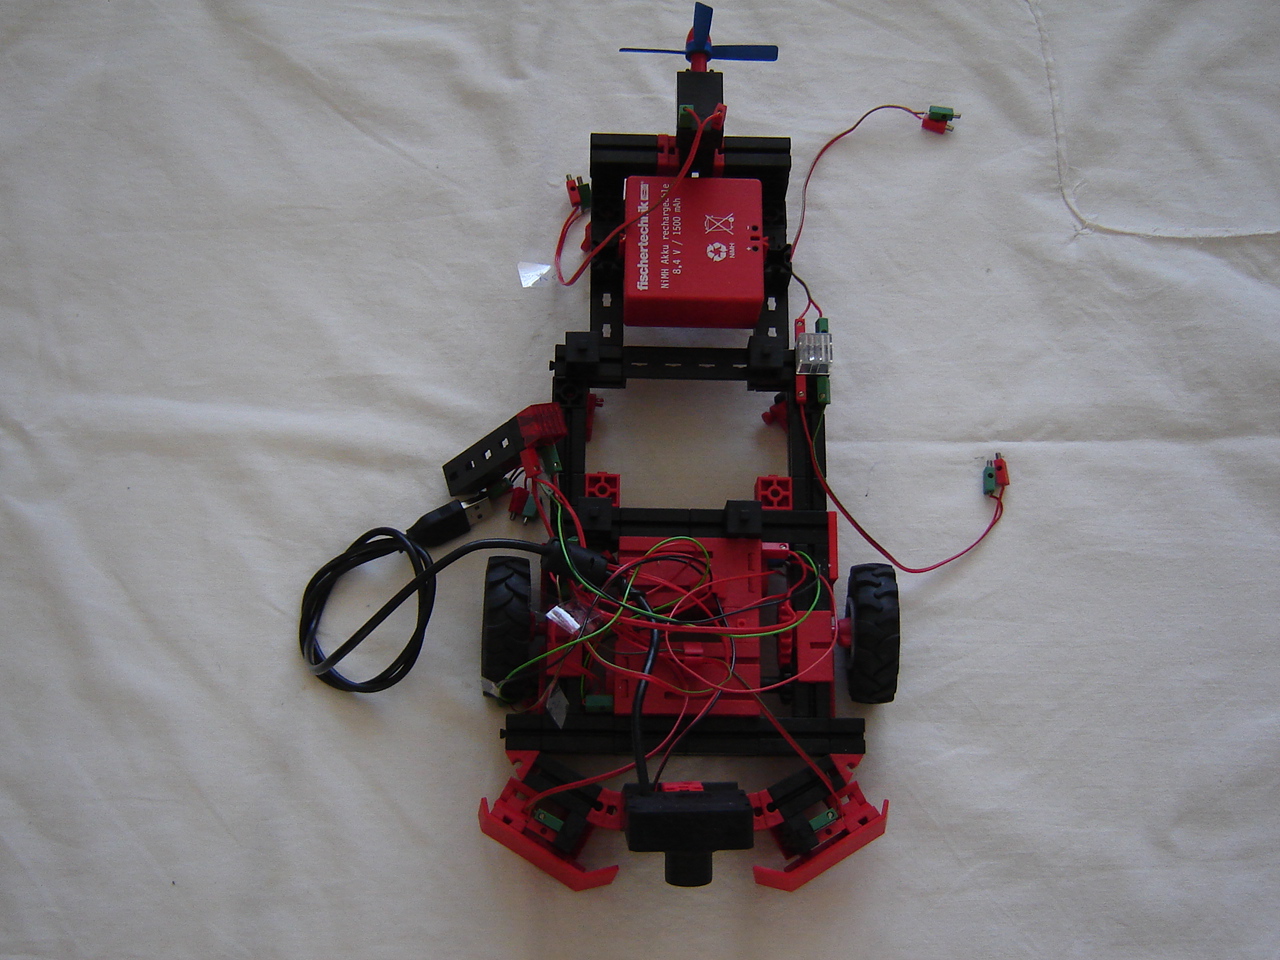
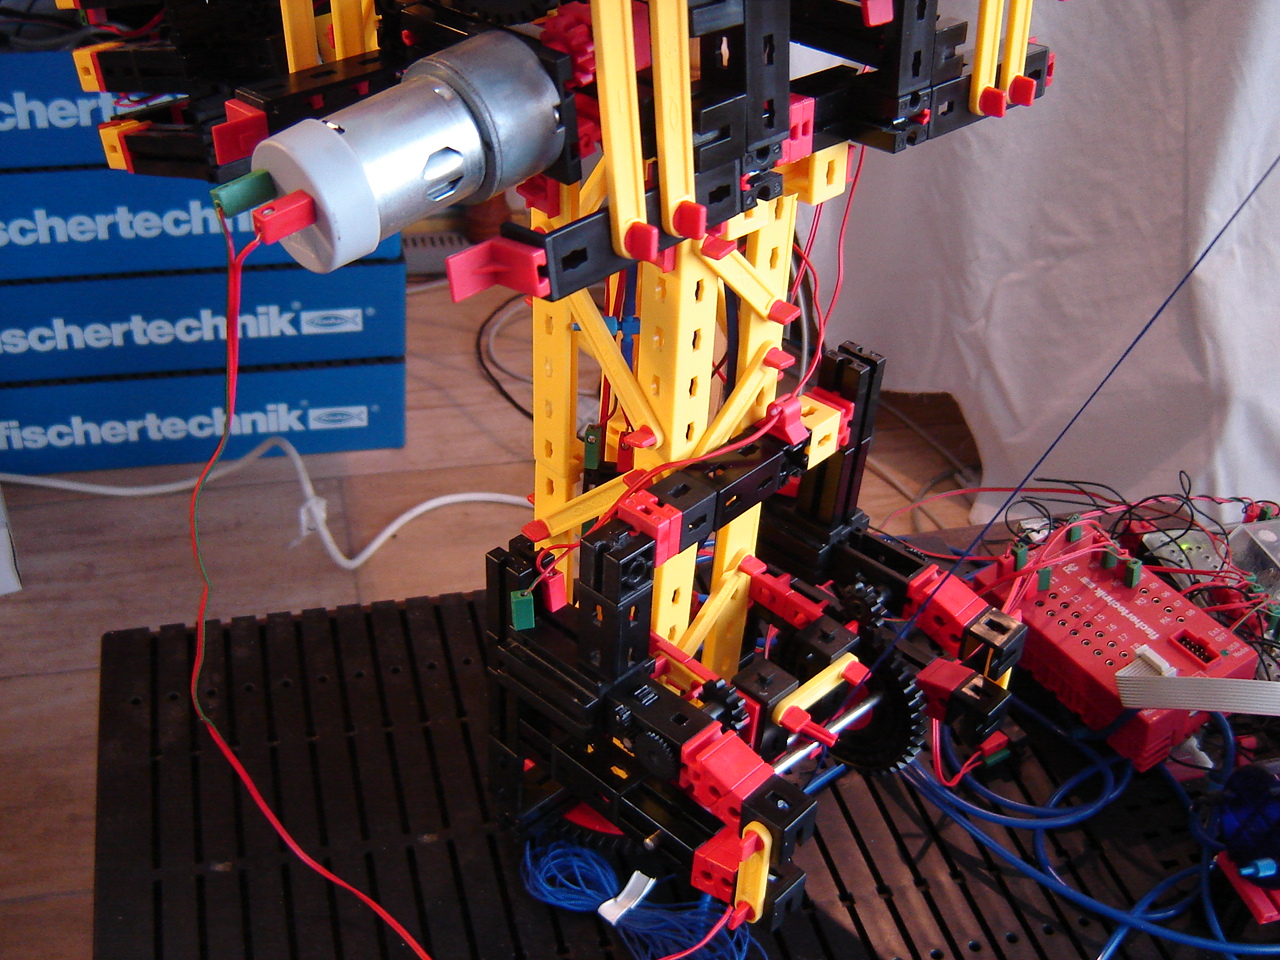
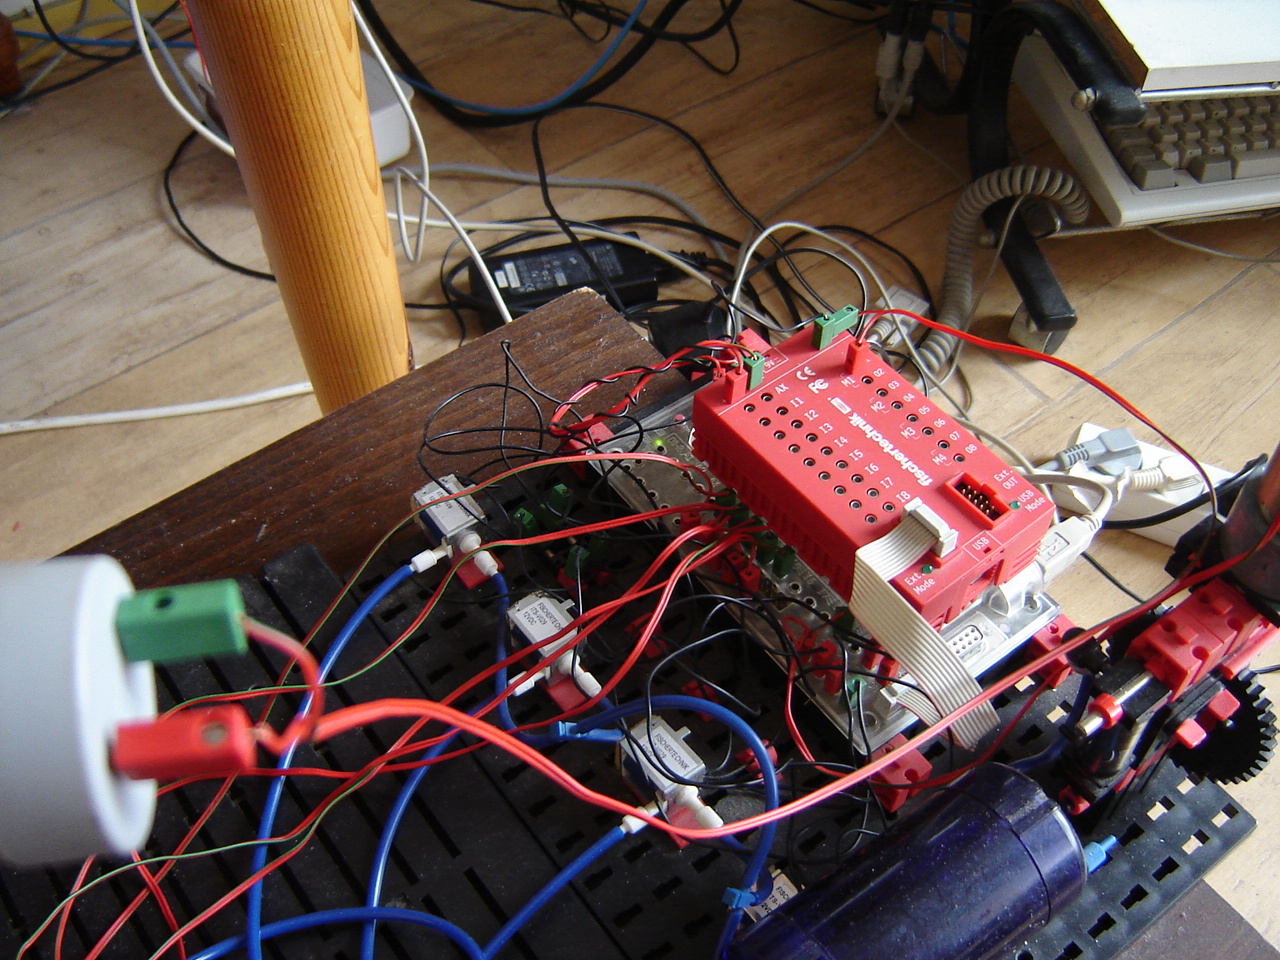
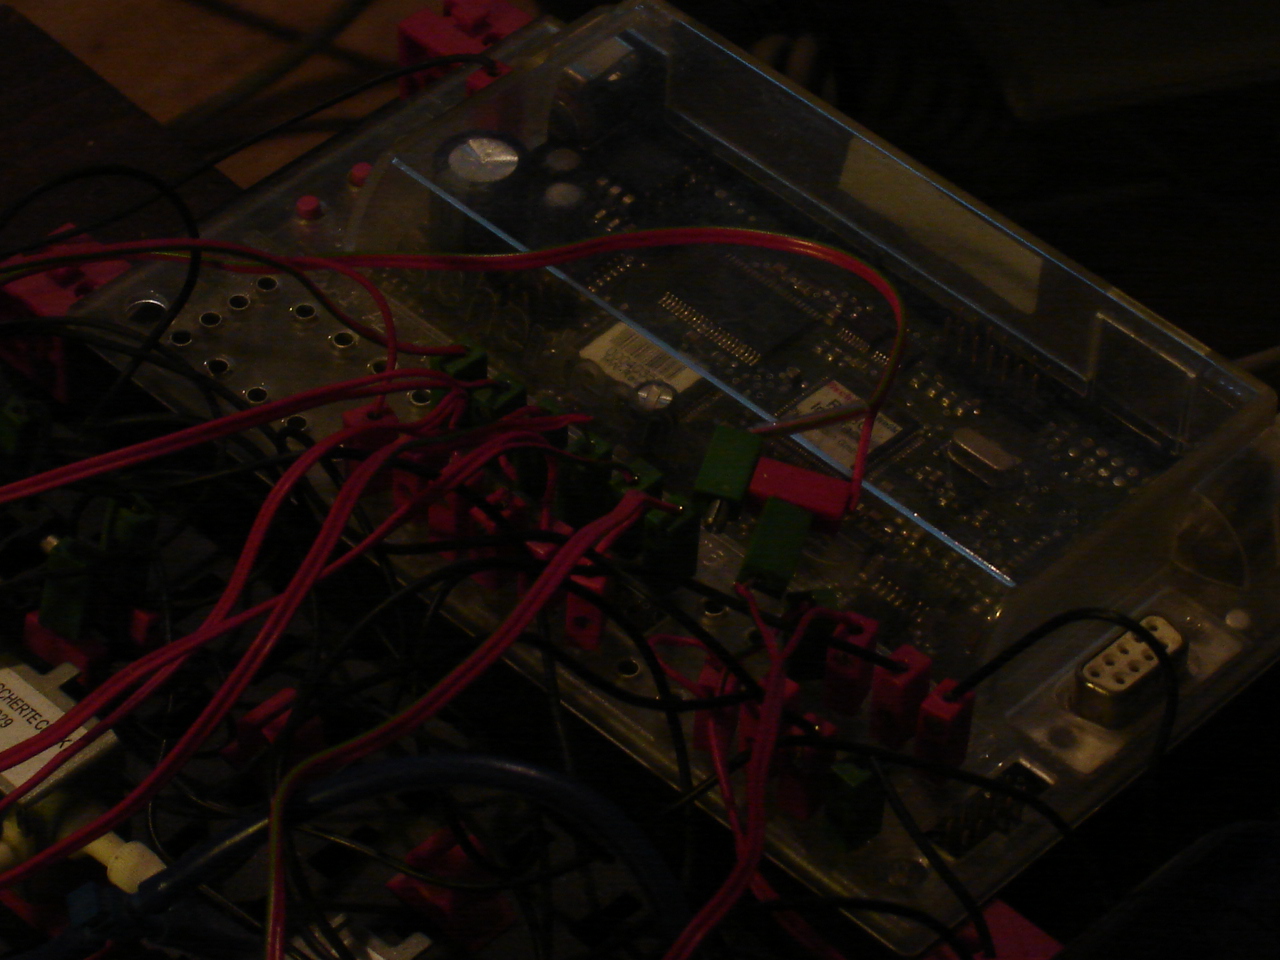
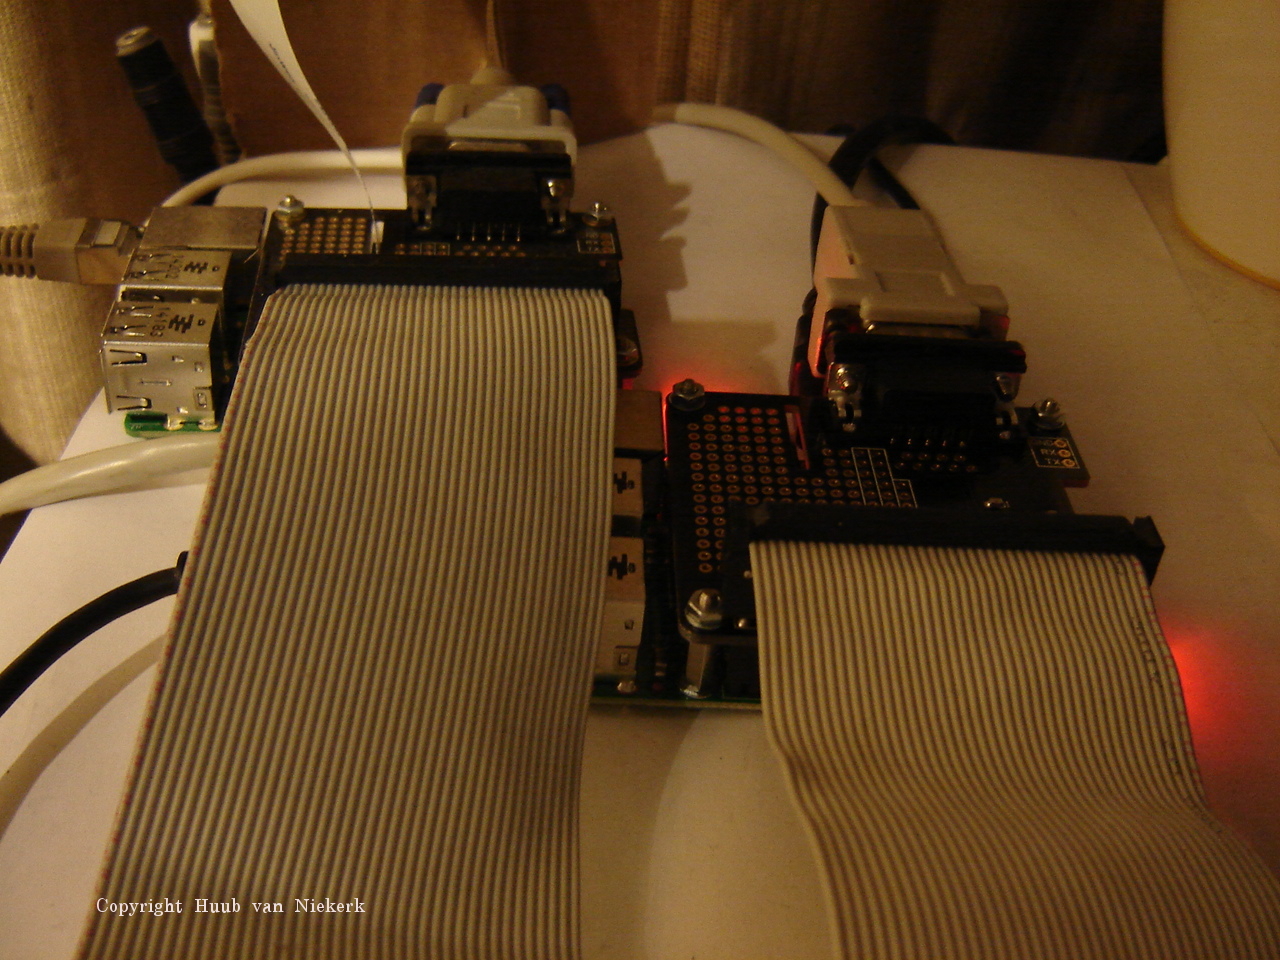
BB: New experiment: using it in combination with the fischertechnik (ft) RoboInterface, ft ROBO RF DataLink, and Python via ftlib. Adding lamp, motor and sonar. See the video.
Discovery: Testing sonar gives odd results and forces a code change. Will this bring improvements? A decision is made to solve some annoying stuff. See the video.

Mirft2: Stabilizing the leg-gears proves to be necessary but comes with another challenge. After that, the legs guidance need improvements. Does it work? Kind of.. sometimes. See the video.
RPi: Continuing LED play with 1 step further: RPi1 activating RPi2. This brings some challenge in wiring and code change, but does it work? See the video.
ArduinoMega: To check if 2 motors can run at the same time, I add another motor. If this works, I try to get the parallellization of the RLC out of the circuit so see if that improves things. This also requires a bit of re-coding. But will it work? See the video.
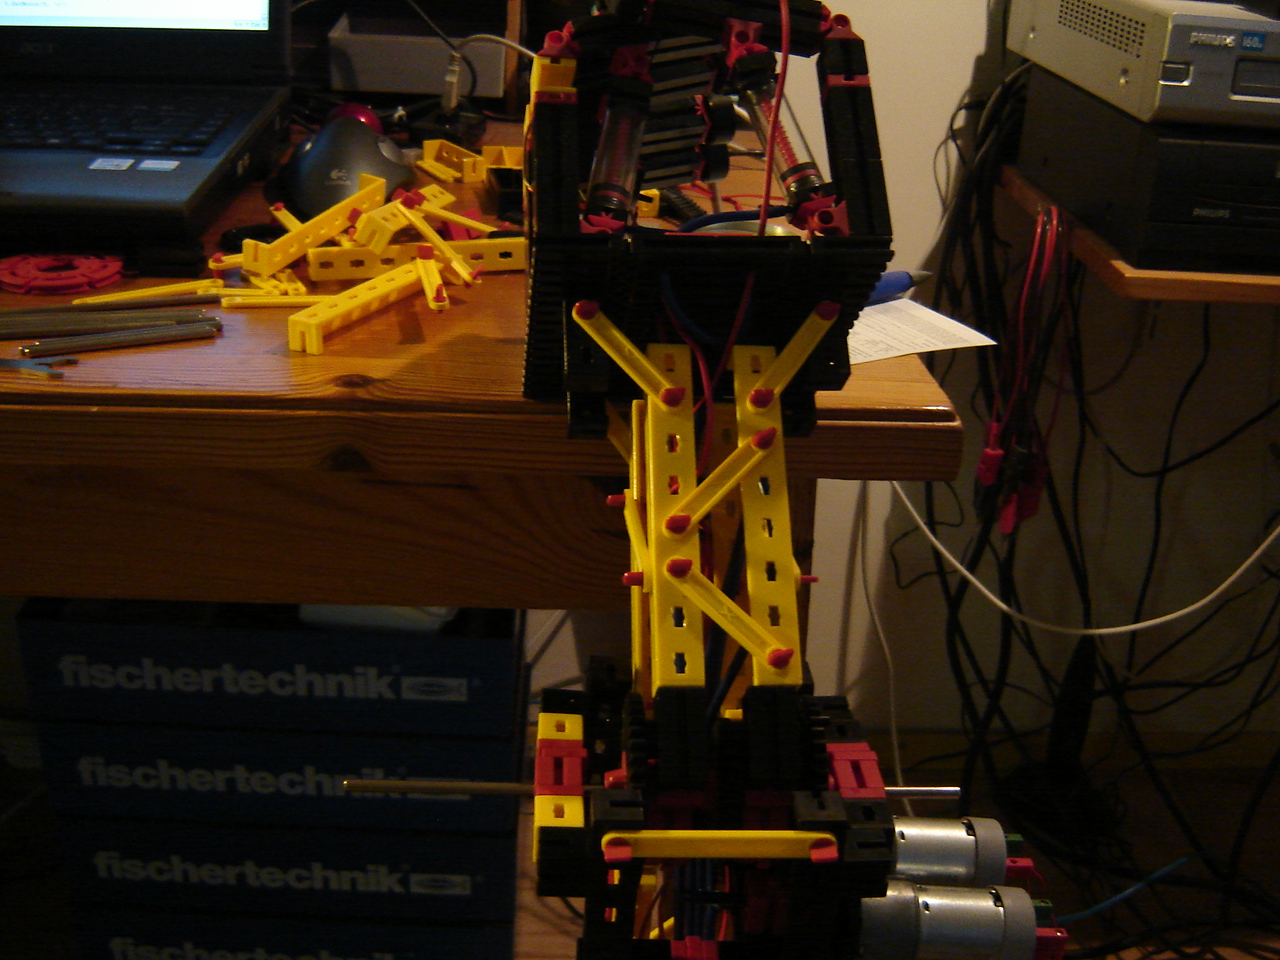
Hand: After the last modifications, it shows that I really need to enlarge the elbow. in possibly more than 1 way. Also, the general rigidity is in question. What to do? Do things work out? See the video.
10 June
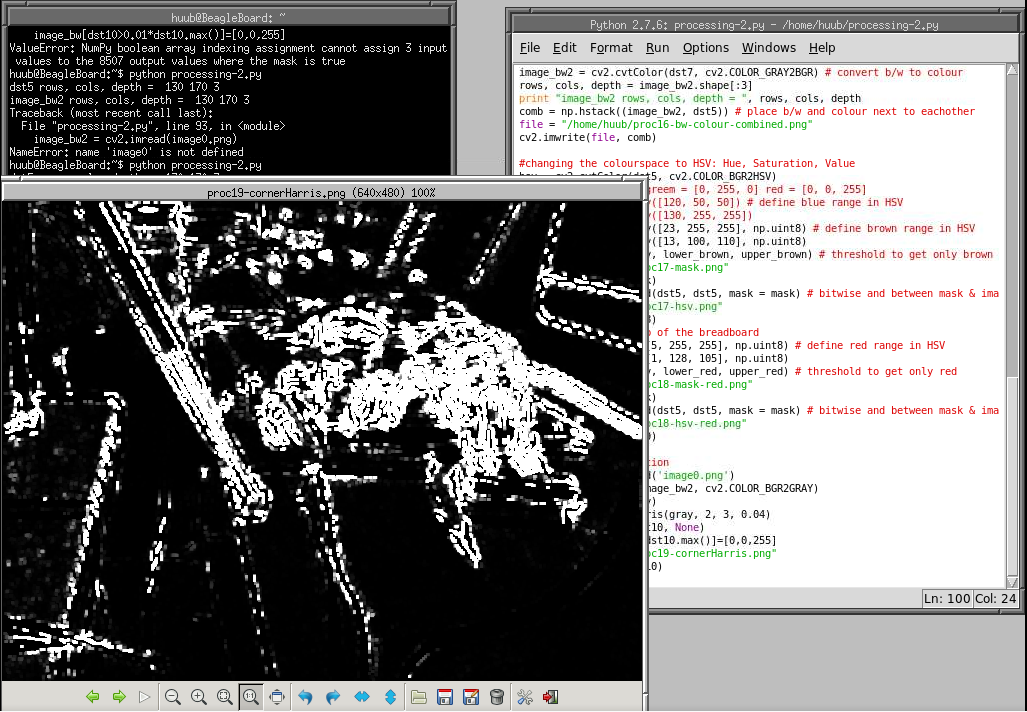
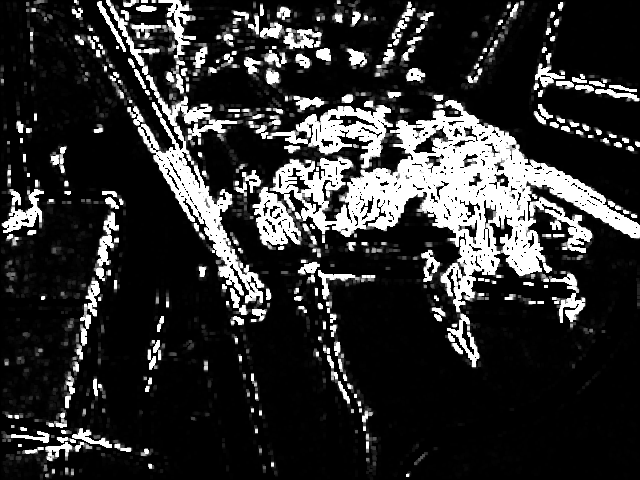
BB: The last operation for now on OpenCV: corner detection. This is interrupted by a big problem that I fortunatly solve but in a regressive way. Ugh. The end-result is not as nice as could have been. But so be it. See the video.
Dicovery: Continued testing on the right side touch sensor, what happens? What does the sonar do? Quite a few events really don't make sense. Some minor code changes and another test...but do they work? See the video. 1st picture: sonar test. 2nd: battery pack corner with touch sensor test.


Mirft2: Continuing with the legs, I find that I need to narrow the guidance. Also: are the motors strong enough? Stability is an issue to address as well. See the video.
RPi: On again with LED play: 1 LED influencing another. Last time it didn't work correctly and now I find out why. Big oops x 2: algorithm and wire. With this fixed, will the rest work as well? See the video.
ArduinoMega: Last time, a LED could burn when a motor couldn't run. Swapping and changing parts for diagnosis is nice, and shows an interesting effect. But what's the solution? See the video.
Hand: First to check is the electric wiring. After fixing 4(!) loose wires, the attention goes to the lower gear and the horizontal motors. Some reconstruction is needed. See the video.
3 June
BB: Just a pixel instead of a full object. So, this is the last attempt for the red object before moving on to another picture and further exploration of OpenCV. Finally, by probing more, I get a nicer result. Next experiment: corner detection. See this video.

Discovery: Focussing on a touch-sensor, will it behave as expected? Finding some code mistakes and changing the algorithm a bit...but will it improve anything? See the video.

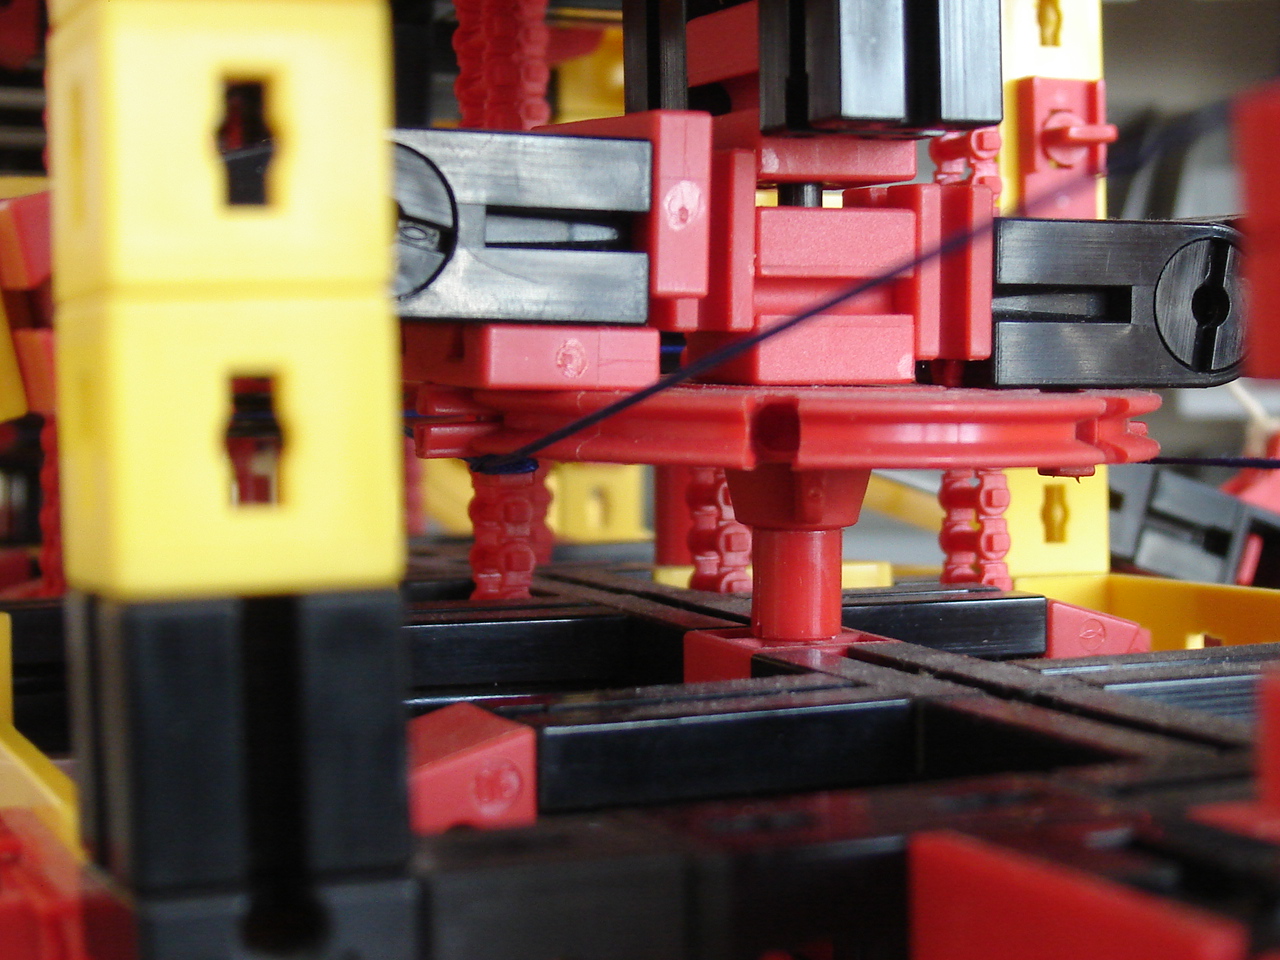
Mirft2: Gears friction is nearly solved, but then stability is an issue in more than 1 way. Also, the legs need to be kept in place which brings up another issue. See the video.
RPi: With the remarkable difference in speed, the code needs a check. Then, with 1 LED replaced and a wiring correction done, the faster run of Python compared to the C++ code turns out to have a simple cause, although it's not entirely solved. Then an LED play attempt: it looks like working between 2 LEDs, but somehow not quite. See the video.
ArduinoMega: With the 2 RLC circuits in place, I want to see if I can replace the LEDs by motors+fans. Needed: some more jumpwires, 2 transistors and another motor. The result is not entirely as expected. See the video.
Hand: Continuing from last week, I manage to put the elbow motors in place. Then, a test shows that the lower gears need an additional motor and the motors need to be re-wired. Testing the pneumatics, it shows that 2 fingers are electrically off. Oops. See the video.
27 May
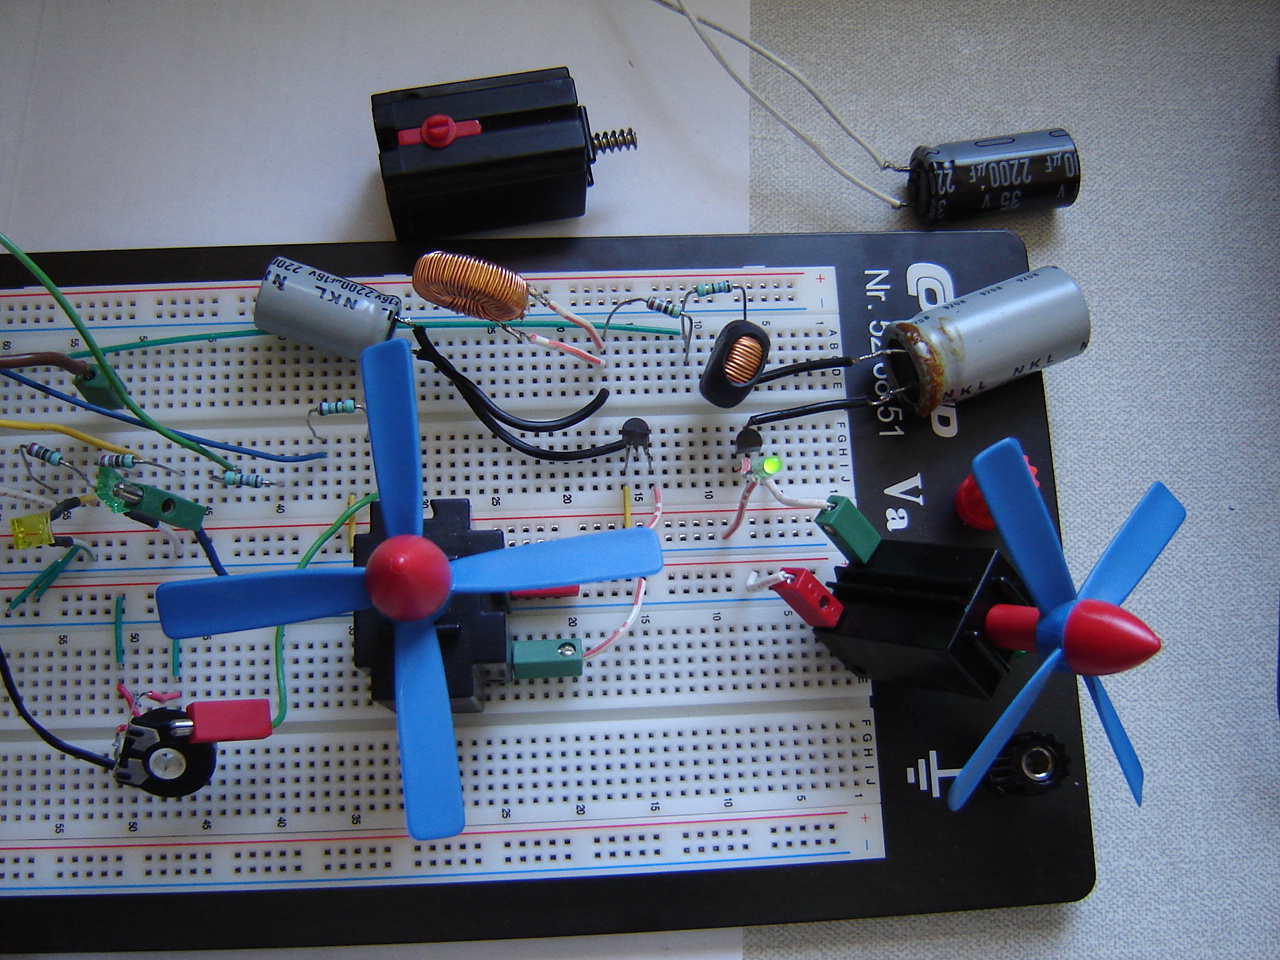
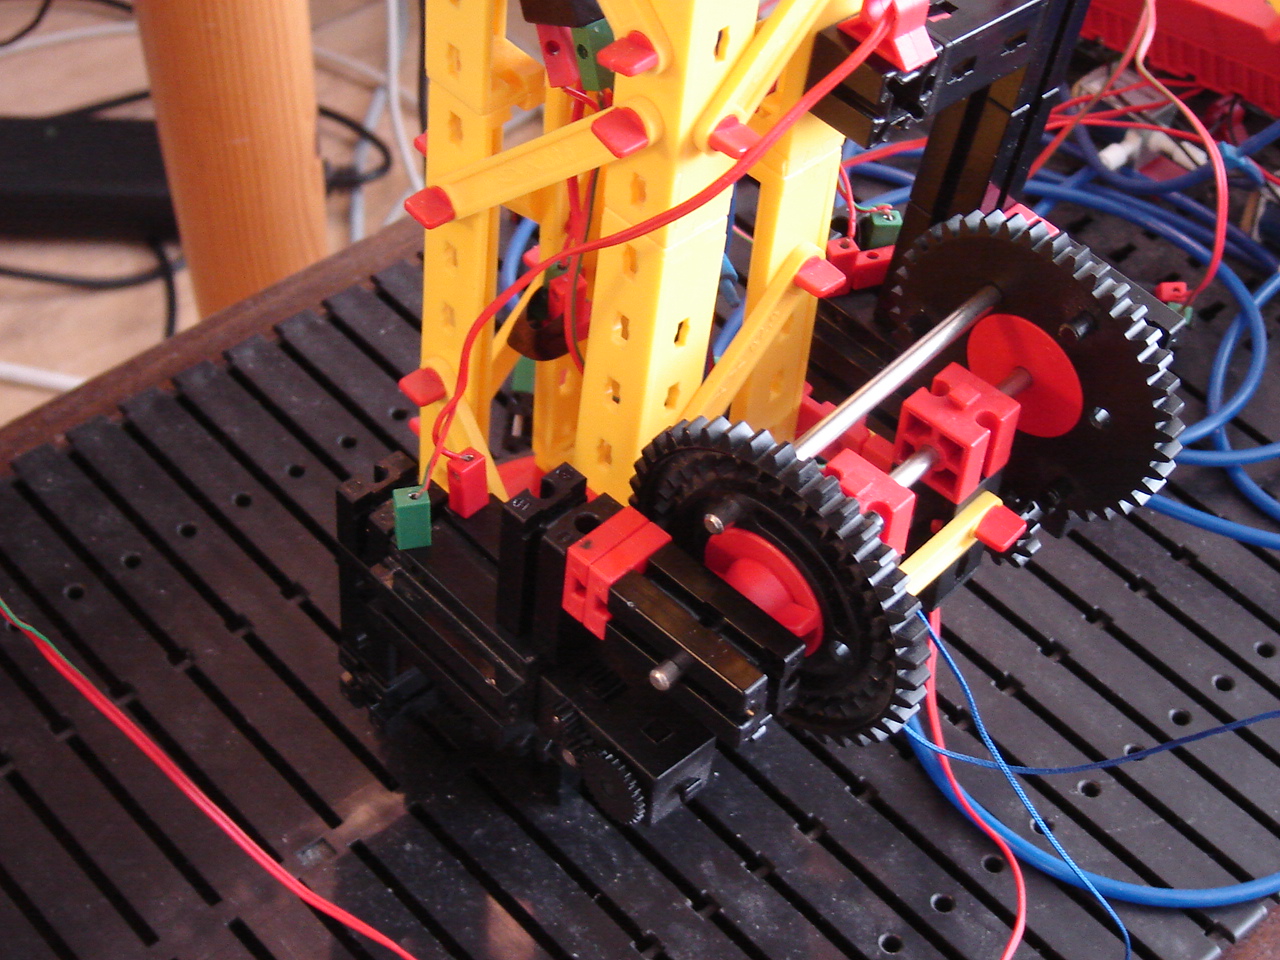
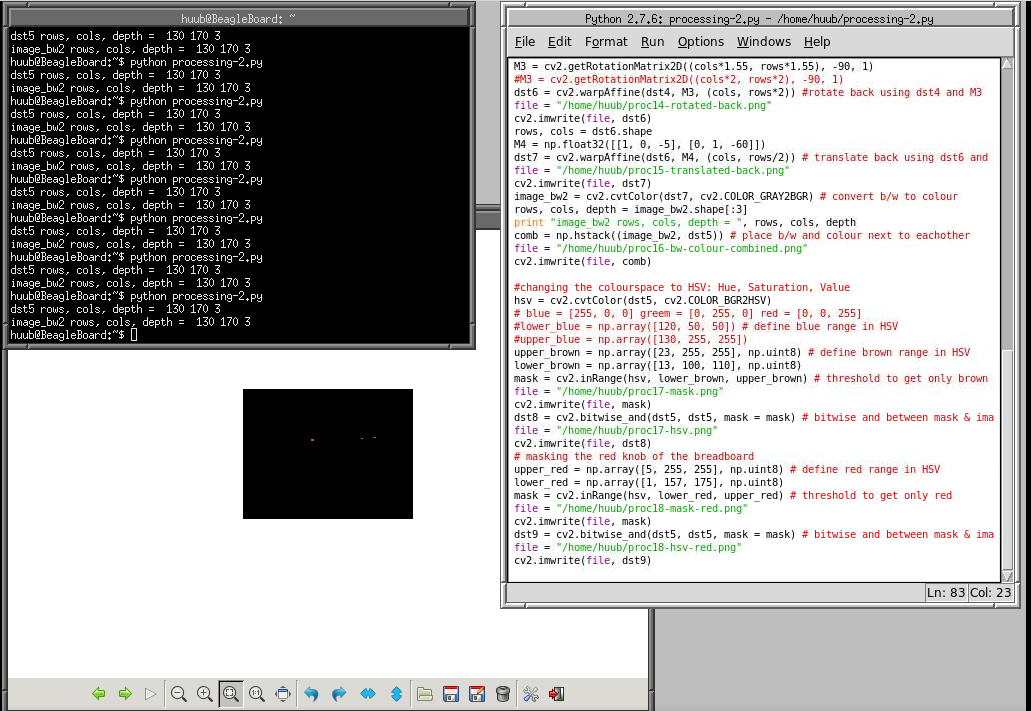
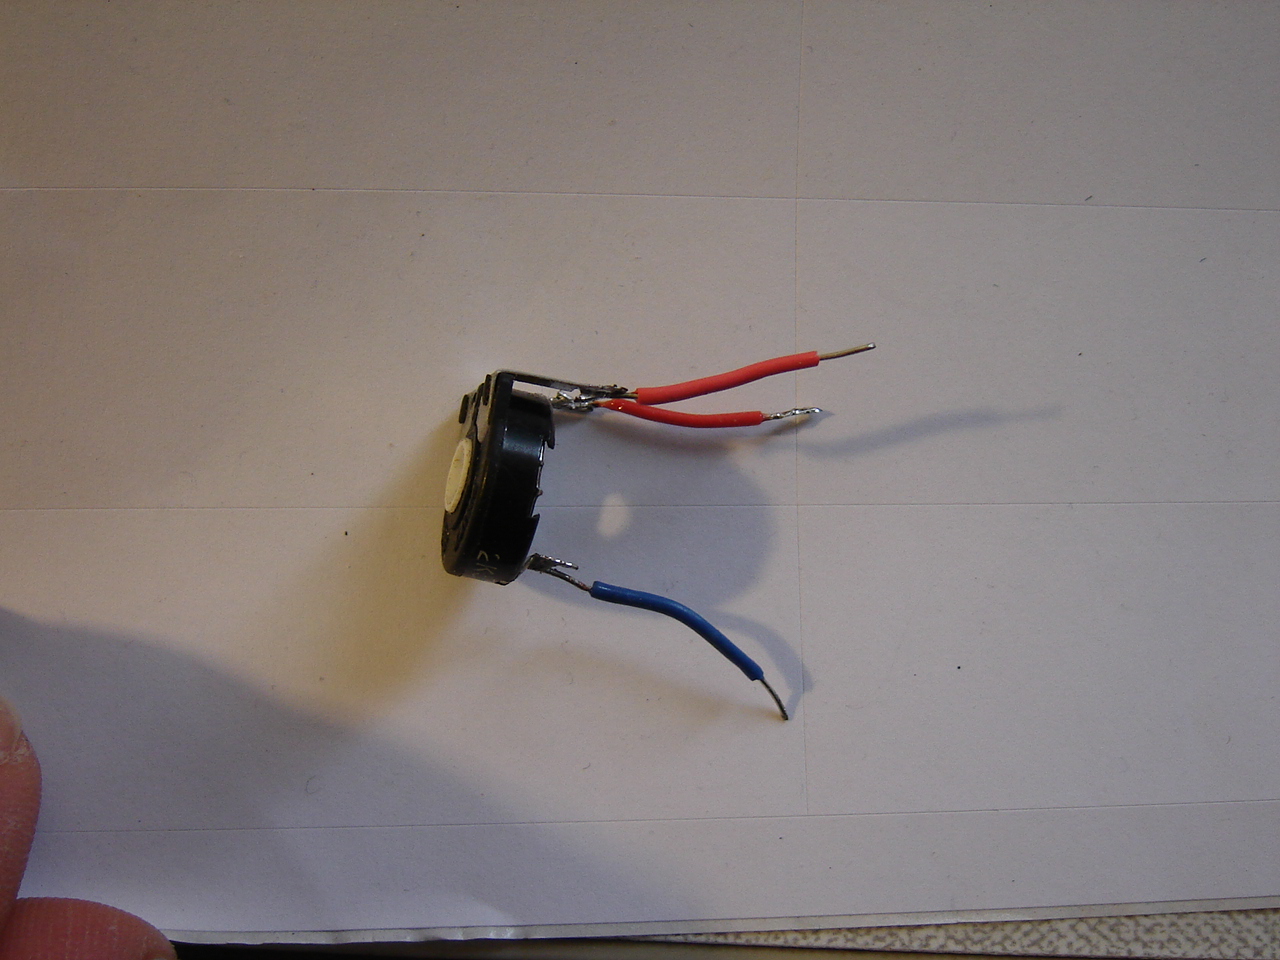
BB: Now that I've managed to get the light-brown colour, how to go on? Trying to mask the orange jumpwires won't be easy as those are very thin. Taking the red knob should be easier. See the video.

Discovery: Still searching for clues about the sonar, so it's time for some sonar-only experiments. This gives some interesting results: while some obvious and as expected, some are not... See the video.

Mirft2: Last time it showed that the gears hardly worked after reconstruction. Pulling the gears apart showed the common cause being friction, but the question is: where? See the video.
RPi: Since the current series of experiments is about Python vs. C++, it's time for C++. And with that, it's nice to do it different than with the binary counter: Python on 1 side and C++ on the other. Once that's decided, I find some LEDs not working. Replacing is only a partly solution. Testing shows a very odd result. See the video.

ArduinoMega: Last time, the question was why the NTC values in serial monitor were different from the resistance meter. A simple test reveals part of the answer. Then an extension to the RLC circuit preceded by a SciLab/XCos simulation. Both show the same behaviour. See the video.
Hand: Part of the elbow needs to be reconstructed...again. It turns out to be a larger problem than expected, and not just the elbow. So some more work is done and the big question is again: will it work? See the video.
20 May
BB: Now that the scaling is known, how to go on? A closer look reveals a small mistake, which after fixing gives a slightly better result. But it's not good yet. See the video.

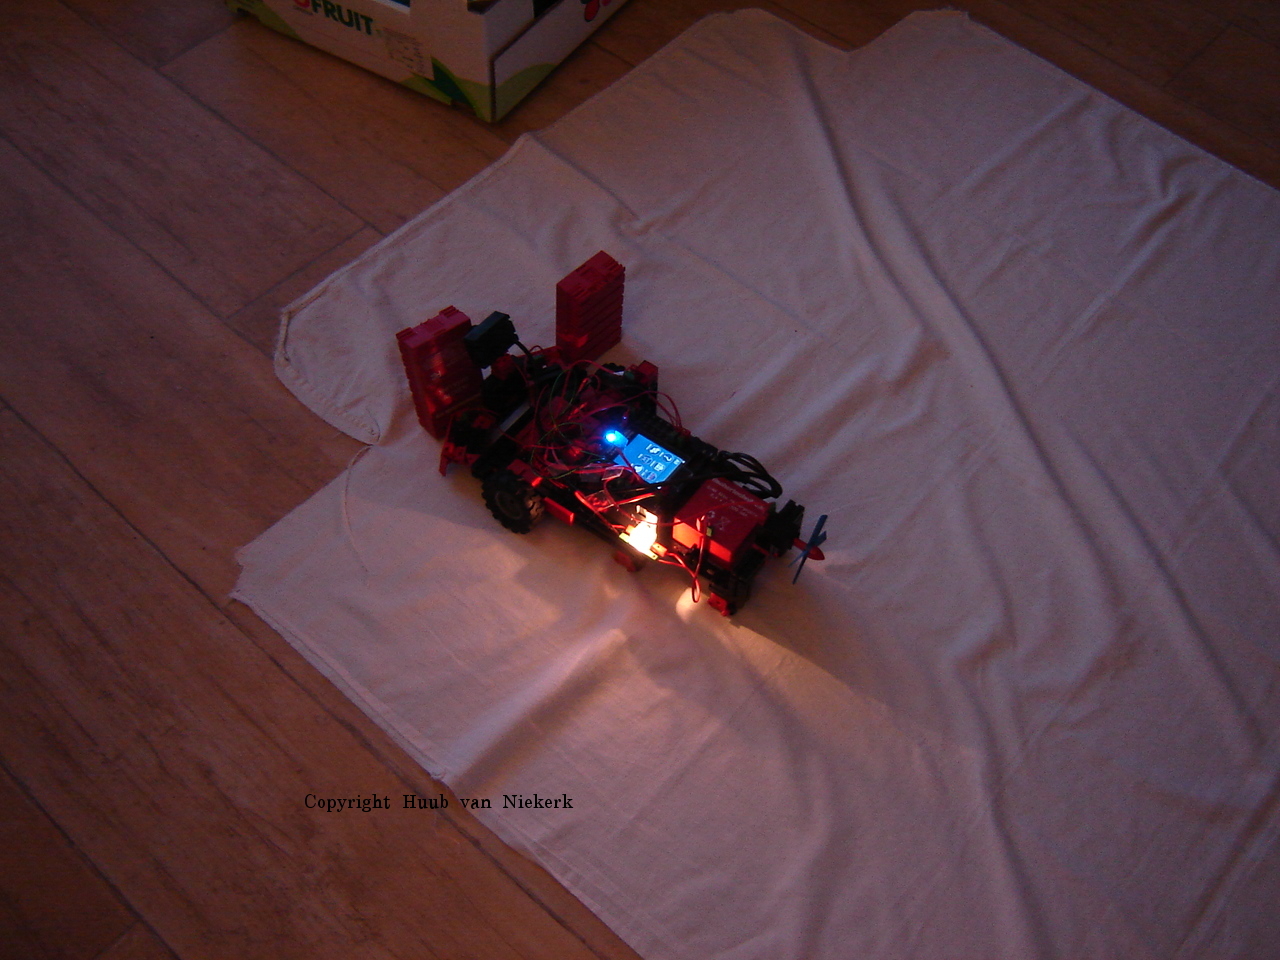
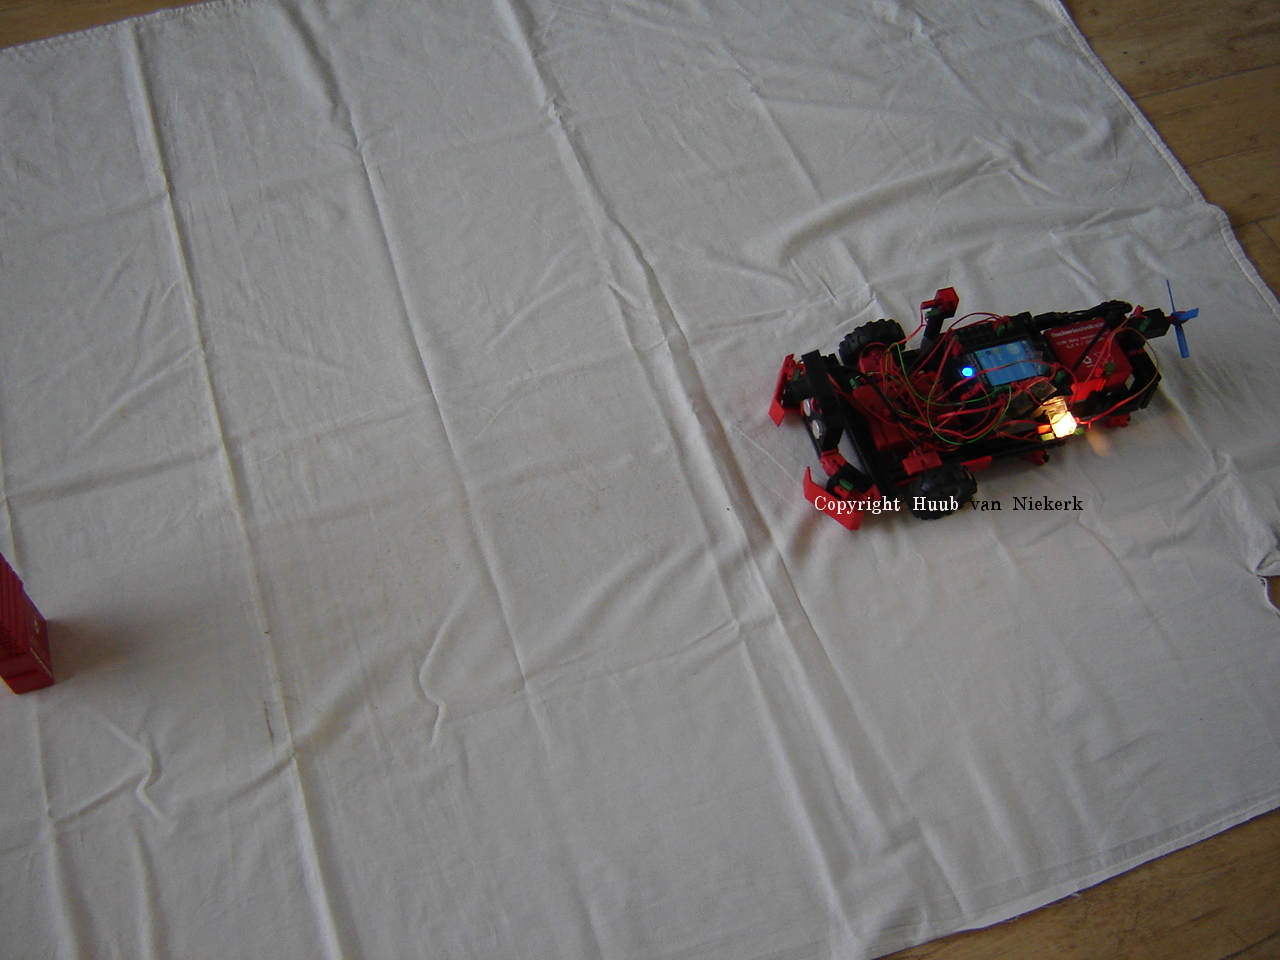
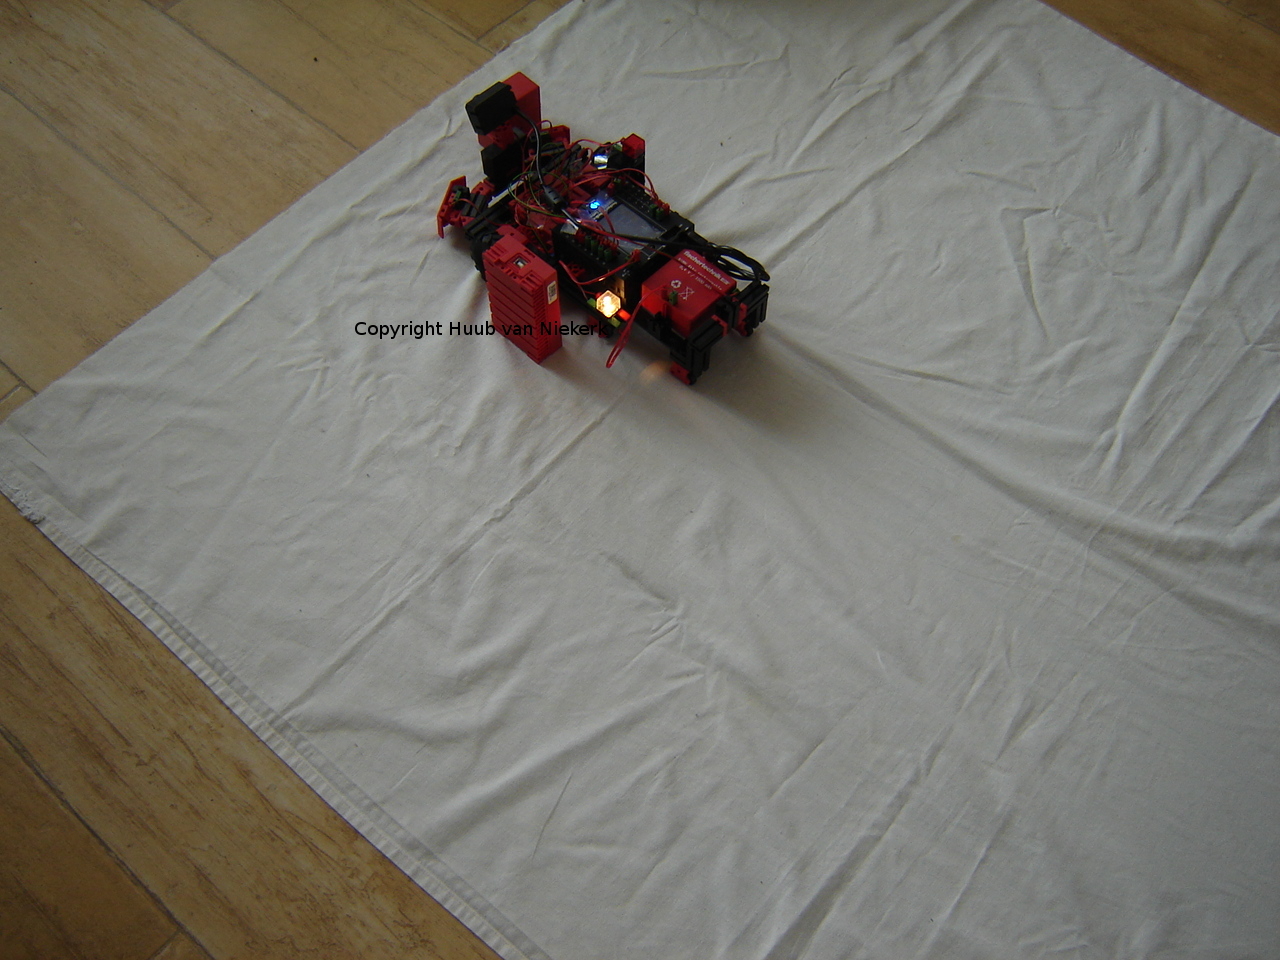
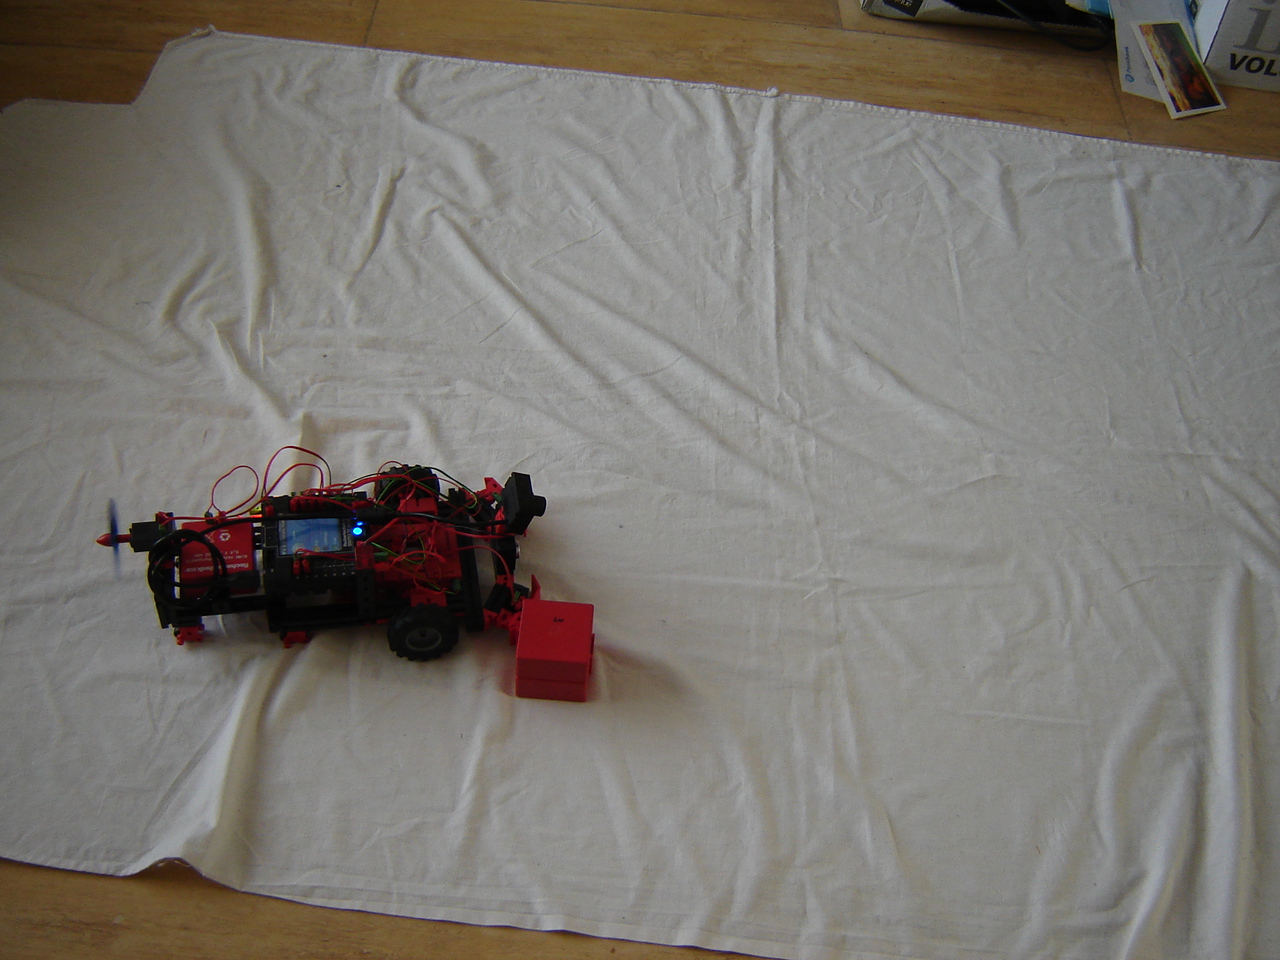
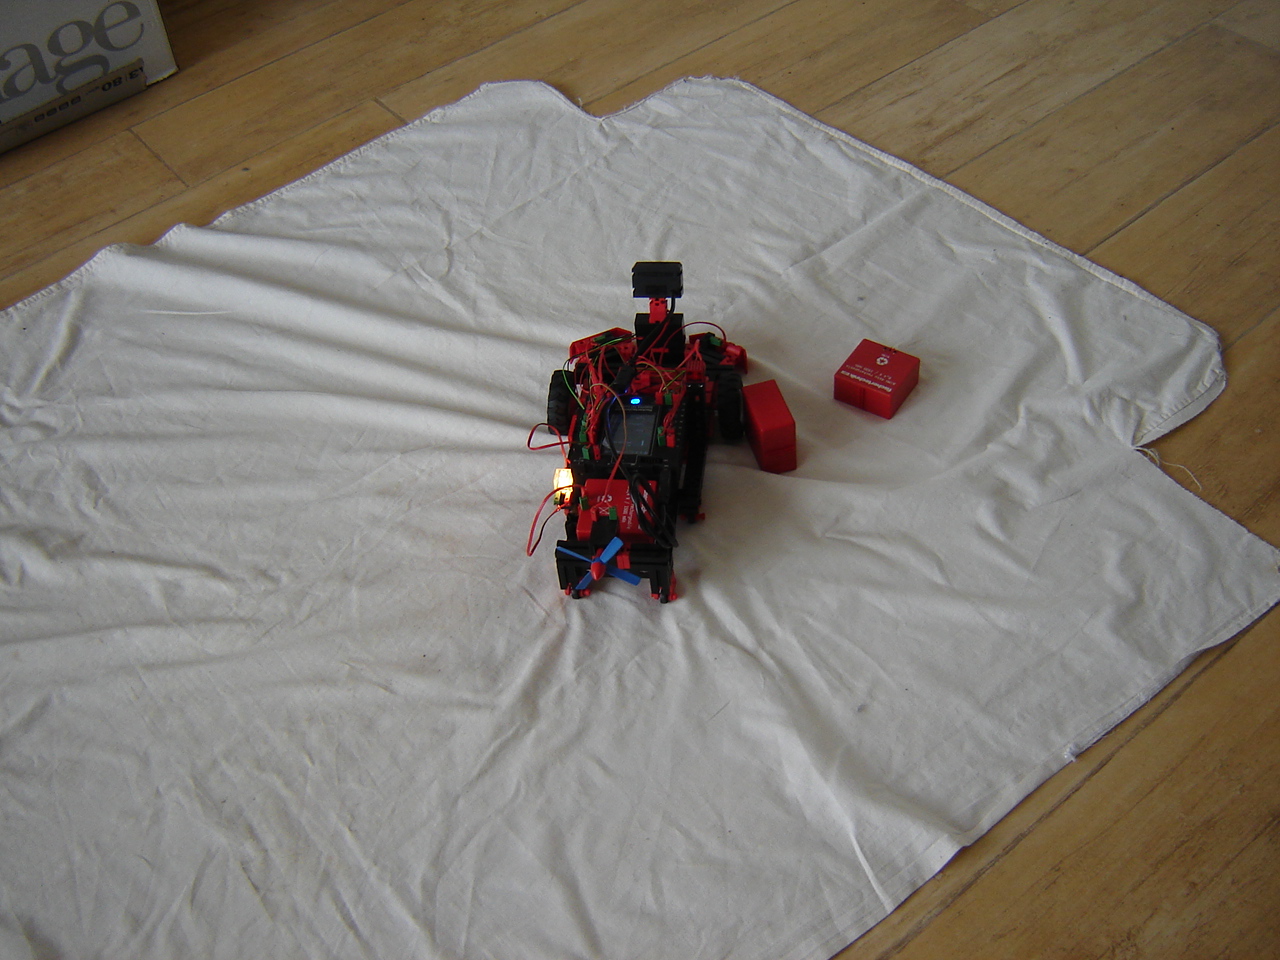
Discovery: Testing sensor sensitivity and a cloth on the floor leads to theories and (un)expected behaviour. The light works, but not during the tests? Some power-off's again..only while on battery, so must be wiring? See the video.
Mirft2: I decided to replace a few the gears so that the legs don't get obstructed. Then, when considering the position of the controller, I find that the gears have to change from inside to outside. In the end (for now), it looks fine. although there is an unexpected result. See the video.
RPi: I intended to replace the red LED with a green LED but that one didn't do anything at all. So for now only the signal wires remain to complete the setup. After this, the code has to be changed and tested which leads to what...? See the video.

Arduino Mega: To verify the NTC, I decide to use the multimeter. However, the indicator shows very different from the serial monitor. So the question is: if anything's correct, what is it? See the video.
Hand: After testing and observing, it becomes clear that elbow gears won't work: too flexible. Another major reconstruction is necessary. But will it work better? See the video.
13 May
BB: With the wifi connection finally back in place, the search for a good colourtool can go on. Then I find why things don't work as expected: scaling. Will this really help? See the video.
Discovery: Now that each picture has its own original timestamp, I can test more thoroughly. So first: how do sonar and touch go? Seem to go fine, with some interesting events happening. Then a big problem from the past seems to return and the voltage meter has to give an indication. Another wiring issue still needs a solution. See the video.
Mirft2: Wanting to add a 2nd leg, I find that I'm short of gear. With some improvisation, I get it done and meet with some unexpected and odd behaviour while running the code. See the video.
RPi: After finding out that several LEDs don't work, I have to check them out or find other ones. After checking and finding all are OK, the question is: why don't they work. Turns out to be a simple cause, but how did that happen?! Anyway, time to complete the setup and get some coding done. See the video.
Arduino Mega: Continuing from last time, I want to focus on the NTC and add another element to the setup. For this new element, I again use the SciLab/XCos simulation first. After a change in the motor setup, will the values make sense? With an inductor added, will the red LED burn the same way? See the video.
Hand: With the new motor and gear setup, the question is if the small motor is good enough. After another reconstruction of the elbow, there's a surprising result and another oops. See the video.
6 May
BB: Some old-fashioned system diagnotics: keyboard works on laptop, mouse works on laptop, USB hub works on laptop. USB-A connector on BB works (it detects the USB hub). Other USB hub shows same thing. So why doesn't the combination keyboard/mouse/hub/BB work anymore?! Well, the USB wireless adapter really is broken, but questions remain. Wondering if the replacement wireless will work on the USB-hub as it did before.
Discovery: With the improvements of last week, it's time to see if it really works. After quite a lot of trying I also manage to add time stamps to pictures, so they're all unique now. See the video.

Mirft2: With the results of the last video, I go on. Of course, nothing goes as intended but with some perseverance I get some movement done as I wanted. See the video (with extension after "the end"..).

Arduino Mega: After adding the lamp to check the NTC, I'm not happy with the result. But first use SciLab/XCos again for a simulation and I add a capacitor with the red LED for a nice effect. Then I change the NTC setup. See the video.
RPi: Time to set up the board completely by adding resistors. Then a problem shows up: LED 3 doesn't work. Time to diagnose once again. See the video.
Hand: With some new parts, I may make some progress. First I fix the big "winch", then the motors. Of course another issue comes up. See the video.
29 April
BB: No matter what you intend to do: with broken hardware, it ends. In this case a broken wireless USB adapter, still under warranty. Sending it to shop and it's hopefully back before or in the weekend, but not counting on it.
Discovery: With some code improvements suggested by the ftrobopy creator, I test again with some nice results but also unexpected behaviour. Does it work correctly or not? See the video.

Arduino Mega: Continuing with the motor with fan and the NTC. I decide to add a lamp to give the NTC some heat. Would this work out? See the video.
RPi: New experiment: LED 1 RPi1, this starts LED 1 RPi2, this starts LED2 RPi, etc. New setup, so new wiring. See the video.
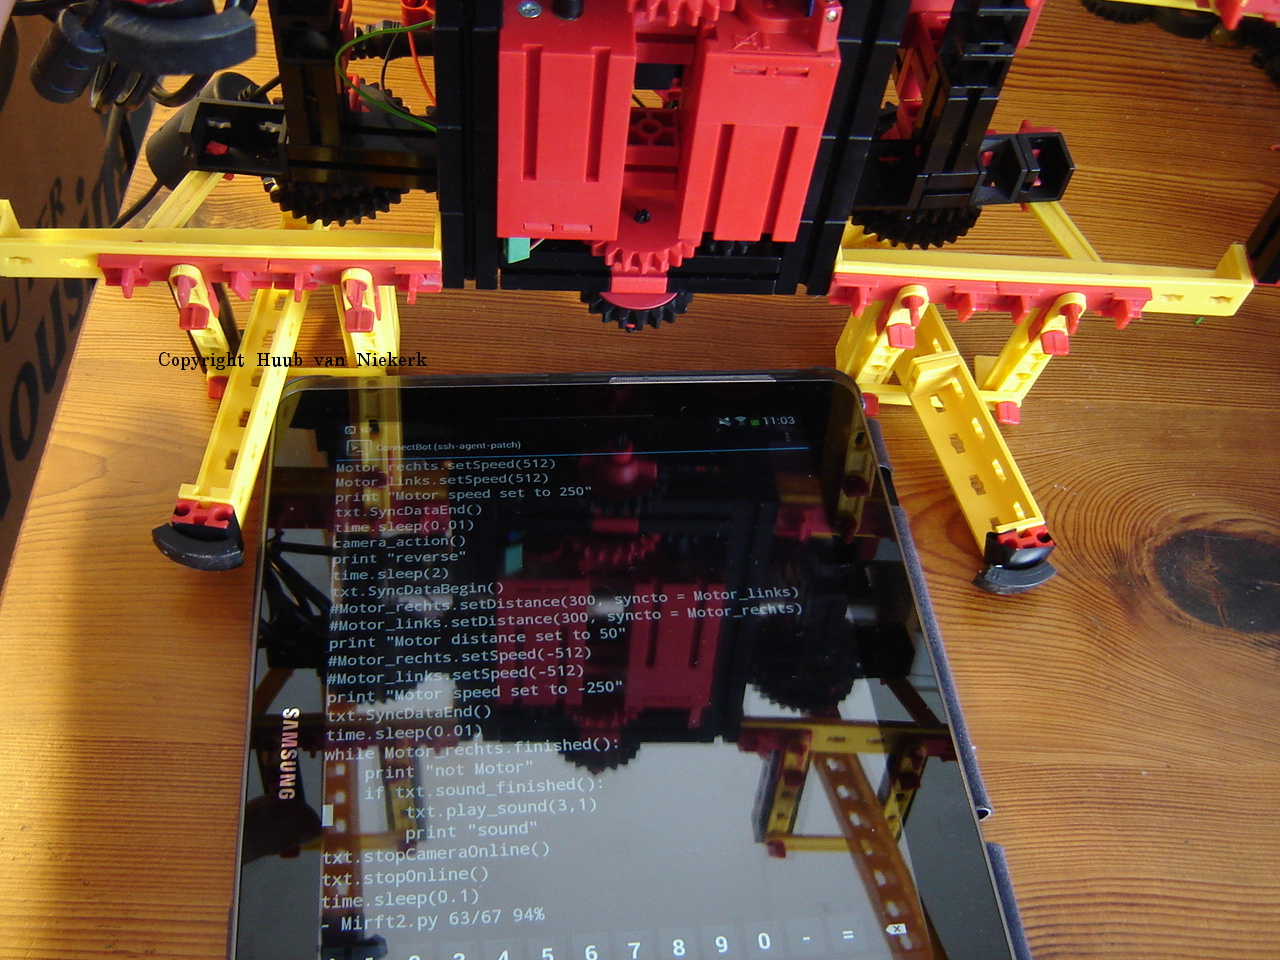
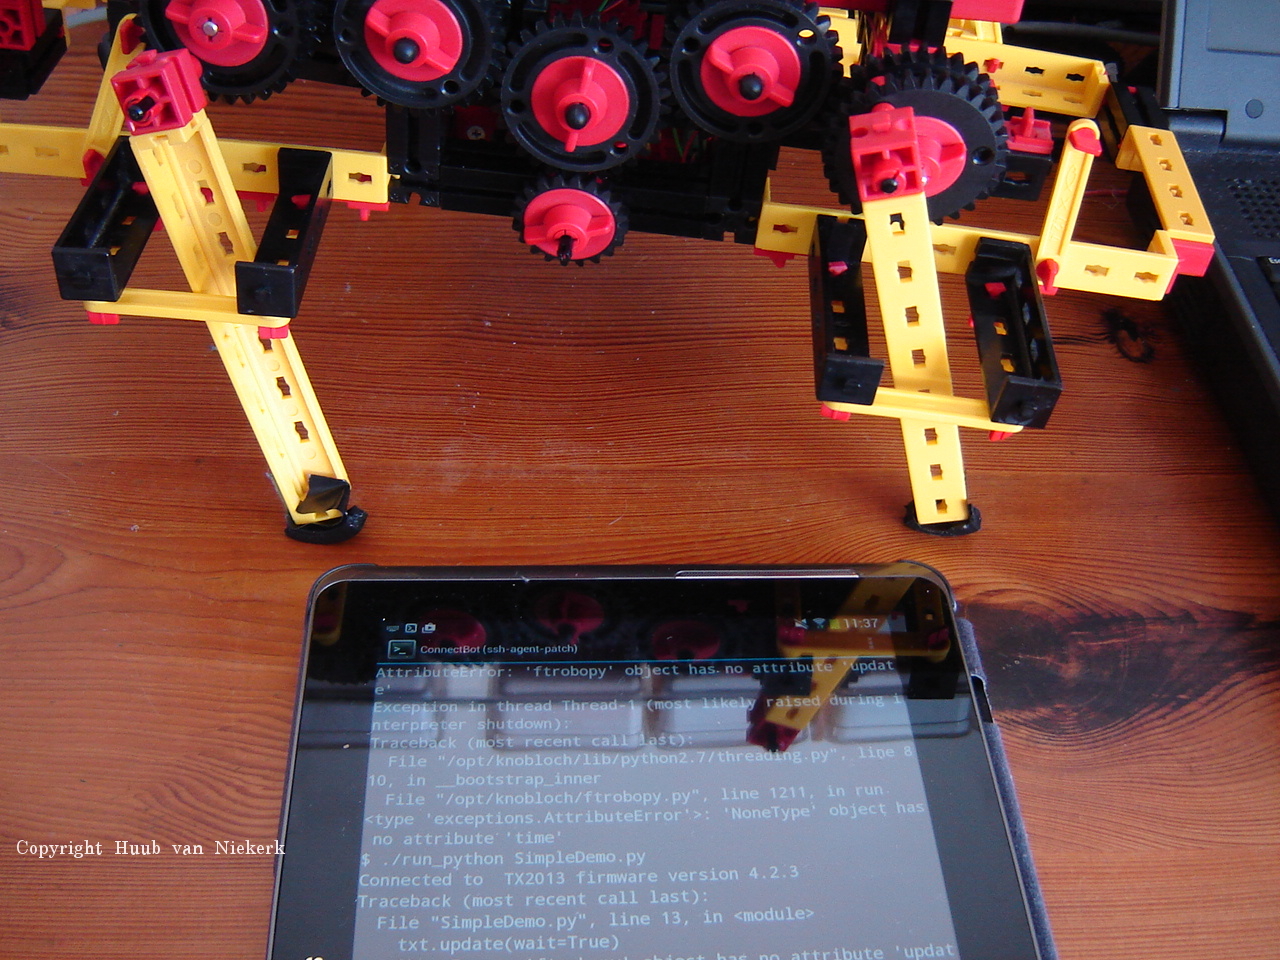
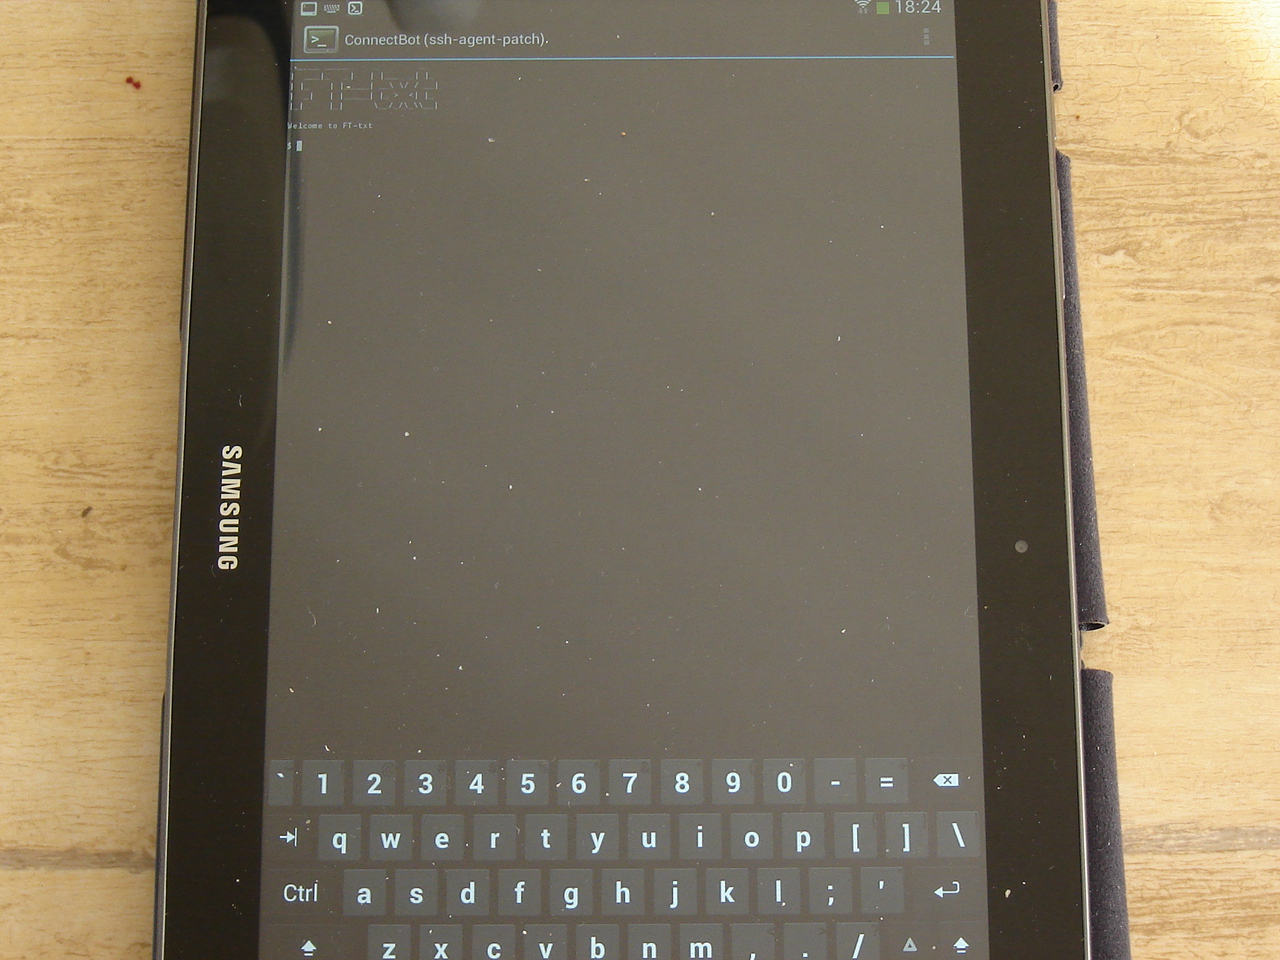
Mirft2: While I'm still only able to connect to the TXT2 by using the Android tablet, I find some wiring errors and a typo. With those fixed, I'm still not getting the motors to run. ROBOPro shows that they're fine, so what's up?! See the video. Shortly after, I found that they do work using Python after adding a piece of code. See this video.
Hand: With some delay, I ordered new parts so hopefully next week I can make some real progress. In the meantime I try to solve the physical moment issue of the hand. See the video.
22 April
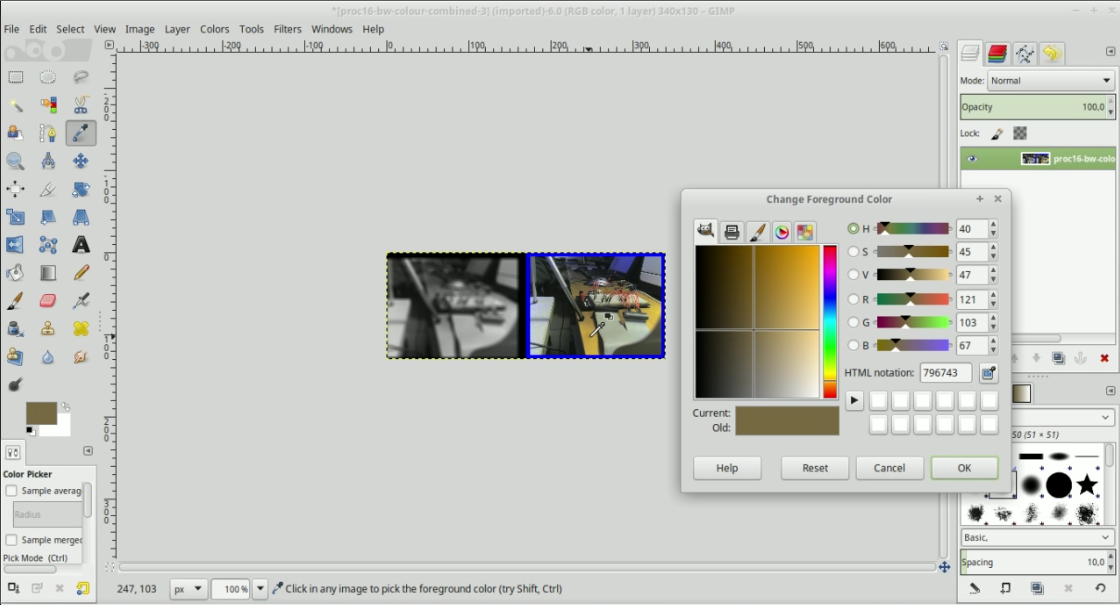
BB: Another attempt in getting the HSV values right. While experimenting, the question becomes: what colour am I probing really? Is Gimp the correct tool anyway? See the video.
Discovery: First focus is on the camera: why do I only see tiny bits on the images? Then: the algorithm. Odd behaviour once again. See the video.


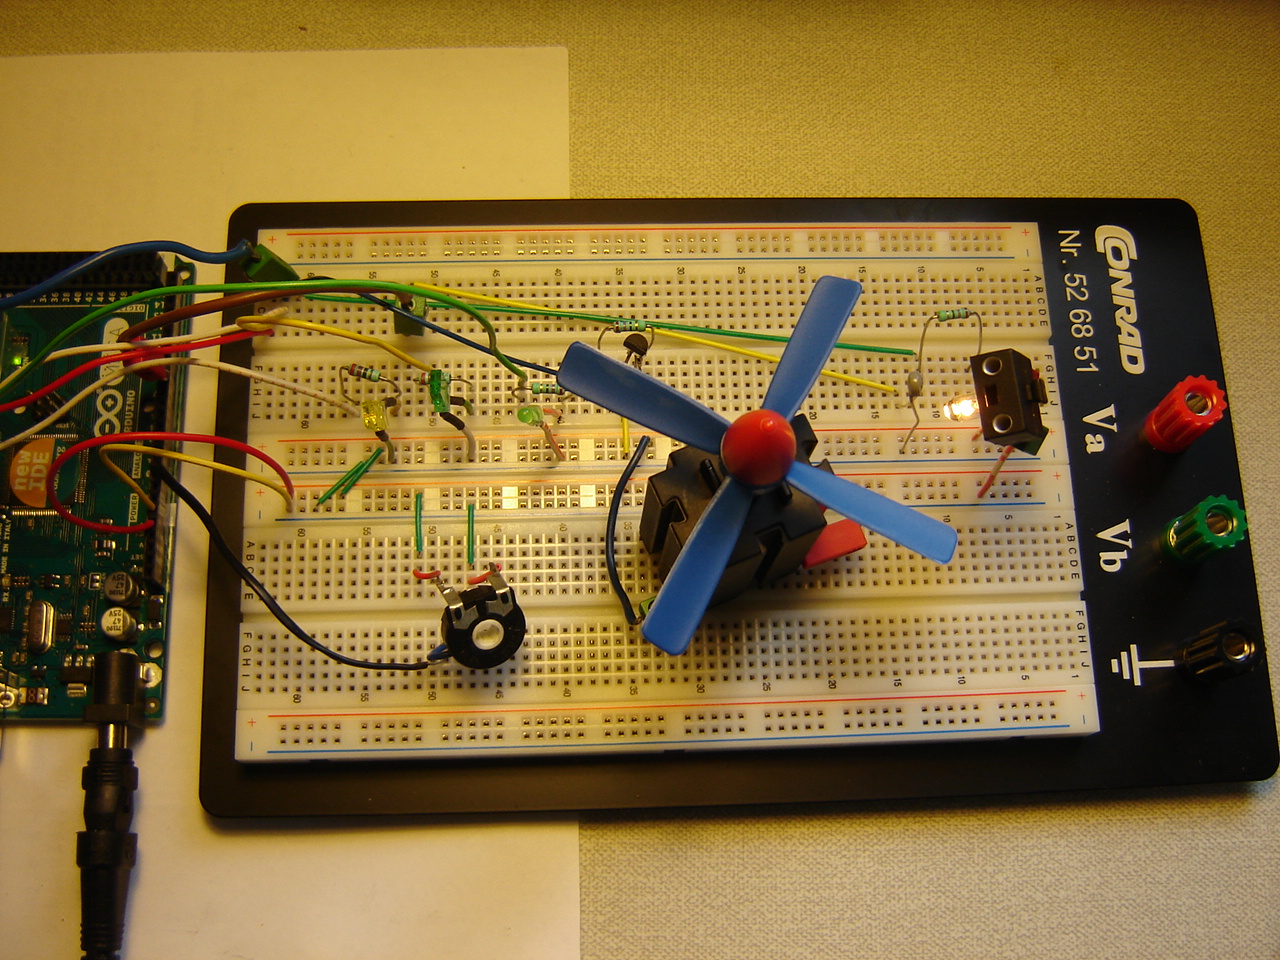
Arduino Mega: Using a brand-new breadboard and ready-to-use jumpwires, I find that I have to make more improvised jumpwires. Then to make the motor run more visibly, a fan is added and followed by adding an NTC. See the video.
Mirft: No changes, but it's being retired after almost 10 years. A final overview video and pictures.
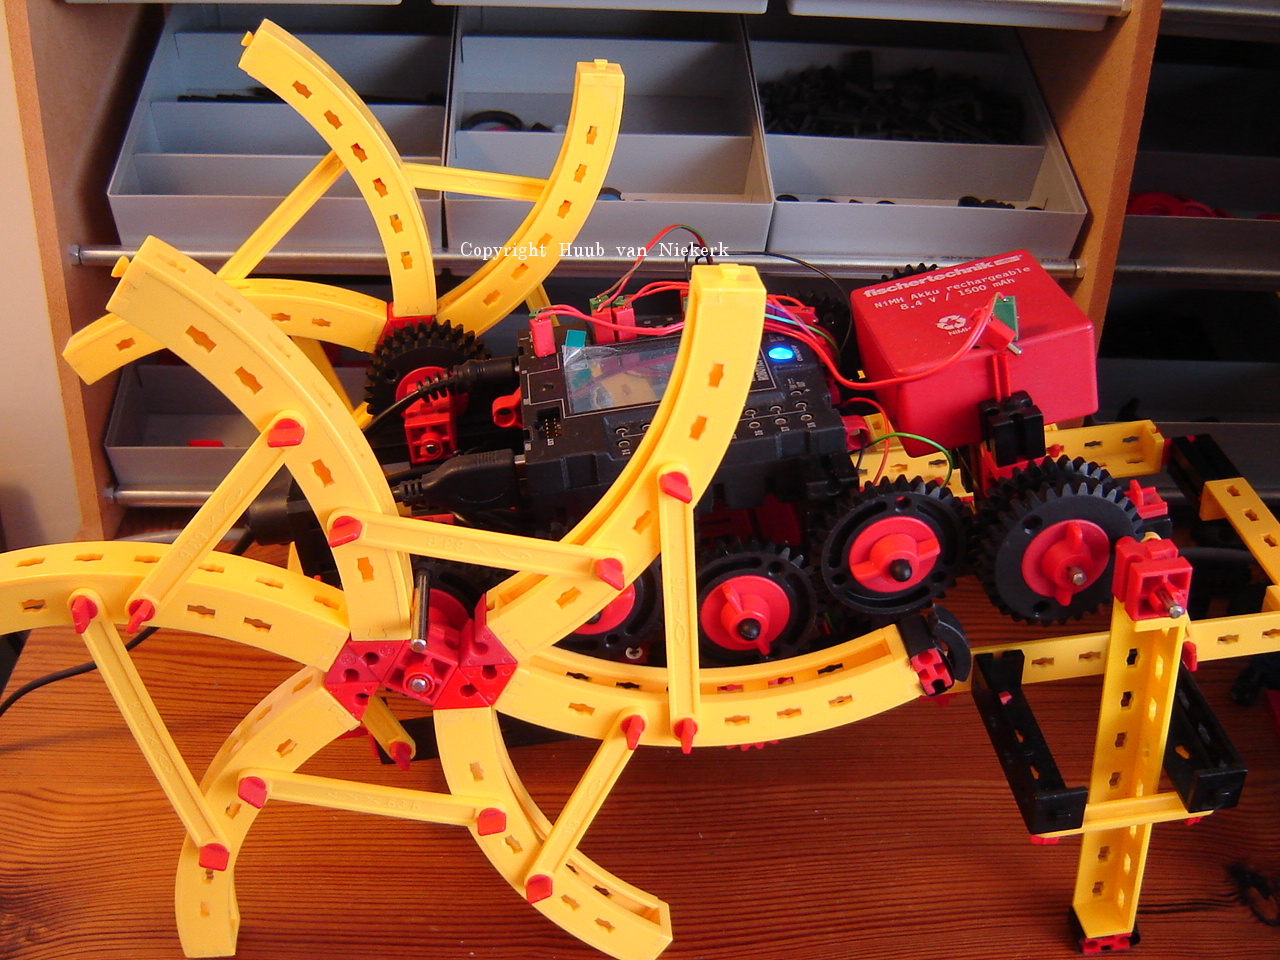
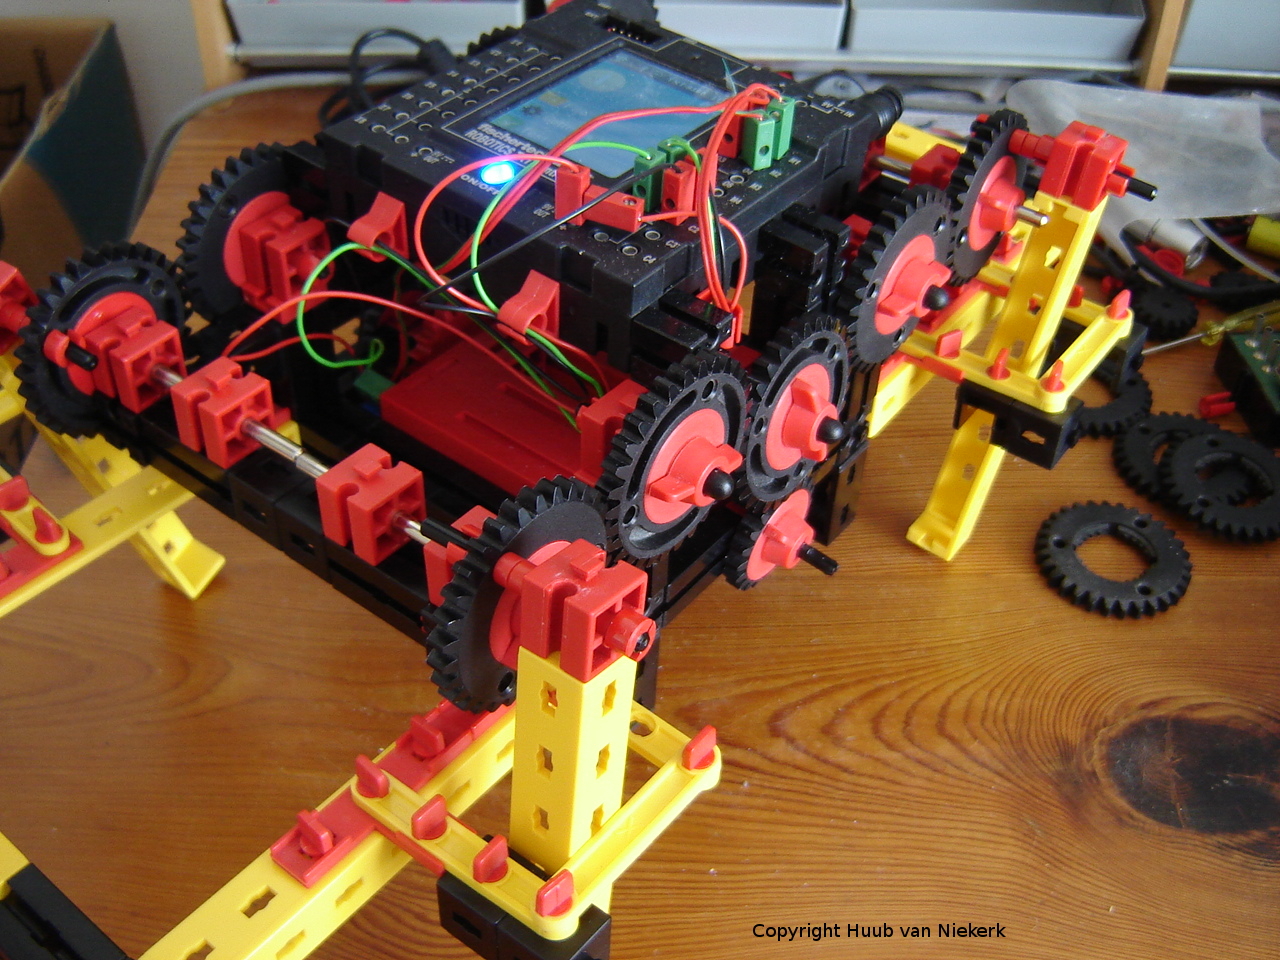
Mirft2: New model that will walk, hopefully. First preparations: update firmware and upload ftrobopy for using Python. This last action gives quite a struggle: using either one of my laptops, the controller's wifi is detected, but can't connect. Then I try my Android tablet: no problem at all. First I test connecting to the USB-camera: ok. Then uploading ftrobopy: ok. But why do the laptops give problems?! Then I realize I still have to upload Python, otherwise ftrobopy won't work. Oops. See the video.

RPi: After finding a mistake in the Python code, it's time to debug C++ again: is the same code problem which was in Python is in C++ as well? Most likely. Does the counting is speed up, and does it count in reverse? See the video.
Hand: A few problems are with the hand: 2 fingers are not responding. Time again for the ftdiagnostics. This reveals 1 problem...but what's the other? See the video.
14 April
BB: Again, brown is the topic. After some trying out and finding examples, I find that the array is really HSV. Also, enlarging the difference between lower and upper brings a remarkable result. See the video.
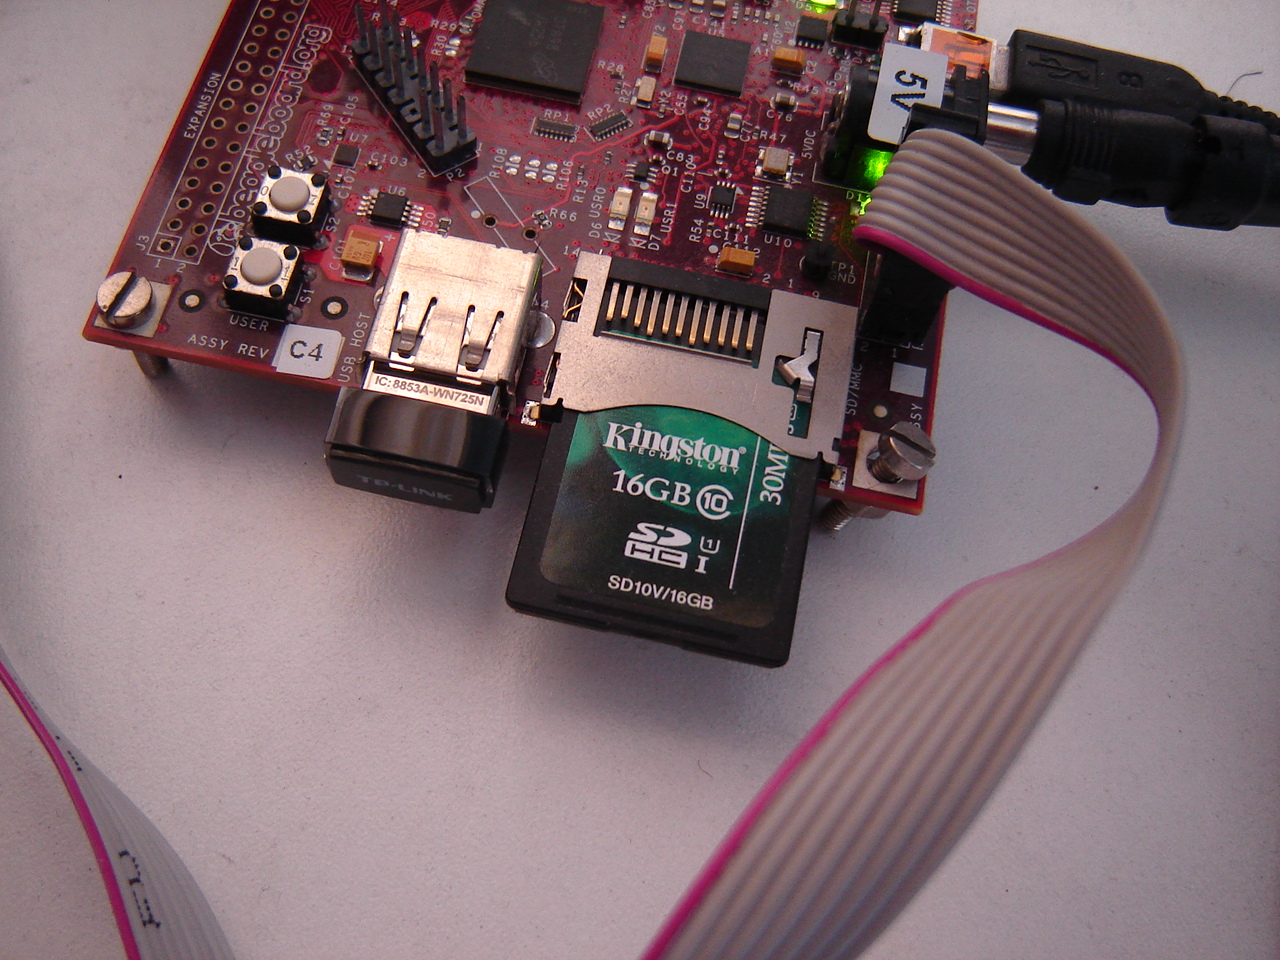
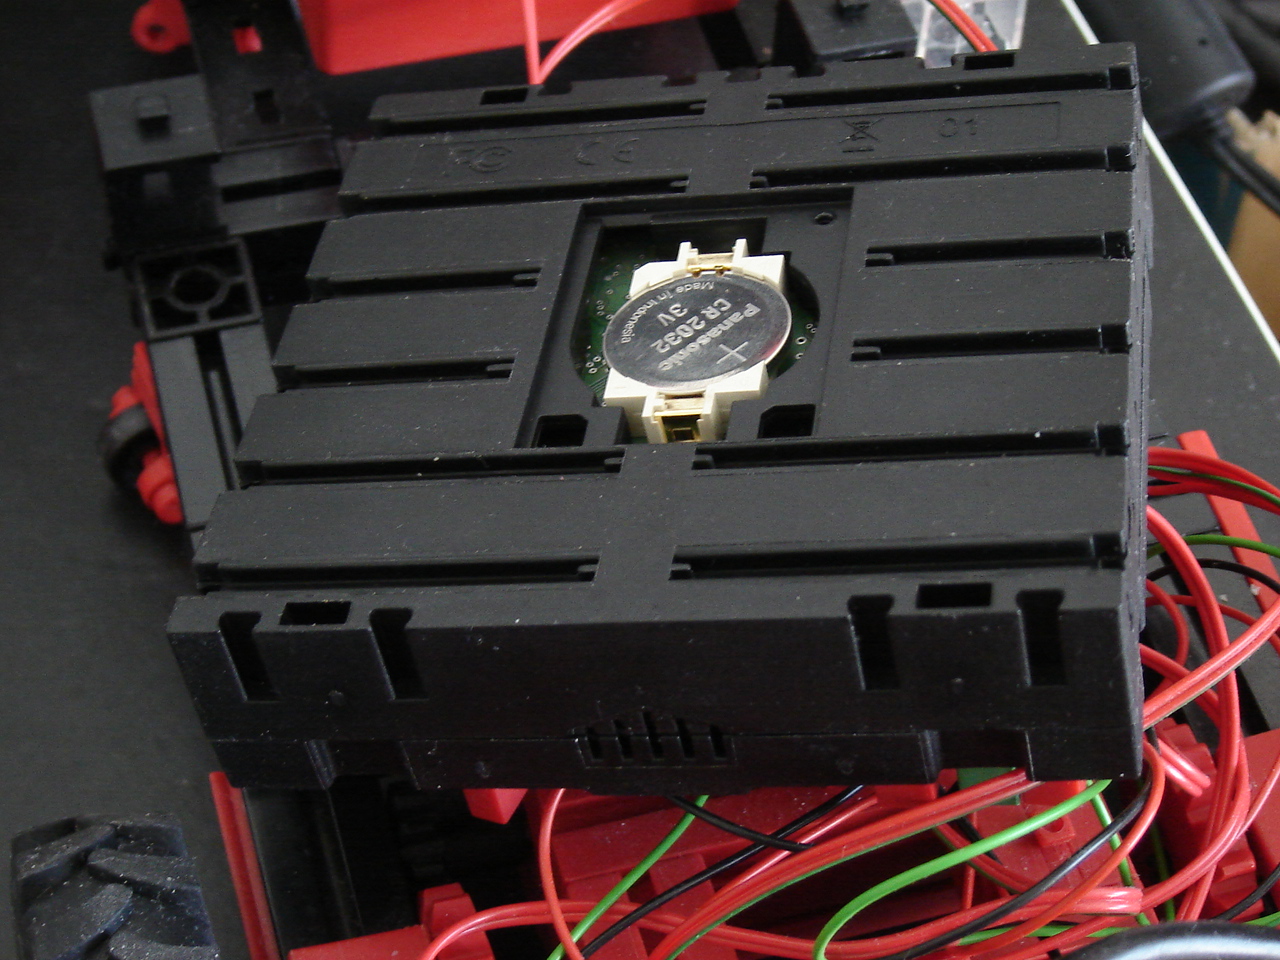
Discovery: Last time I found out that the date of the pictures grabbed from the camera was 01-01-2000. So I need to replace the battery, which has gone down to 2V. Then it's time for some experiments: are 500 pulse-counts enough? The 3rd picture shows the camera image...not much. But why? See the video.

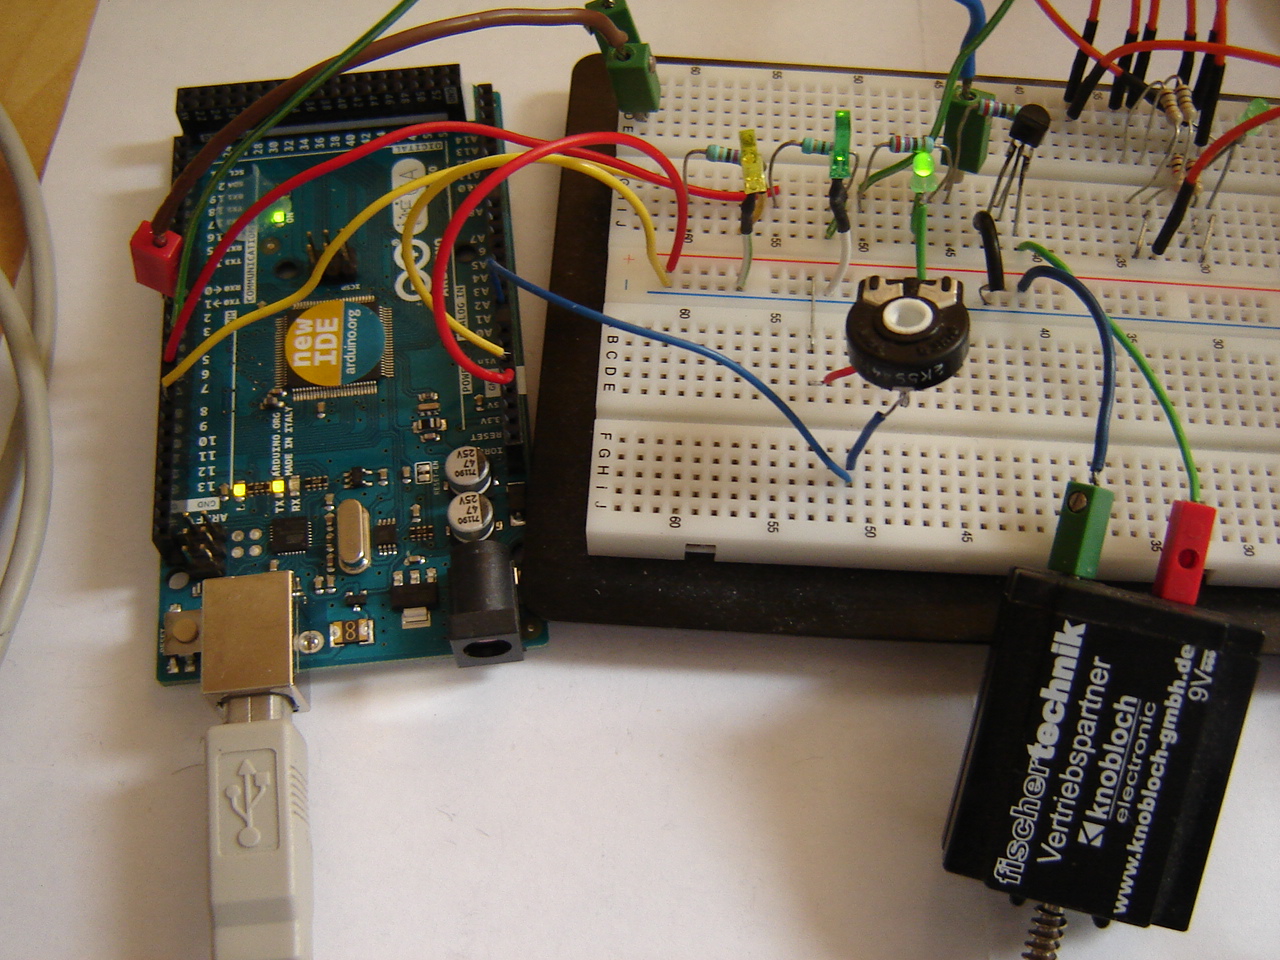
Arduino Mega: Continuing with the circuit from last time, I change the USB cable for a more flexible one. Since I'm now dealing with a true analog circuit running at 5V, I try to connect a small fischertechnik motor and a buzzer. See the video.
RPi: In order to verify the code, I decide to check the reverse counting in Python and find an error. So probably I make the same mistake in C++. Oops. See the video with lots of (boring?) testing.
8 April
BB: Going on with colourspace, I do some more attempts with colour range. If they fail, how were the blue values derived? See the video.
Discovery: Going on with the camera and the sensors, there turns out to be a hardware issue. After solving it, will it work fine now? See the video.
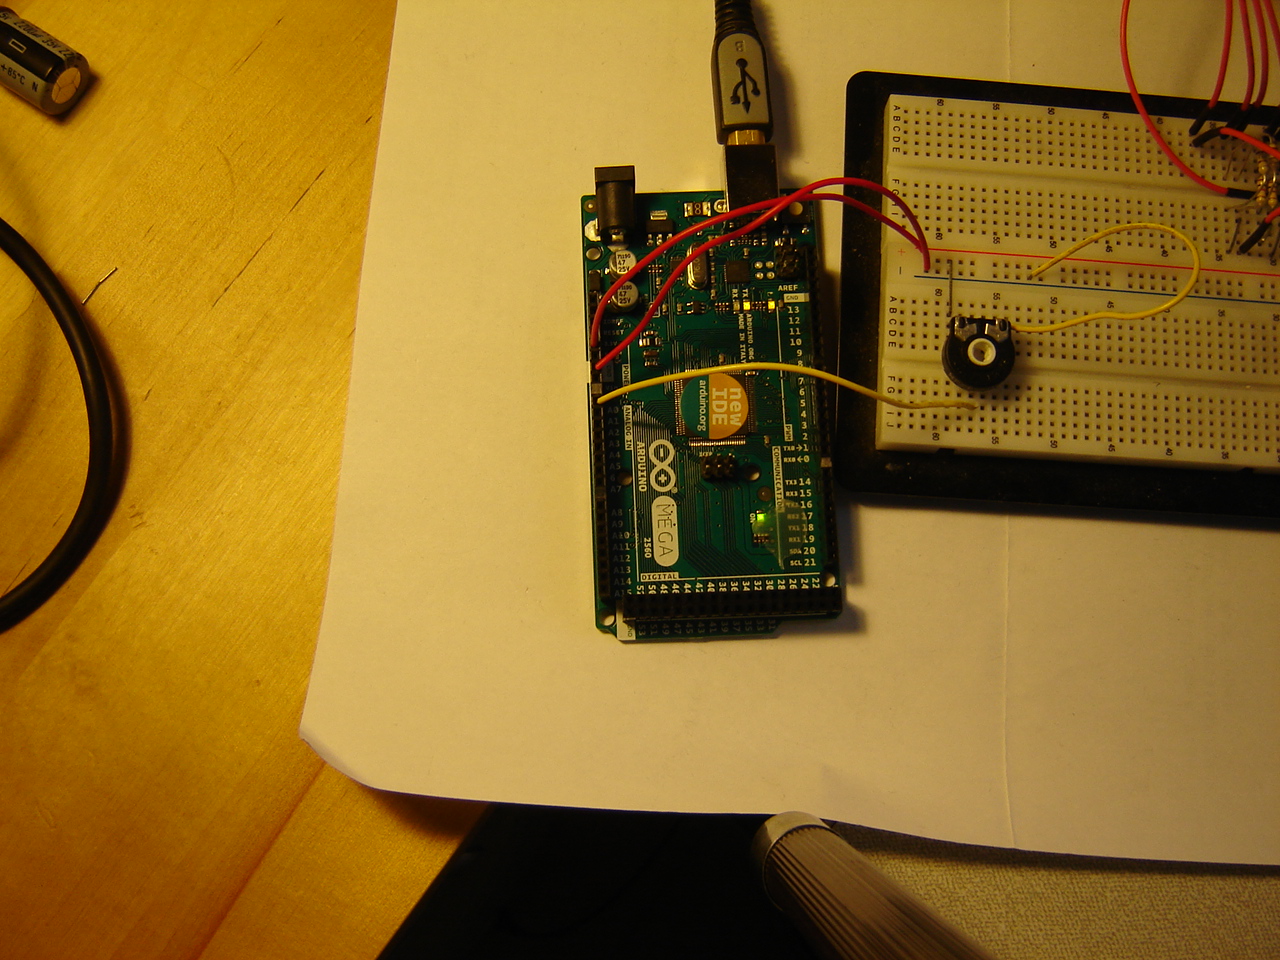
Arduino Mega: Last time I worked with a potmeter that had to be pressed down. The solution looked simple enough but still took some tinkering. Also, a change in LED was needed: no more red. Not finding any round LED, I go for yellow square. With these issues solved, on to the next circuit: an extension with a 2nd LED: the green one, showing a remarkable result. Would adding a 3rd LED bring anything new? See the video.
RPi: With some clarity due to added timing, the question rises: what causes the delay in counting? I end up with unexpected behaviour and a decision. See the video.

Hand: With the gearing problems...what to do? Another idea to fix the motorside seems to help and other problems are left to fix. Then it's time to test pneumatics and motors. Will everything work this time? See the video.
1 April
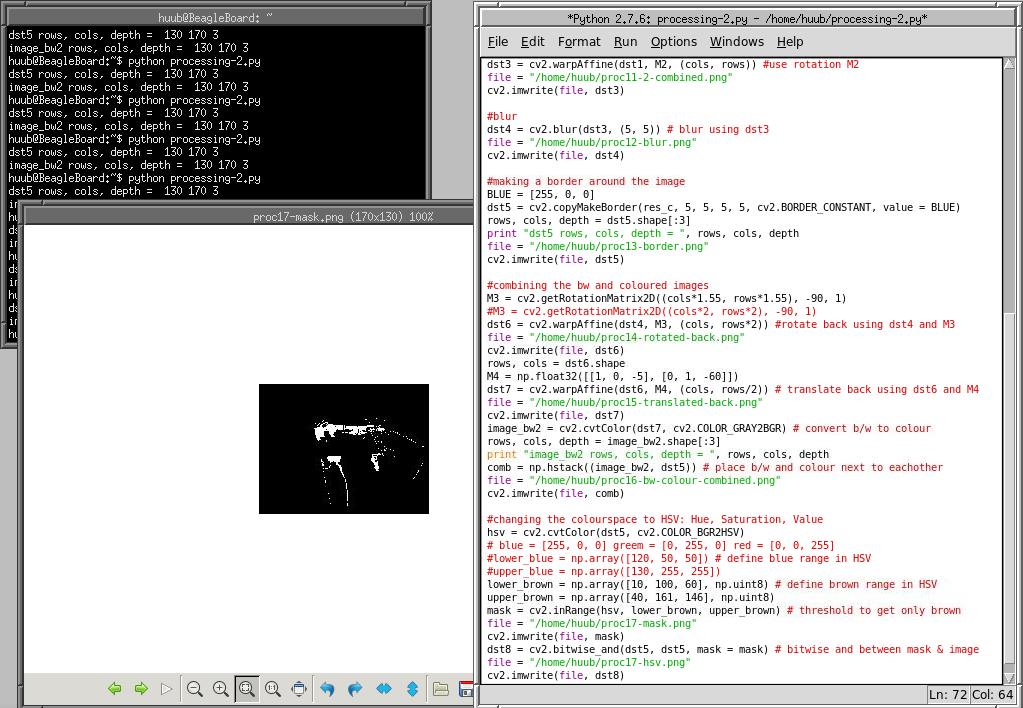
BB: Brown is the question. When searching the net doesn't help, Gimp, being an open-source competitor of Photoshop, might help. Other candidates could be ImageMagick and Shotwell. But do they do what I need? See the video.
Discovery: Continuing with the sensors: what's going on? Adding a piece of code, activating the camera when both sensors are hit at the same time. Then all goes weirder. Two pictures: 1 shows a bit of red object..might be the red trail line, might be a piece of battery. The other showing nothing...overexposed? See the video.


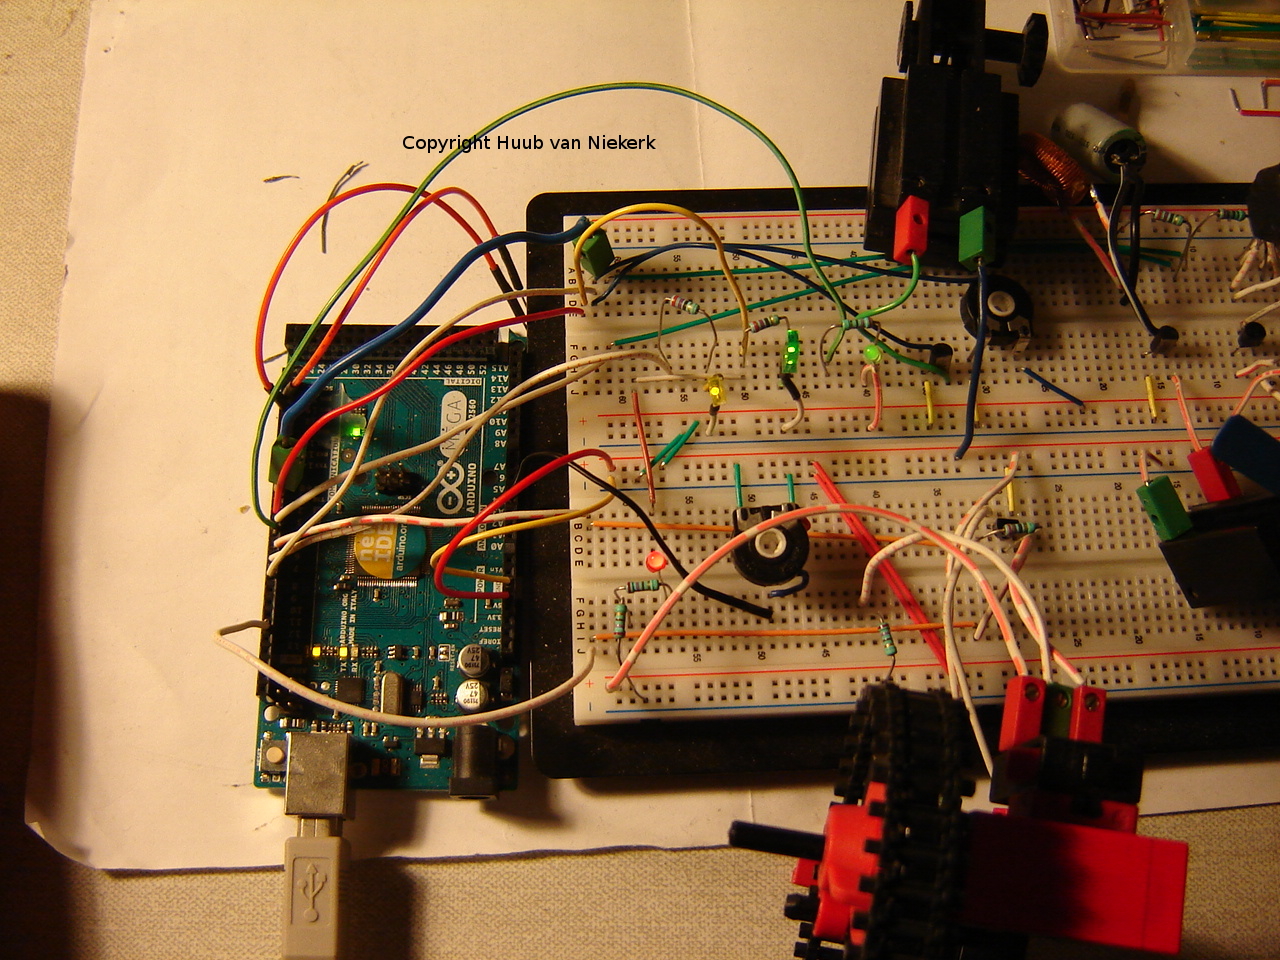
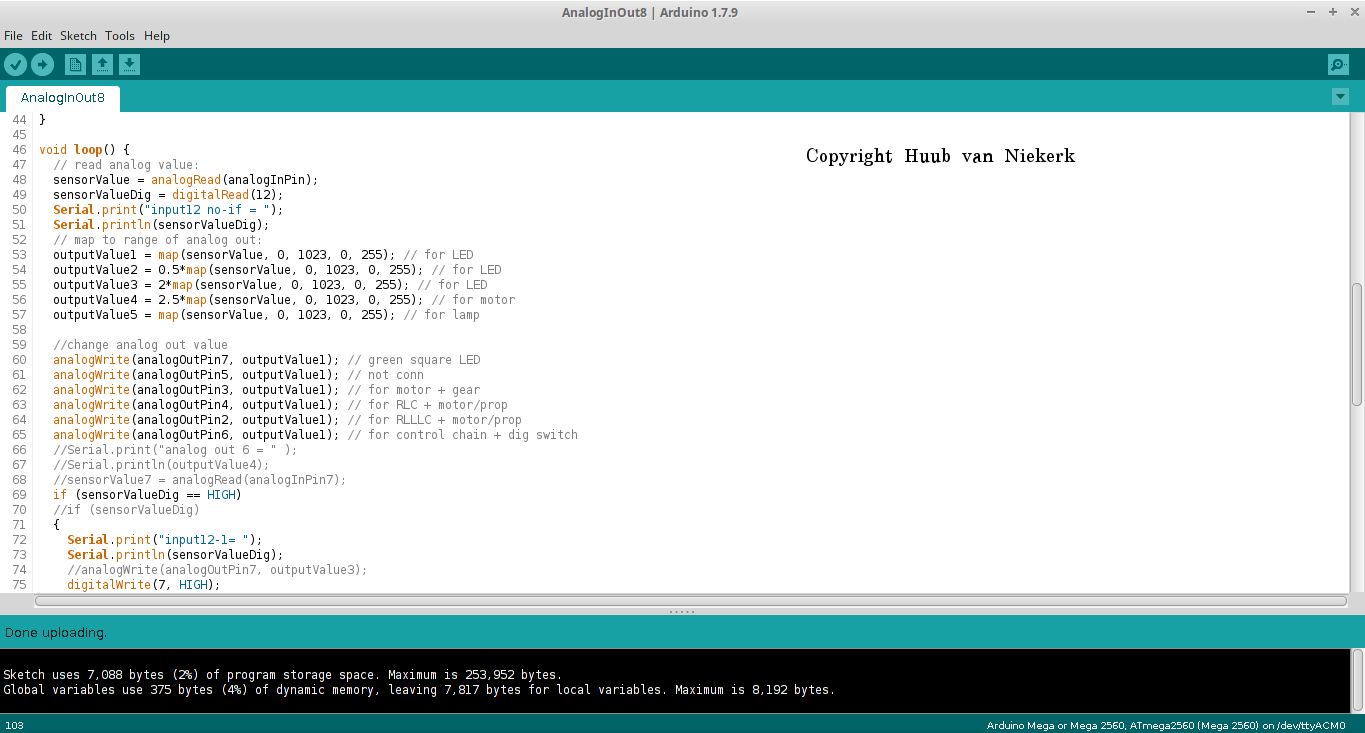
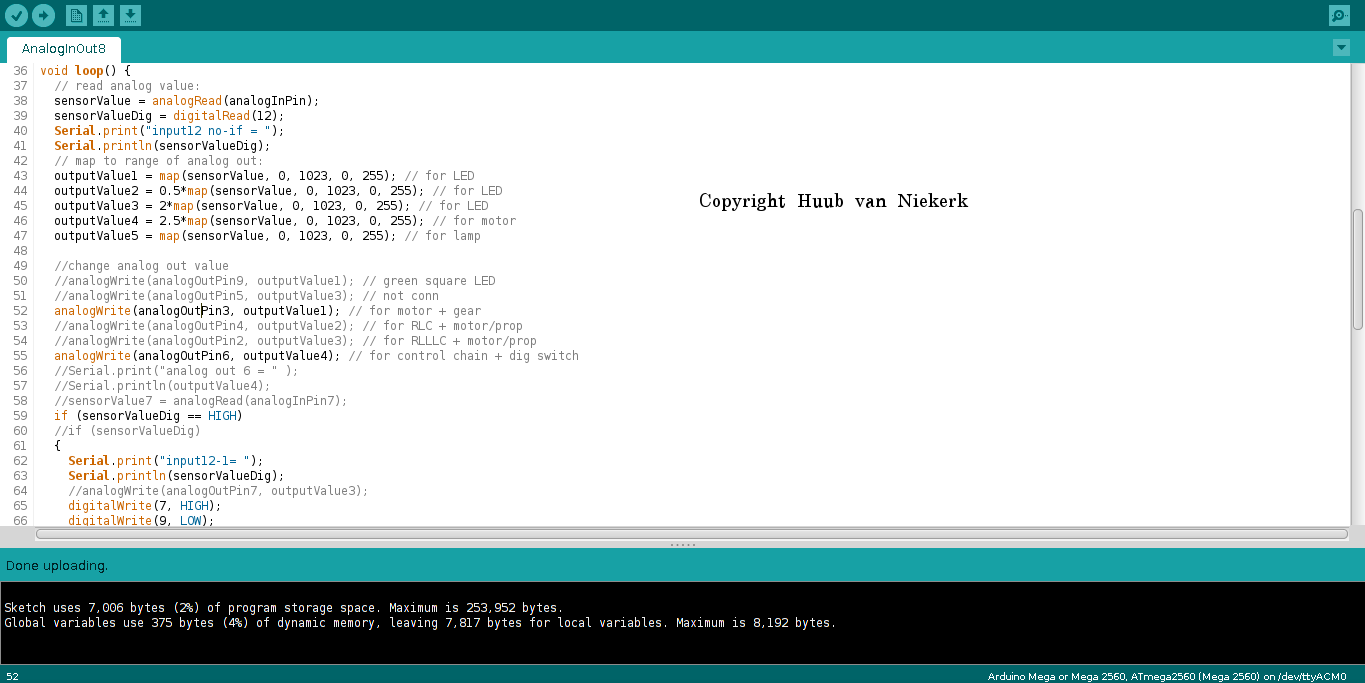
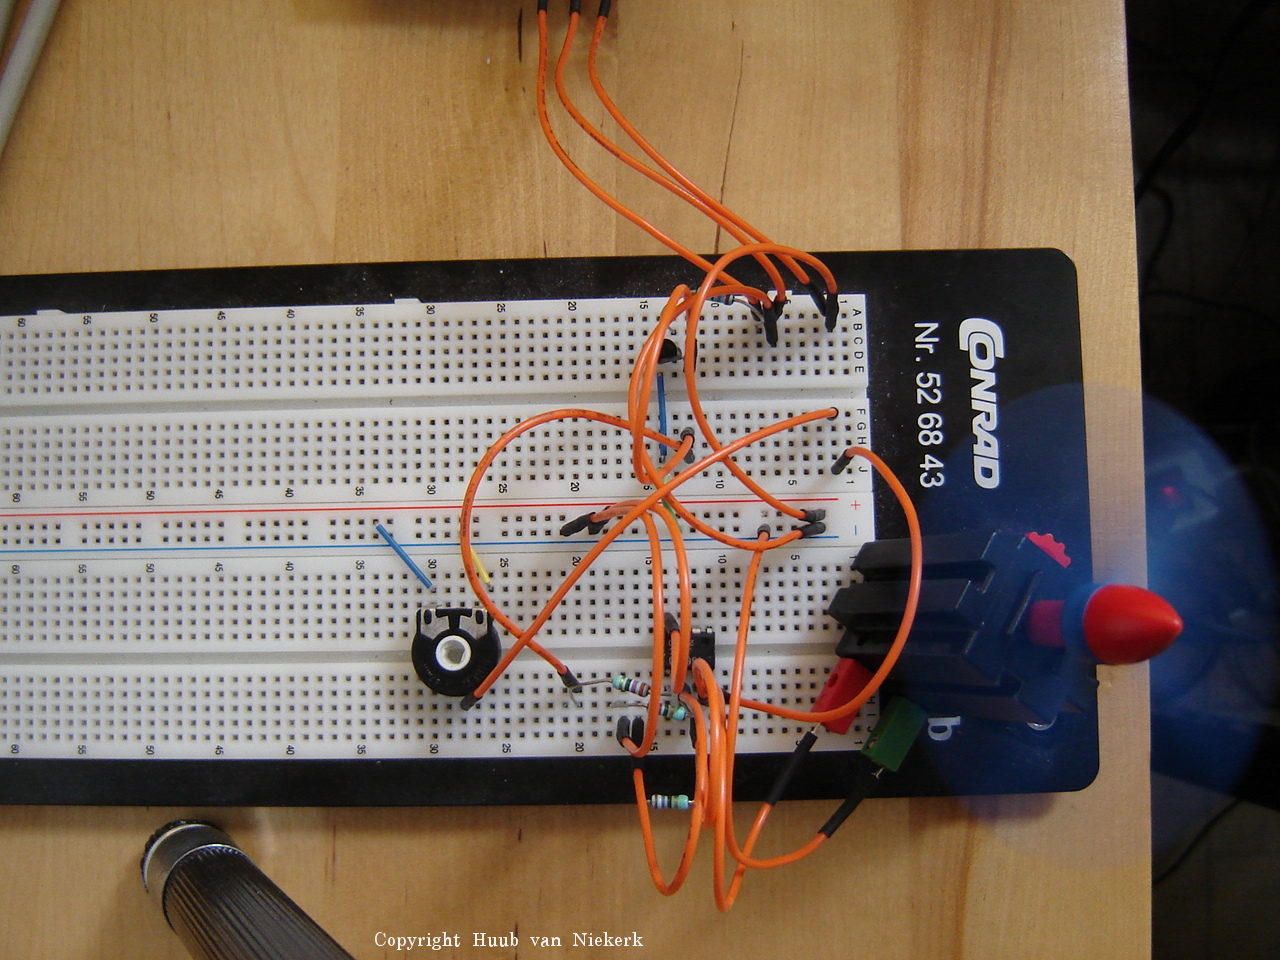
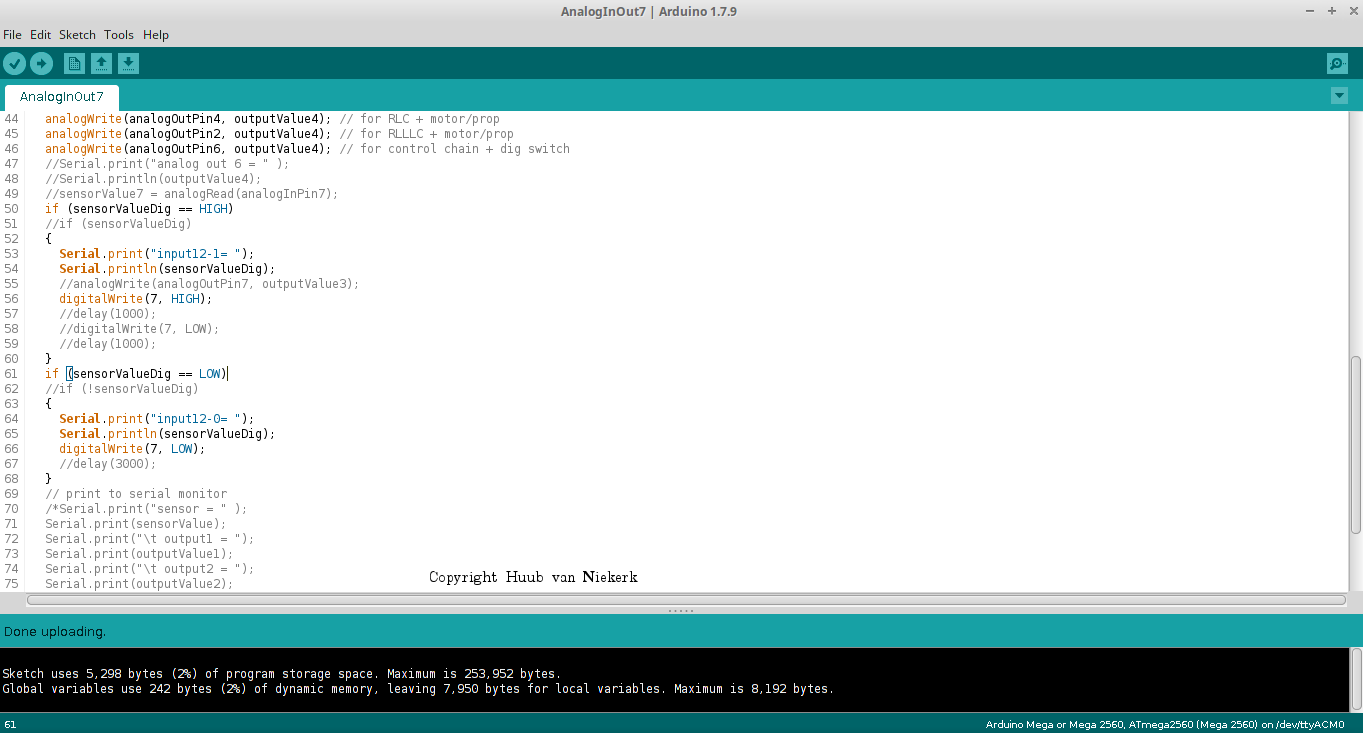
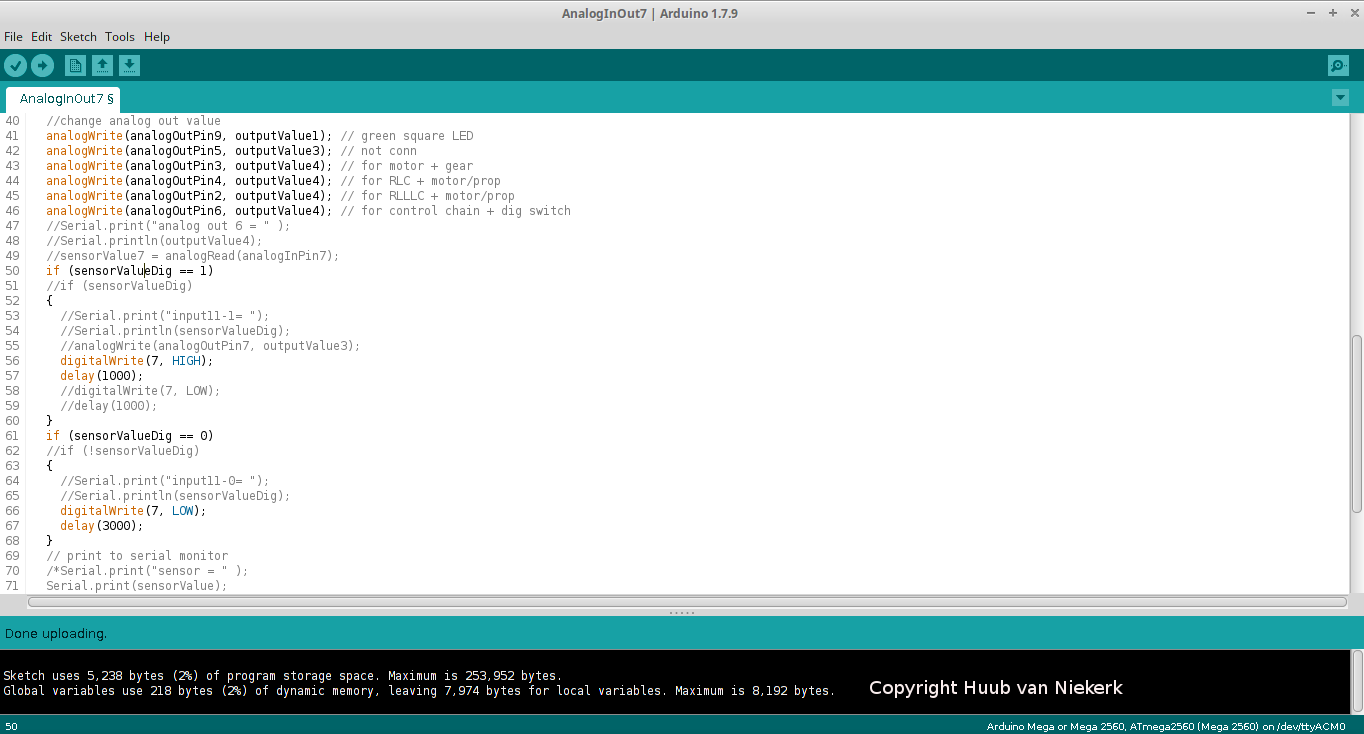
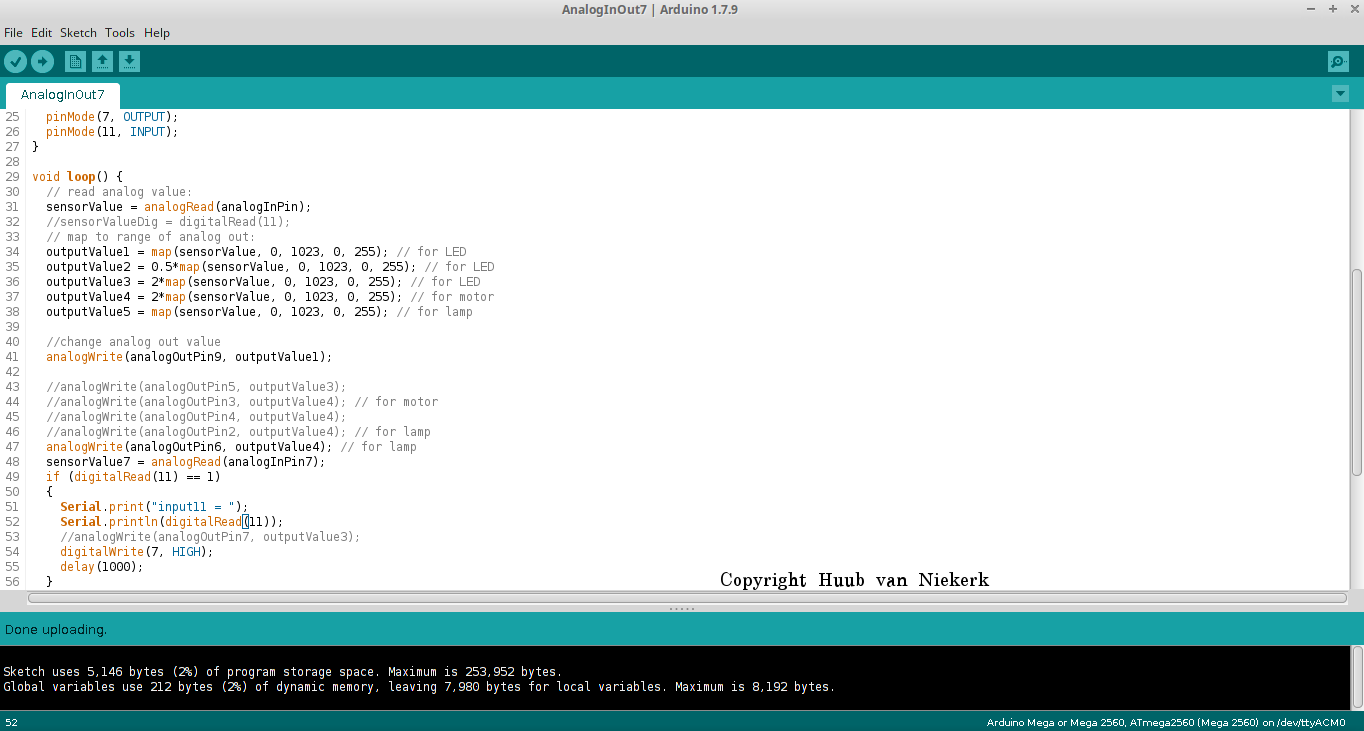
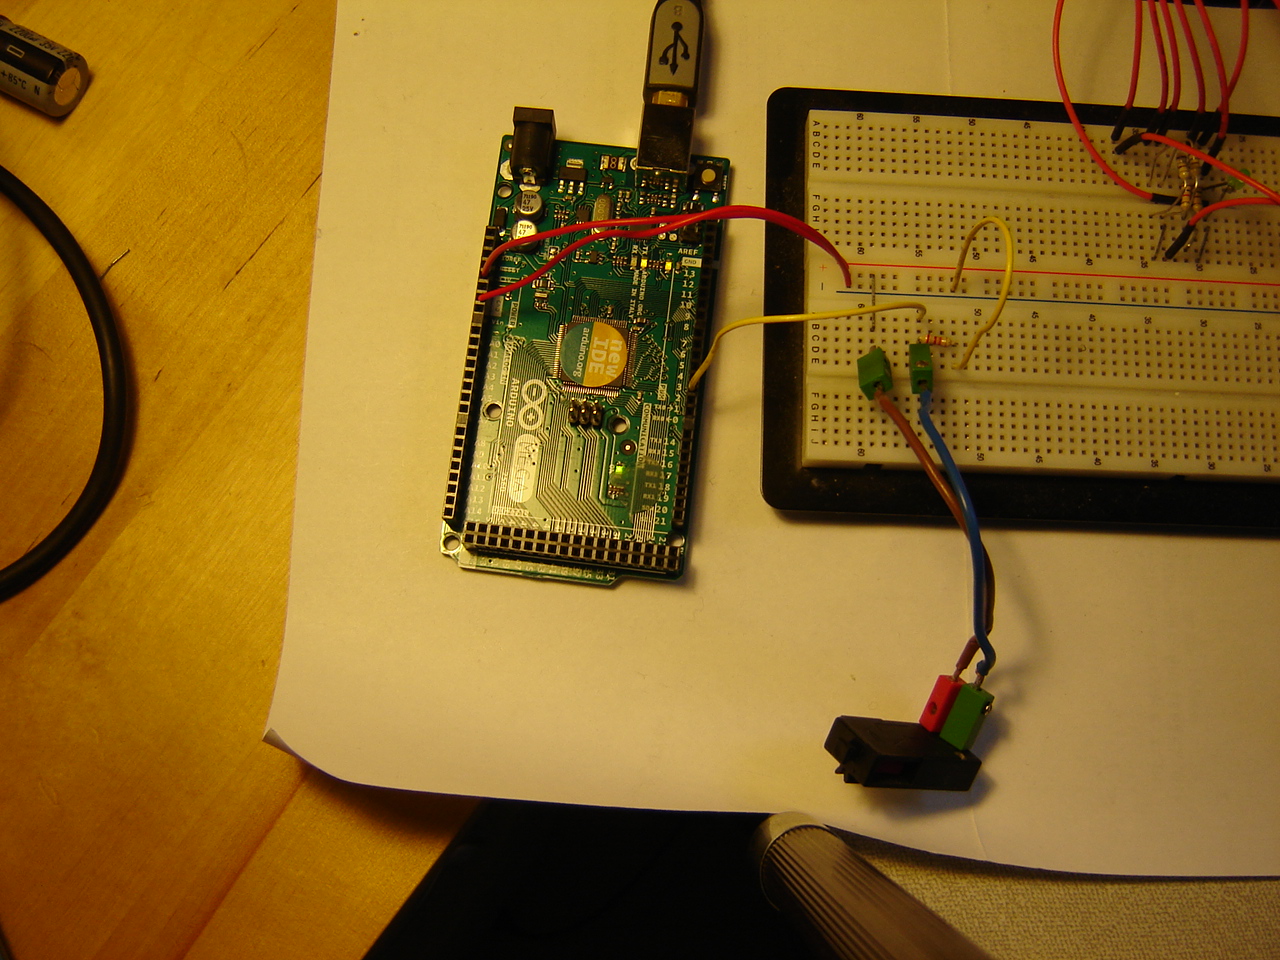
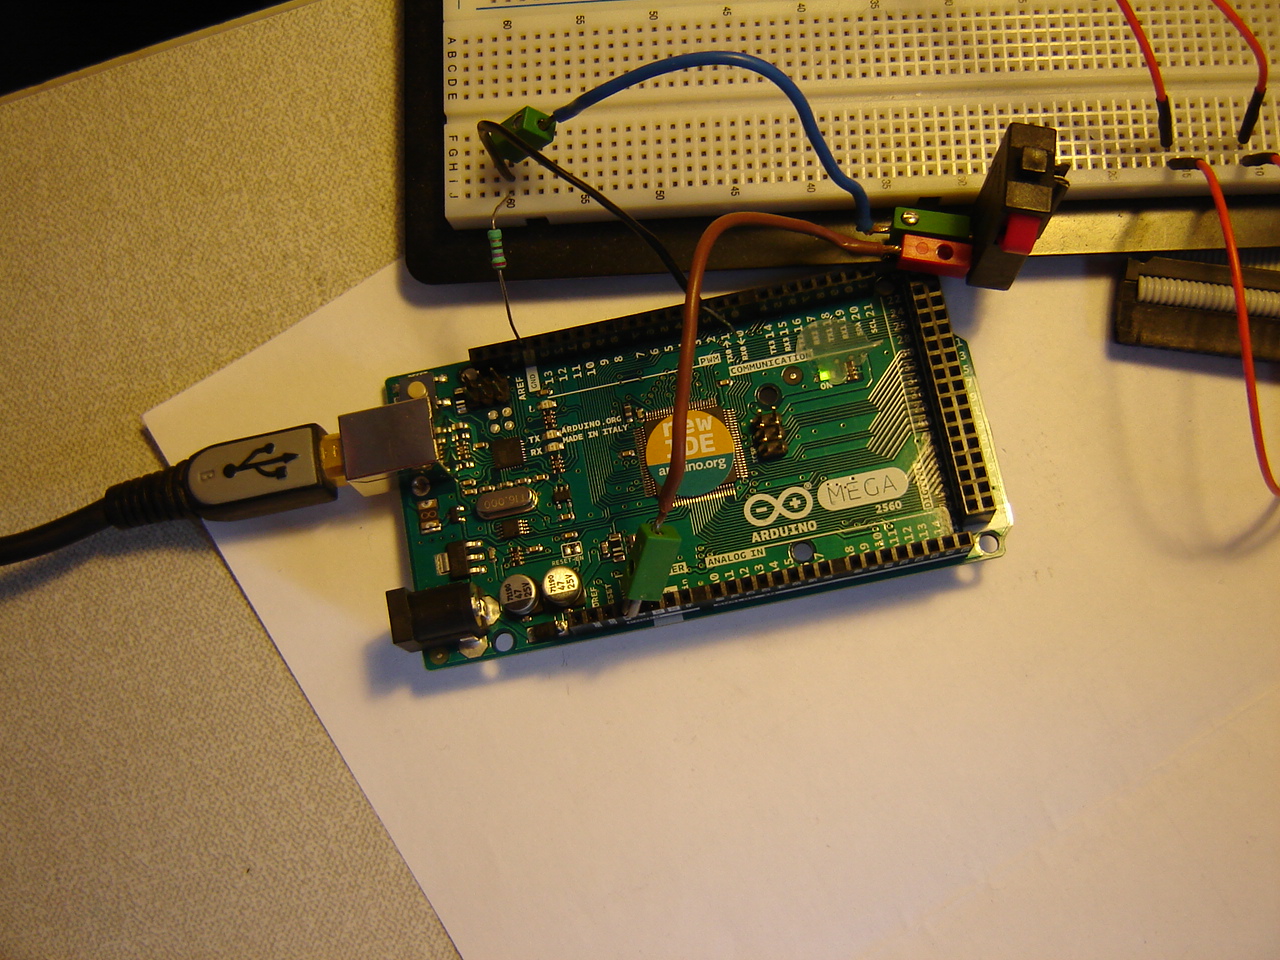
Arduino Mega: Continuing with the last Sketch example: DigitalReadSerial. This requires a breadboard as well. So until I have another one, I will have to share it with the RPi circuits. Problem is that I have a shortage of jumpwires, so I have to improvise and make a few myself. Following this example to setup the circuit, although it uses a different Arduino model and switch, I try anyway. Another example, AnalogReadSerial, uses a potmeter and a 3rd example, AnalogInOutSerial applying PWM uses a potmeter, a resistor and an LED. See the video.

Hand: With the current gear problems, another question pops up: can it hold a steady position anyway? If so, how does the gearing behave? Why does the software behave oddly? Mistakes can always happen... See the video.
RPi: After the last time, the question is: what to do? First thing: optimize screen output and unclutter it. Apart from that: more time stamps create some clarity. See the video.
Mirft: Now that I've tested so much and found quite a few problems, what can I do? Perhaps some stabilization would help. See the video.
25 March
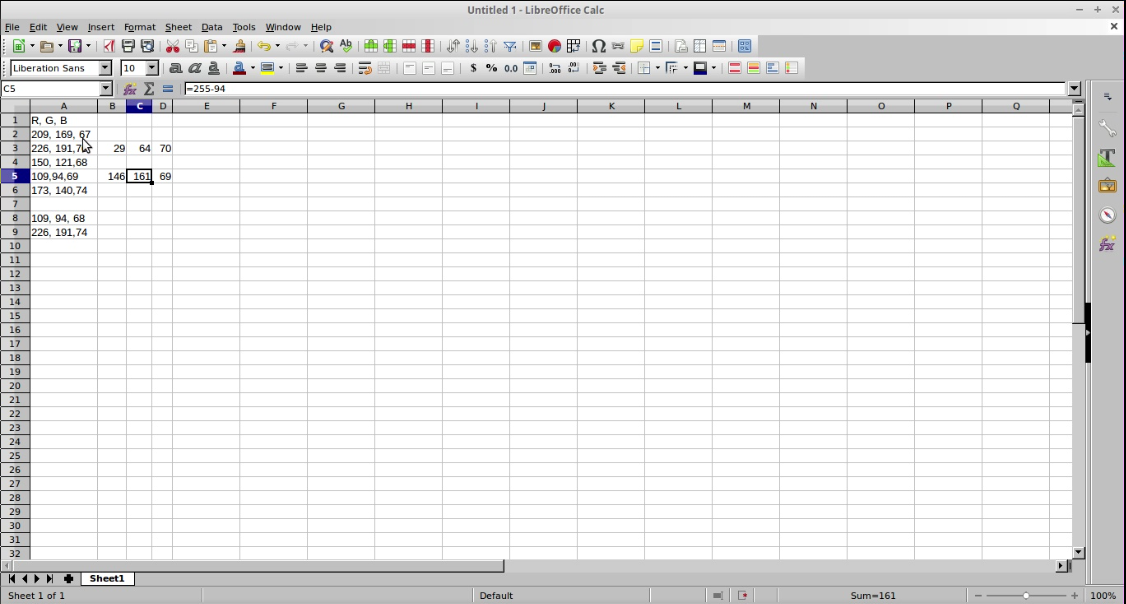
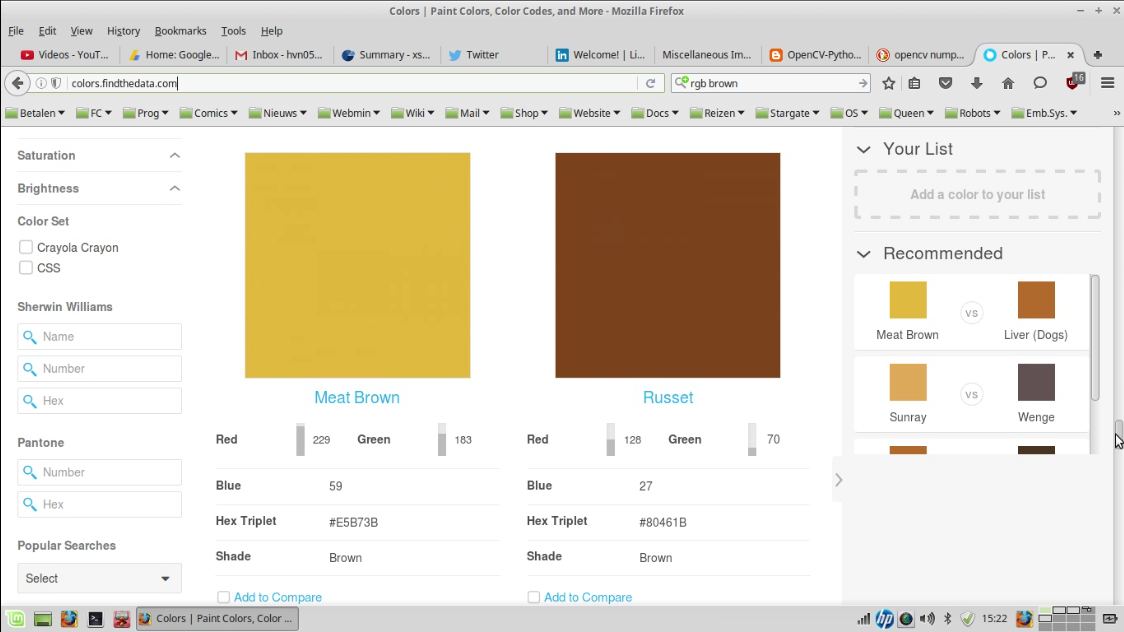
BB: Once again the changing of colourspace. When talking about BGR, Blue = [255,0,0], Green = [0,255,0]. White = [255,255,255]. So where's any brown? Apparently, somewhere around [?, 155, 50]? According to this, "dark brown" is [33, 67, 101] and "meat brown" has very different values. See the video.
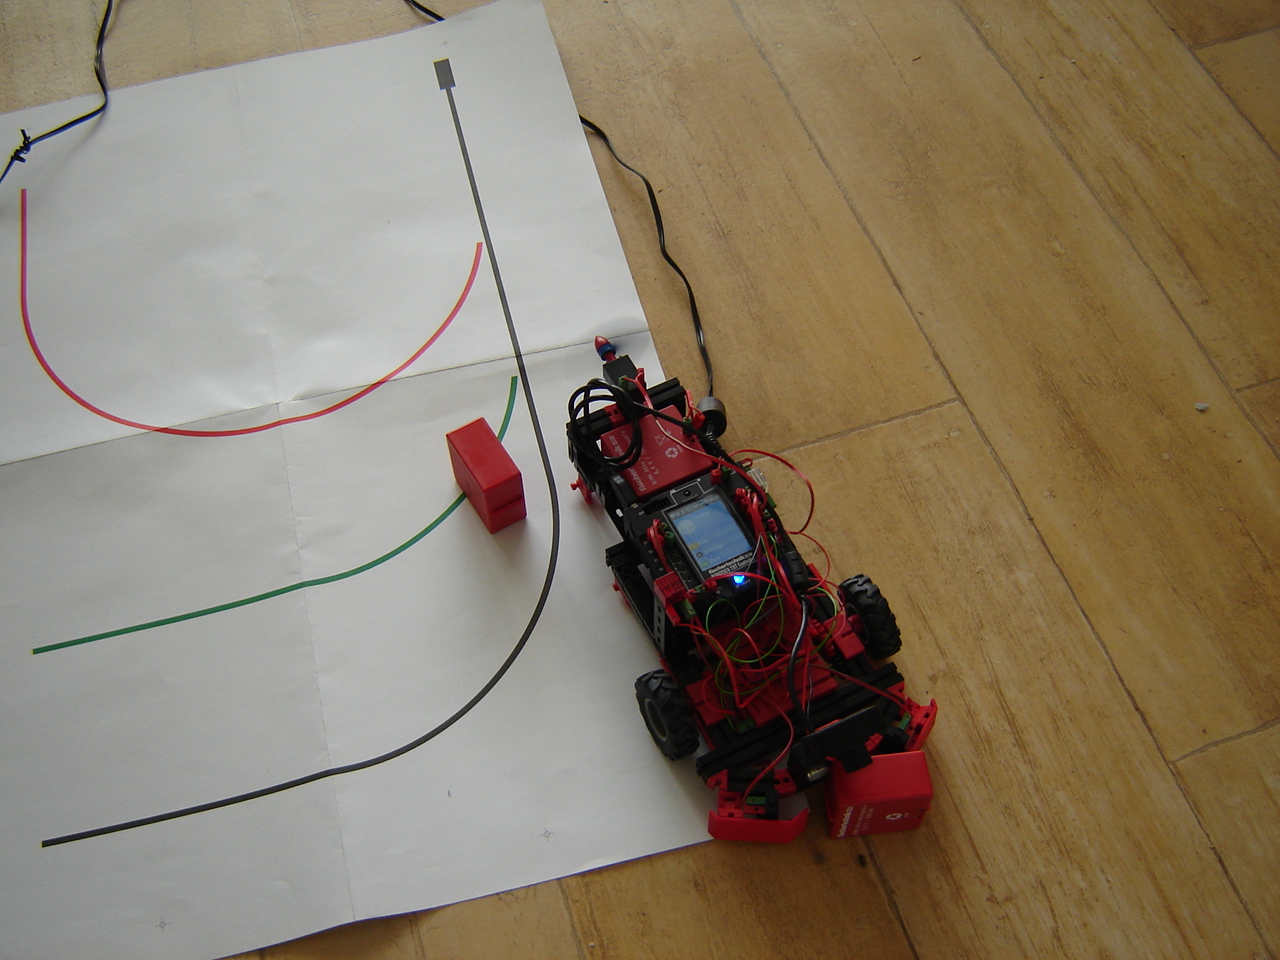
Discovery: Going further with the problems from last time: the robot riding in a curve instead straight, robot not stopping by sonar or touch, images the same on different moments. Ugh. So back to testing and trying. See the video.
Hand: Last time, everything functioned but didn't work. So now the focus is on: wiring and pneumatics, the elbow and detachment of the arm from the base. The elbow turns out to be a more complicated issue than though. The detachment on the other hand is quite easy. To solve the wiring and pneumatics, tests have to be done. See the video.
Arduino Mega: With the communication error last time, I have to find out if and how this is reproduced. To keep it simple, for now, I'll just take basic sketch examples. The fade code needs a breadboard, and since I'm using a breadboard for the RPi experiments, this leads to the question if I should buy another one and more jumpwires. See the video.
RPi: With the code still not functioning as I want, and a LED seemingly acting up...what to do? Experimenting, reasoning and finding errors in thinking... See the video.
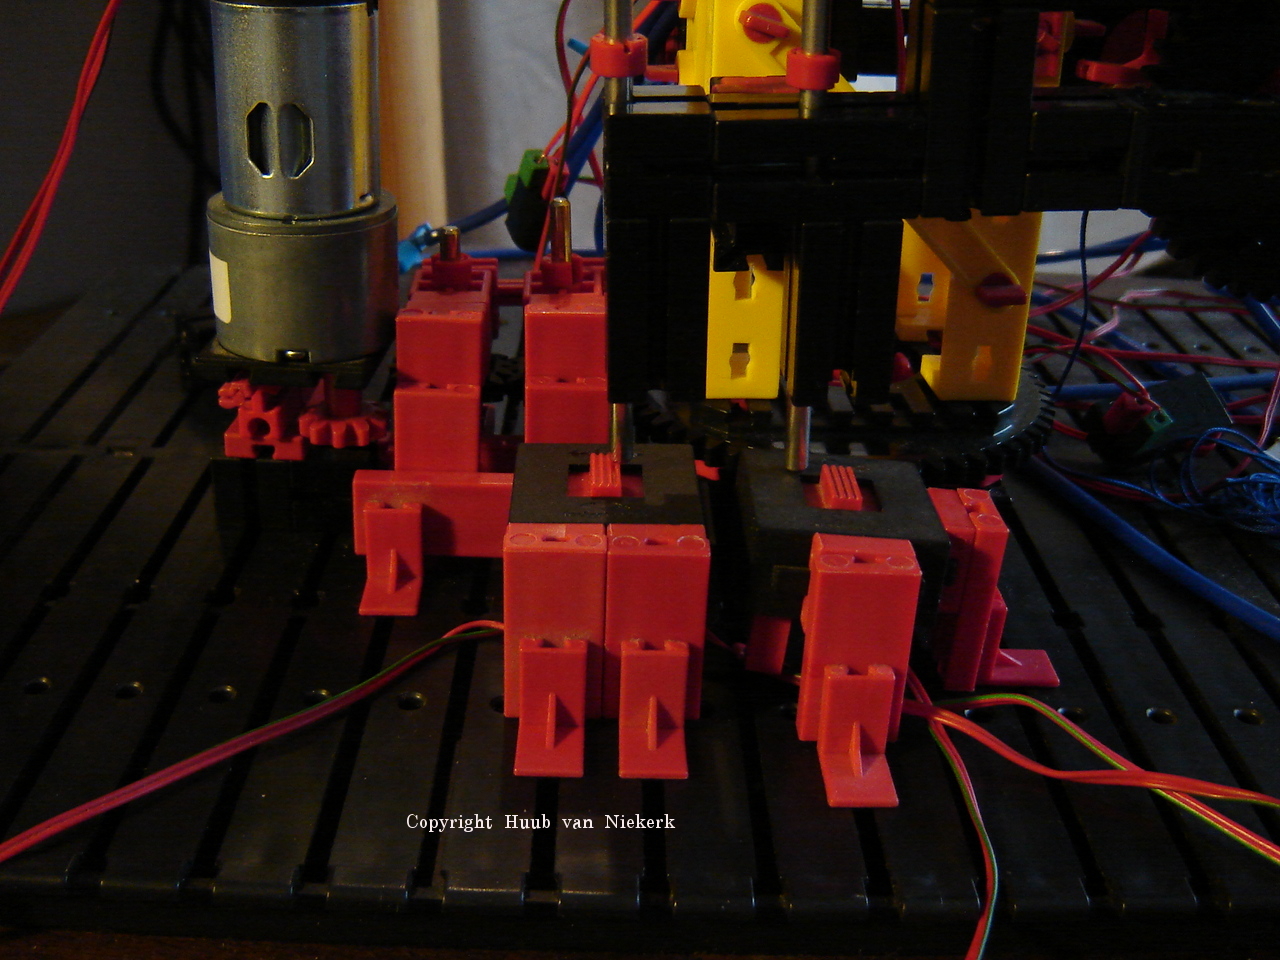
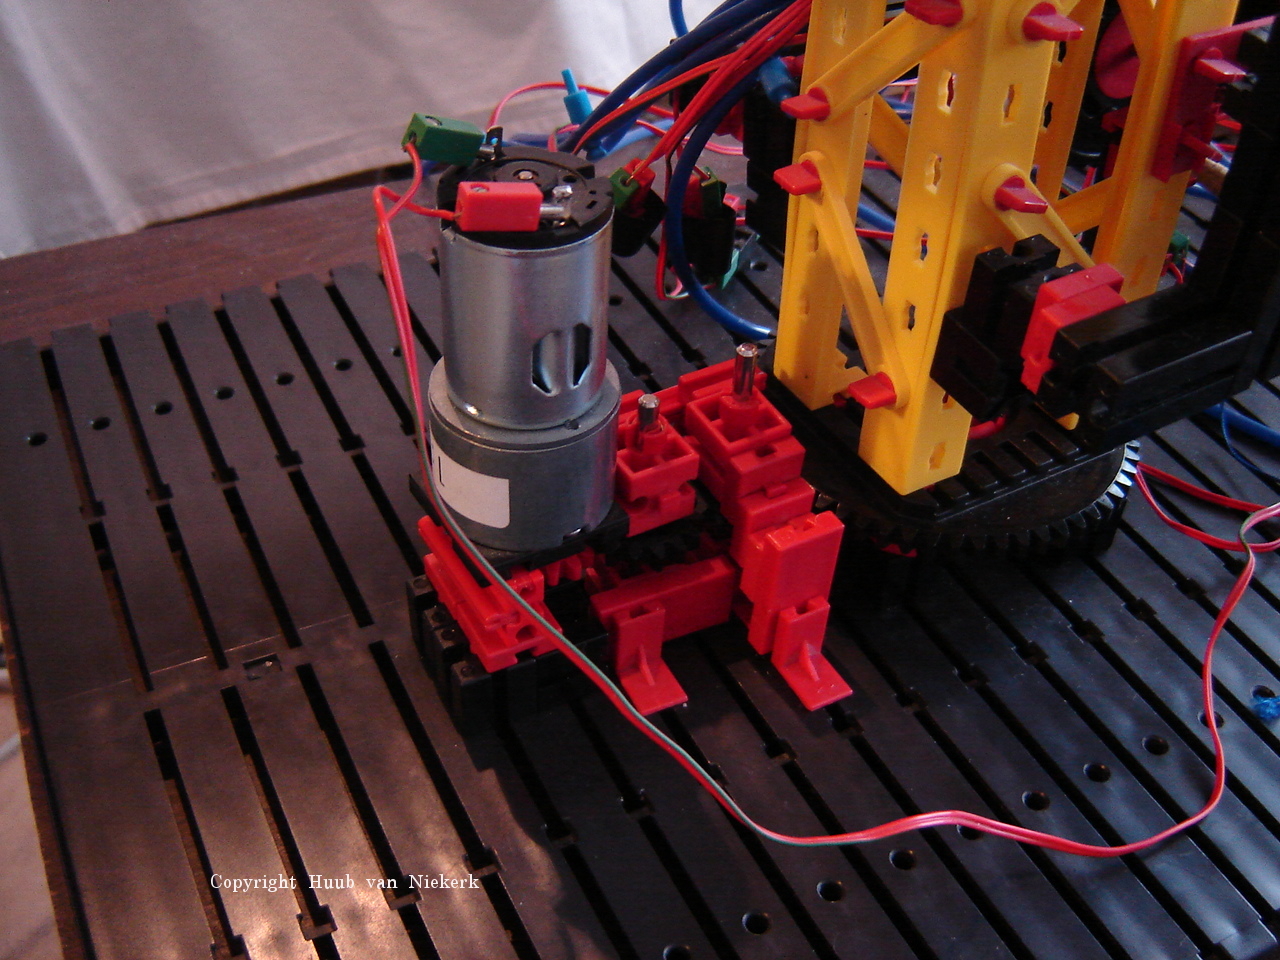
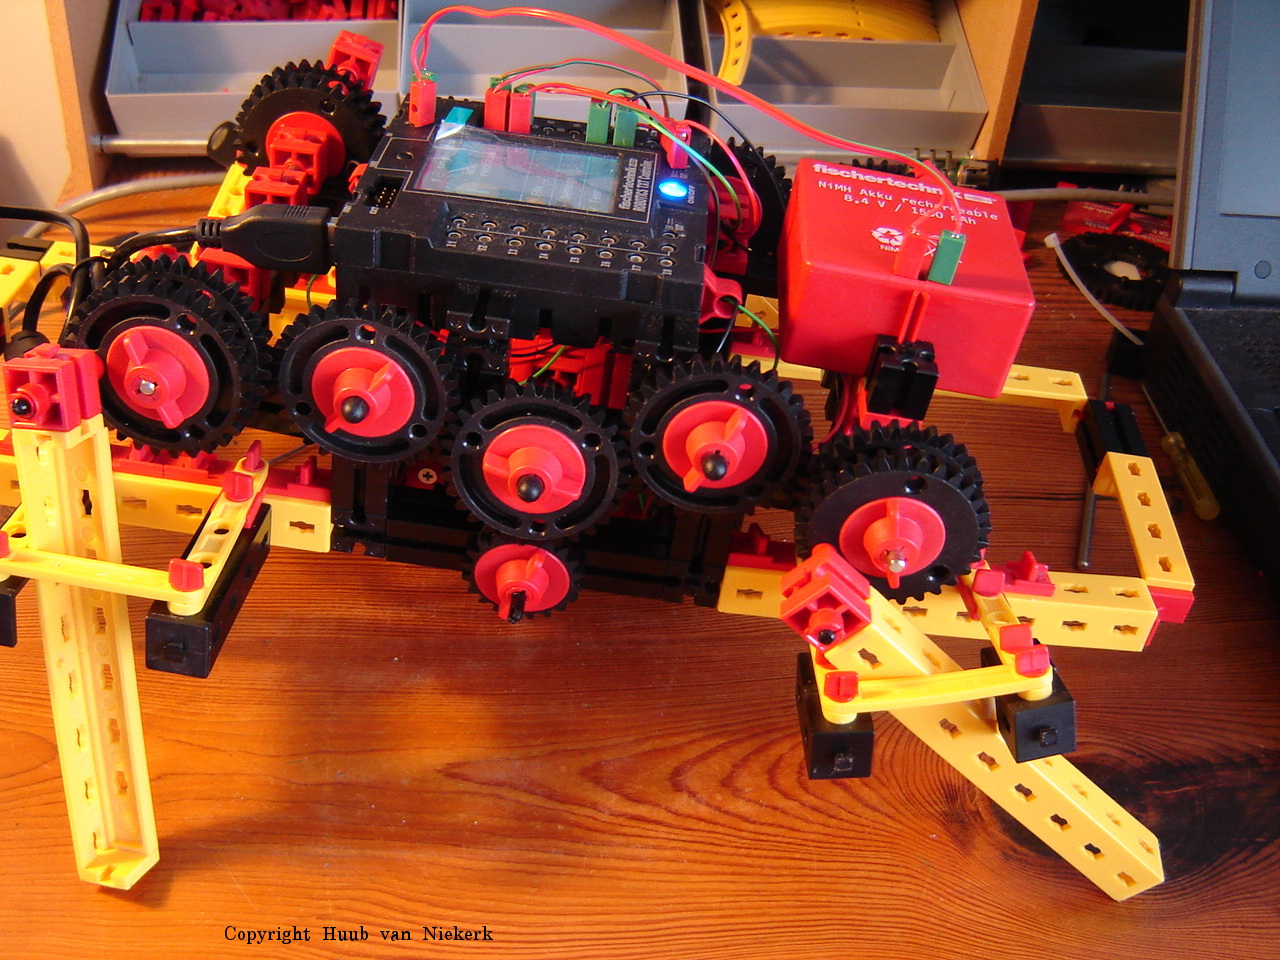
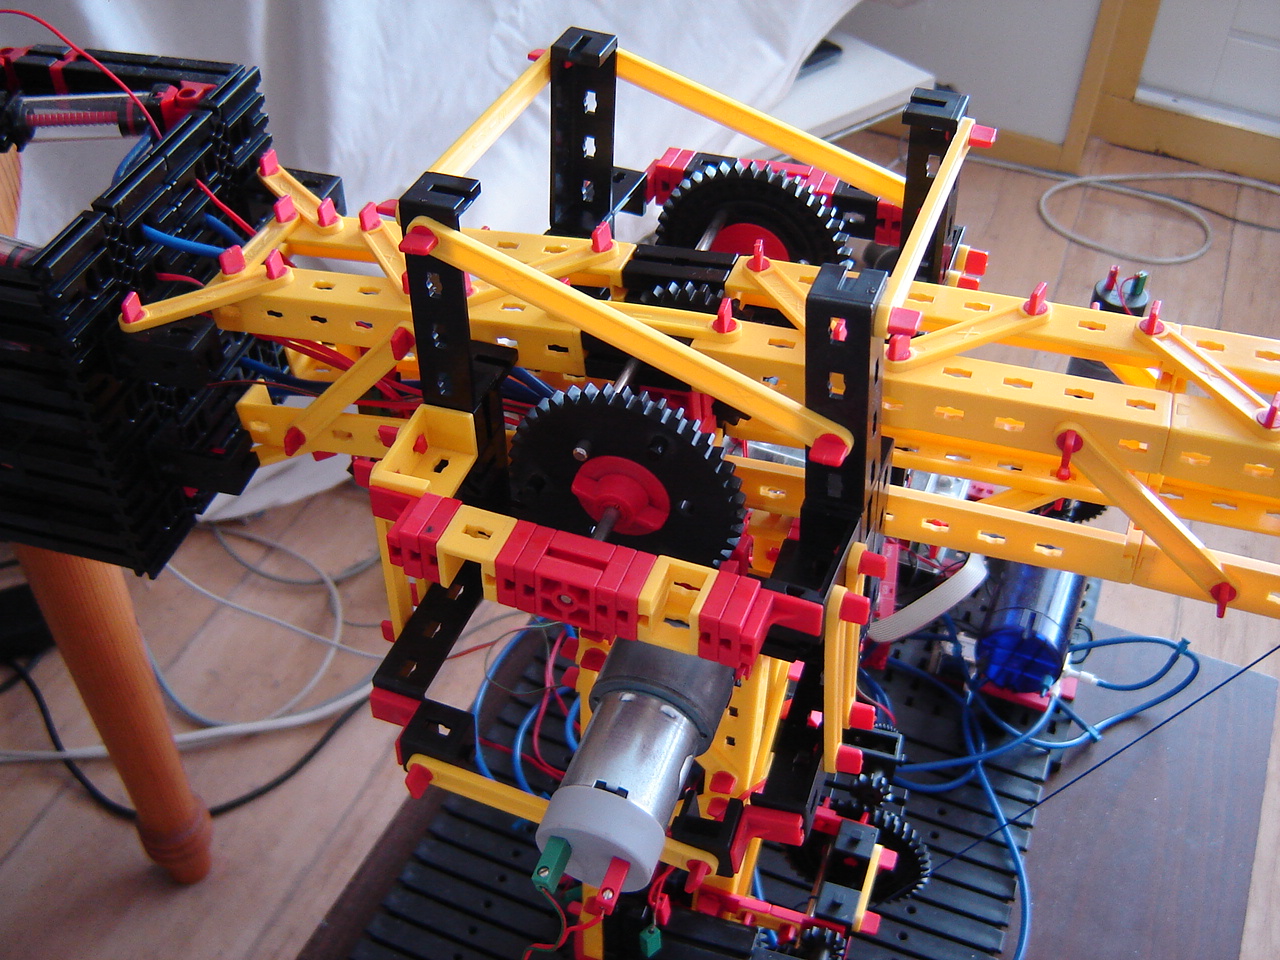
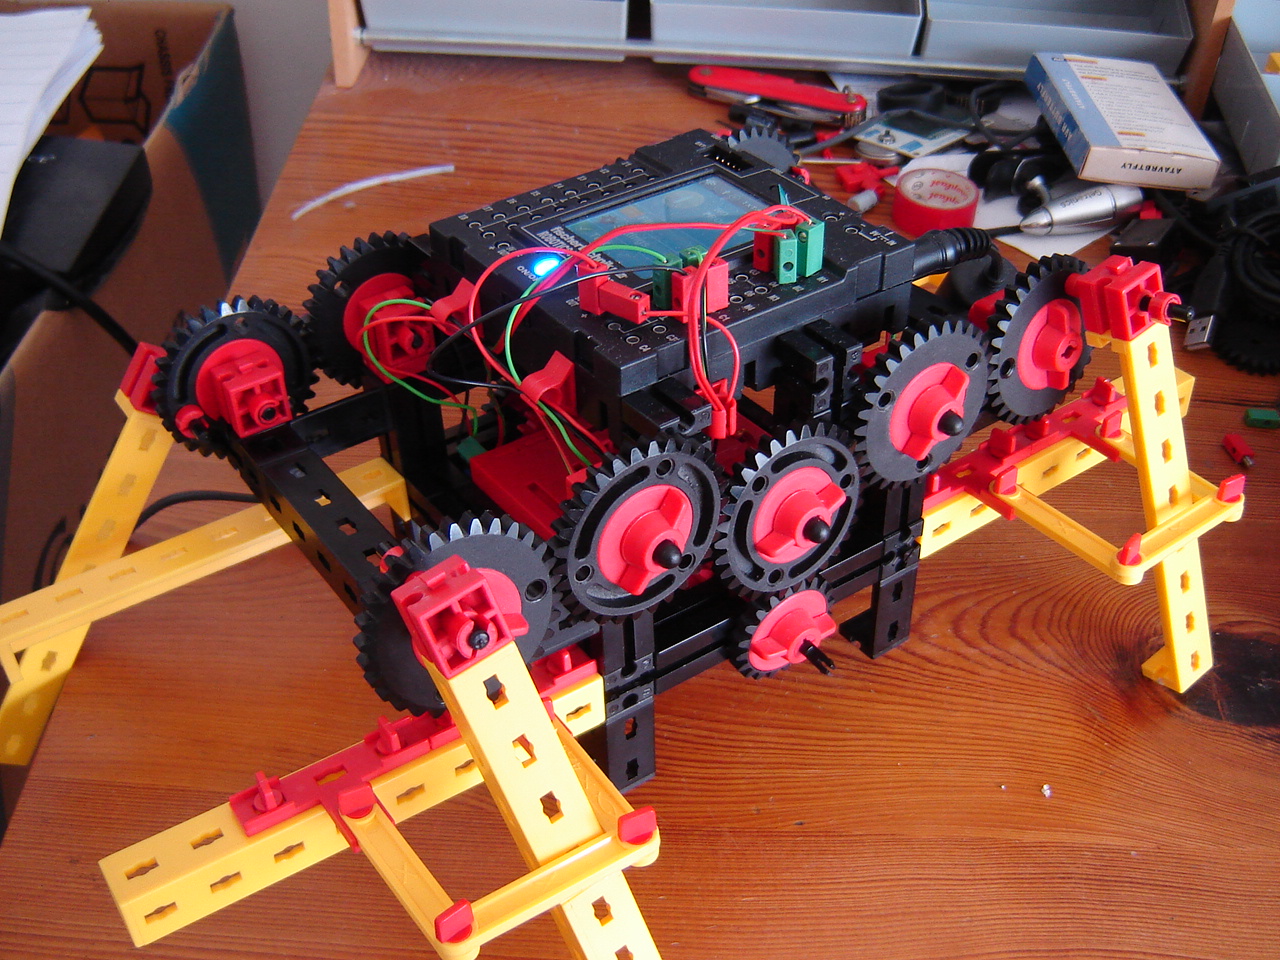
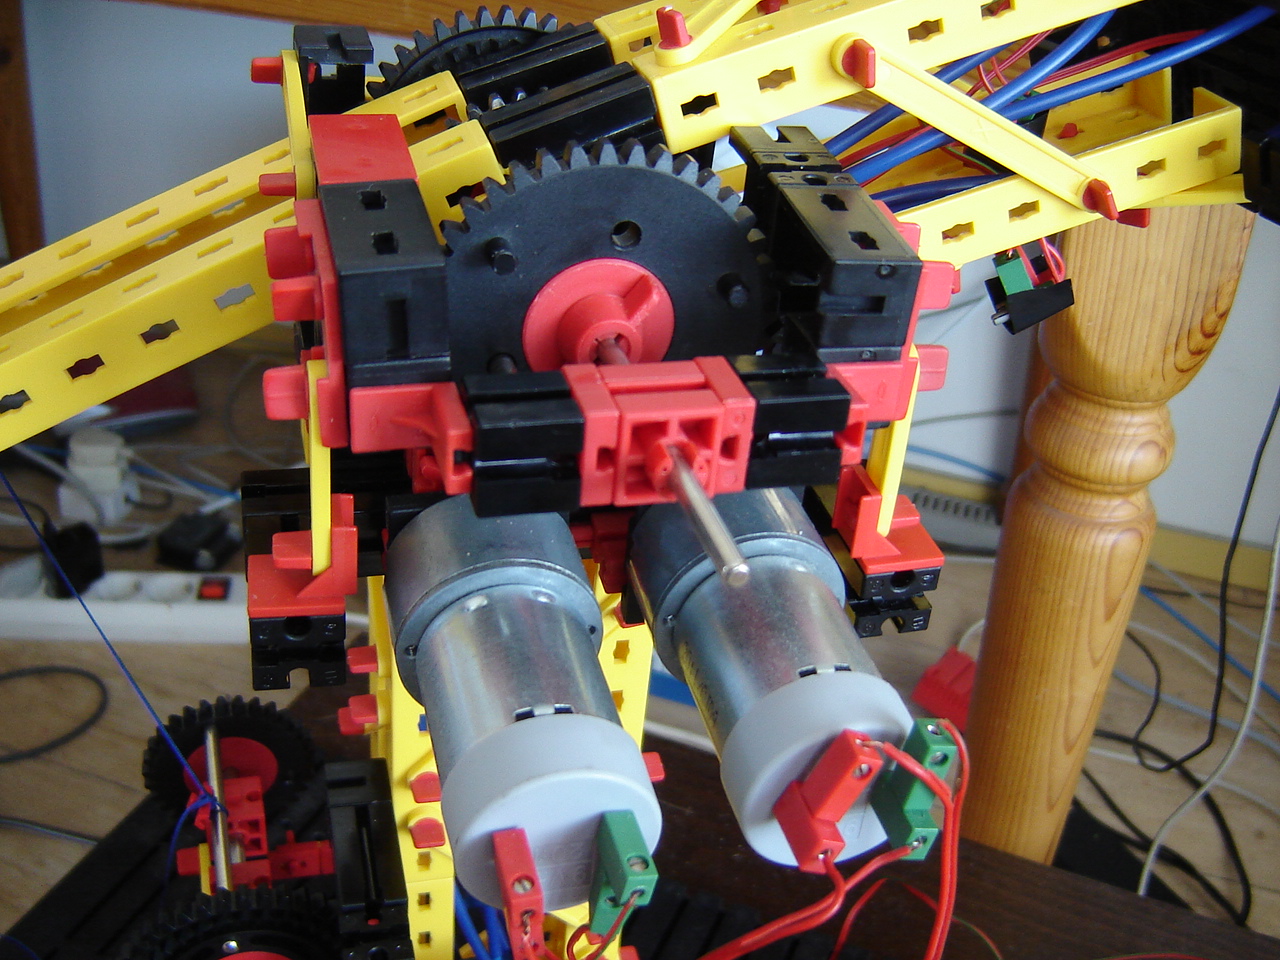
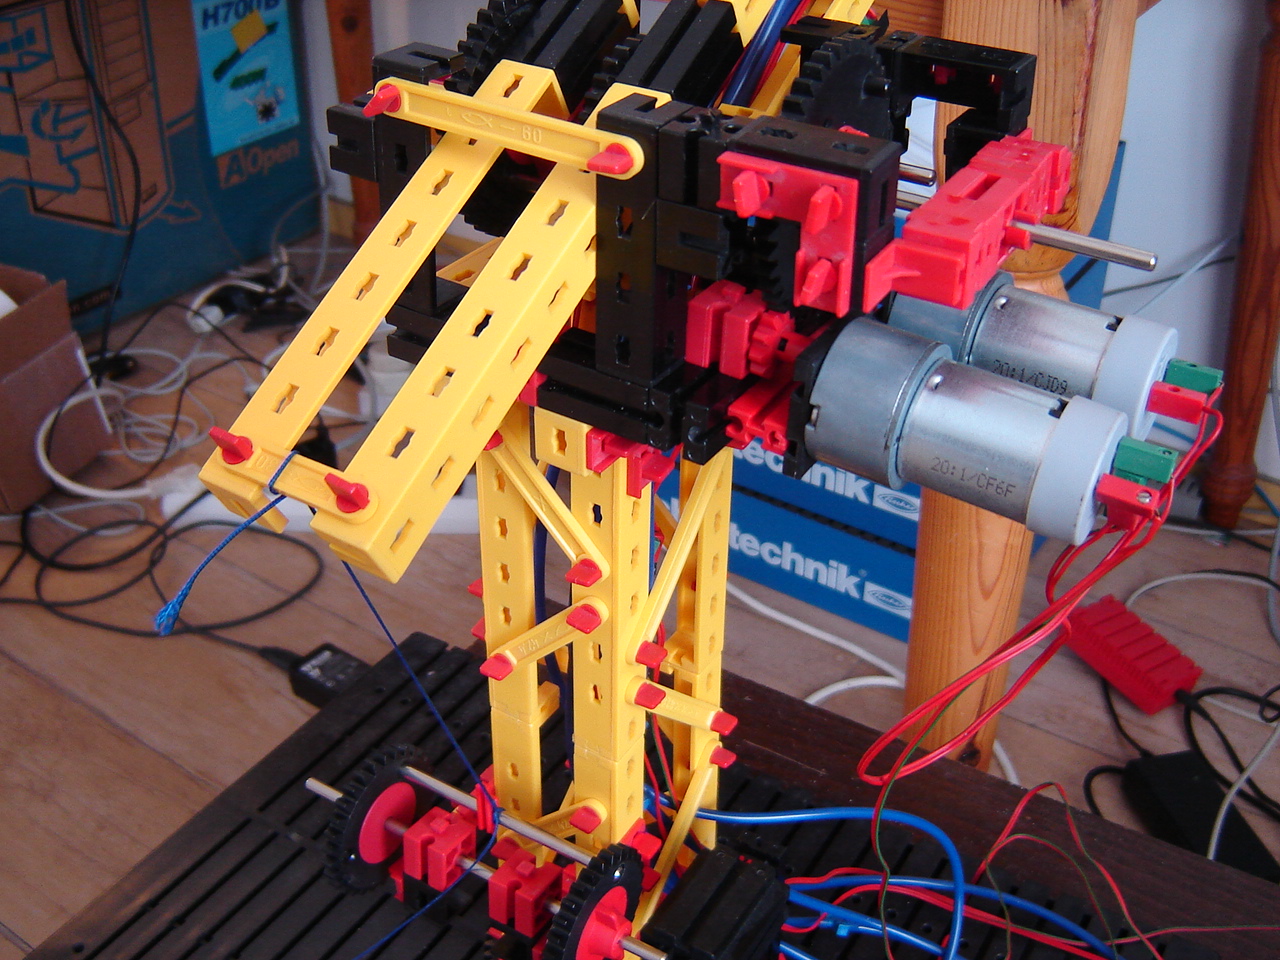
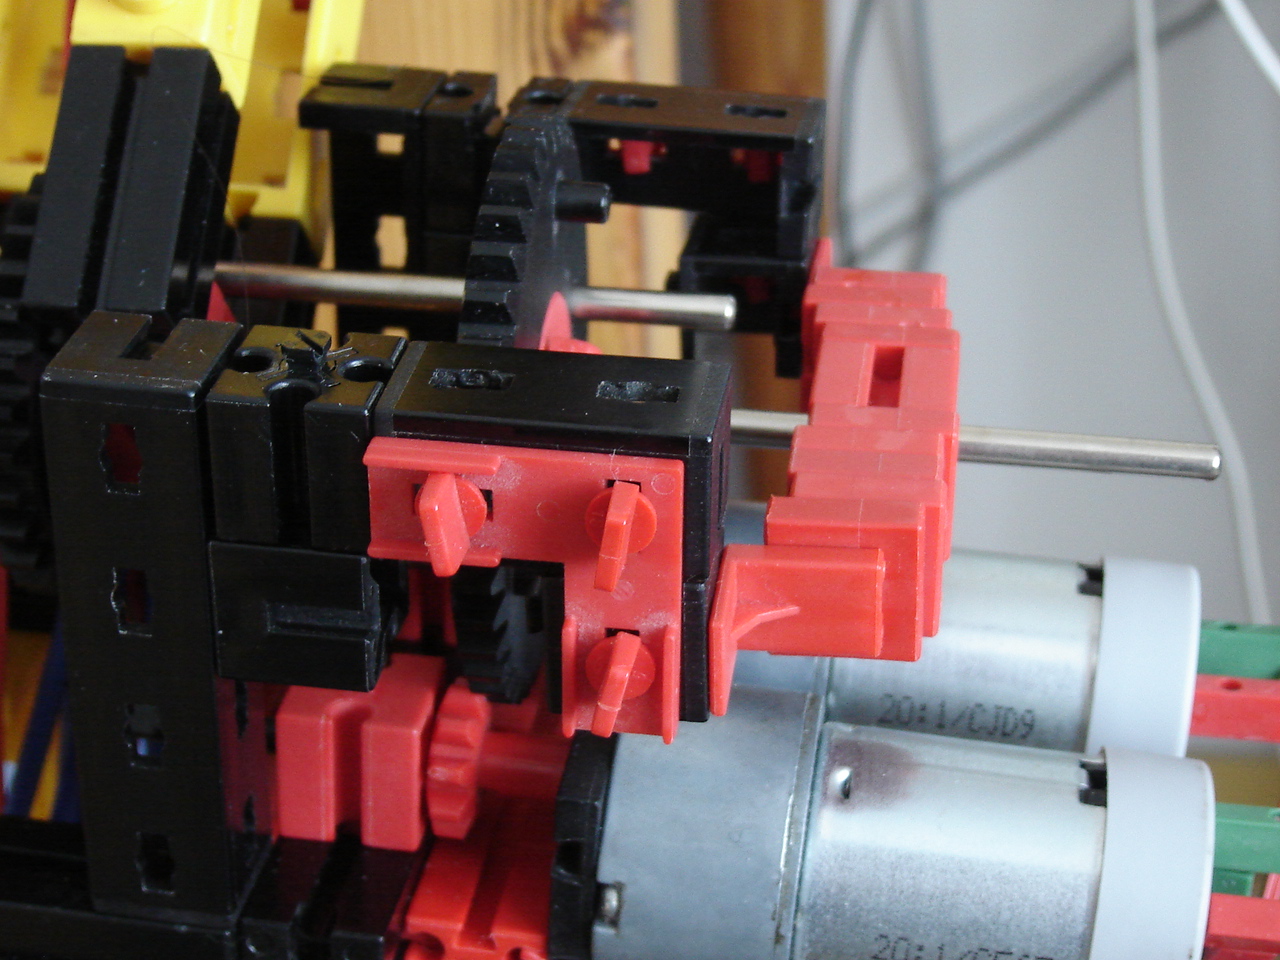
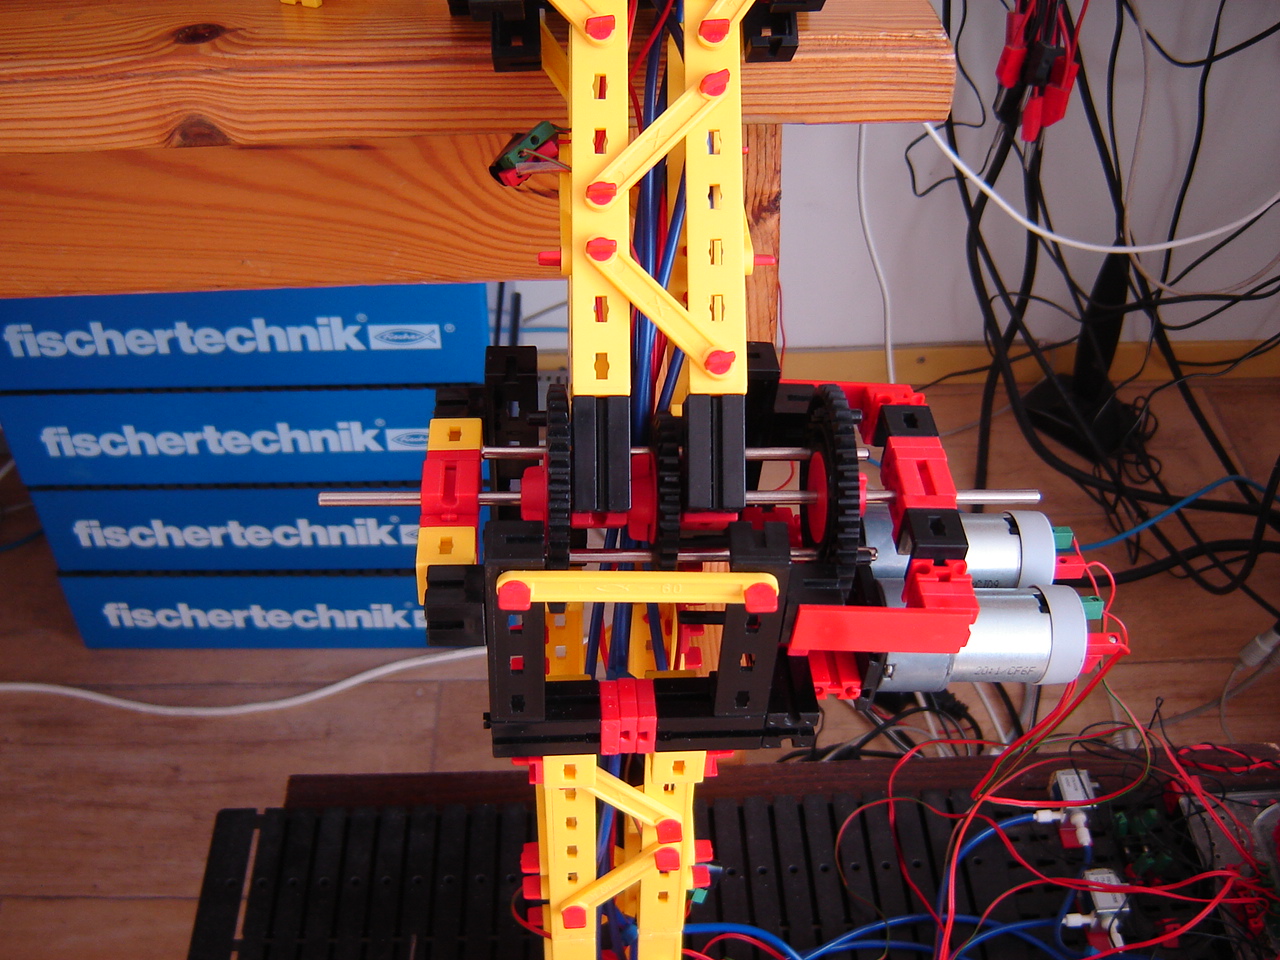
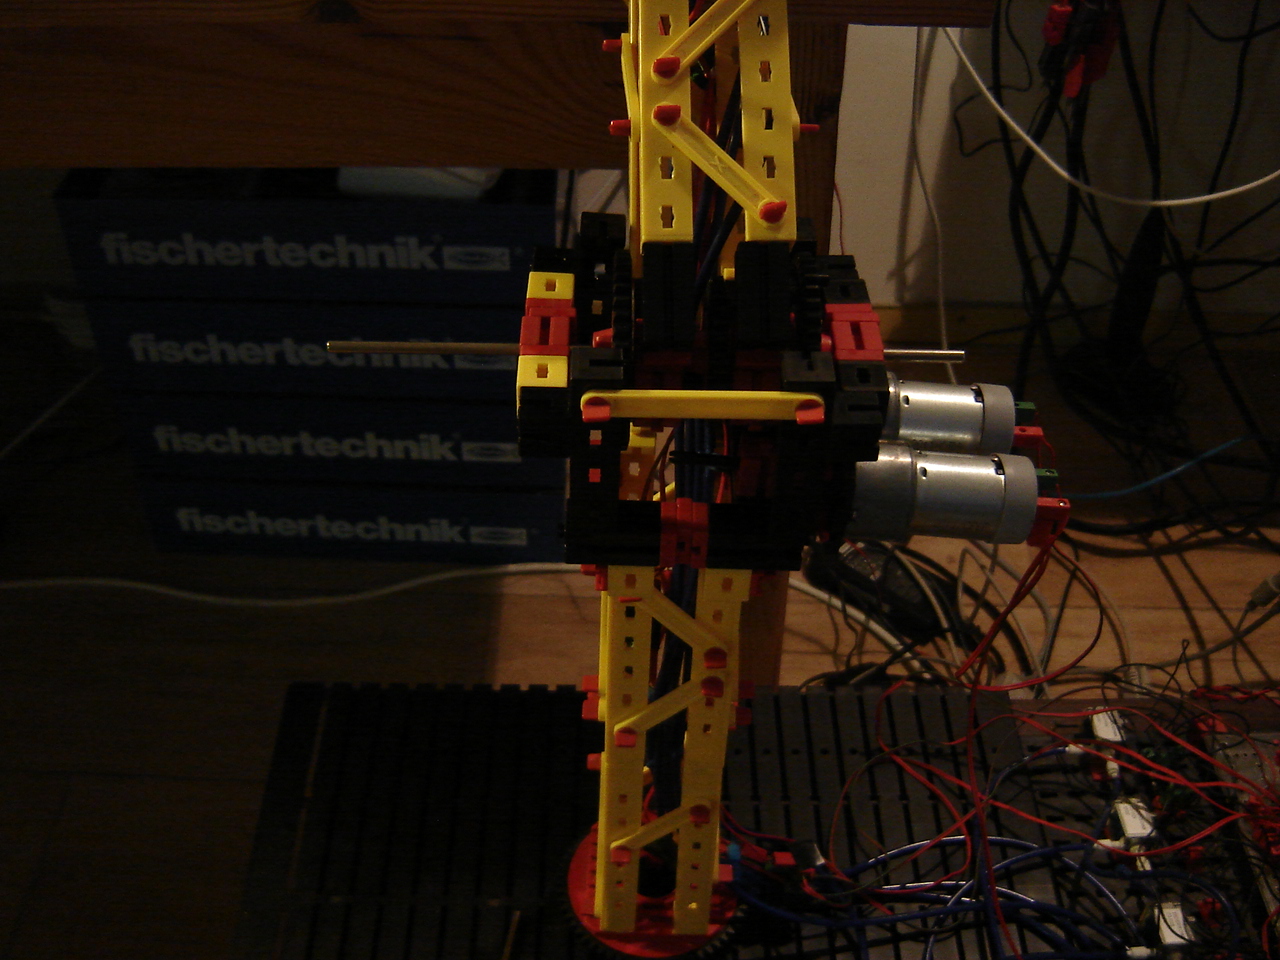
Mirft: With the current failing floortests, it has become clear the gears need serious improvement. Currently, the motors used for the vertical movement have a 50:1 ratio, about 115 rpm and a torque of 60Ncm. This type is the strongest type fischertechnik offers. And it's obviously not strong enough for my purpose. The motor I use for the horizontal movement, is a 125:1 and as such slower but has a stronger torque (150Ncm?). Summarizing all issues, what should I do? See the video.
18 March
BB: Going further with the colourspace..I find that the colour white can't be represented. Neither can black. So to pick a colour, I go for some light-brownish as my table shows. However, that shows to be tricky. Blue goes fine. See the video.


Discovery: Going further on the mysteries of the positive while, empty camera images, motors etc. After changing the code a bit, things go from odd to weird. Is it hardware or software? See the video.
Hand: The elbow turns out to be out of balance, so I reconstruct it once again. Then the test follows, which doesn't go entirely as expected: all wiring is ok, all code is ok and still.... But what's new... See the video.
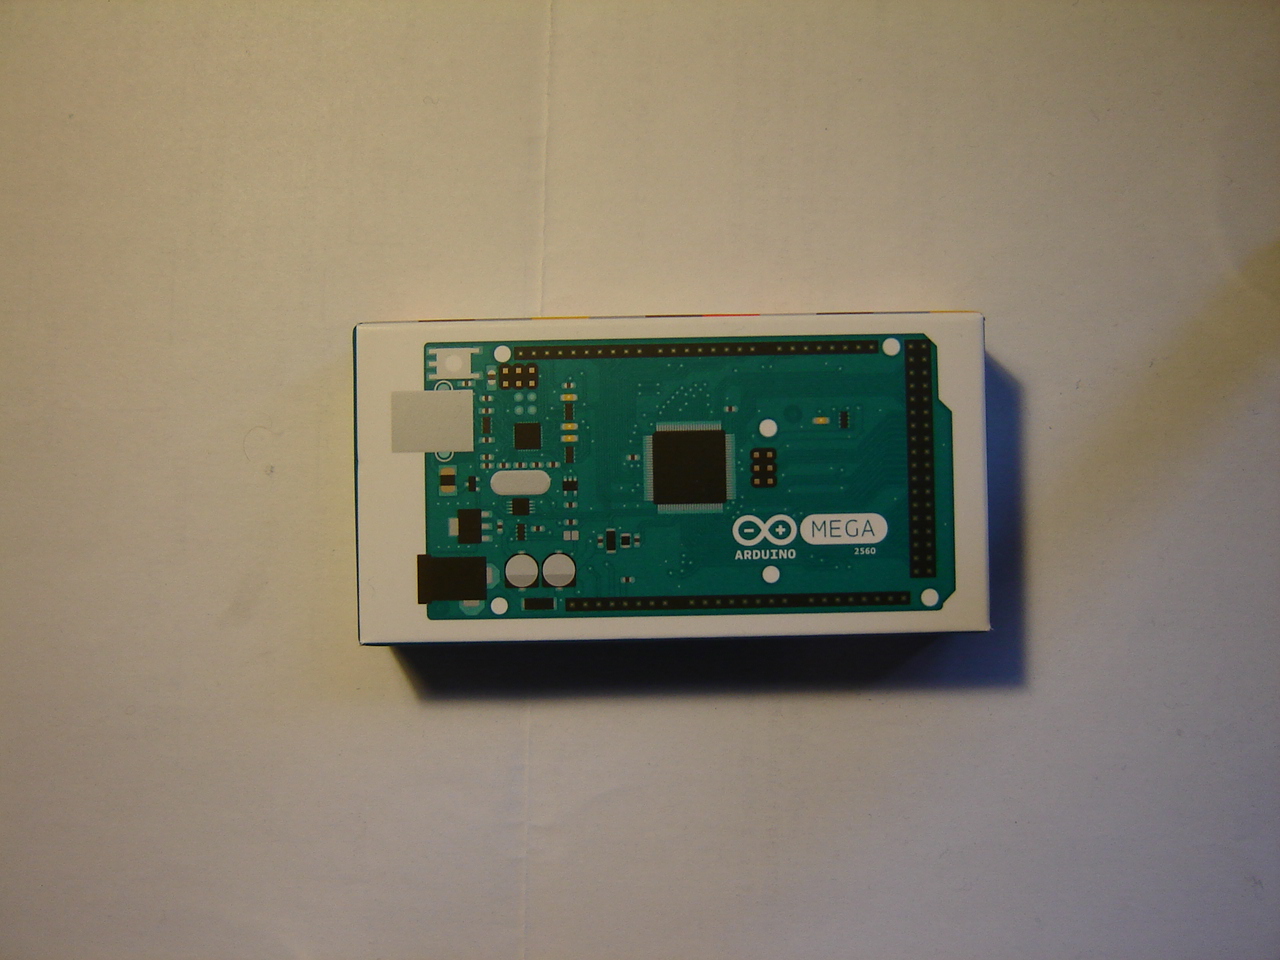
Arduino Mega: When unpacking, I'm in for a surprise. Connecting it to power is a dare: will it work? Using it, takes the Arduino IDE. A first example works fine, but with the second example (for which I have to use the breadboard) I hit a first oddity. See the video.

RPi: Continuing from the conclusion that the code partly had to be rewritten, I find I may have made some mistakes. And again, a LED is not fully cooperating. See the video.
Mirft: During the last floortest it clearly showed that some mechanical problems remain. After fixing gears and correcting a supporting rod, another floortest is done. See the video.
11 March
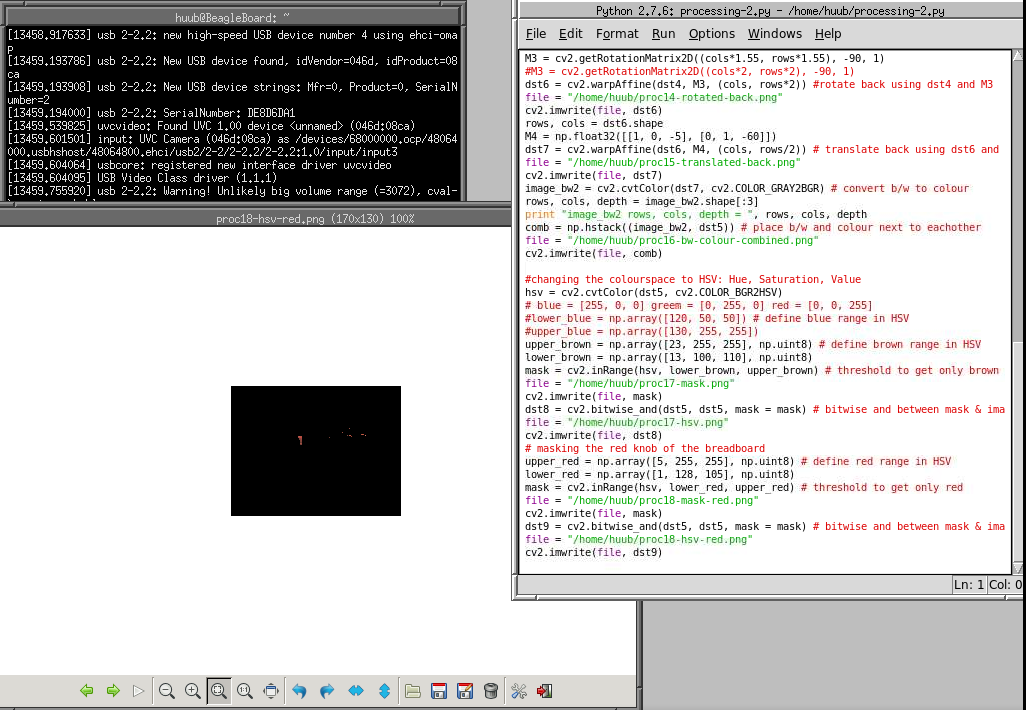
BB: Going on with OpenCV, I try to change colourspace: from RGB to HSV. Following an example from the internet, it shouldn't be that hard. See the video (#15).
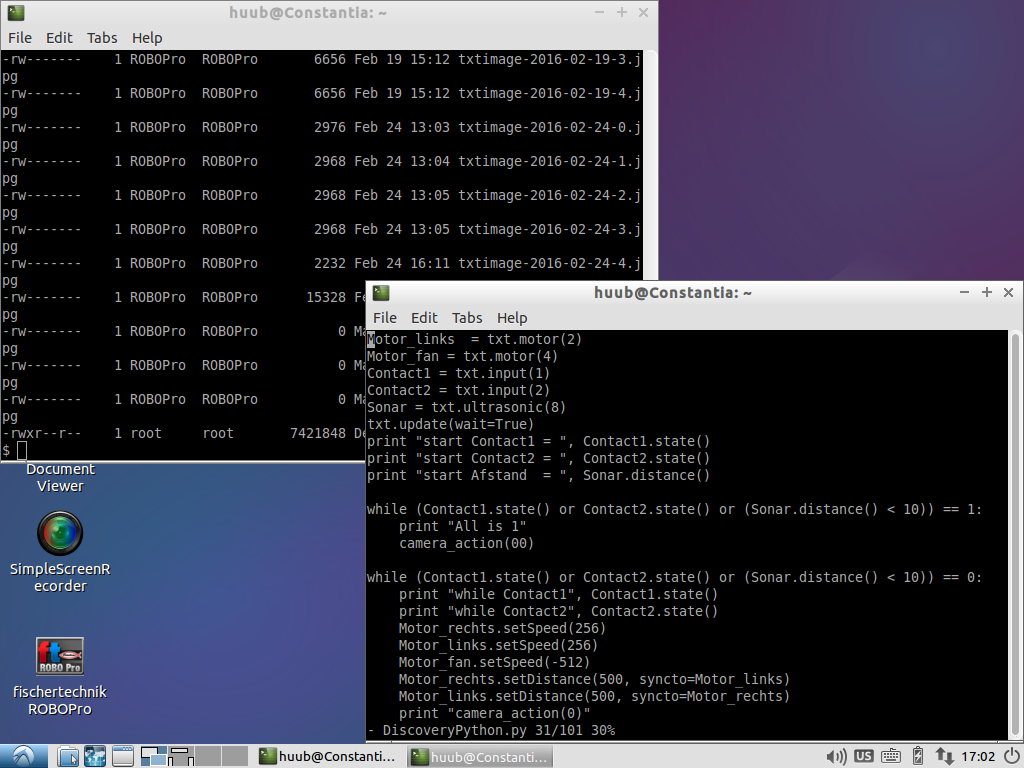
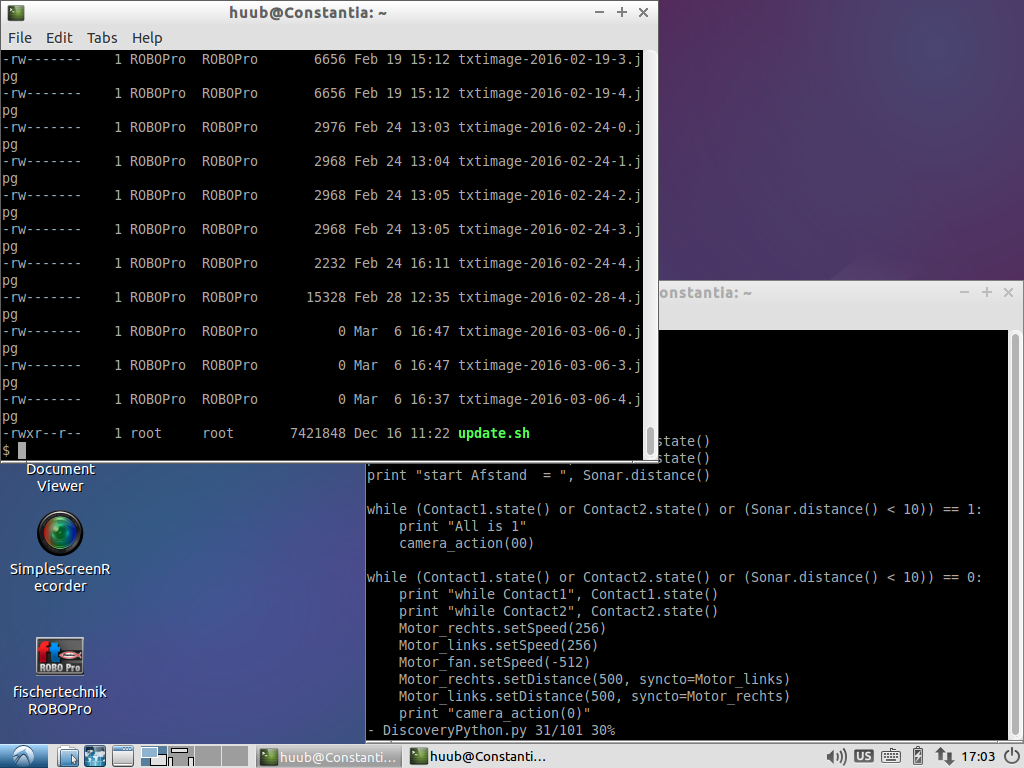
Discovery: The motors don't run while the sensors are ok. For a test I add another while loop, with unexpected results in more than 1 way. The motors run, the fan runs, pictures are being made and copied...but all ok ? See the video (screencast only) (#18).
Hand: The last attempt for reconstructing the elbow didn't quite work out. So several new ones are tried out, ending up with a much smaller one. Also, the rather heavy arm needs to be reconstructed to get a much better physical moment: F=m*a, also known as the 2nd law of motion. See the video.
RPi: Last time, the timing was an issue but not solved yet. Now another issue shows up: an important feature was defined but not implemented. Oops. So the code has to be changed. See the (long) video.

Mirft: After reconstructing a leg for better horizontal movement, it still is the question if timing is the best solution. Using lamps may be better. Also, in hindsight the leg reconstruction isn't completely finished. Time also for another floortest. See ths video.
Videos: Top 3 of my most viewed videos so far: fischertechnik convention Dreieich 2015 (1920x), TXT controller first video (486x) and fischertechnik convention Schoonhoven 2015 (307x). Date: 5/3/2016. Videos with views over 1000x, are promoted. Except 1, mine aren't even close yet.
4 March
BB: Getting on with image processing, I manage to get the b/w image full. See the video (#14).
Discovery: Last time, the images where quite overexposed and the motors didn't run. So it's best to check with RoboPro to see if the touch sensors and the sonar still work. After commenting out the camera actions, there's a problem with motor(2). So another test with RoboPro is needed, this time on the motors. See the video (#17).
Hand: An option to improve the lifting power of the arm is to use a 2nd motor for the elbow, either opposite of or next to the existing one. It might work, if the connection between the gears and arm is changed. Considering all the attempts, there's another solution. See the video (#25).
RPi: Facing several issues, I first give the up- and down counting more time. I also relocate the camera. Adding time code, I find at least 1 reason for the slowing down which is quickly solved..or is it? Other issues remain. See the video (#10).
Mirft: Going further with the vertical movement and reconstructing a leg with 2 hinges. After a code change I manage to get the legs fully moving up and down and the hip/leg reconstruction looks promising. See the video (#26).
Arduino: To continue with Arduino, I've bought a Mega2560, to be delivered in 3 weeks from now. So this will be a new blog topic and series of videos, hopefully more than the 3 videos about the e-brace.
26 February
BB: Starting with the result of last week, the challenge is to get it correct. To achieve this, I go into more detail and write all intermediate results to file and add comments. This always leads to clearer code, although not necessarily to a solution. See this video.
Discovery: With both the copying and numbering working now, the question is: why does the 2m. distance cause such a delay? If I bring back the driving in the program, I want nice images fast. This also means that I have to go smart on the image capturing. See the video. The pictures show some overexposure, while most are pointed away from the sun.


Hand: The solution for the elbow from last time didn't work out: way too flexible. So this needs to be changed. Another change is that the ft RoboIOExtension will be attached so I can run the motor and maybe other stuff as well. Question is if all this will work out as intended. See the video.
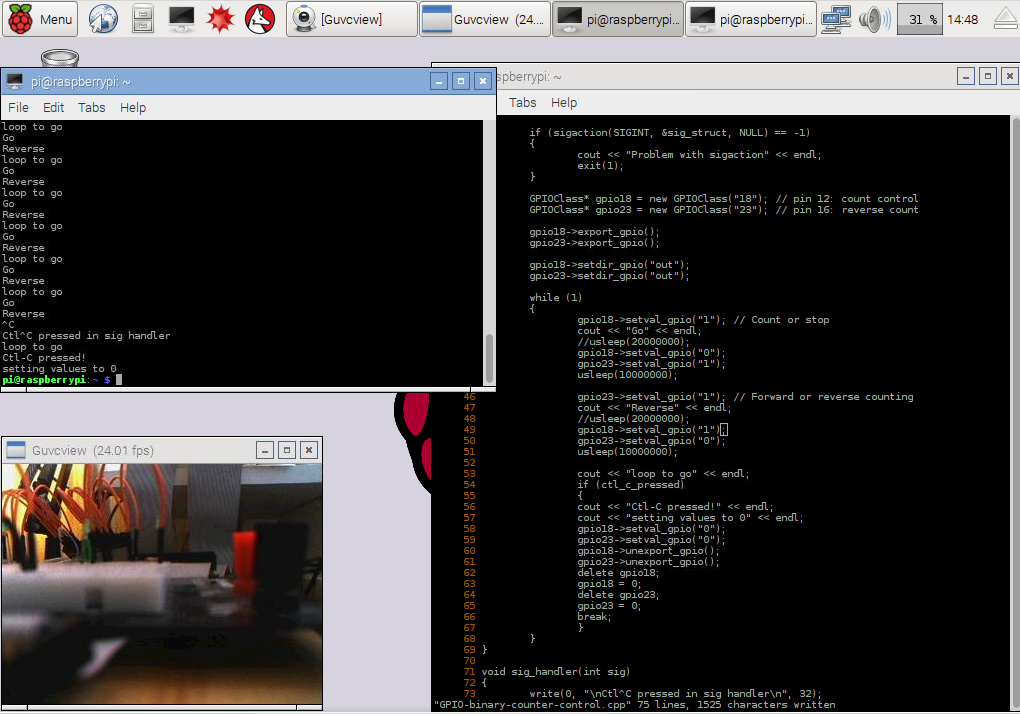
RPi: Some problems remain after last time: the counter has become extremely slow, and the Ctl-C mechanism doesn't work instantly anymore. A lot of reasoning is needed to find the cause(s). See the video. Picture is just another moment of the counting, but taken with the RPI-camera using raspistill at 320x240 resolution.
Mirft: Continuing on the vertical movement, and more specific the apparent wrong signal from the light-sensitive transistors. This turns out to be a software issue, which I manage to solve. Then changing the while loops makes the algorithm better, and opens the way to fully operating movements up and down. The video is a bit double in parts, because I had to put in voice somehow.
19 February
Because of absence this week, only 2 subjects.
BB: Continuing with the problem that a blurred image turned into black, apparently after rotation. After trial and error, I find alternate settings for rotation and translation so the final image for now looks like this. See the video.
Discovery: The problem with "date" stamp for images was due to a missing space in the date command. However, I need to concatenate a string, e.g. "image", and an integer, e.g. 19022016, and that seems to be quite a problem in Python. However, I finally find an working solution and get what I want: filename + date + sequencenumber. See the video.

12 February
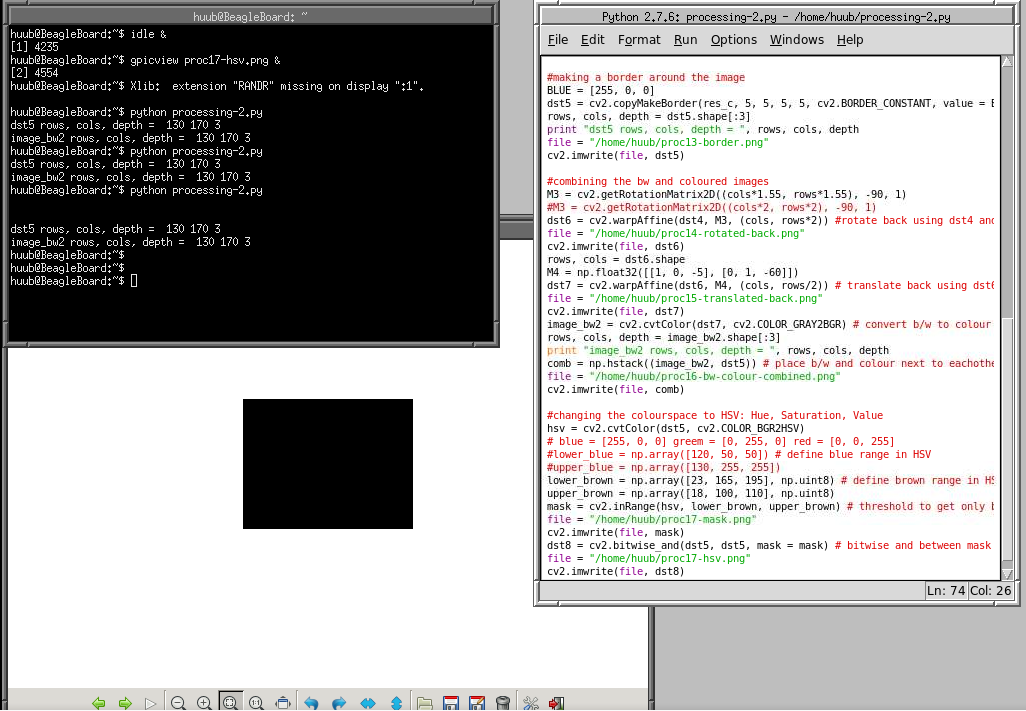
BB: Continuing with OpenCV: Last time ended with errors that made the images suspiscious. After inspecting the image arrays it turns out they've the same number of row, columns and depth. And after another attempt, the hstack command to put images next to eachother just works. All seems fine, with the exception of the rotated part: it's black, so something strange happens between blurring and rotating back. The (for now) ending picture:
See also the video.
Discovery: It turns out that the date commands will be really functional in the next firmware update, whenever that may be. So in the meantime I have to use a workaround. A nuisance is also that, when using scp in a loop, I have to type the password each loop. For now it's ok...it works sort of. See the video.
Hand: After receiving more technical information on how the fischertechnik motor works (which is quite logical considering how ftdiag is working), it turns out that the elbow motor will not work in the current setup. To get it working, a RoboIOExtension is needed, which is only available at "high" cost: from € 80 on. So the question is: is it worth it.
Apart from this question, another problem still is the construction of the elbow. It turns out that the hand itself is actually too heavy for the elbow construction with gear. A solution could be to put the motor straight on the axis, but this requires the metal axis to be replaced by a non-metal one, which is a bit flexible. The problem still is that I can't control the elbow motor, so I may have to take the IO extension from Mirft for the time being. See the video.
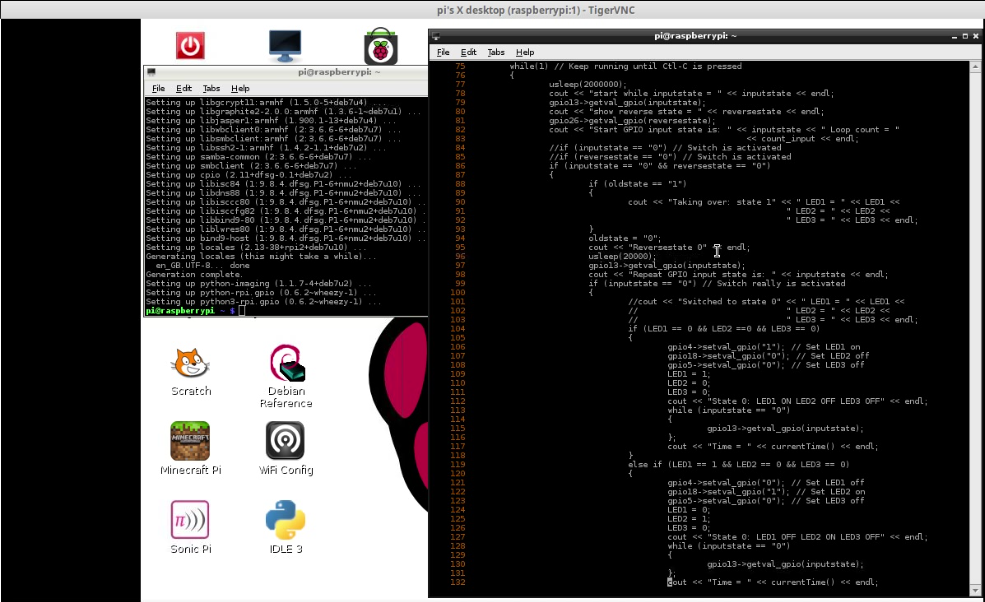
RPi: Continuing with C++, I finish the "state 1" if's on the RPi side. However, during the tests I notice some more issues to fix. See the video.
Mirft: Without extra hinges I can't do anything on the horizontal movement of the legs. So I focus on the vertical one, where I have used lens lamps to detect the presence of the legs. Considering the use of timed motor run with the horizontal leg movement, and the problems so far using the lamps, I try timing with the vertical leg movement. Since this turns out to be not practical, I continue with the lamps for now. In programming the lamps it turns out that I made a small mistake. So far I used full motor-connections M1..M4 but I should use the outputs O5..O8. With the mass-lines all grouped it works out nicely. This also frees the IO extension for use with the Hand. The only problem now is the light-sensitive transistors: they don't signal 1, only 0...sigh. See the video.

5 February
BB: Continuing with OpenCV, I try to put 2 images next to eachother. See this video.
Hand: The elbow needs more attention, but first the wiring of the elbow driving motor needs to be fixed. Programming in Python is easy enough, but the changing from "cw" into "ccw" (or vice-versa) doesn't work at all. Rewiring doesn't solve this: it stays 1 direction only. The only solution seems to be using a voltage divider, and put the 2nd motor in between the resistors, but this depends on the controller electronics as well. And this is a totally unknown factor. See the video.
RPi: With both the 3 bits binary counter 2nd LED problem and the RPi2 control solved, it would be nice if the reverse counting could work as well. For this to work, some code is necessary. And while preparing with longer delay times in code, it turns out the the control still doesn't work as intended. This picture is made with RPi camera. See also the video.
Discovery: Another attempt to use scp from the TXT to get the picture to the laptop. From the laptop side it does work, so why not this way? Because sshd turns out not to be installed and then the ufw firewall stops ssh. With these problems solved, I find that the use of subprocess for systemcalls is preferred. And with this code added, I still need my password to actually copy the created image but at least the copying works. See the picture and the video.
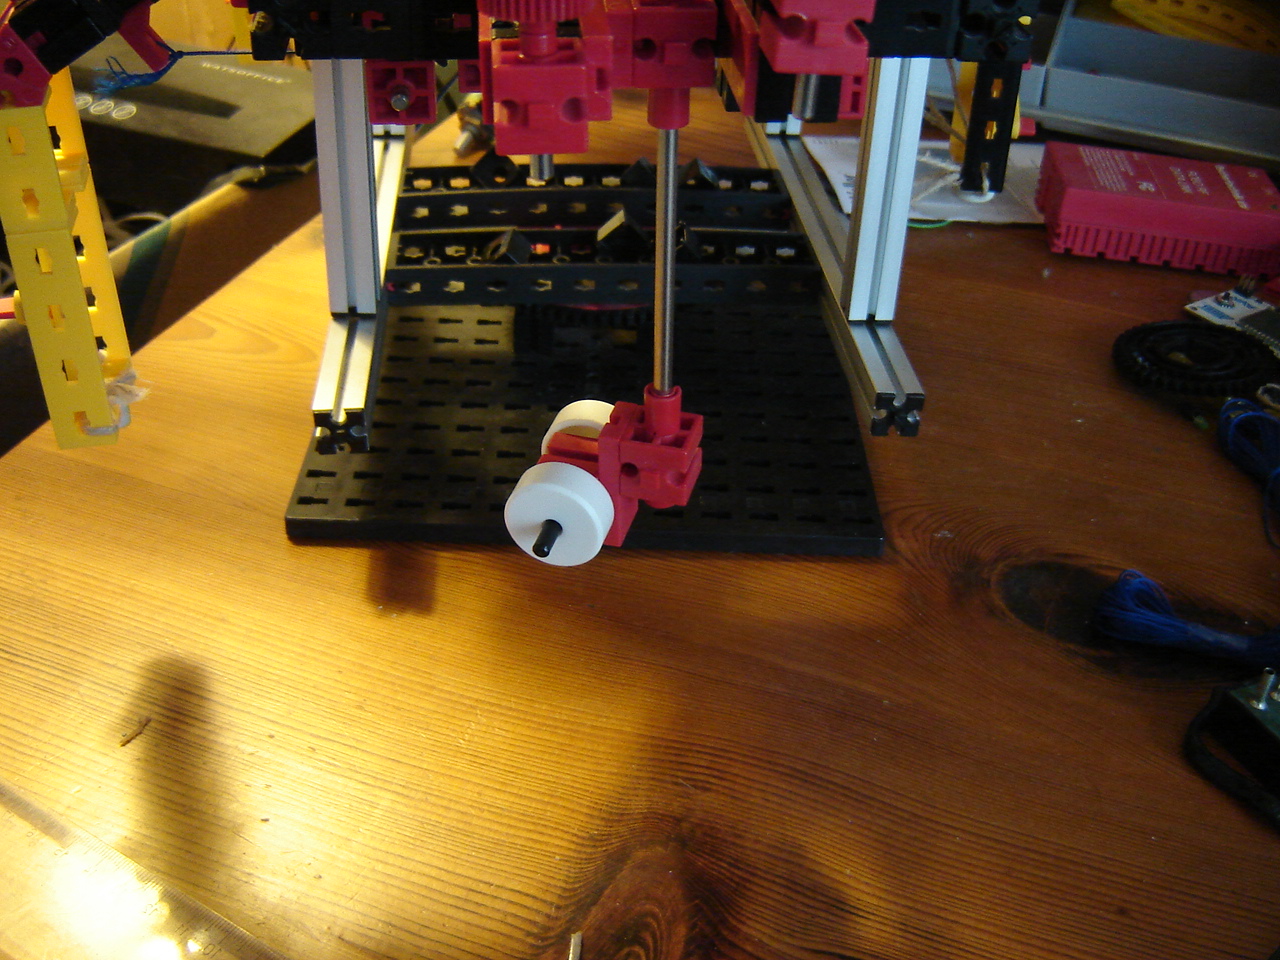
Mirft: To solve the problem I try with another set of wheels, place in the middle. I also replace the construction of the existing supporting wheels which makes the revolution more smoothly. See the video.
29 January
Youtube: A little bit of rant...On Wed. 27 Jan., I counted 71 views, and € 0,00. What if each viewer allowed Adblock to show ads and watched 1 skippable ad ? Although Youtube is rather inconsistent in displaying ads, out of those 71 viewers at least a few would have seen a skippable one. To give a bit of insight in total views of my videos this week: Fri: 53, Sat: 46, Sun: 58, Mon: 61, Tue: 25, Wed: 71, Thu: 62.
Given the almost fanatical negative reactions by Adblock users on the various forums about the fact that people try to make some money by creating videos, and the fact that maker Eyeo so far wins each trial in German court (they're German), I doubt this will change anytime soon. Do they go to the cinema for free as well ? End of rant.
Discovery: Continuing with the bluetooth tests. What if I use it with ROBOPro on the same laptop as last time, so with integrated bluetooth ? See this video.
BB After the last time with OpenCV using e.g. blur, I try putting a border around the image. This takes searching for examples but also a question why it doesn't work as expected. And I'm not talking about typos. Finally I find the reason, which is quite logical but also makes me wonder if it can be dealt with differently. See the video.
Hand: The elbow needs to be fixed to the axis and the elbow motor needs to be fixed to the arm. For the motor, I've found a flexible solution.
The elbow is a different story. The plan is to add a gear in the middle and therefor it needs a rigorous reconstruction. After this, the solution is, although a nice idea, also a bit questionable.
See the video.
Mirft: A solution is to put the supporting rods on wheels, but the first attempt doesn't work out quite as well.
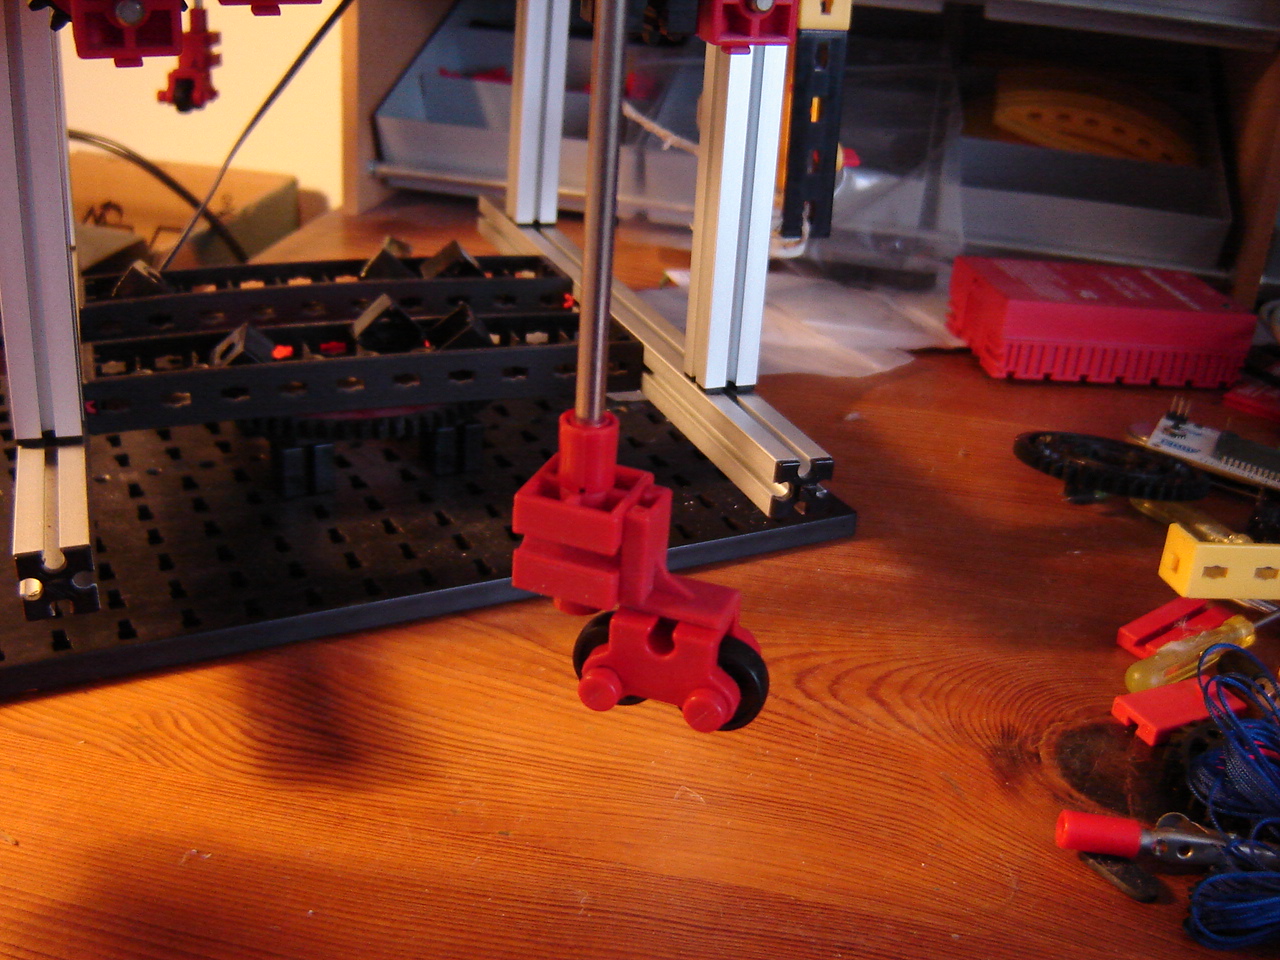
And neither does the second attempt.
See the video.
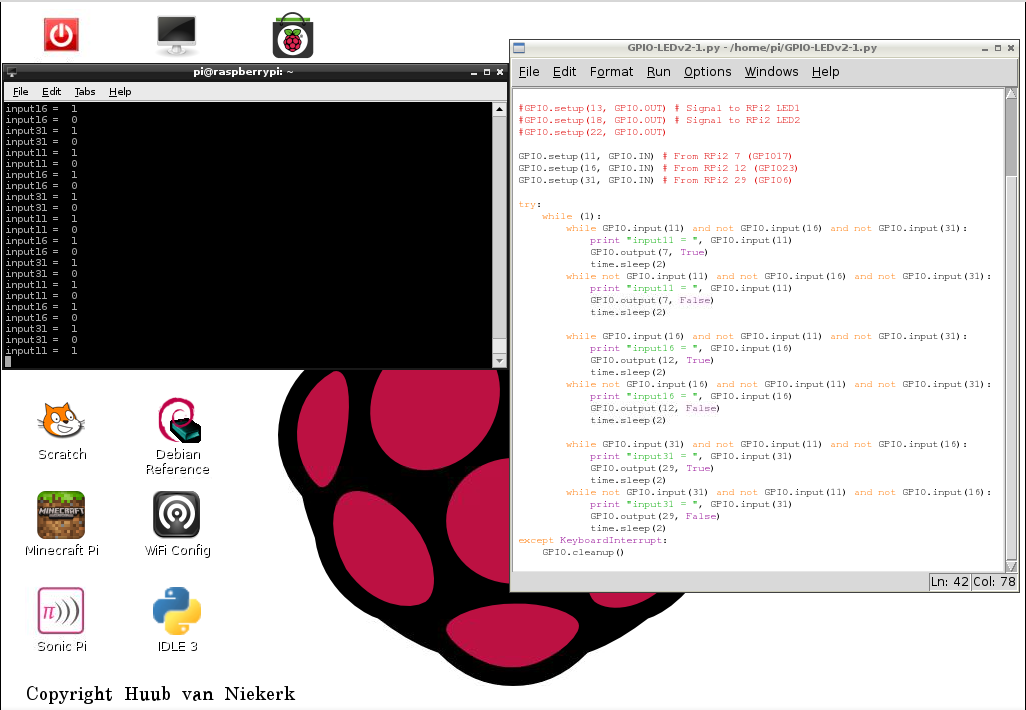
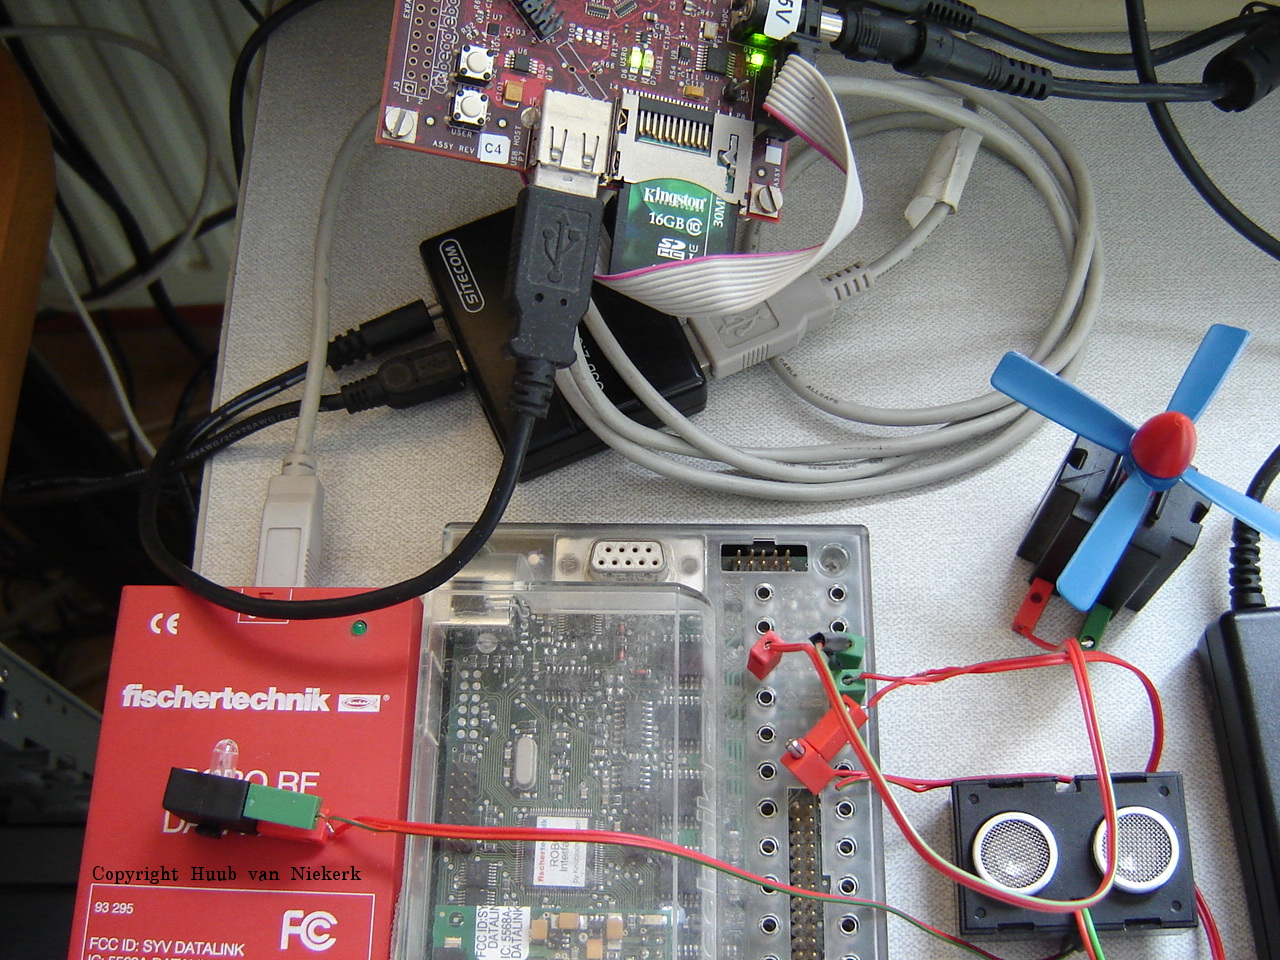
RPi: I added a Serial Pi Plus to my RPi2, so I can now use a serial terminal connection to check for errors.
Then an attempt to correct the 2nd LED when using C++. Using the GPIO layout, and comparing the Python and C++ code,I find that I made a small mistake in the C++ code. Problem solved. See the video.
22 January
Discovery: Testing bluetooth from a different computer that has the adapter fully integrated doesn't work out as expected. It pairs, but I can't browse the controller. From ROBOPro, it doesn't work either. See this video.
The new Python version, 0.6, has been released, so it's time to try it out. The most important (for me) change is the ability to use the camera. A first attempt fails resulting in a 0 bits picture. To be sure, I take a tablet to check if the camera actually works, which is the case. Then a second attempt works out nicely. The only downside is that you have to copy the picture to a computer with an imageviewer to actually watch it. See also the video.
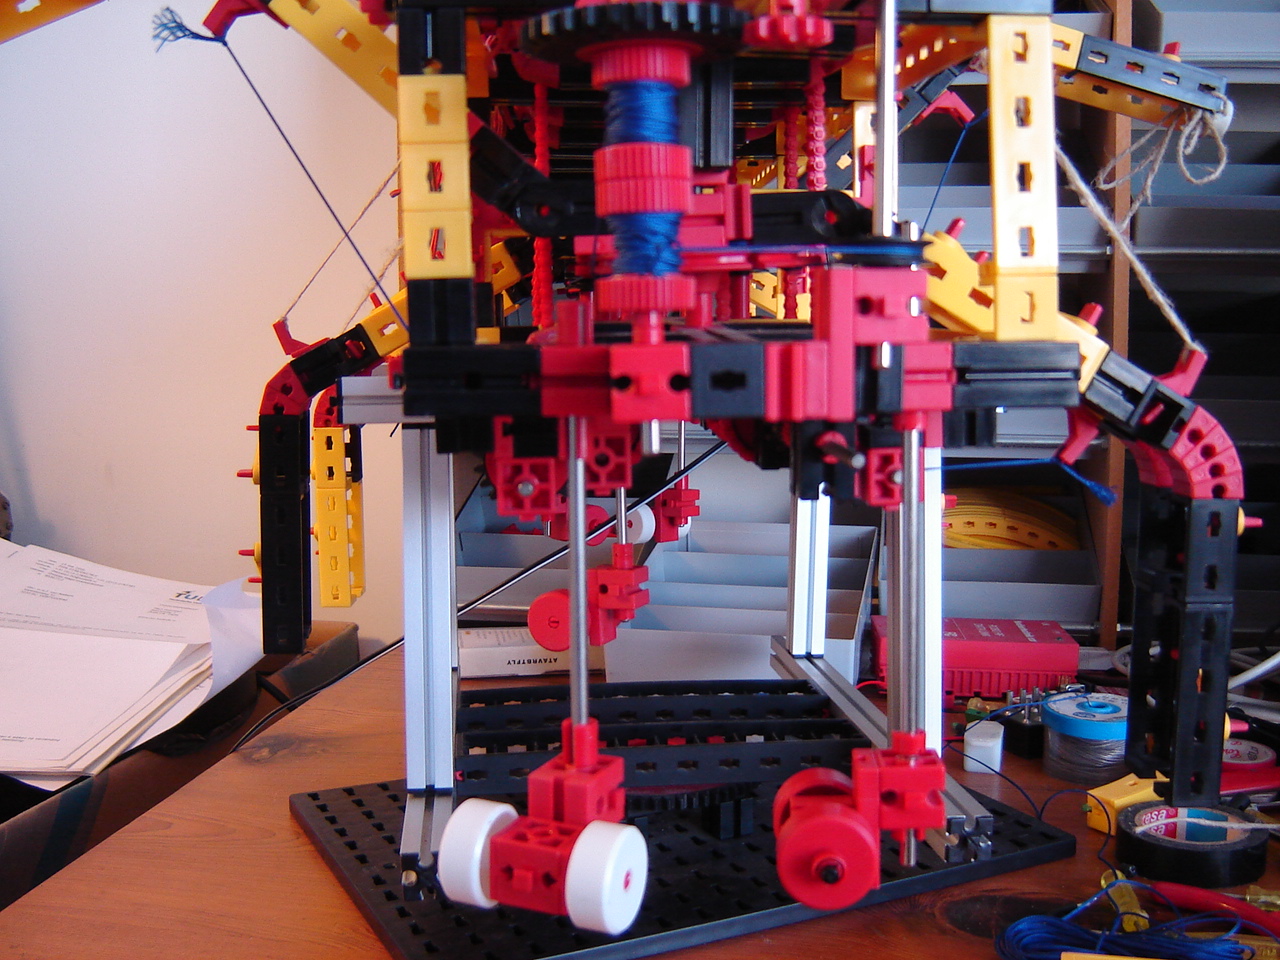
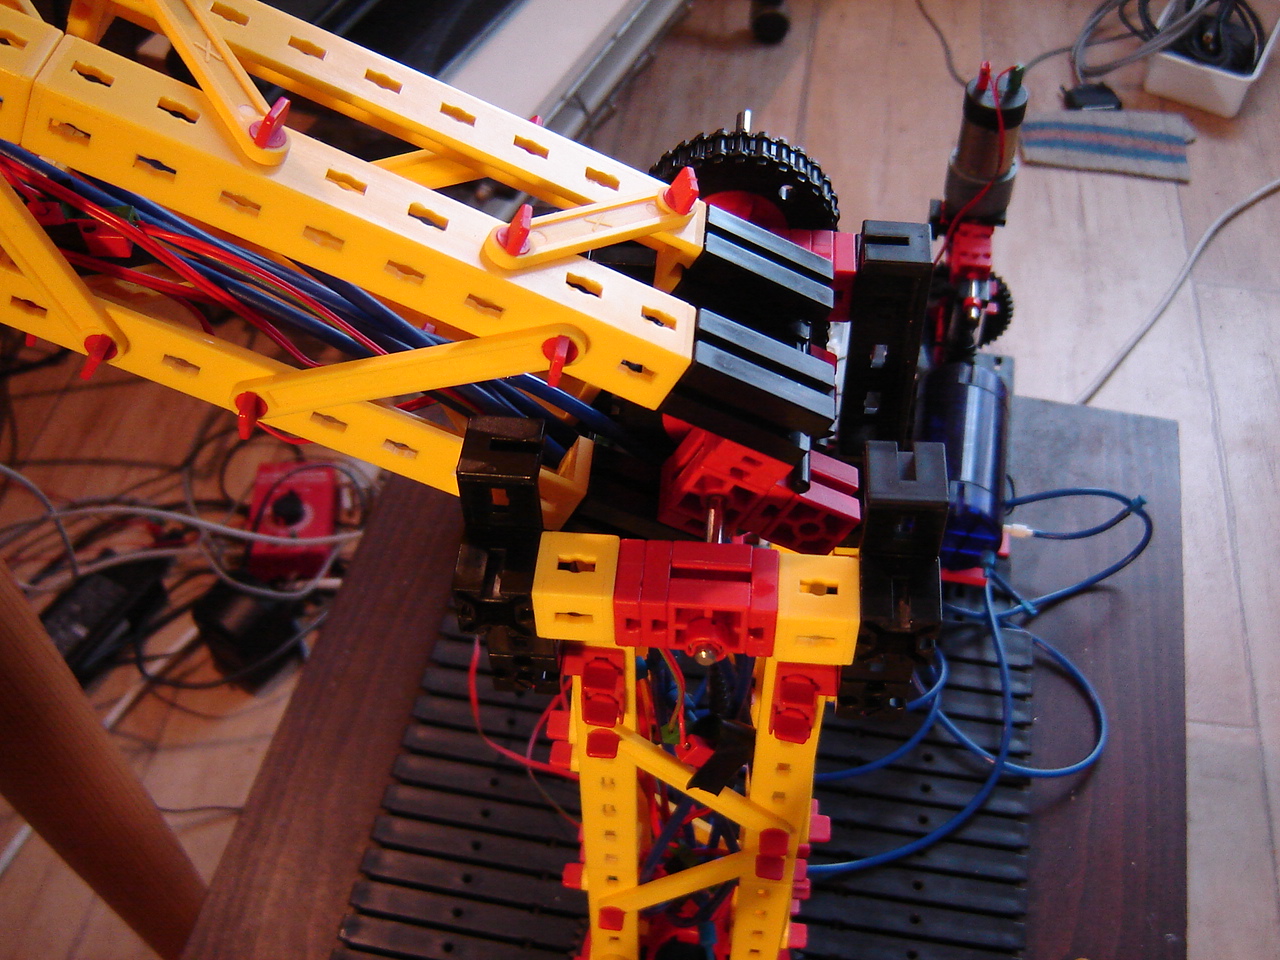
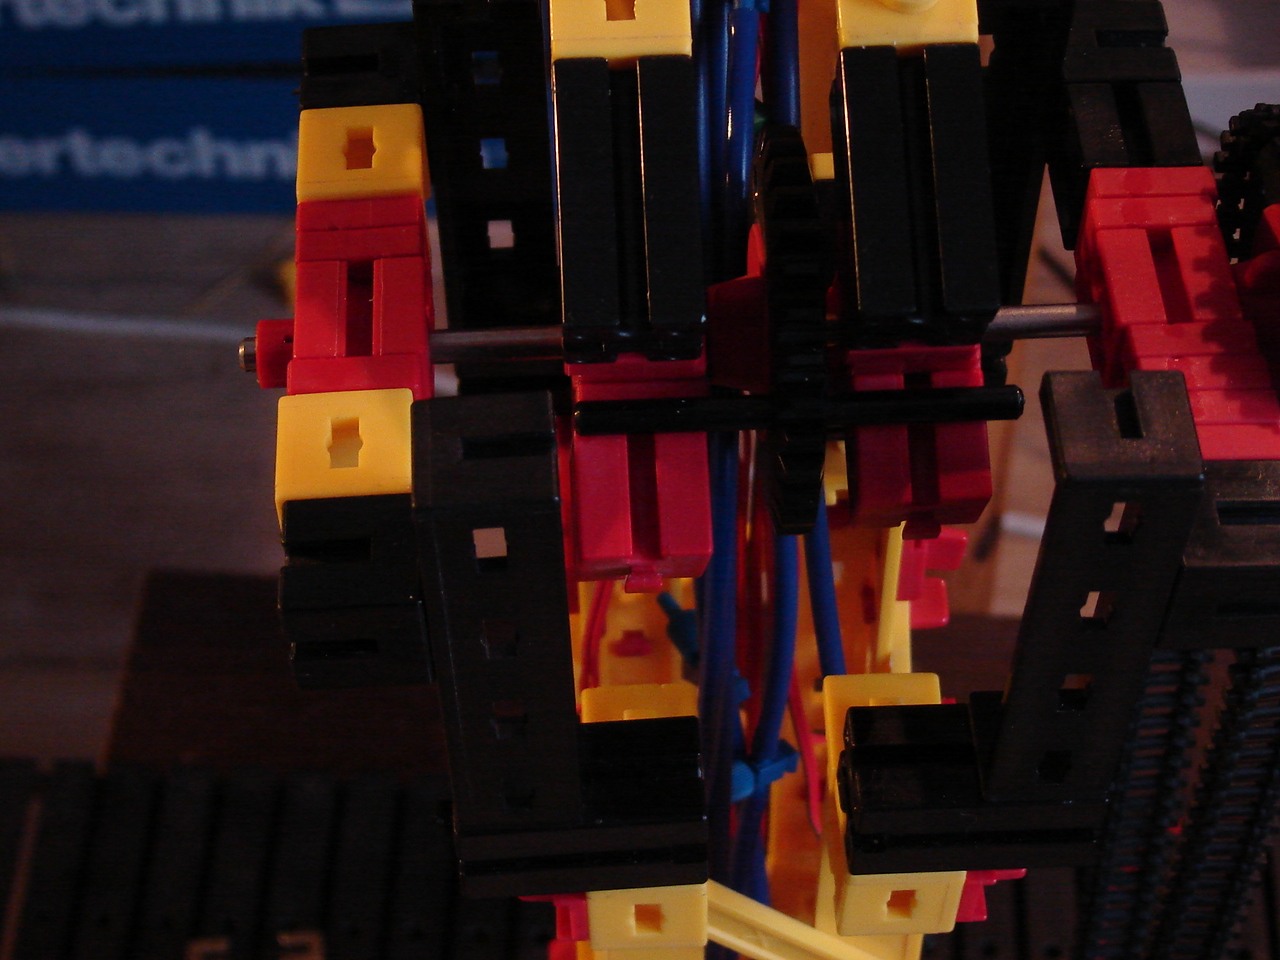
Hand: With the hand working as real end-effector, it's time to focus on the elbow. A rigid elbow isn't nice to see and to work with. I decide to follow the design of some industrial robots and modify the elbow such that it becomes a big hinge with the lower arm+hand revolving inside the end of the upper arm. The actuation will be/is chain driven by a motor. See the pictures and this video.
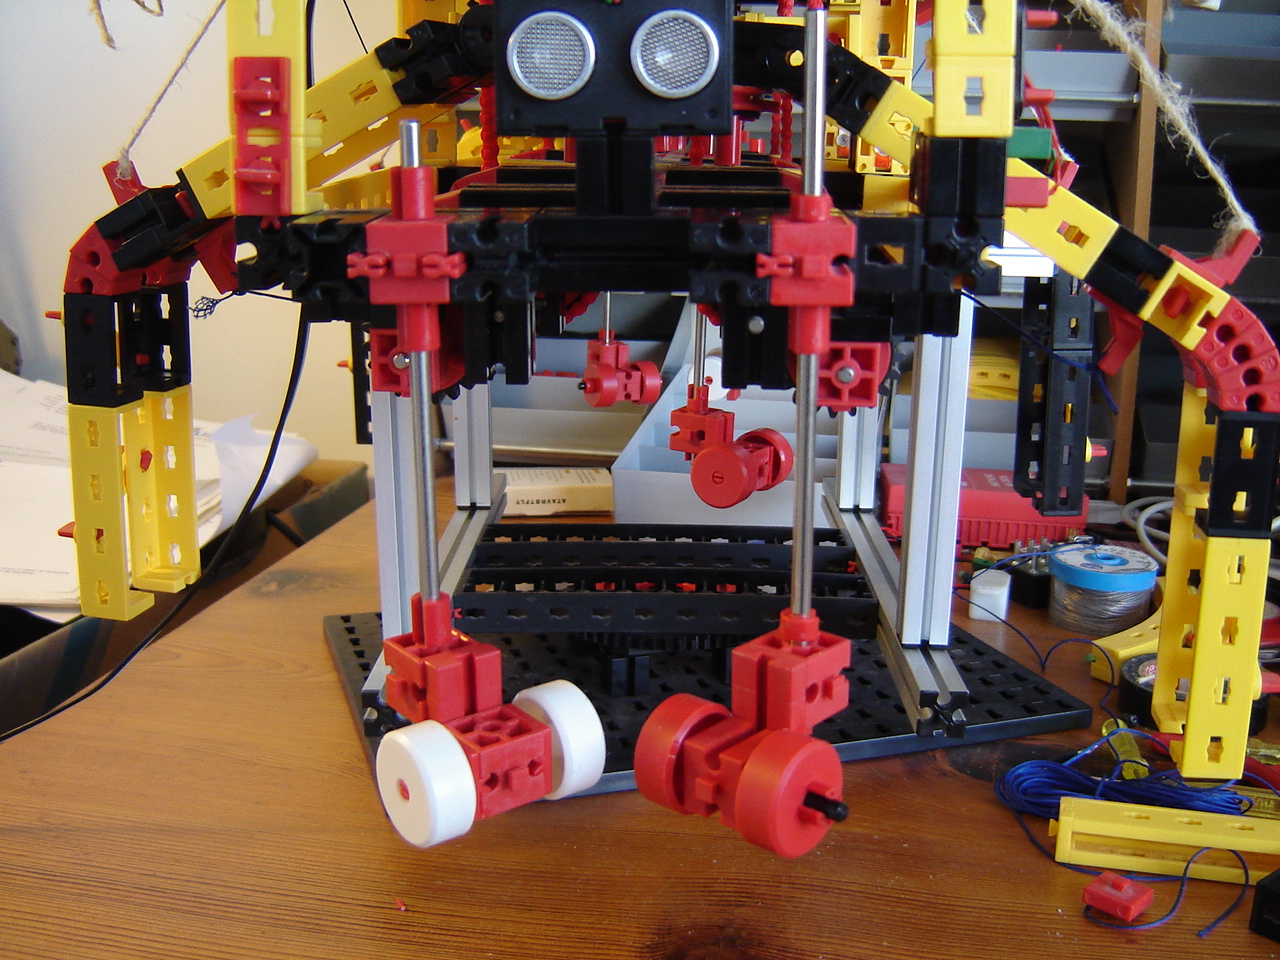
Mirft: Although there's been a huge improvement lately, it doesn't walk. This is probably due to lack of friction between the legs and the floor. So that's what has to change. Taking 2 rubber knobs that supported a CRT monitor, I put them as feet under 2 legs and do the floor-test again. With mixed result. See the video.
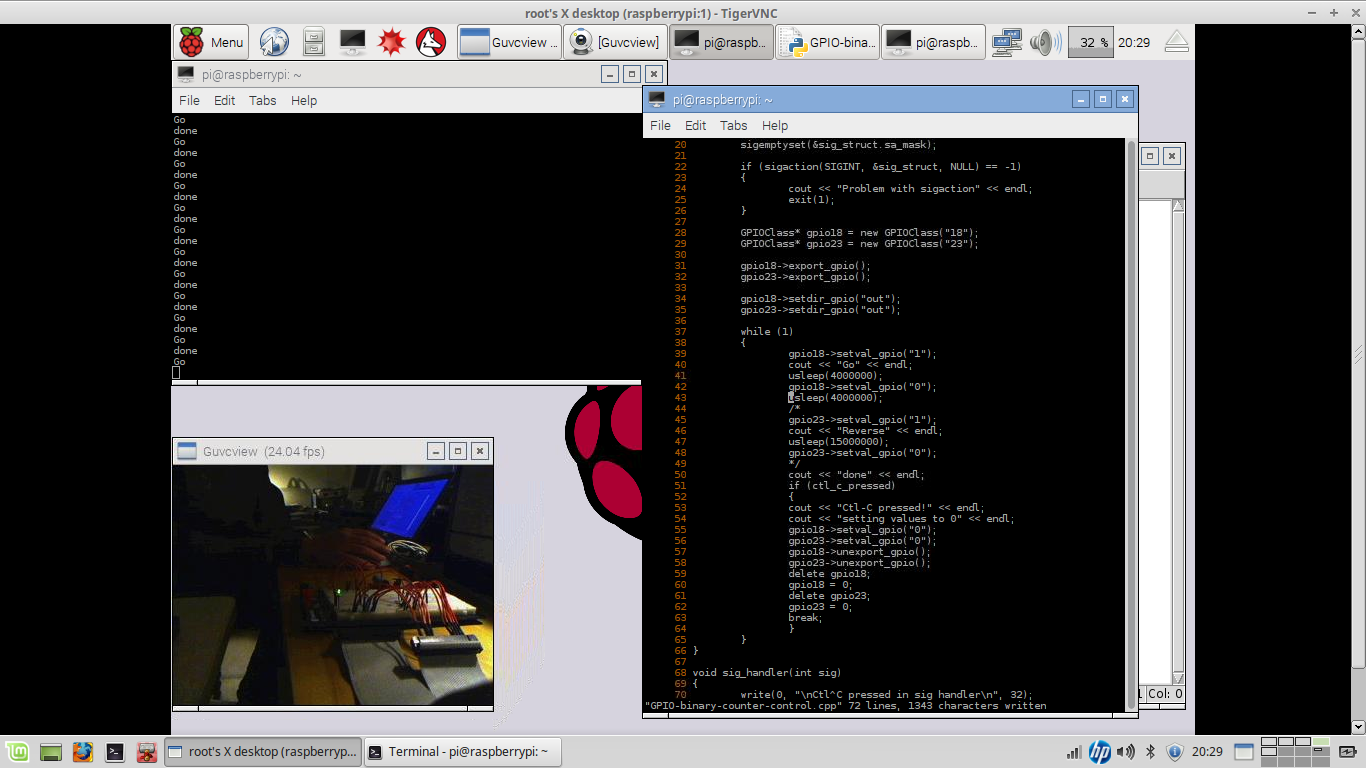
RPi: Continuing with C++. When looking at the code at the RPi2 side once more, the timing is 15 seconds. This seems odd, but when considering the fact that the timing on the RPi side is 2 seconds and there's no handshake, it should be fine. When using a manual switch, you don't know when it's time either. As a test, I change the state of GPIO18 to "0" after the 15 seconds. This doesn't work out as intended, but when I change the timing to 4 seconds for both "1" and "0", the control most definitely works. What remains in this experiment is the working of LED2. See the video.
15 January
Discovery: Time for an extra experiment. Does bluetooth work any better with the new firmware? So far, the answer is "no", but since the bluetooth dongle is several years old, that may be the cause as well.
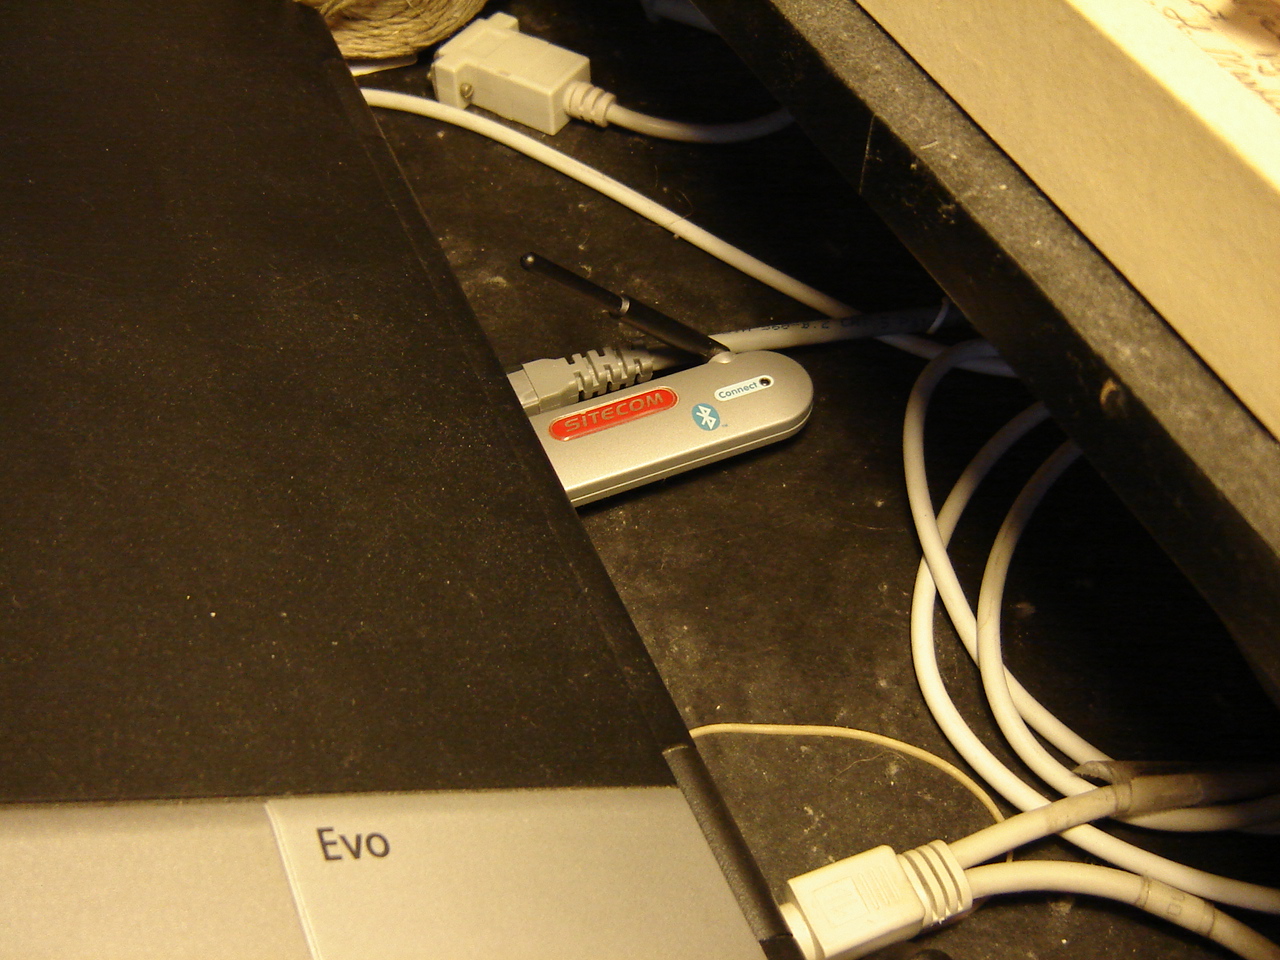
See the video.
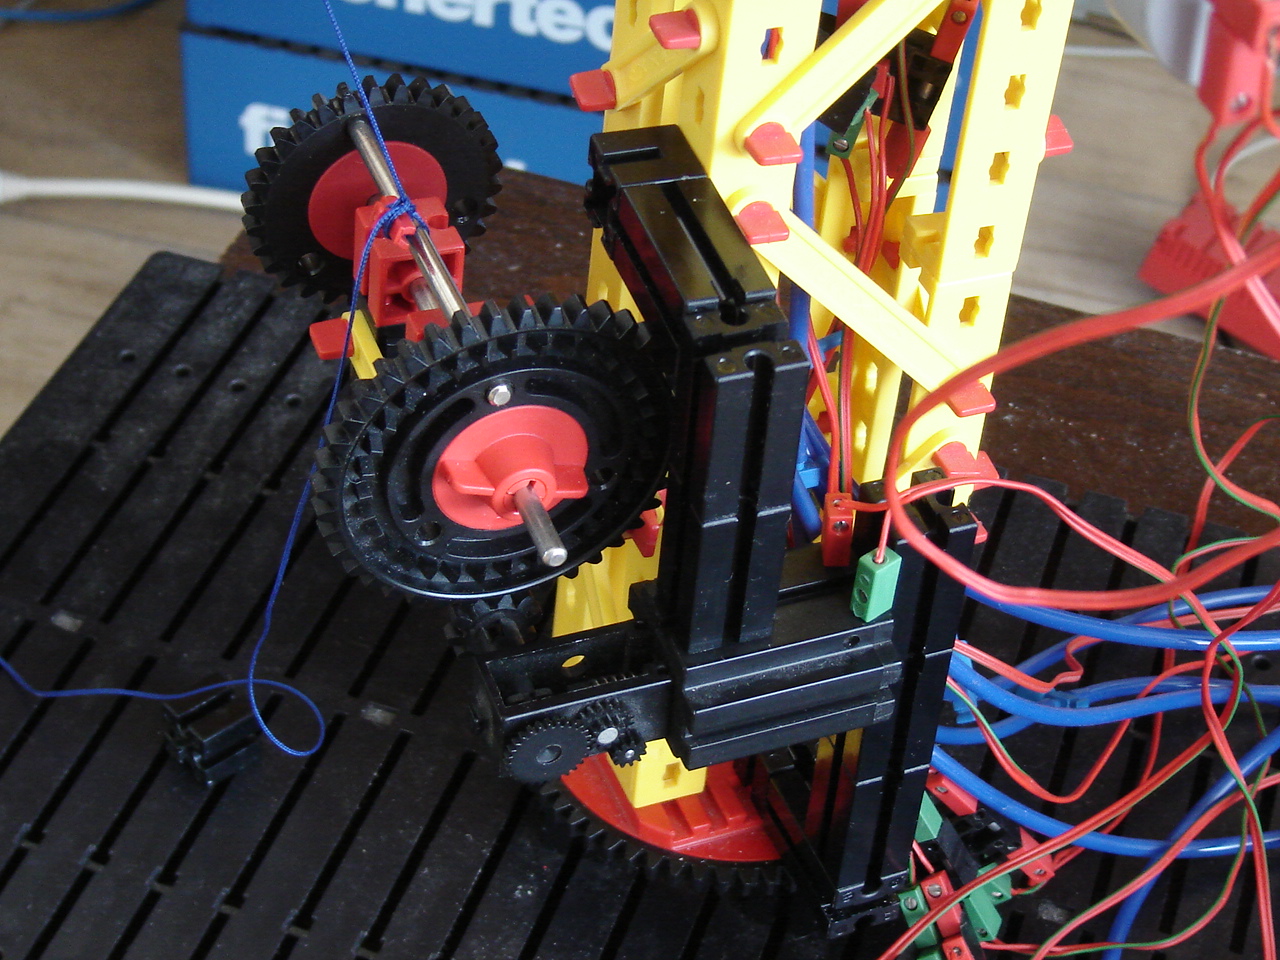
Mirft: Continuing with the horizontal winches. There are 2 major problems to solve. 1: when a winch is hauled, and the cord gets its maximum tension, the gearing slips. 2: From that moment, the other winch gets unwinded too much. It should be noted that this happens during manual control. So, what will happen during programmed timed control ? This works out well, as far as the moving of the legs goes. To see if it also moves the entire robot, the floortest is done again. See the video.
BB: After resizing, translating and rotating, it's time to combine effects. One result is the first picture, taking the resized image, then translate and rotate. Trying to blur the image, was a bit confusing: the found tutorial shows another way of working than a found example. Fortunately, the example works. See also the video.


Hand: Work to be done now is to fix whatever is wrong with the electrical wiring and the pneumatics. First, it turns out (after "some" time and trying out) that in 1 wire, not 1 but 2 connections are flaky. After fixing this with a wire stripping plier and small screwdriver, the connection is fine, but still controlling the wrong finger. In the end, I fix this at the controller's end. Then, despite that the wiring is fine, the fingers don't move a bit. I decide to remove the new tube for the thumb from the t-piece, put a sack on it to check the airflow, and ... nothing happens. I check for the other fingers that are still fully connected and to my surprise all works. WHY?! HOW?! I reconnect the tube, check and all keeps working. Big mystery, but ok. Next step...changing the elbow? See the video.
RPi: The ongoing problem of the binary counter shows that it is far from consistent. Using Python script 15 again, the control from RPi2 works once. Stopped and started again...nothing happens. Repeatedly. Then C++, the counter works again without RPi2, but LED2 doesn't burn. Checking the code for LED2..nothing wrong. See the video.
8 January
RPi: Going further with C++ and Python. Why has the algorithm the opposite effect as intended? Another problem: the wiring of the 2nd LED. It seems to be that, even 1 of the jumpwires is only 1mm out of the breadboard, the LED doesn't work. And that 1 mm is hard to see with so many of them grouped. Ugh. In addition to that, ssh and vncserver seemed to fail again on the RPi2 and didn't come back. After restarting ssh without being able to start a session after the restart, I tried restarting the network interface: sudo service networking restart followed by sudo systemctl daemon-reload. This worked: after a few moments both the ssh session and vnc worked again. However, I have to restart using a keyboard/display. I still need to buy another serial pi plus and null-modem cable to see if I can do all this successfully via the serial port...and I would be surprised if I can't.
Back to the problems with C++/Python/LED2: some wiring issues at least to be solved. Ugh. See the video.
Hand: With some extra parts: tube, T-pieces with stops to connect the existing tubes with new tubes and some double-sided adhesives, I start the process of relocating the controller and compressor. This brings new problems and ideas: the base plate of the arm doesn't have the same holes to connect parts. So I decide to do something else: relocate the entire controller/compressor combination. After that, I have to rewire and add the tubes. For safety, I decide to lead the tubes through the arm, and logically, the electrical wiring as well. For the description of the pictures, see the hand page.
It turns out to be a tough job, ending with a tiny(?) problem. See the video. The initial problem is solved quickly after finishing the video by removing the lamp from the socket, but a broader test shows there's more not quite right with the wiring (or/and the tubes?). Yikes.
Mirft: Now that it can't drop down, the question is: can it walk? For this, the horizontal movement needs to work and this brings another challenge. First I need to change the fixation.
Then the existing problem of the slipping winch has to be solved. One idea is to put both winches on the same axis which brings a more clear setup, as shown in the pictures.

Testing shows it's not "the" solution though. See the video.
BB: Continuing with OpenCV, I say goodbye to watershed. Time for another OpenCV feature: transformation of features. The first series I try are scaling, translation and rotation. Of course, because of the properties of both the BB and Python, it doesn't happen very fast. But it works. See the video.